
Highlights
- Learn how-to techniques and tips for easily creating precise flying geese freezer paper piecing quilt blocks.
- Gather essential tools, including freezer paper, rotary cutters, quilting rulers, and sewing machine.
- Get step-by-step instructions for preparing a template, cutting fabric shapes, and piecing the units with precision.
- Extra pro tips for perfect points and seams.
Freezer Paper Piecing Tutorials
Did you know you can use freezer paper to easily make perfect flying geese blocks? And beginners can learn just as easily?
Maybe you’ve heard about their bad rep from other quilters.
For being super challenging, crooked and missing sharp points. Maybe you’ve heard about tediously ripping off paper foundations. And maybe, you’ve decided to wait to try until someday…or never. But in this video and tutorial, I’ll show you an easy way to get perfect flying geese.

You’ll love this method because it combines the accuracy of foundation piecing with freezer paper piecing. It does two amazing things:
- Makes precise flying geese blocks using foundation piecing, with crisp edges and sharp points in all the right places.
- When you’re done, you peel off the foundation just like a sticker! No ripping or tiny paper shreds!
How cool is that?
I promise, this tutorial will teach you everything you need to know step by step.
Let’s get started. Watch the video below or read on for directions and photos.
What Are Flying Geese Quilt Blocks in Quilting?
Flying geese quilt blocks are made using three triangles. They are often arranged in quilts to look like flocks of geese in the sky.
Make each “goose” using one triangle in the middle (body). Two more triangles are sewn onto the sides (sky). When you put these together, it makes a rectangle shape.
Tools and Notions
Quilters, you probably have most of the tools and notions already. You will need:
- a rotary cutter with a 45 mm blade.
- an acrylic ruler for trimming seam allowances
- Add a Quarter ruler (optional but nice to use), which has a raised edge to hold it in place.
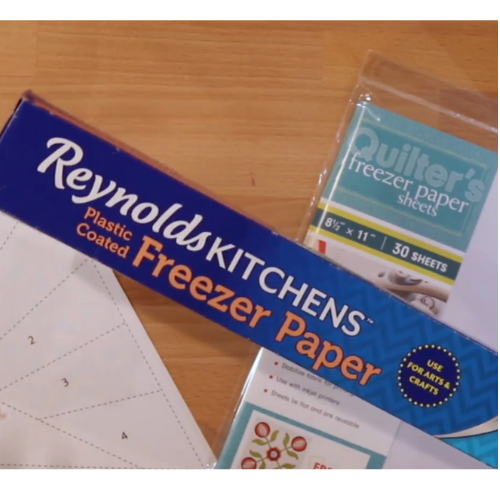
- freezer paper – Reynolds or pre-sized Quilters Freezer Paper Sheets
- a printer (if you don’t have one, you can trace your template)
- sewing machine with a standard, quarter inch presser or stitch in the ditch foot
- 80/12 sewing machine needle
- 40 or 50 weight cotton or polyester thread (your preference)
- Two fabric scraps, approximately 7 x 18 inches each – fat quarter or a quarter yard. Use smaller individual scraps if they fit. We’re just practising here!
- Perfect Geese Template by Lee A. Heinrich, a printable download.
About the “Perfect Geese Template”: Make perfectly accurate Flying Geese units in a fraction of the time with this collection of easy-to-use paper-piecing templates. One PDF includes everything you need to make geese in 14 different sizes/configurations.

At the time I’m filming, the instant download is just $9.99 and you’ll use it for years! I’ve had my copy for almost 10 years, so definitely money well spent.
See more about choosing and using tools and notions in 12 Freezer Paper Piecing Tried and True Tips.
Step-by-Step Guide: Flying Geese Freezer Paper Piecing
This step-by-step guide shows you how to prep your templates, cut fabric shapes, sew the blocks together and press seams for flying geese freezer paper piecing. I’ve added my pro tips for keeping the points pointy while sewing seams. Hooray!
1. Preparing templates

New to printing on waxed paper? Watch this video tutorial for simple steps and different ways to do it.
As you saw in the video, good old Reynolds waxed paper works as well as my favorite, pre-sized freezer paper sheets. Cut out the templates along the cutting lines.
Now fold your printed paper along all of the dotted stitching lines (Sew Here lines). You can use your finger, but create the crispest edges three ways:
- Fold along the edge of a beveled ruler,
- Score the dotted lines with a hera marker
- Pierce the dotted lines with a tailor’s wheel.


Crisper edges = accuracy!
2. Cutting Fabric and Matching Freezer Paper Shapes
Cut fabrics into pieces that are at least a quarter inch larger on all of the edges as shown on the template. You will have Fabric A pieces and Fabric B pieces.
Match the first Fabric A piece to the shape on your template. Lay the fabric wrong side up so it lays against the shiny side. Press the dull paper side, along the entire stitching line (see photo). This makes the fabric more secure

Add Fabric B, right sides together underneath Fabric A, matching the shape and lining up the edges.

Next, place a fingertip at each point on the triangle and fold it over to make sure you have at least a quarter inch of extra fabric beyond the stitching line. If not, rearrange your fabric or cut a larger piece.

Now you are ready to stitch.
3. Piecing and Pressing
Stitch as close as possible along the fold.

PRO TIP: Sew at least a quarter inch before and past the end of the template – this will help you match and sew the blocks and rows together. The crossed stitching lines are for reference and indicate how far you should sew past the edges of the template.
Remember, you aren’t stitching on the template – you will stitch as close as possible to the folded edge.


Time for trimming your seam allowance. If you’re using a regular ruler, match your ¼ inch line to the folded edge of the template. If you’re using an Add-a-Quarter ruler, place the ledge against the folded template and trim away the extra fabric with a rotary cutter (see photo below).


Unfold template and finger press the right side of the fabric. Flip over for a quick press on the wrong side.

PRO TIP: As you sew, press your seams in the same direction, which makes it easier to remove the template when you’re done.
Repeat with the other Fabric B piece by flipping the template over to the printed side, folding back the stitching line, matching the pieces and stitch.
PRO TIP: Take a close look at the seam line where it intersects the tip. Make sure you sew the seam just a hair to the right of the fold so the tip isn’t cut off and blunt.

If you’re happy with your goose, trim and move on to the next goose on the strip.
Step 4: Joining Blocks and Finishing Tips
When you’ve finished the four flying geese on the strip, peel off the paper in the direction of your seams. You will have fewer fraying edges.

Now, look closely at the point. Does it lay just outside the seam allowance? If so, you have saved the point!

Trim your flying geese strips on all four edges.

Tadaaaa! Your strips will look like this on the front and back sides.

Place the blocks with right sides together, matching seams. Double check if you need to sew a “fatter” seam to avoid cutting off a point with the seam. It’s okay to fudge a little to save a point!
When you finish sewing the blocks, finger press the seams open before ironing to see if the points are intact and the seams line up.
You did it!
That was a lot to learn but doable, right? Learning how to make Flying Geese freezer paper piecing blocks changes the kinds of quilts you can make. Most foundation paper patterns can be made using these techniques. Plus, hundreds of patterns are designed for this kind of piecing. Now YOU know the EASY way!
MAKE BETTER FLYING GEESE FREQUENTLY ASKED QUESTIONS
What size should I cut fabric pieces?
Fabric pieces need to be larger than the freezer paper template on each side by at least ¼ inch or even a half inch to give extra fudging room for points. The extra fabric is trimmed away after the seam is sewn with a rotary cutter and ruler.
More Resources
These tips give you more tips about freezer paper piecing.
Set Up Your Sewing Area for Freezer Paper Piecing
How Many Times Can You Use a Freezer Paper Foundation?
Choosing the Right Sewing Machine Foot for Freezer Paper Piecing
