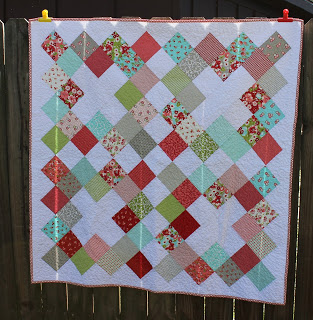
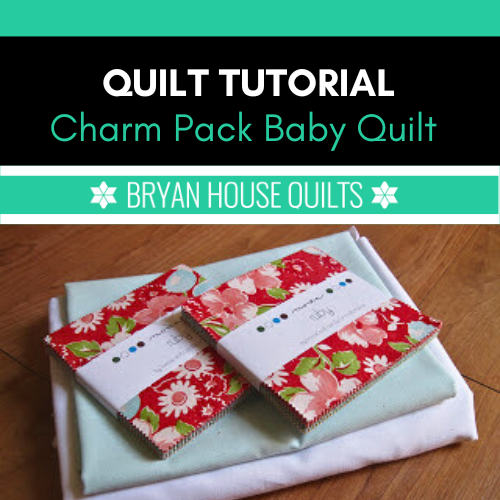
Quilt Tutorial: Charm Pack Baby Quilt shows you how to sew up some cute with my Pinked Charms quilt pattern below. Learn how charm packs are perfect for easy piecing projects and make a gift at the same time!
Key Highlights
- Pinked Charm baby quilt is a quick and easy way to create a beautiful quilt with coordinated fabrics.
- Step-by-step instructions are provided for making the free Pinked Charms baby quilt
- The tutorial includes information on fabric and notions needed to make the quilt
- Prepping and cutting fabric is an important step when starting a quilt.
- The tutorial in this blog also covers layout and sewing blocks, as well as adding borders and binding.
- Additional links to resources are listed below – learn more about using charm packs for baby quilts and other quilty projects.
Why are charm packs popular for patchwork?
If you haven’t used them yet, here are bunches of reasons why.
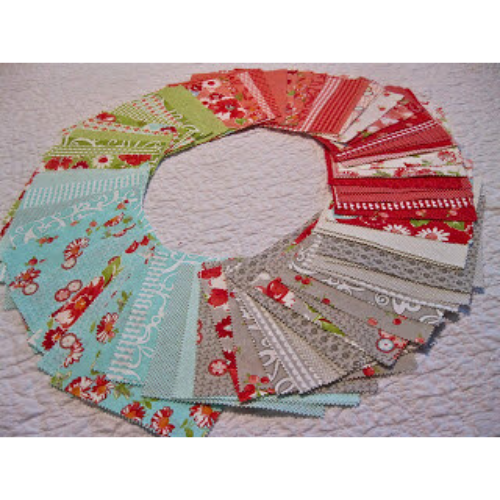
First, they offer a simple and convenient way to create a quilt. Charm squares are pre-cut 5-inch cotton quilting fabrics. Each pack contains 42 pieces. Many baby quilt patterns are designed for using them.
Second, they are a beginner-friendly option. And no cutting, which saves times and let’s face it, make fewer cutting mistakes!
Third, the packs offer a variety of fabrics from a single collection from a manufacturer. The colors and patterns have been coordinated so you don’t have to. Look for patterns designed for these precuts, which use the variety of prints, solids and colors in the design.
Fourth, packs are stash busters in disguise – leftover pieces from packs make great stash busters by matching up with fabrics you already own. Cutting squares from smaller pieces in your stash is great way to curate your own packs. Make pretty and easy charity quilts with 5″ squares and no stash fabric is overlooked!
Last, charm packs are versatile – they work for many kinds of quilted projects, especially smaller ones like zipper bags, pot holders, lunch bags, as well table runners, table toppers, totes, and lap quilts. Five-inch squares are easy to use for many scrap projects.
Overall, they offer a variety of prints and colors. Mix and match them with fabrics or other packs from the same manufacturer for endless creative possibilities.

Make a modern triangle in my free class and learn the magic of Freezer Paper Piecing! Download the free pattern and I’ll walk you step-by-step through the technique. Get started here!
Quilt Tutorial: Charm Pack Baby Quilt – Free Pattern
Step 1: Gather your materials
Before starting, decide on the finished size of the quilt and calculate the number of charm squares needed. For example, my Pinked Charms quilt is 61 x 61 inches which requires 64 5″ squares. Adjust the size and number of squares based on your preferences. Be sure to factor in ¼ seam allowances for the finished size.
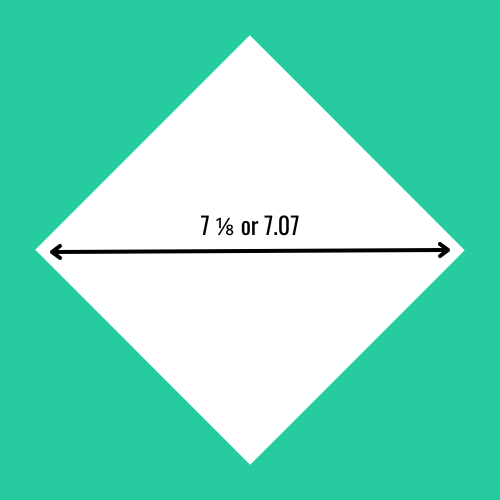
When 5″ squares on set on point, the diameter is 7.07 inches across. Be sure to consider in your measurements when changing a quilt’s size or block orientation.
FABRICS
- 2 charm packs
- 1.25 yards of white fabric for charm squares and fabric strips
- 1/2 yard of white quilting cotton for border
- 1/2 yard coordinating fabric for binding
- Fabric for backing – 64 x 64 inches square, 3 yards of 42-44 inch wide fabric, pieced together.
- Batting – 62 x 62 inches
I used Ruby by Moda for the packs and red polka dot fabric from Bliss by Moda for the binding.

NOTIONS
- Rotary cutter
- Cutting mat
- Quilting ruler for cutting
- Pins or clips
- Matching thread
- Scissors
- Iron and ironing board (or pressing mat)
Step 2: Prepping and cutting
PREPPING
Properly prepping and cutting your fabrics is essential for creating a well-made baby quilt. Take your time and use the necessary tools to ensure accurate measurements and clean edges.
Press the fabric yardage to remove any wrinkles (the squares in a pack are usually flat). Measure twice and cut once.
CUTTING
From the white fabric cut:
- 53 squares (5″ x 5″)
- Four (4) 5″ x 14″ strips
- Six (6) 2.5″ x WOF (width of the fabric) strips for the border strips. Join the border strips together to form one long strip and cut into two 58-inch top and bottom border strips and two 64-inch side border strips.
From the coordinating fabric for binding cut:
- Cut 7, 2.5-inch strips x WOF
Accuracy is important so the seams and points line up.

Step 3: Layout
Take apart your packs. Choose four sets of 20 charm squares each, dividing the colors easily among the blocks. Choose a balanced mix of colors in lights and darks for each set.
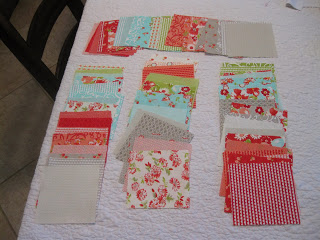
Now it’s time to layout your blocks. I’m going to show how to build a block in rounds. Use a design wall, clean floor or a table to keep yourself organized.
Start in a corner of your design space and begin laying out your first block using (1) 5″ x 14″ strip, two white charm squares and four charms as shown below. The blocks are set on point so begin with the points at north, south, east and west.

In round two, you will add 12 more charms.

Add the final print charm squares, one to a side for a third round.

Repeat this process three times for your other three blocks.
Once you’ve got your quilt blocks all laid out, consider it your rough draft and edit your charms to your liking. Arrange the charm pack squares in a layout that you like. I like the colors spread out and creating contrast. When you’re satisfied with the layout, sew diagonal rows with the squares using a ¼” seam allowance. Press the seams to one side.
Then, fill in empty the negative space with the white charms, around all the blocks in a set and completing the four blocks with a vertical and horizontal on-point rows in the center of the quilt.
Here’s my final layout after my edits:

Step 4: Sewing
SEW BLOCKS INTO DIAGONAL ROWS
When you’re satisfied with the layout, sew diagonal rows with the squares using a ¼” seam allowance. Press the seams to one side.
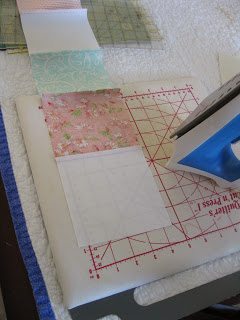
Step 4: Finishing the quilt top
SEW ROWS TOGETHER
Sew the rows of squares together. Start at the bottom left corner, making sure that you always join a white square to a color charm square as shown. Press the seams to one side.
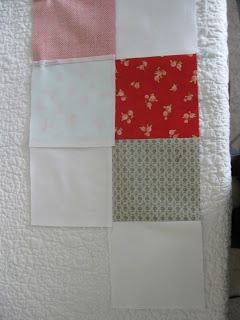

Step 5: Trimming sides and attaching borders
Trim the pointed ends of the white triangles even with the colored charm square points. You will trim off half of each white square, leaving half of the white square between the colored squares.

First, add the 58-inch borders to the top and bottom edges with a ¼ inch seam allowance. Trim even with the side edges.
Make sure the top and bottom border seam allowances are completely covered by the side strips so your border is square. Press seam allowances toward the inside of the quilt.
Step 6: Make a quilt sandwich

Need to learn how to make a quilt sandwich? I’ve got you covered with my step-by-step guide on layering the top, batting and backing, and basting.
Step 7: Quilting the top

There are many ways to add stitching to your quilt top. The easiest methods are stitch in the ditch or straight line quilting – I’ll walk you through those on the blog.
Step 8: Square up the quilt top
Learn all about how to square up a quilt top on my blog.
Step 9: Add the binding
My favorite way to add binding is the opposite of how many quilters do it but I like the results – my stitching stays on the binding!
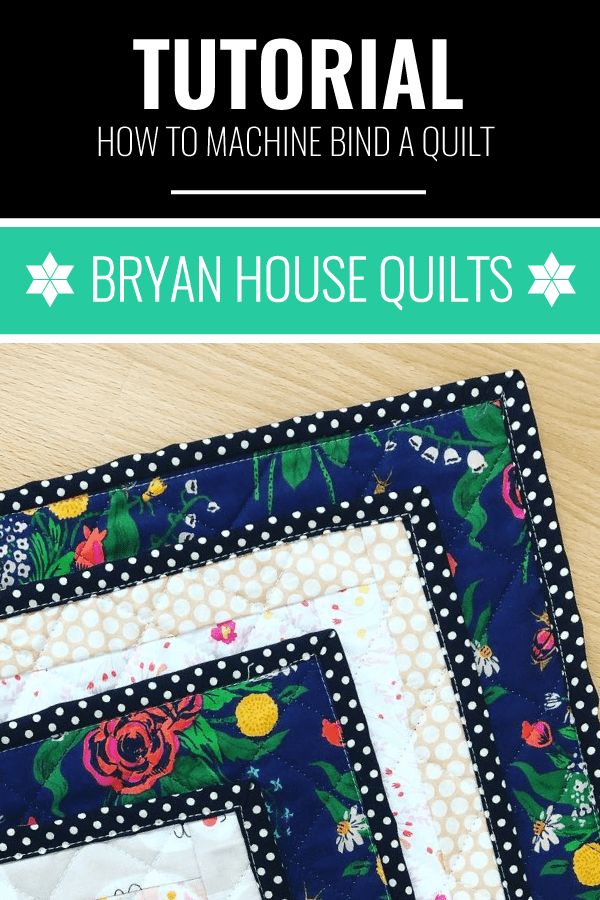
Does your quilt need a fancy binding? Here are 25 quilt binding ideas to try out.


More Resources and Blogs
If you’re looking for more fun with charm pack quilts and projects, check out these links:
- Great tutorial: Check out the blog, The Polkadot Chair, for a detailed tutorial on making a baby quilt with charm packs. The tutorial includes step-by-step instructions and helpful tips.
- Short video: Watch a video tutorial on making a tote bag with a charm pack on Theresa Down Under’s YouTube channel.
- PDF pattern: Try this easy free PDF precut pattern on Moda Fabrics’ website designed for charm pack projects, Charming Plaid.
- Fat Quarter Shop has a great selection of charm packs and free PDF patterns for charm pack projects, like a small baby quilt Chatter Box.
- Check out November sales for holiday precut packs and whip up Moda’s 32″ square mini for your wall or table.
These resources will help you find answers and inspiration on your charm pack baby quilt journey. Enjoy exploring and happy quilting!

Frequently Asked Questions
How Many Charm Packs Do I Need for a Baby Quilt?
Typically, you’ll need two charm packs. This will provide enough 5″ x 5″ fabric squares to create a 42″ x 42″ quilt. However, the number of charm packs needed may vary depending on the desired size of the quilt.
What is a charm pack in quilting?
A charm pack in quilting is a pre-cut collection of fabric squares, measuring 5″ x 5″. They usually contain a variety of coordinating prints from a specific fabric collection. They are a convenient and versatile option for creating quilts and other sewing projects.
Can I Mix Different Charm Packs in One Quilt?
Yes, you can mix different packs in one quilt. This allows you to create a unique and visually interesting design. Mixing packs from different fabric collections adds variety and personalization to your quilt.
Can I mix precuts with other fabrics from my stash?
Consider mixing different fabric collections and pulling fabric from your stash. You can also experiment with different layouts and other pre-cut fabrics like a jelly roll.
How many 5-inch squares can I cut from a fat quarter?
One fat quarter will make 12 squares.
How many 5″ squares can I cut from a layer cake?
Each package contains 42 10″ squares. Each square yields four (4) 5″ squares for a total of 168.
BY THE WAY, YOU CAN JOIN OUR BOM PROGRAMS ANYTIME!

By the way, you can join our Modern Triangle block of the month quilt programs anytime. Work at your own pace with a great community of quilters. Learn more about all the goodies in the Club!
OUR LATEST DESIGN, COLOR and Modern Triangle Posts
- Radial Design Quilt Ideas and Techniques
- Beginner’s Guide to Quilt Photography Basics
- Master Freezer Paper Piecing – 12 Easy Tips
- Choose Easy Analogous Combinations for Quilts
- Beginners Guide: Using a Walking Foot
- Modern Quilt Colors: Mixing Brights Right Tutorial
- Rainbow Quilt Designs: 9 Ways to Make Inspired Rainbow Quilts
- Hexagon Quilts Roundup
- Aurora Block of the Month
- Quilt Coloring Pages: 4 Methods for Successful Color

I see that the charm squares are pinked but in the later pics I don’t see the pinking (unable to expand the pictures), were they trimmed or just incorporated n the seams later on?
Just incorporated into the seams. Thanks!