• About
    • Privacy Policy
  • Teaching
    • Member/Student Login
    • Online Programs
  • Shop
  • Member/Student Login
  • Blog
    • Free Quilt Patterns – Scrappy Whirligig Quilt

Bryan House Quilts

How to Sew Improvisational Curves

Tutorial· video

7 Dec

Hey there! Have you ever tried sewing curves? What about improv curves? Lately I’ve been stitching a lot of improvisational curved lines and I wanted to share the love by showing a tutorial for how to sew improv curves.

How to Sew Improv Curves

Over the past year (I can’t believe I’ve been working on this since February!) I’ve been doing a bunch of improv sewing, including sewing improv curves.

Improv Quilt Finishes

Let me show you a few examples of recent quilts I’ve made using improvisational curved piecing.

Black and White Improvisational Quilt, Rebecca Bryan

This is a black and white improvisational quilt I made and finished a while ago. I actually finished it before we left Holland.

I mean to stretch it on stretcher bars and hang it in my living room, but I messed up the binding/facing. So I have to fix it. And so its lingered. I really should fix it!

Sunshine, traditional and improvisational pieced quilt, Rebecca Bryan

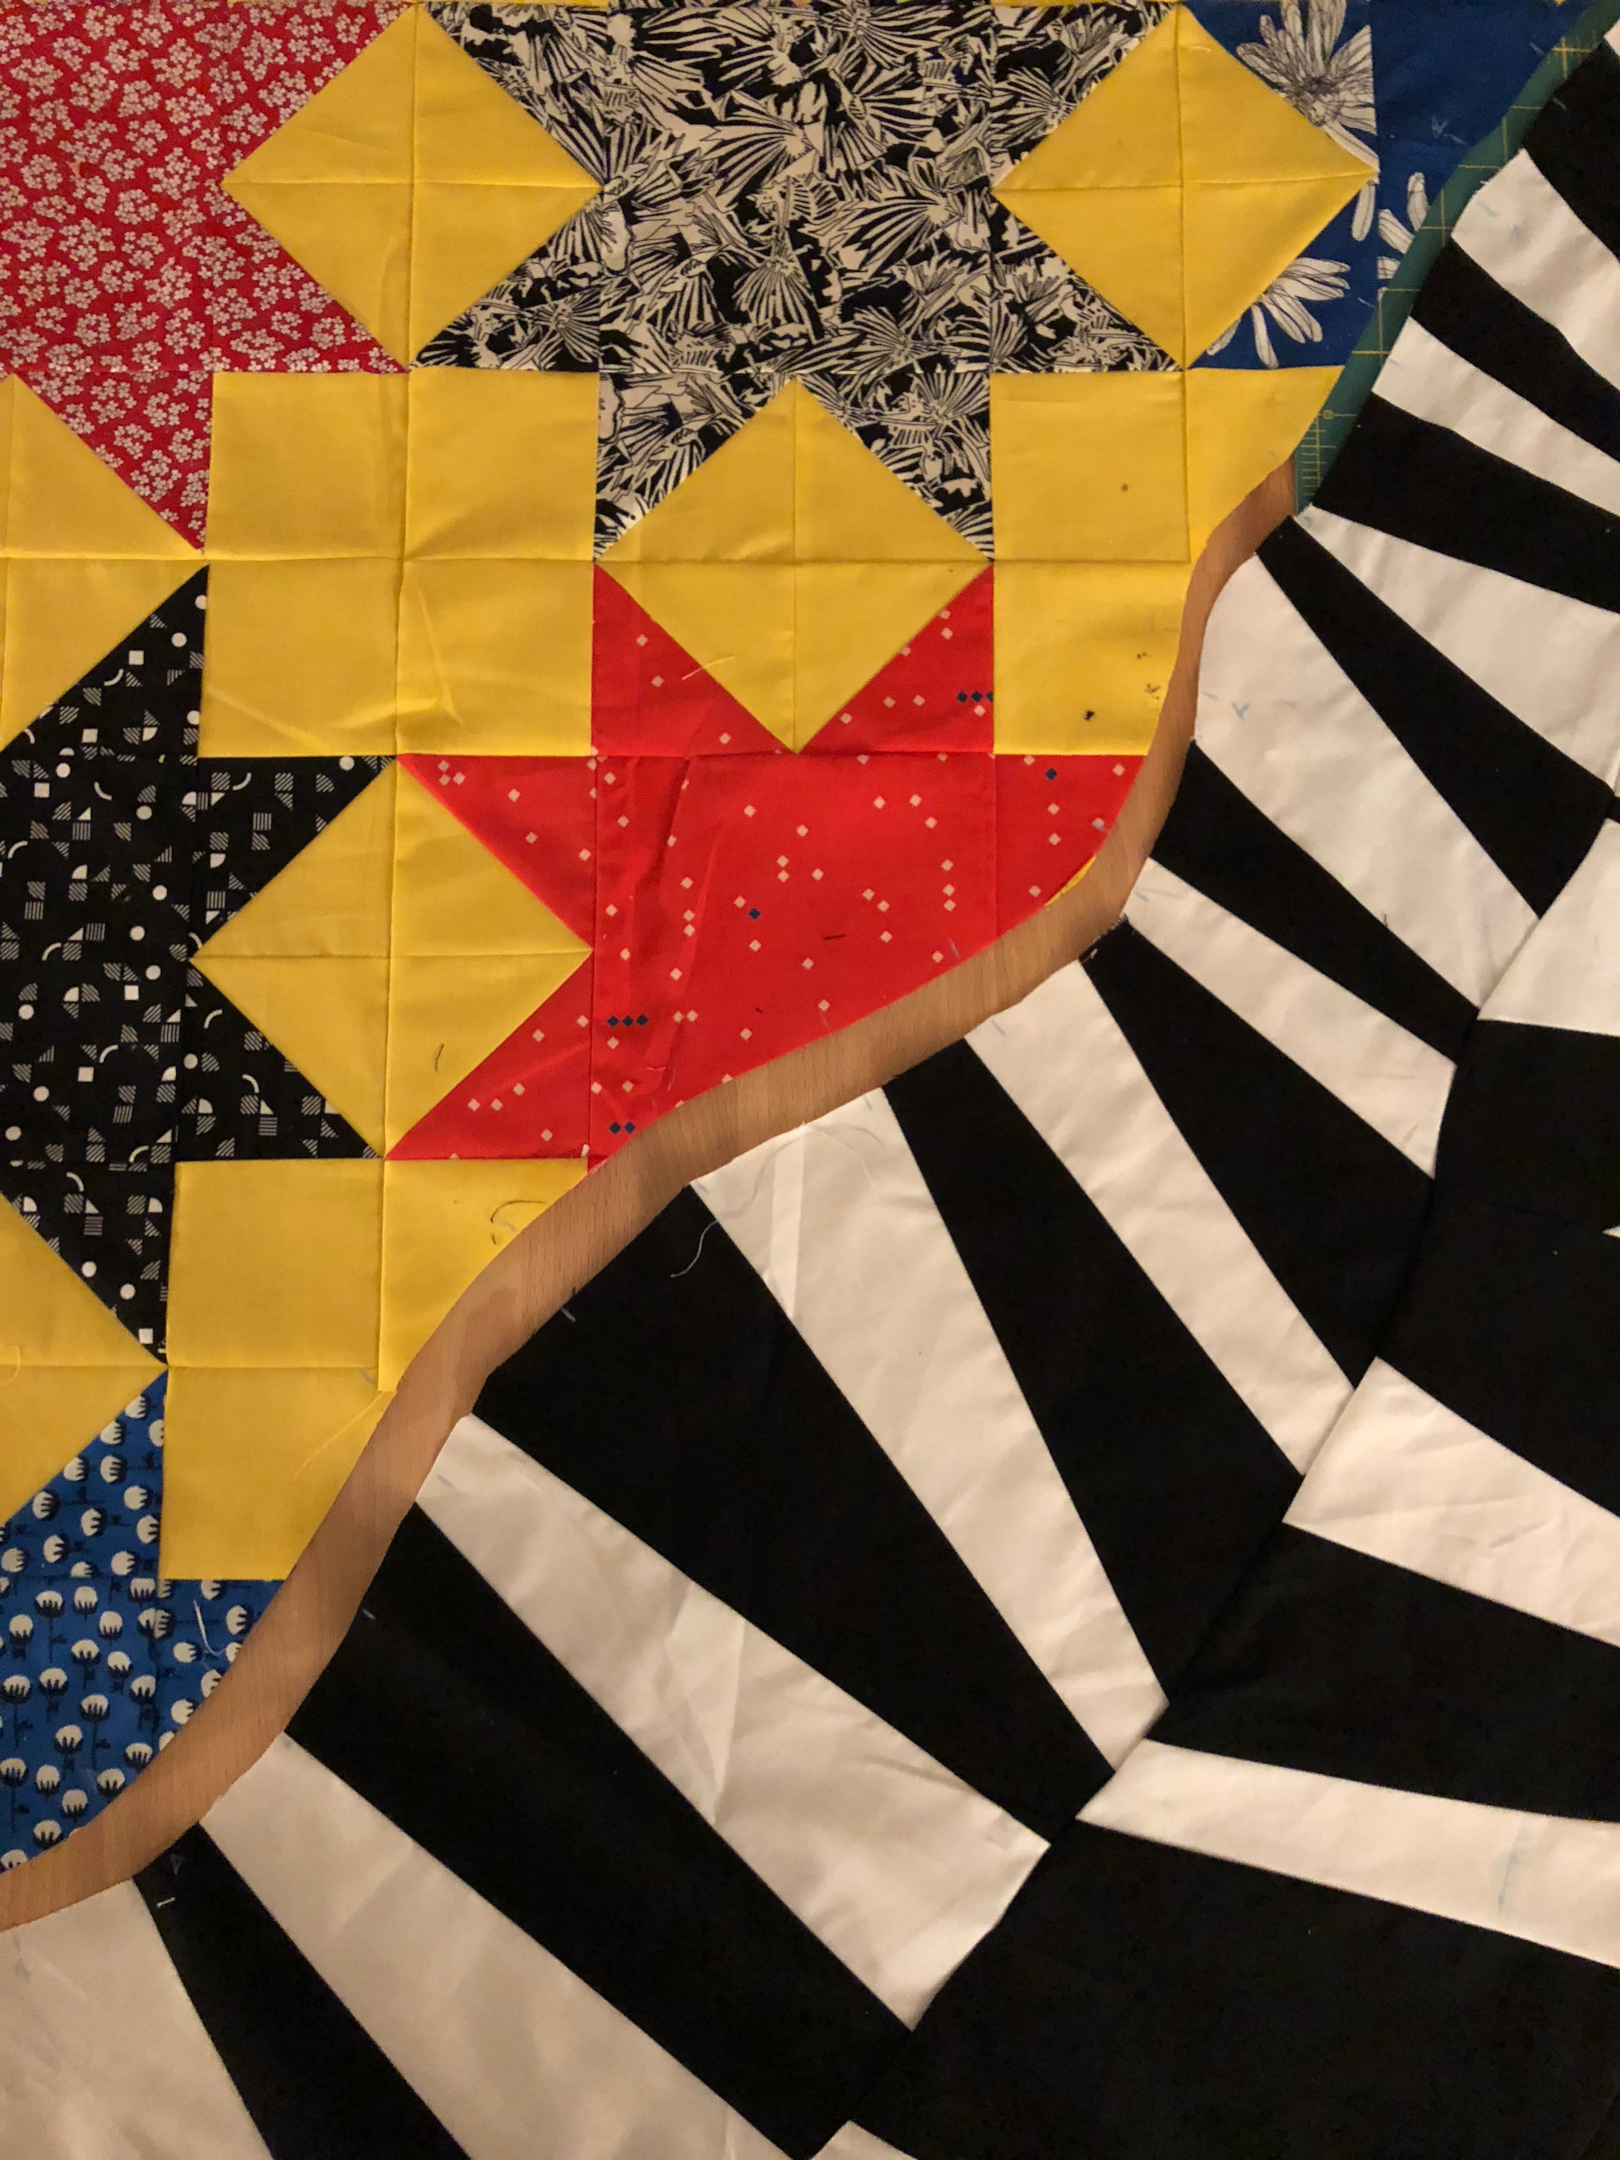
This is Sunshine. If you follow me on Instagram, you’ll have seen me working on this one over the past months.  Sunshine, is a bit different. She’s two quilts in one – half traditional piecing and half improvisational piecing. There is a lot of improv curves in this one!

Though she’s a bit of an oddball, I love this quilt so much! It all started when I wanted to work with yellow. As I made the stars sets on yellow, it began to look really happy, but I personally didn’t feel happy.

Nothing was or is wrong per se, but I most days I just feel like a mess with a smile on. So Sunshine is my self portrait in a sense.

And the two quilt halves came together by sewing a big improv curve. Here’s what it looked like before sewing.

And here’s the finished and quilted result!

How to sew improv curves

Here’s a close up. Look at that curve! So fun! And it’s so so easy!

how to sew improv curves Tutorial

In my latest video tutorial, you’ll learn how I sew my improv curves. This technique is the one I used to sew my improv curves in the two quilts above.

In the video, you’ll glimpse these projects, how I cut my improv curves, how I might pin the pieces together (it’s just for show, I’m a pinner sinner!), how I sew the improv curves, how I press the improv curves, and how I would sew the pieces together sans pins (be careful on this part!).

Bear (bare?) with me on this video. My videography skills have much improved since I shot this video six months ago. (It’s so funny how time flies!) You may notice my hand is in the way of “the money” shot for the sewing machine segments.

Please know management has received your complaints and is working to improve the situation. Ha!

In all seriousness, in spite of my shortcomings (I think I’ve mentioned being a mess with a smile on? Ha!) I want to share what I know about how to create improv curves so that you can take the lesson and do you own thing.

So, even with my big ole’ hand in the way, I hope you can find this video tutorial helpful!

Here’s the detailed technique video! Enjoy!

Here’s the video! Enjoy!

Blog Tutorial – how to sew improv curves

Now, the video tutorial is great. But sometimes I prefer some images of key moments for a new technique. So below you’ll see just that!

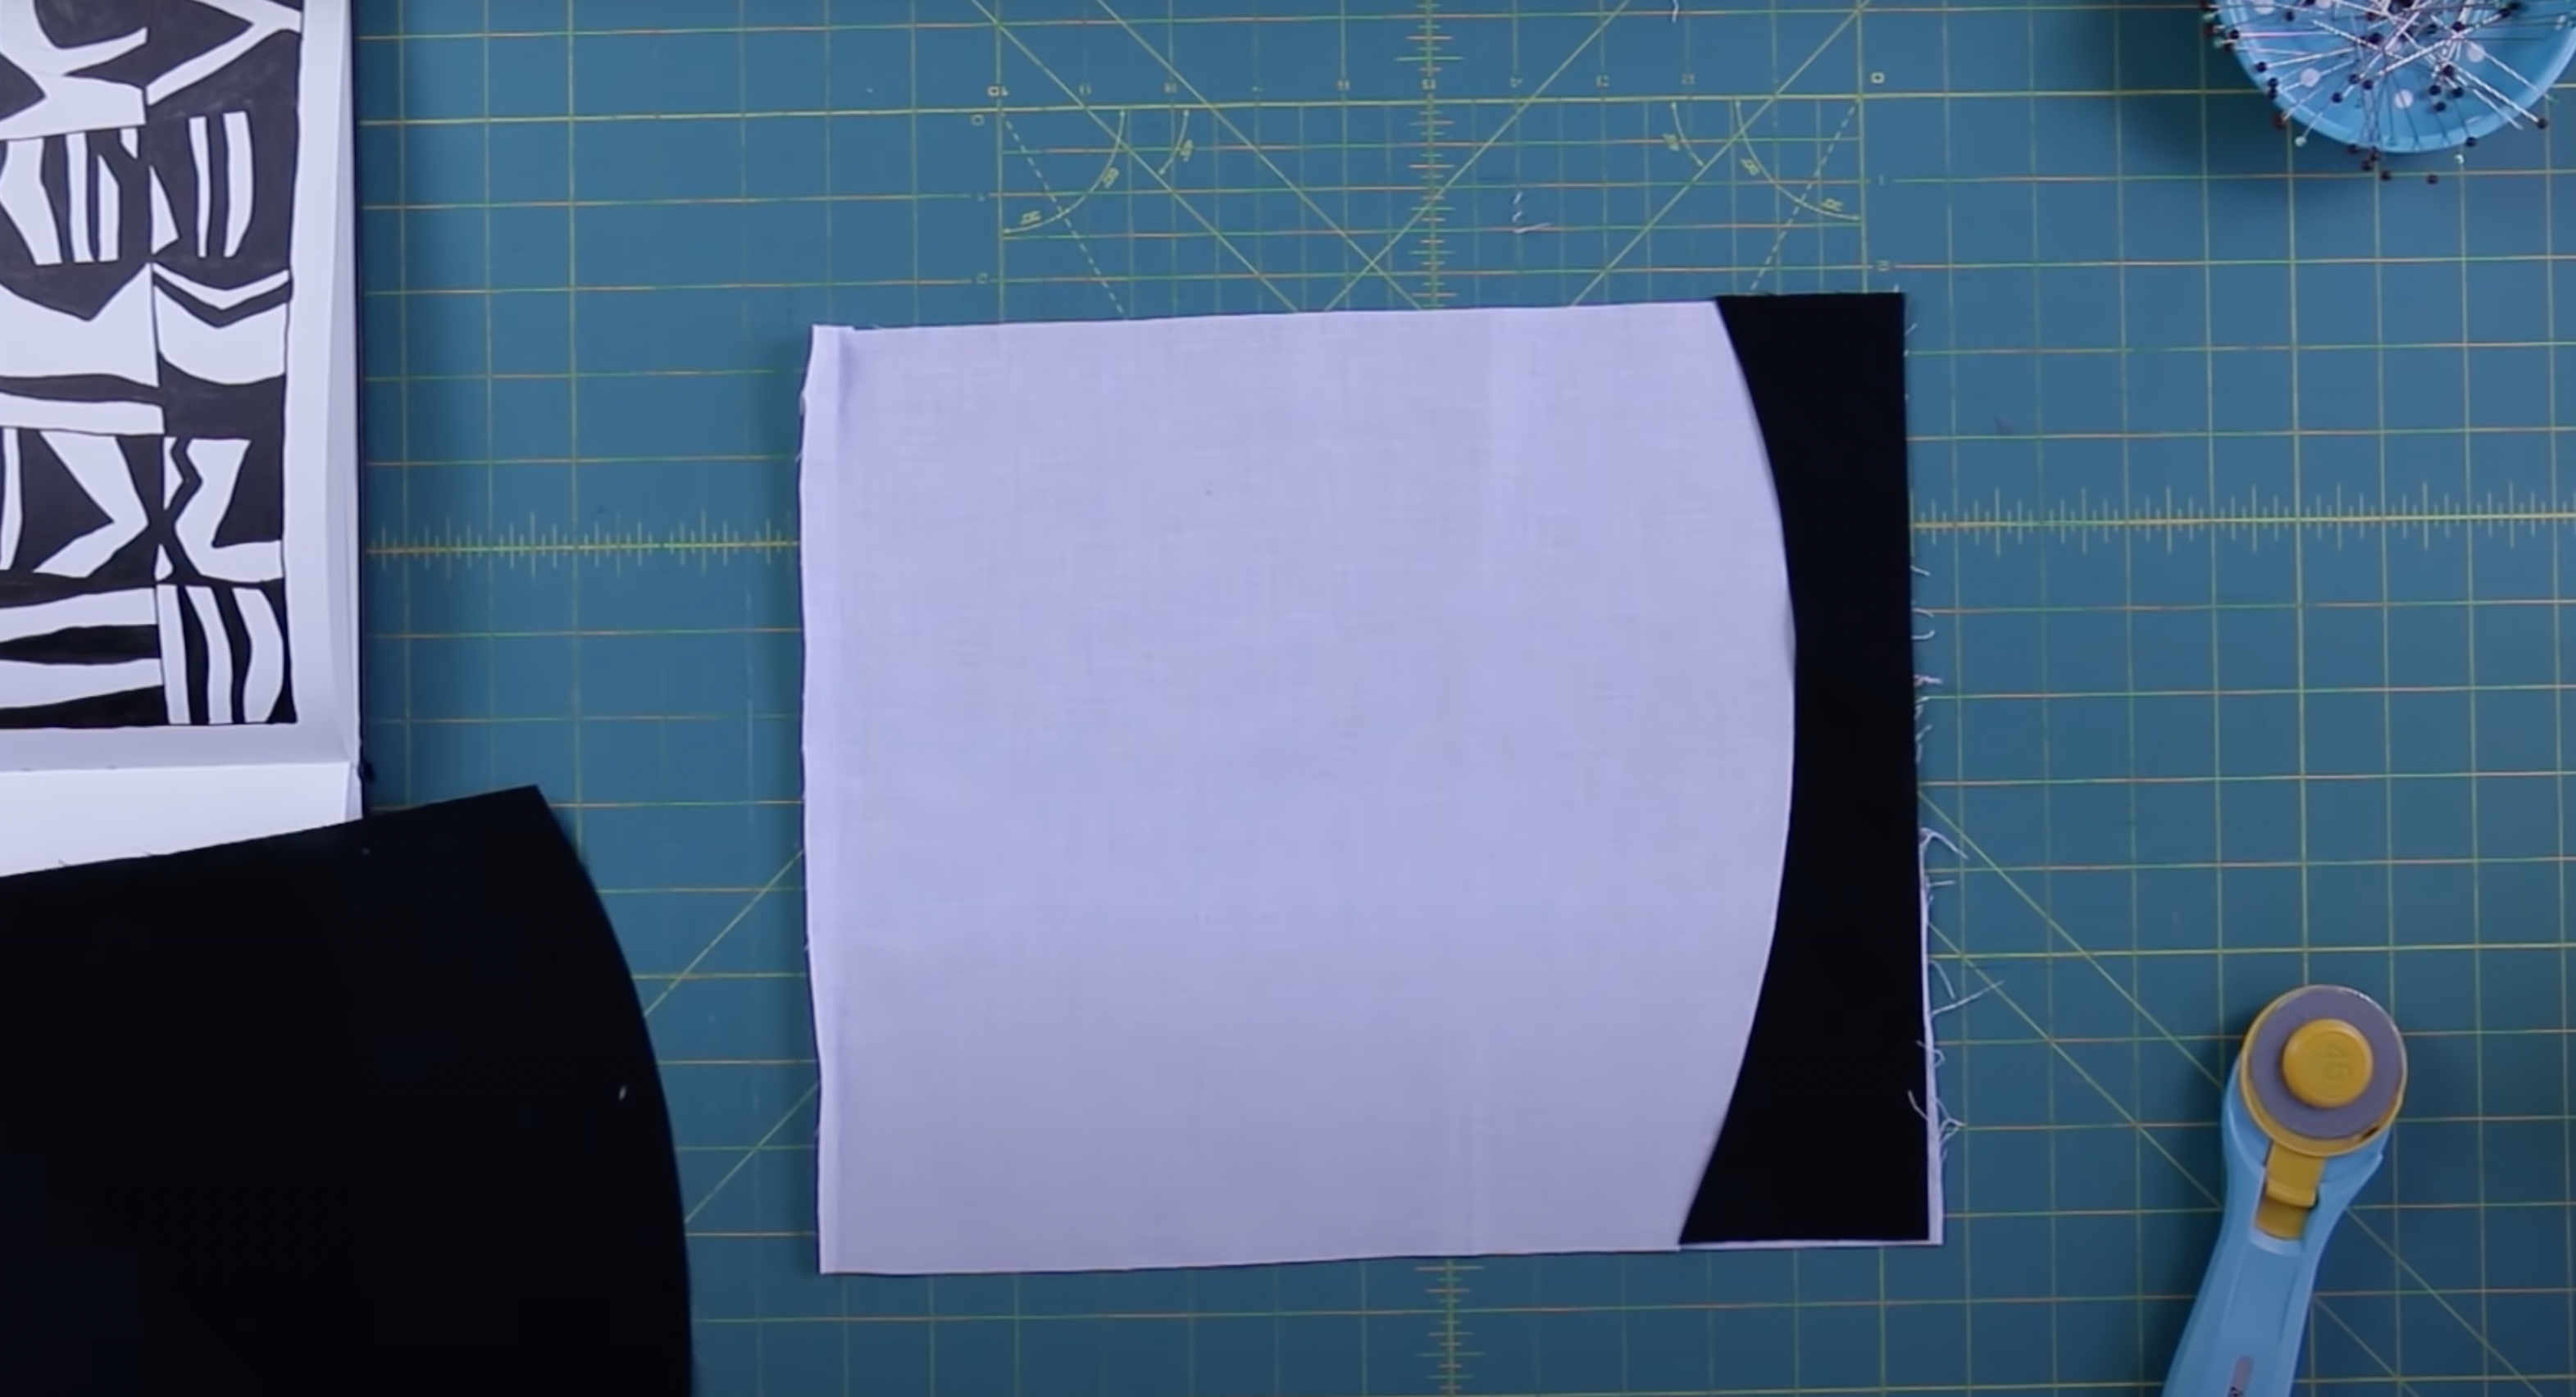
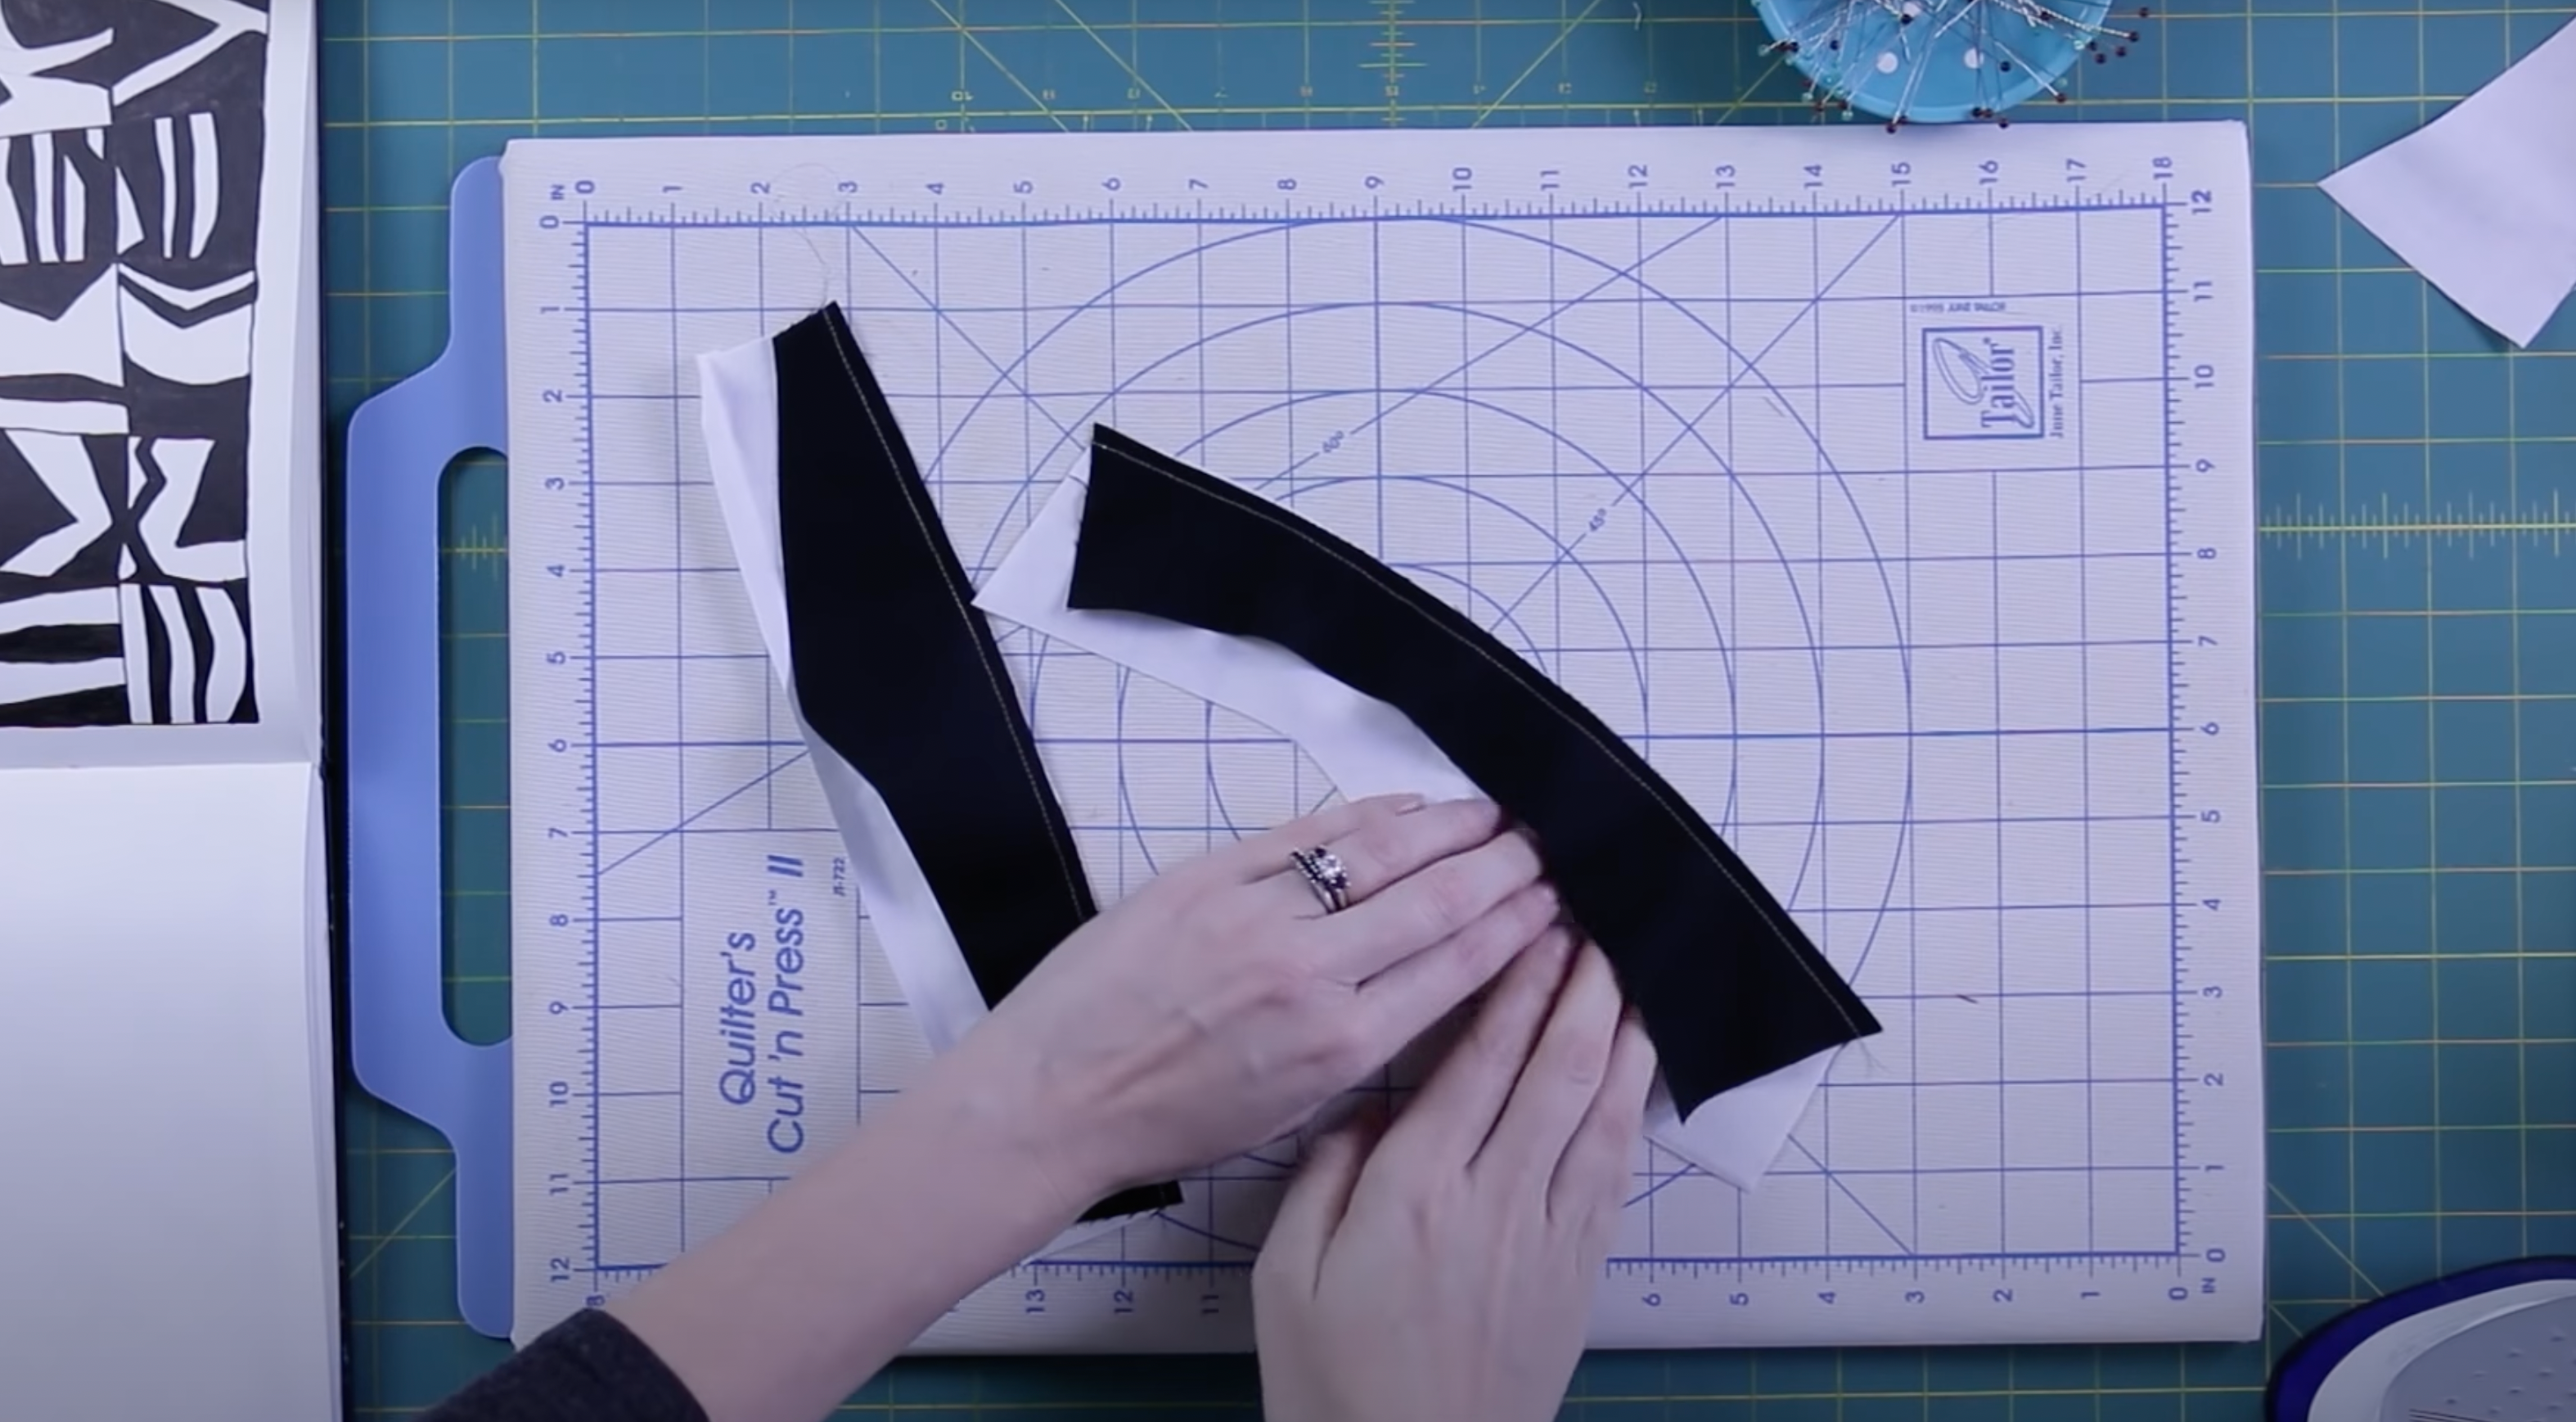
Step 1 – Stack and Cut

Stack your fabric one on top of each other on your cutting mat. Right sides up for both pieces if you’re using prints.

Image shows stacked fabrics

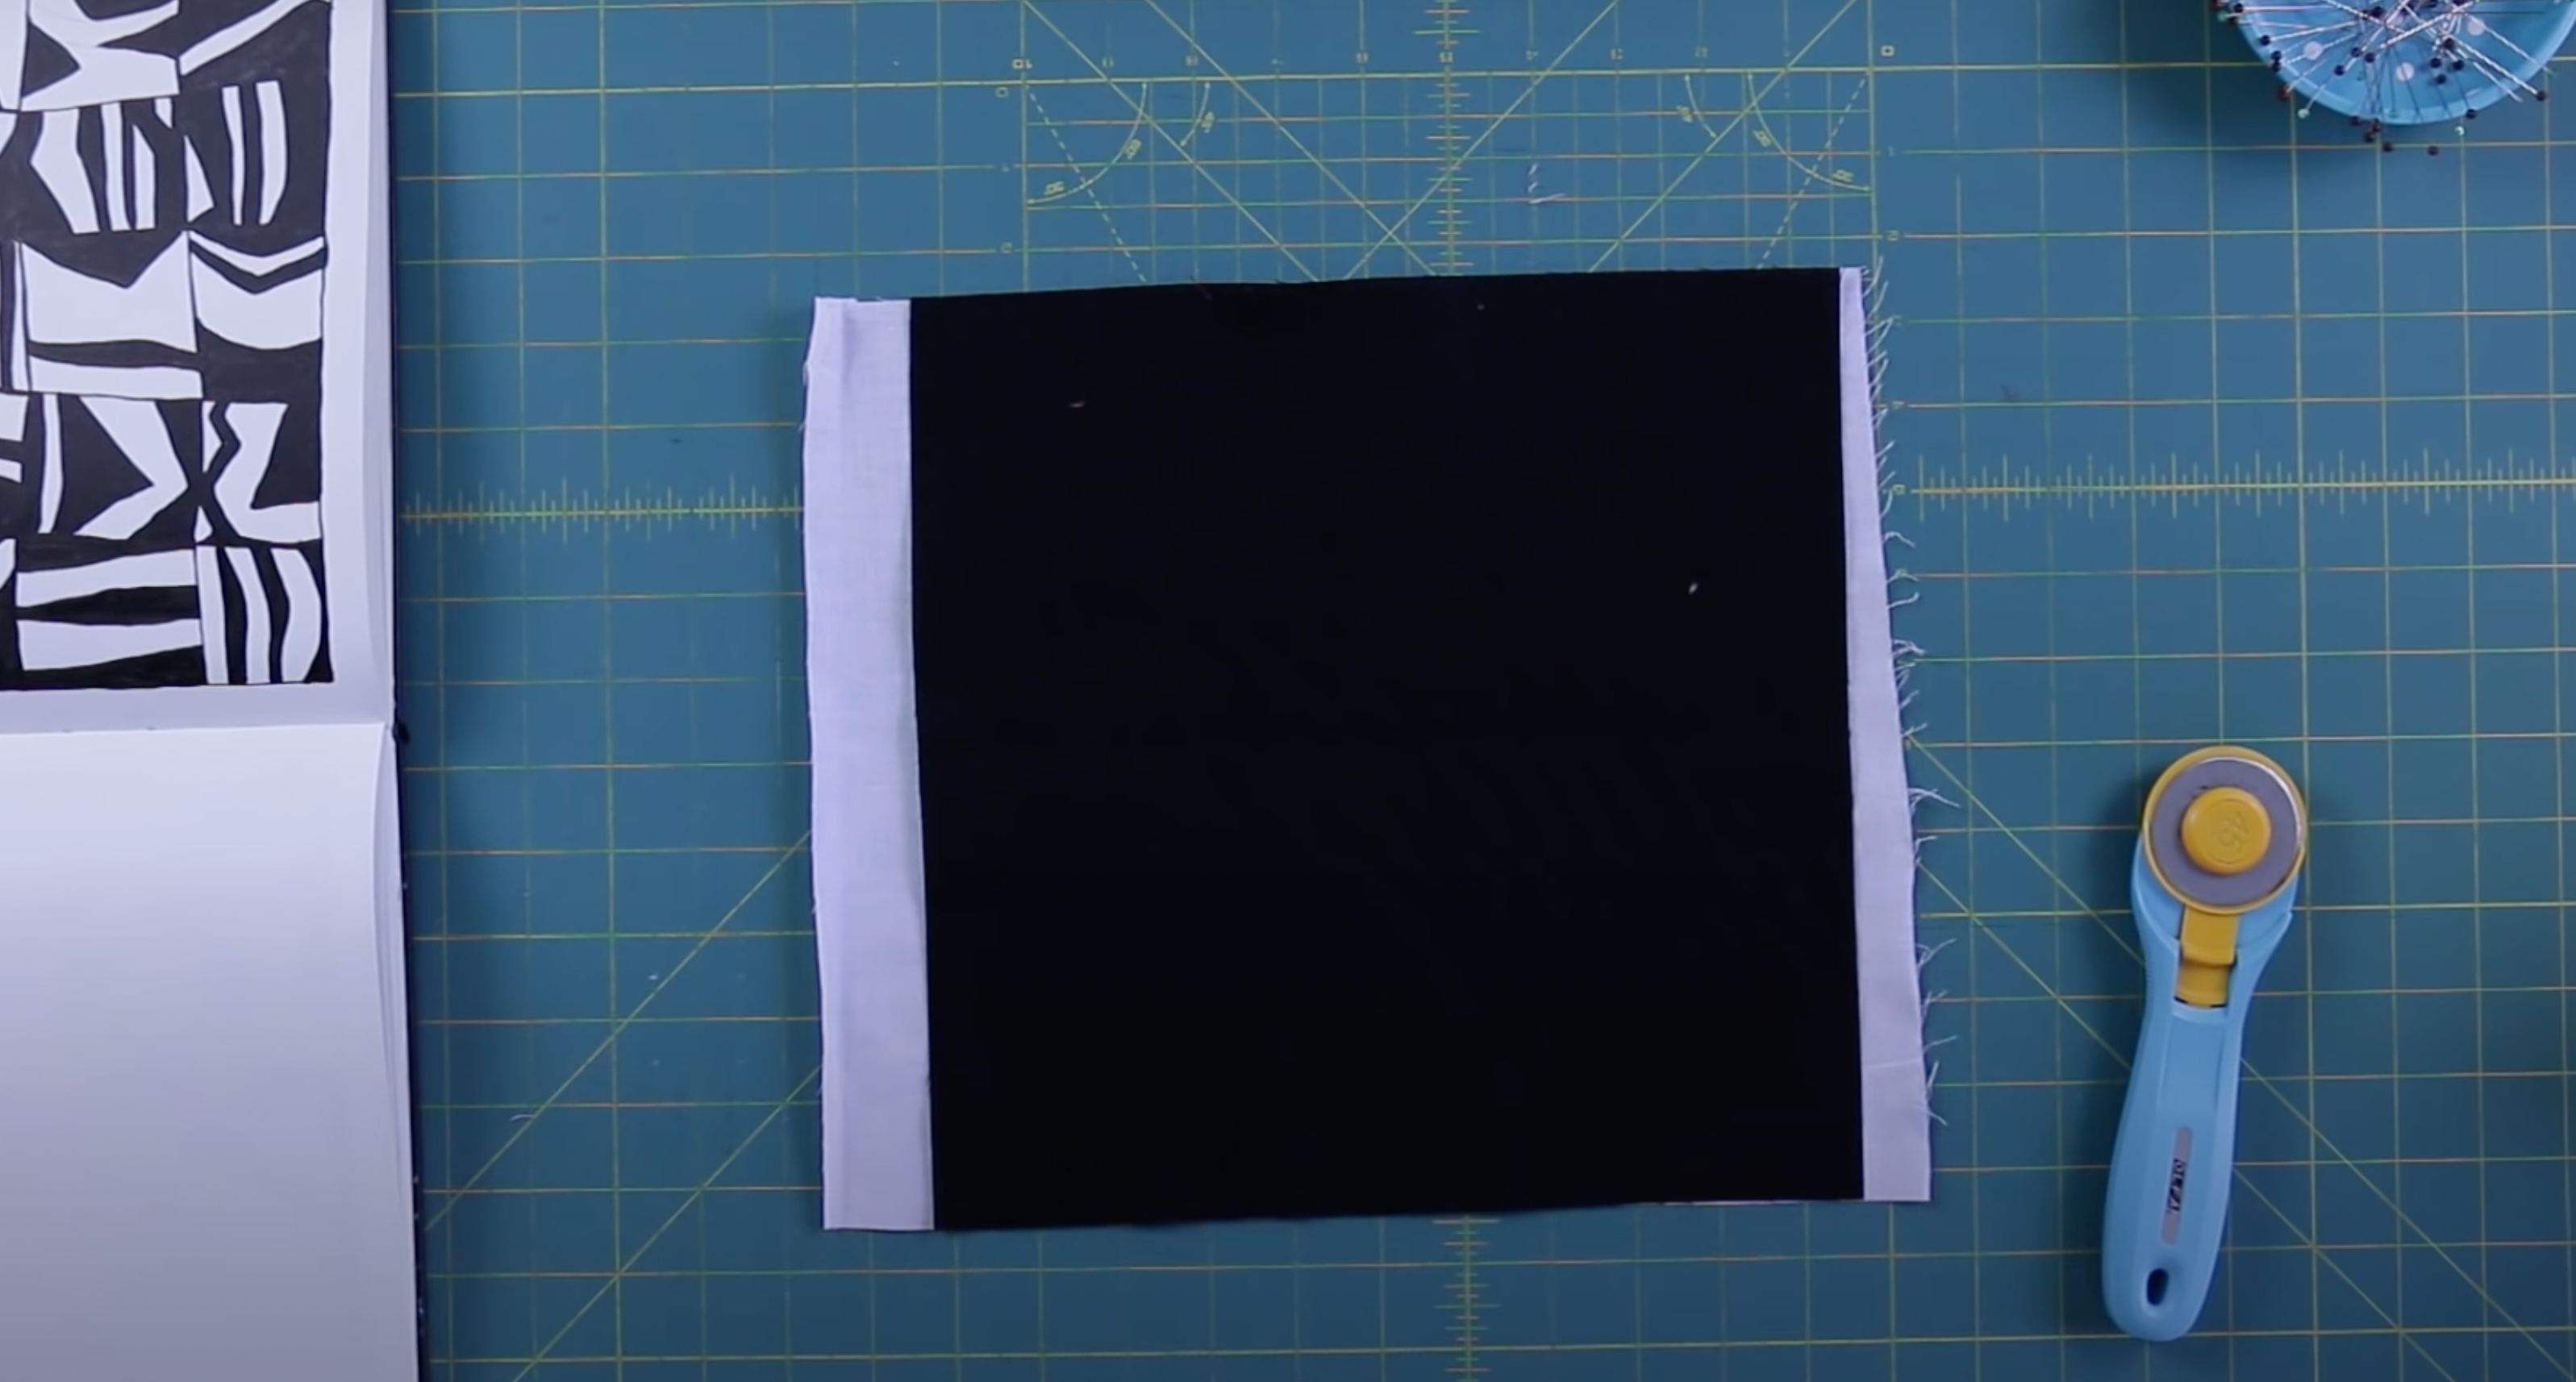
As I note in my video, my fabric pieces are large because I’ll be working through making the Black and White block using all of each piece of fabric.

Then, you’ll be using your rotary cutter to cut your curved line. If you’ve never cut without an acrylic ruler, you are going to be shocked at how straight you actually cut! It takes a bit of practice and a bit of conscious intention to not cut straight!

Before cutting, I find it helpful to do a rough draft cutting motion. You can see exactly what I mean in the video above.

Image shows cutting fabrics for improv curves

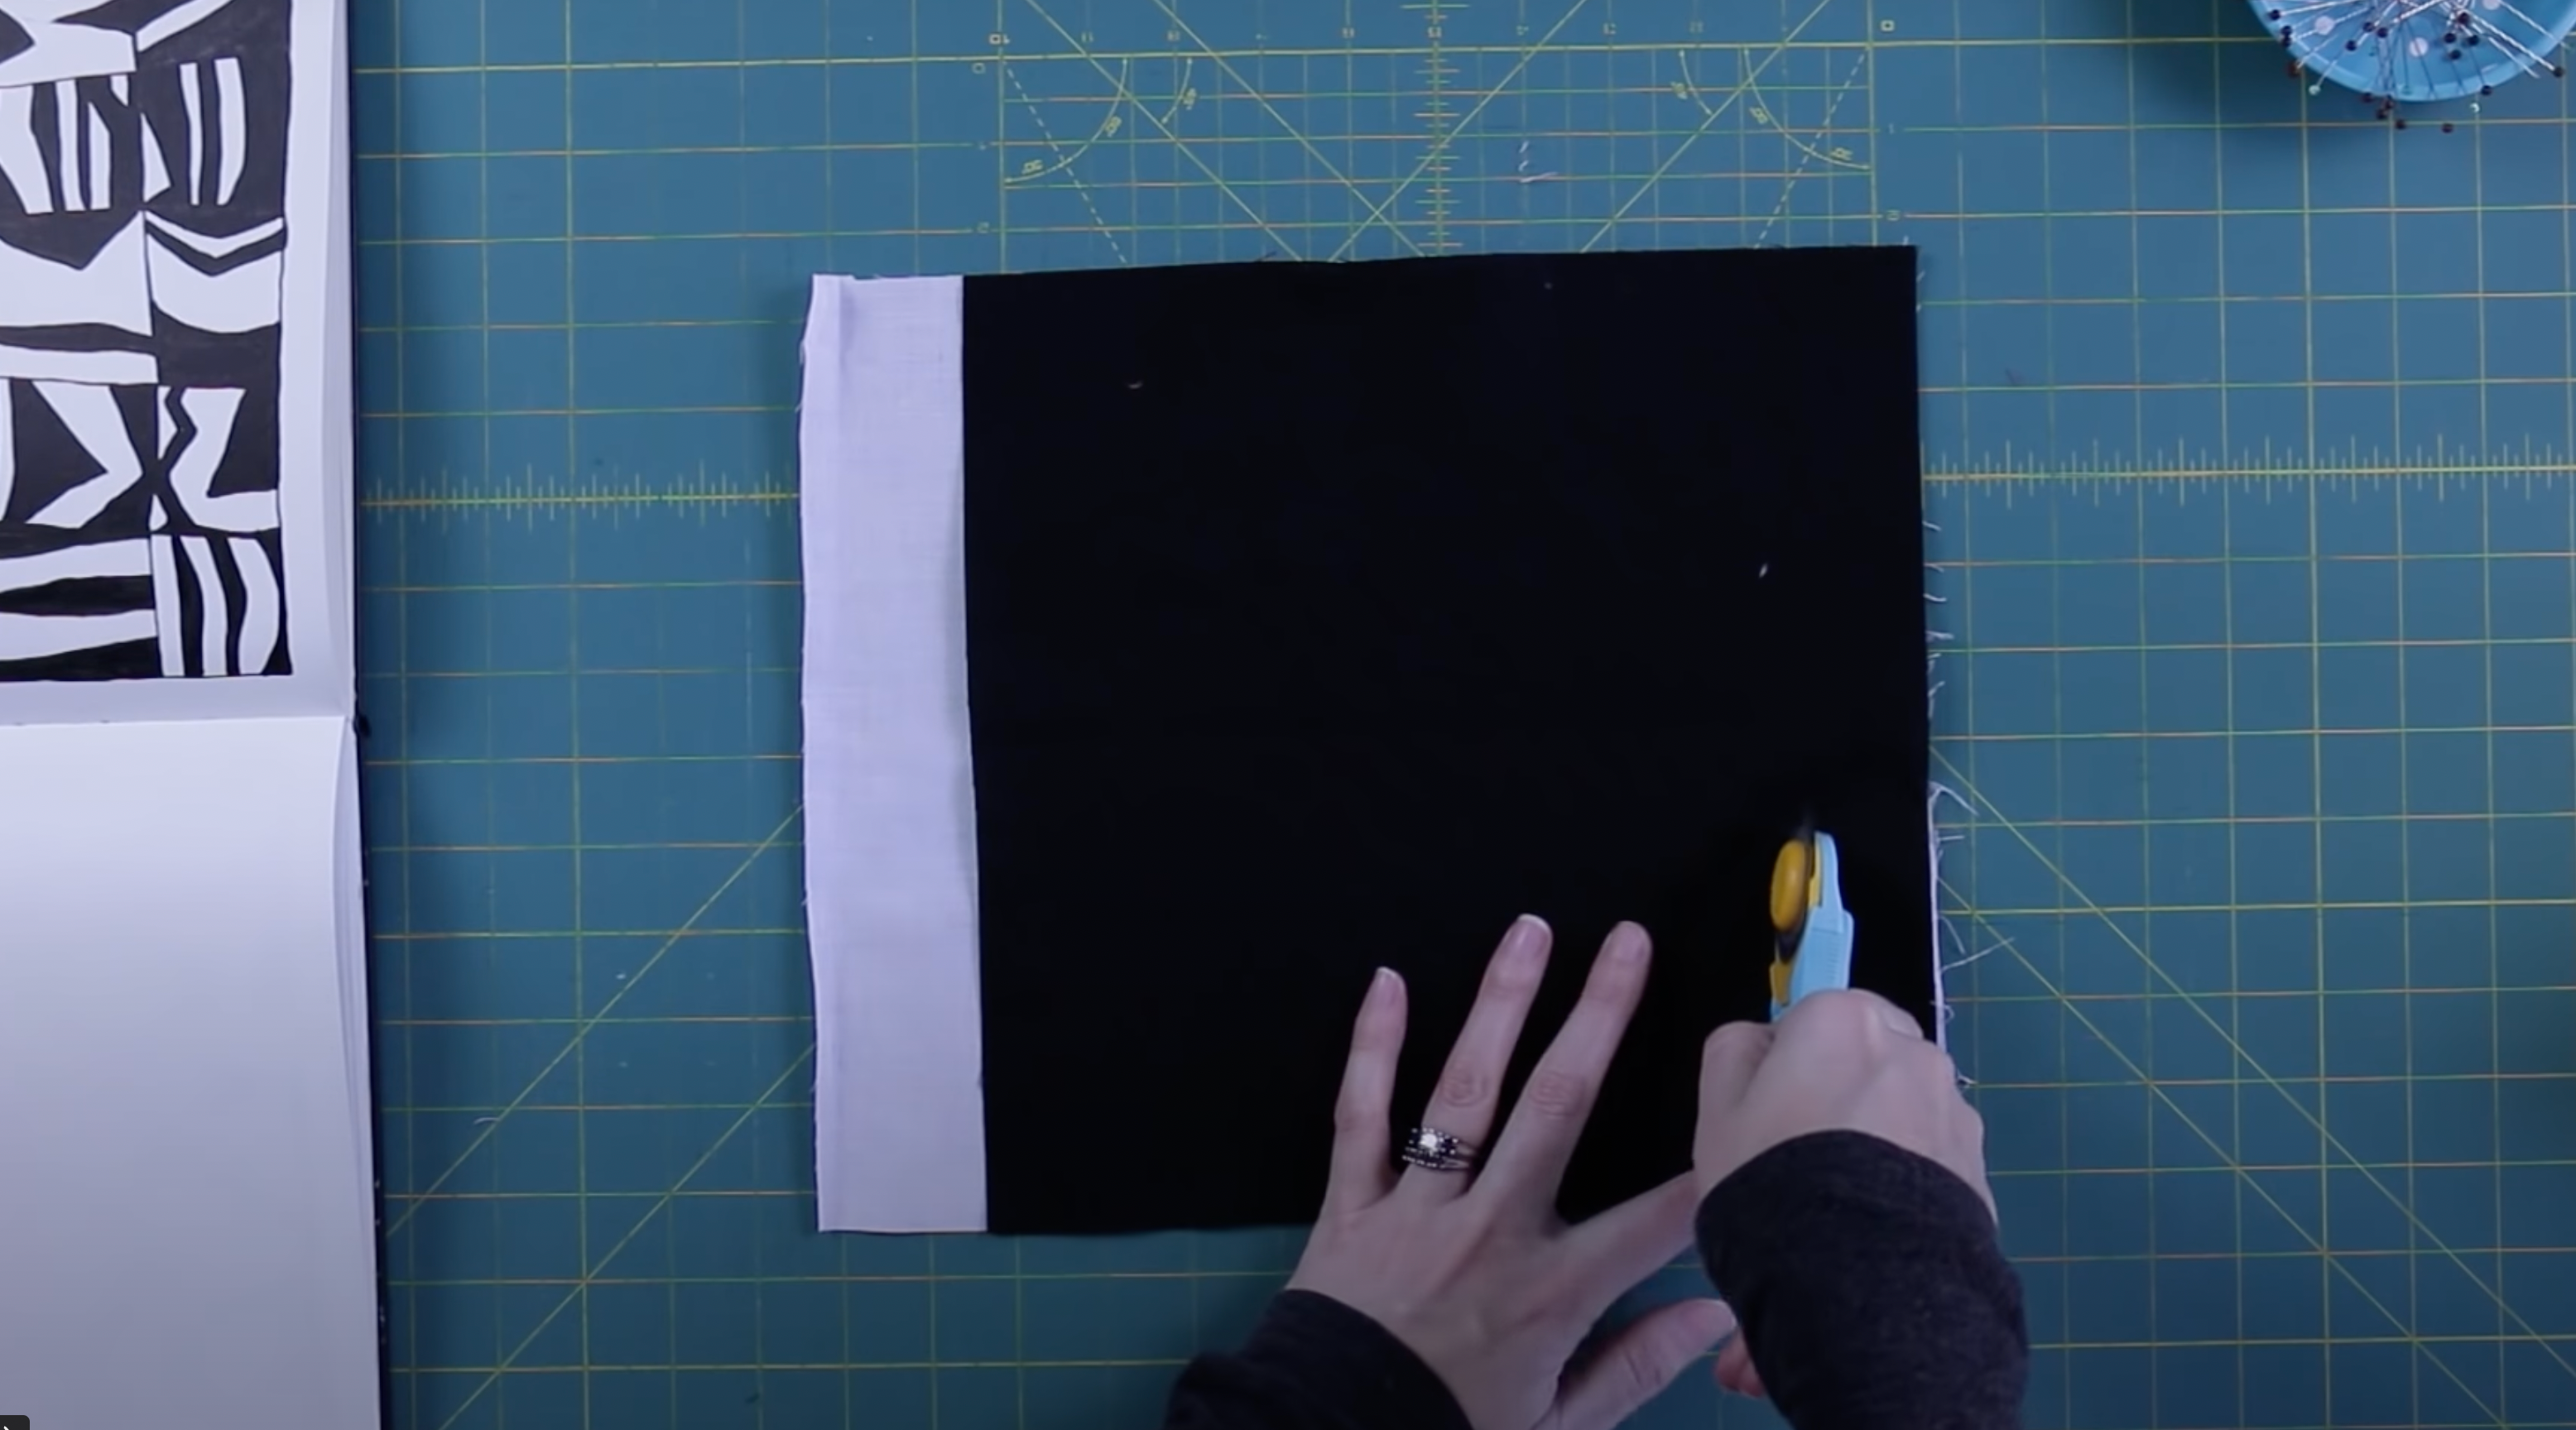
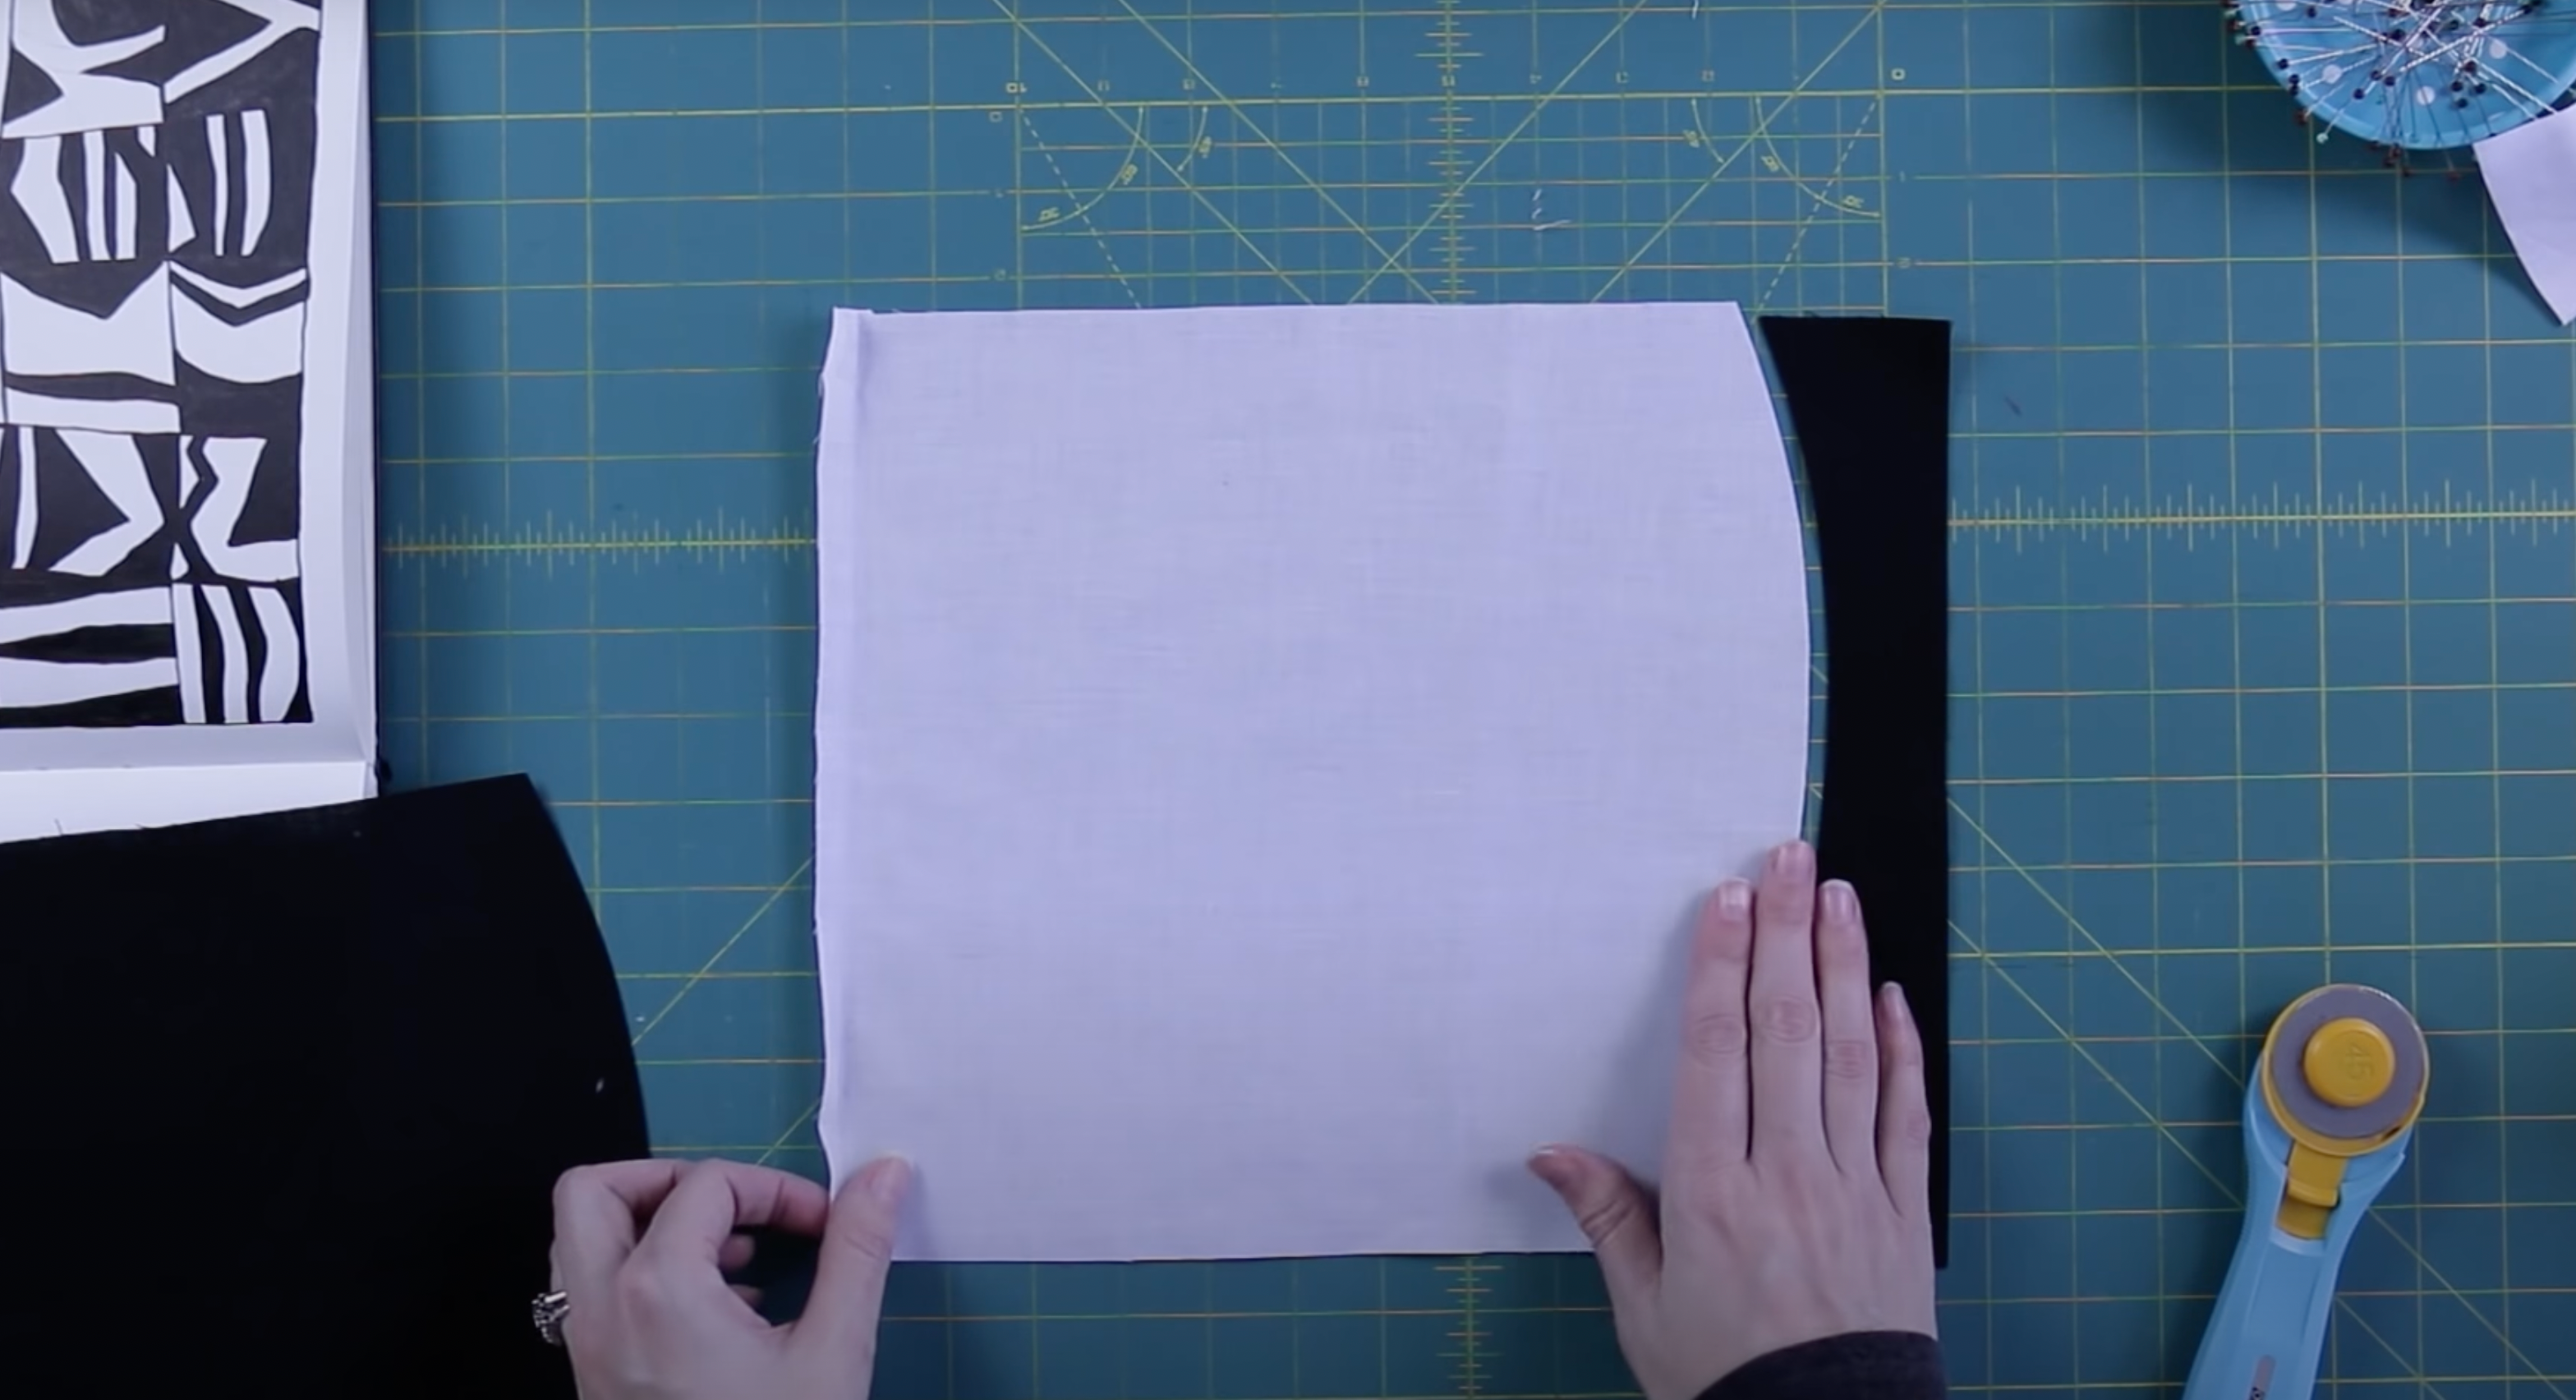
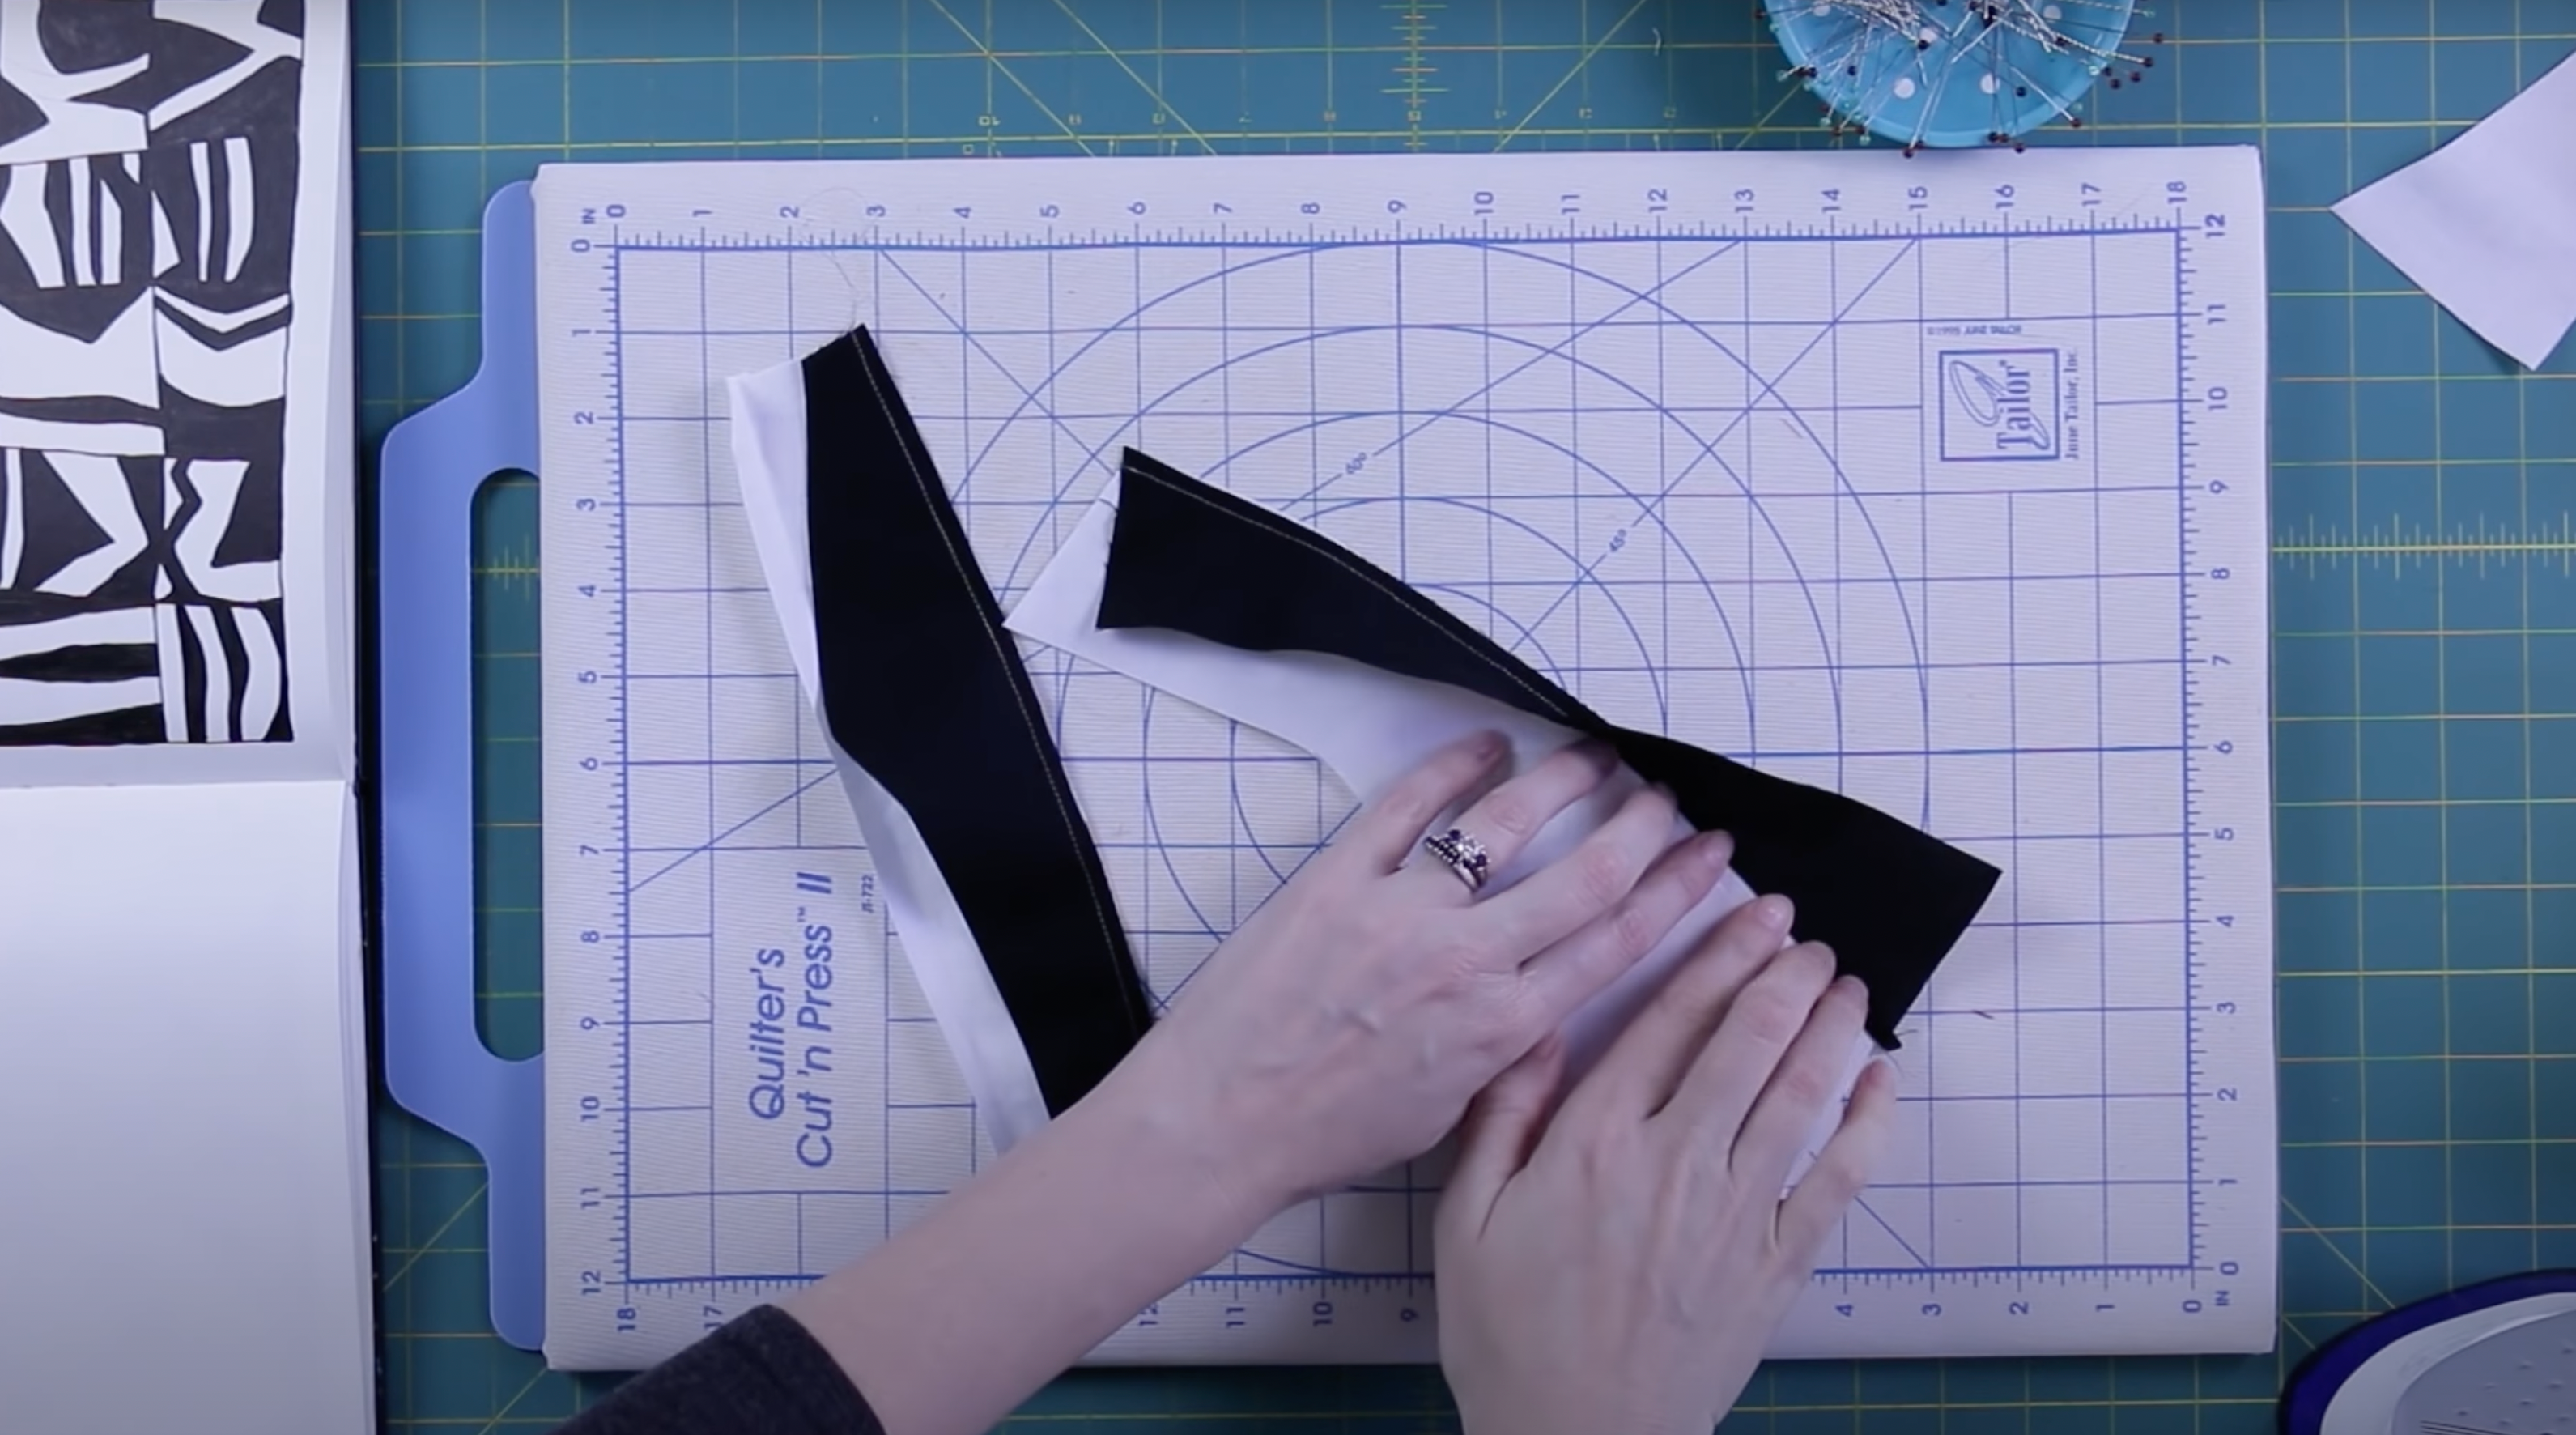
Then, remove the excess fabric. For me, I removed the black fabric that was on the top to the left of my cut, and then I’ll remove the white fabric under the black fabric piece to the right of the cut.

Image shows cutting fabrics for improved curves

Now, here’s the first line I’ll be stitching. And remember, when you put these through the sewing machine, you’re going to lose about half an inch from the seam allowance.

How to Stitch Improv Curves

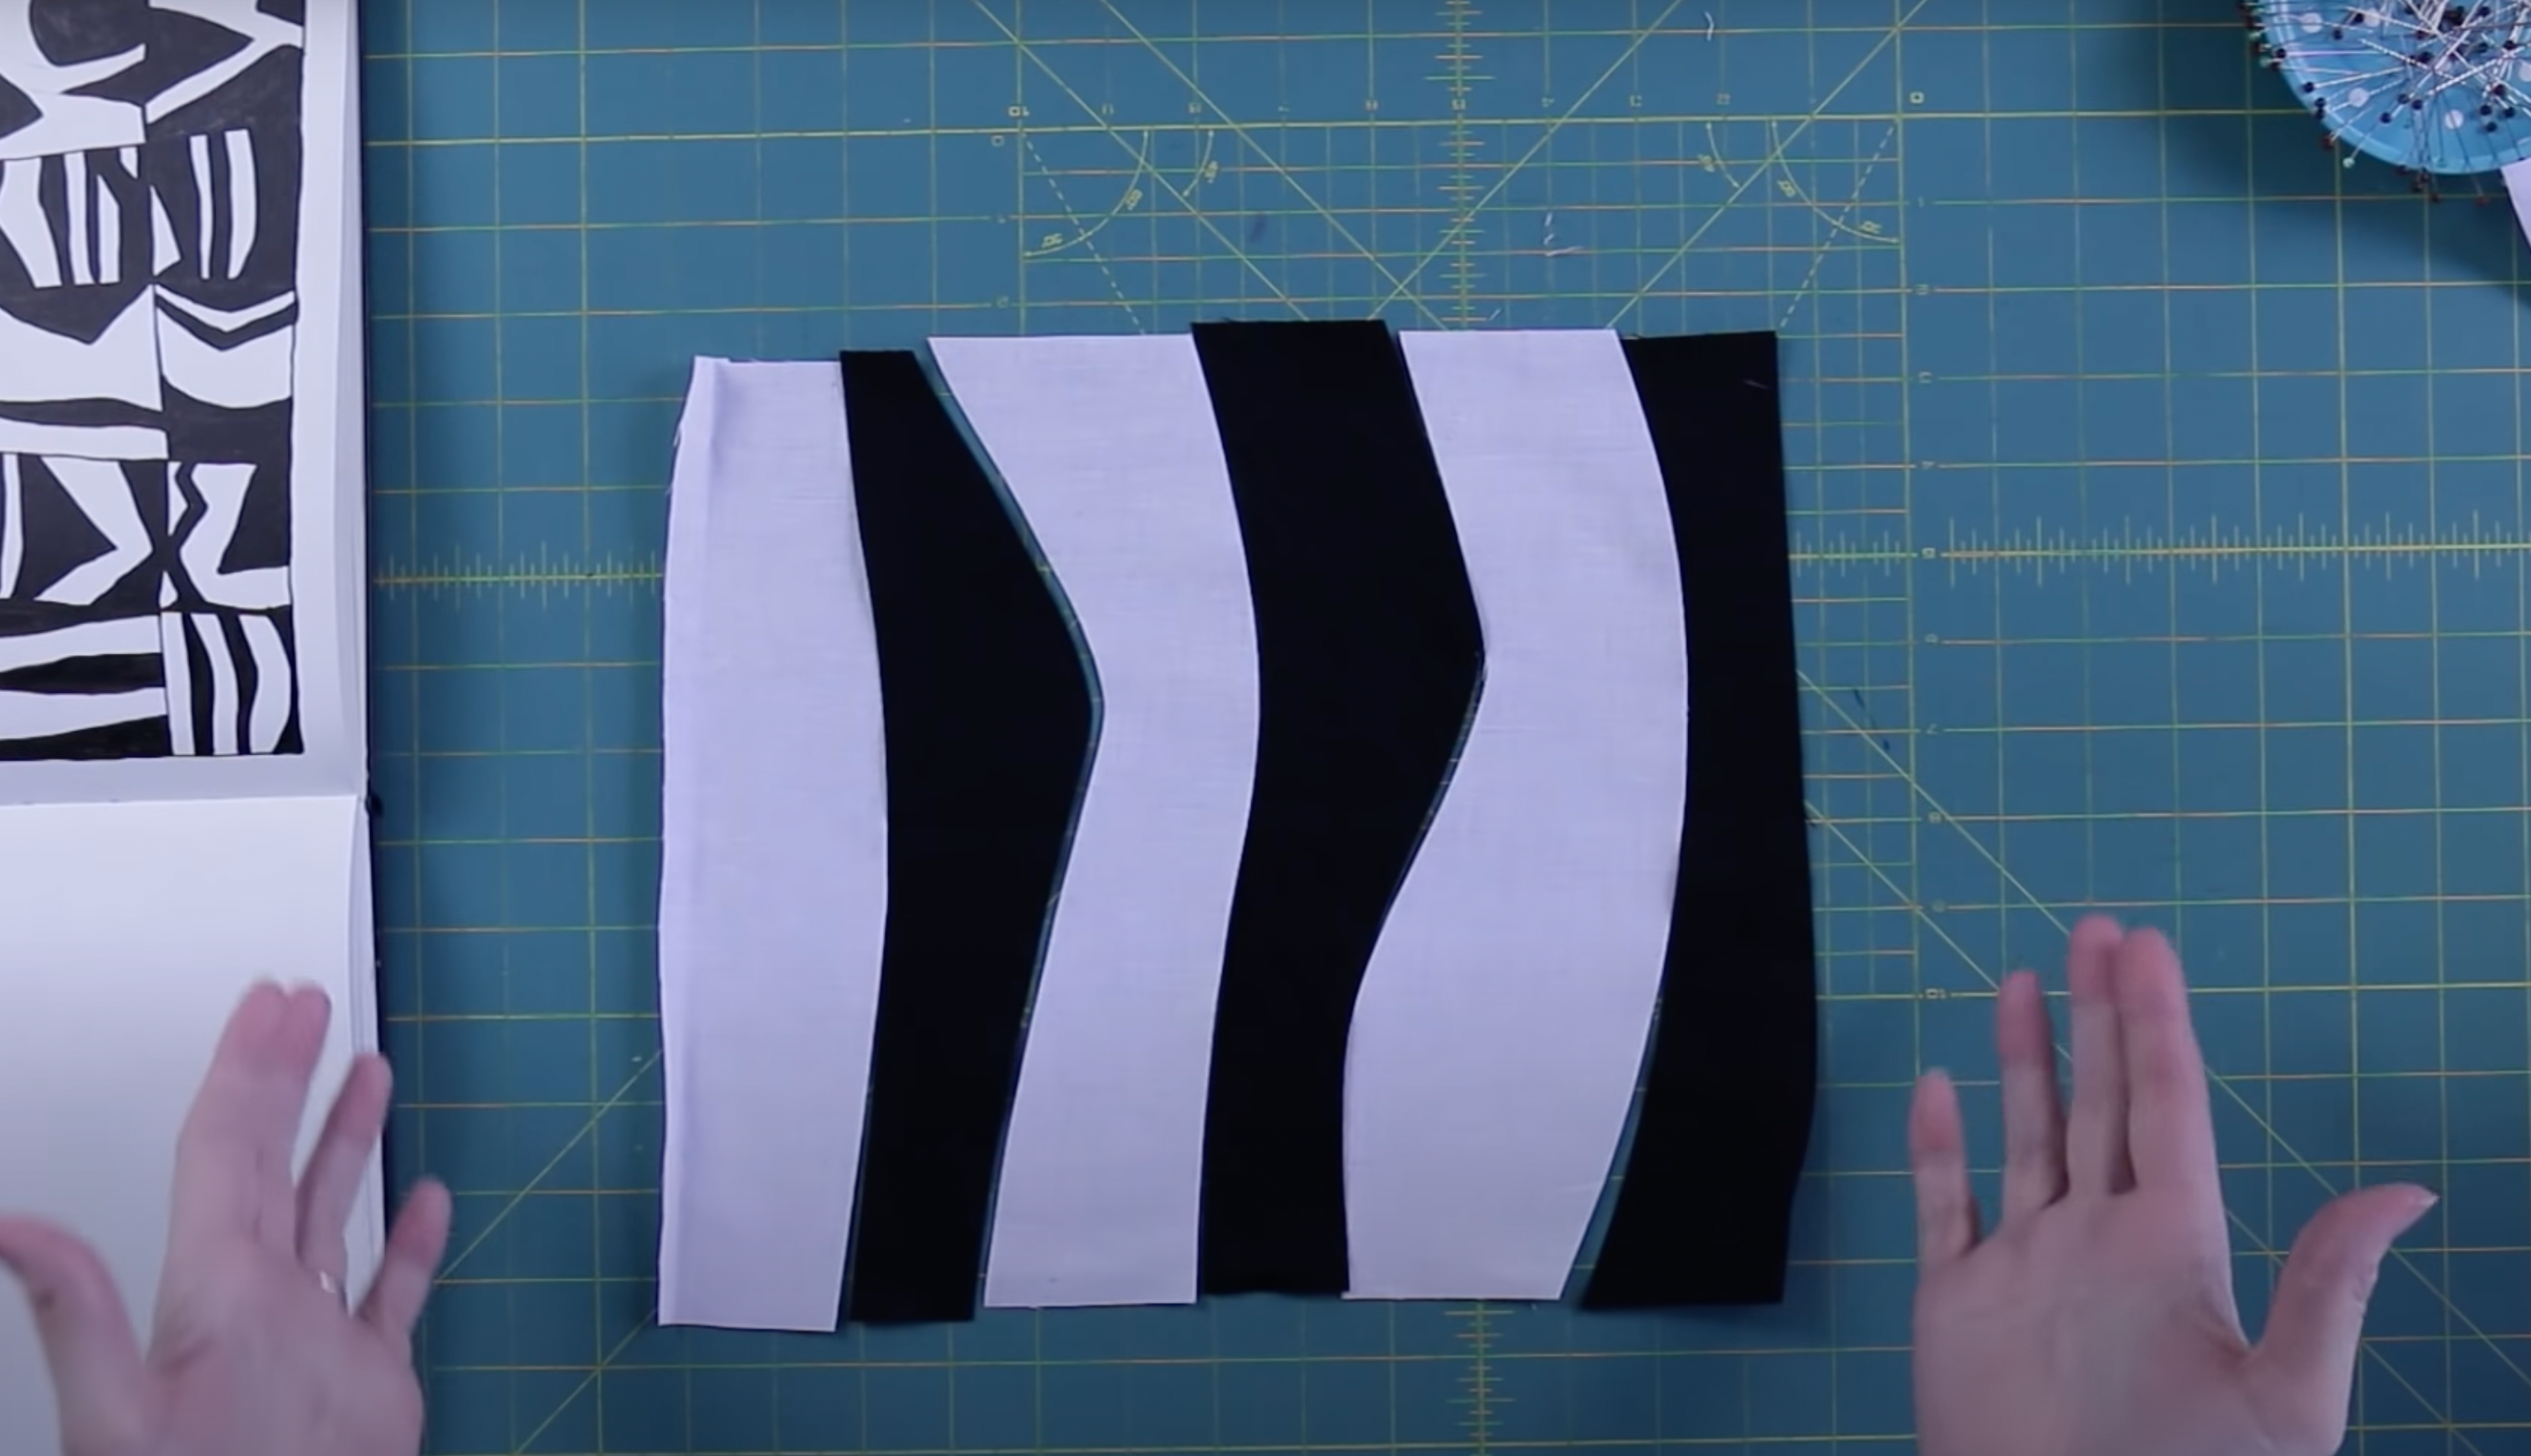
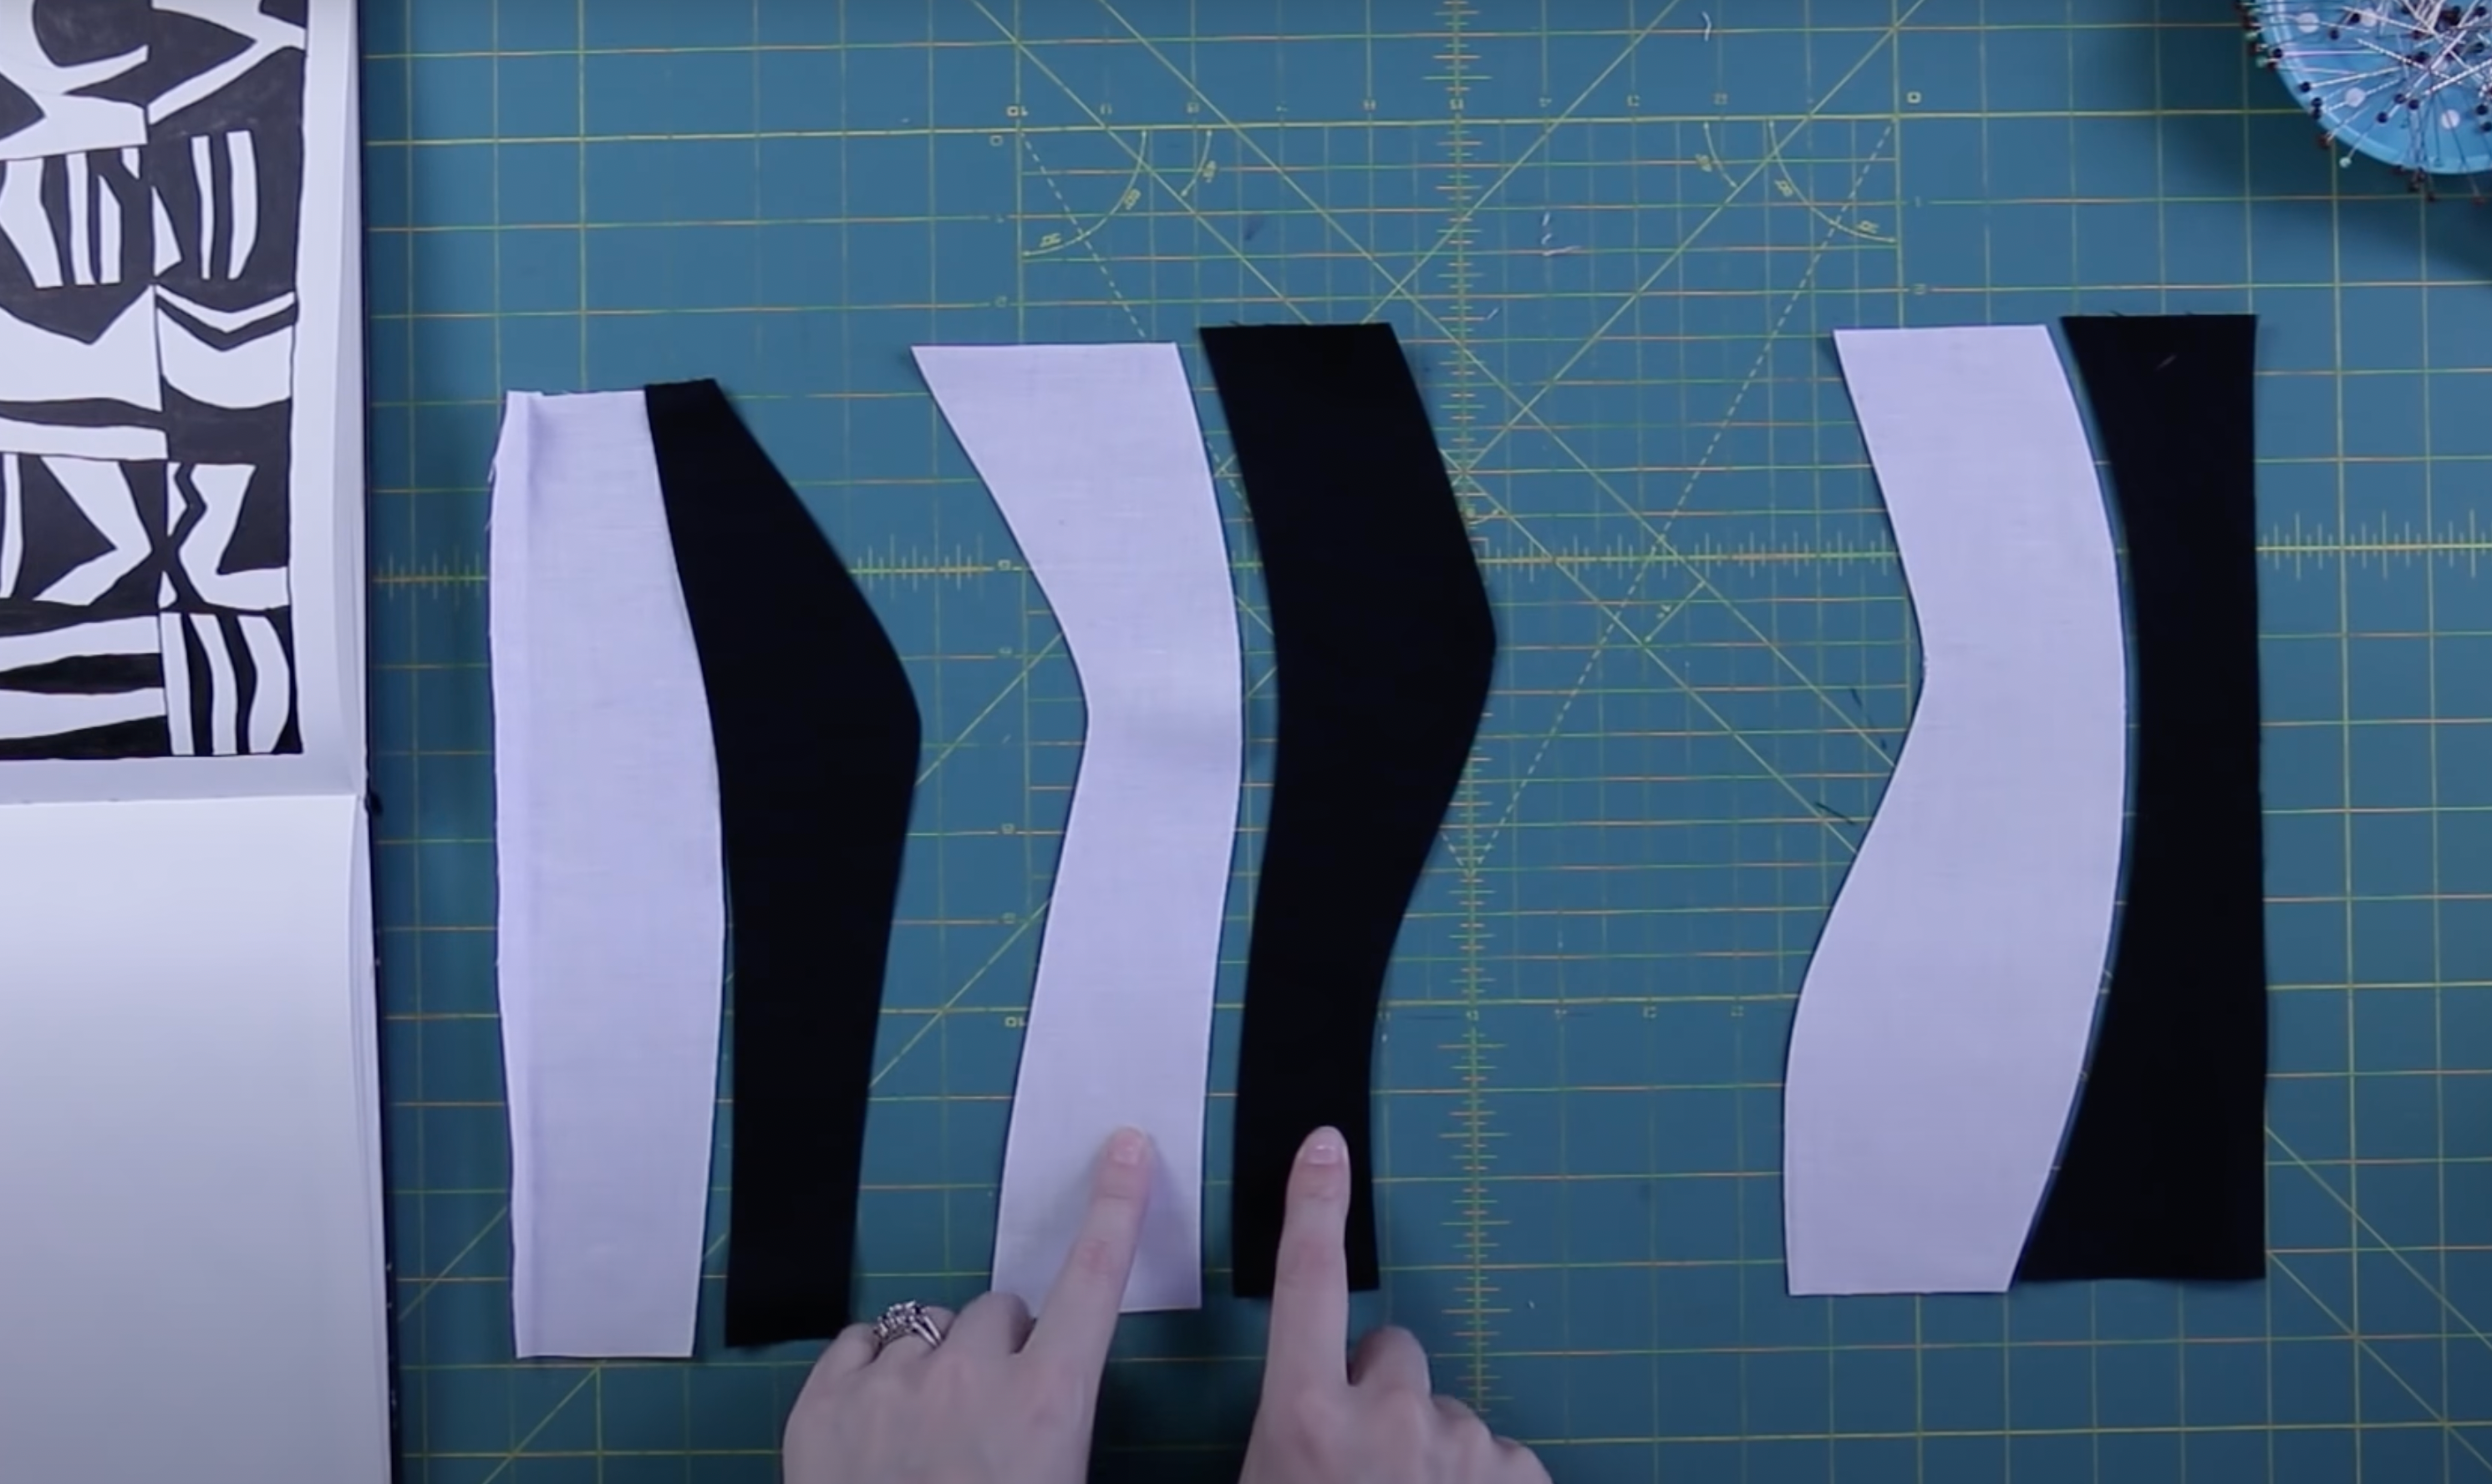
For my demonstration, I went ahead and cut for all of my block using my rotary cutter and my mat.

Image shows an improvisationally curved block

Step 2 – Pinning and Sewing

A lot of the time, I won’t pin, but that takes practice. So I’ll show you how to pin these curvy fabric pieces together.

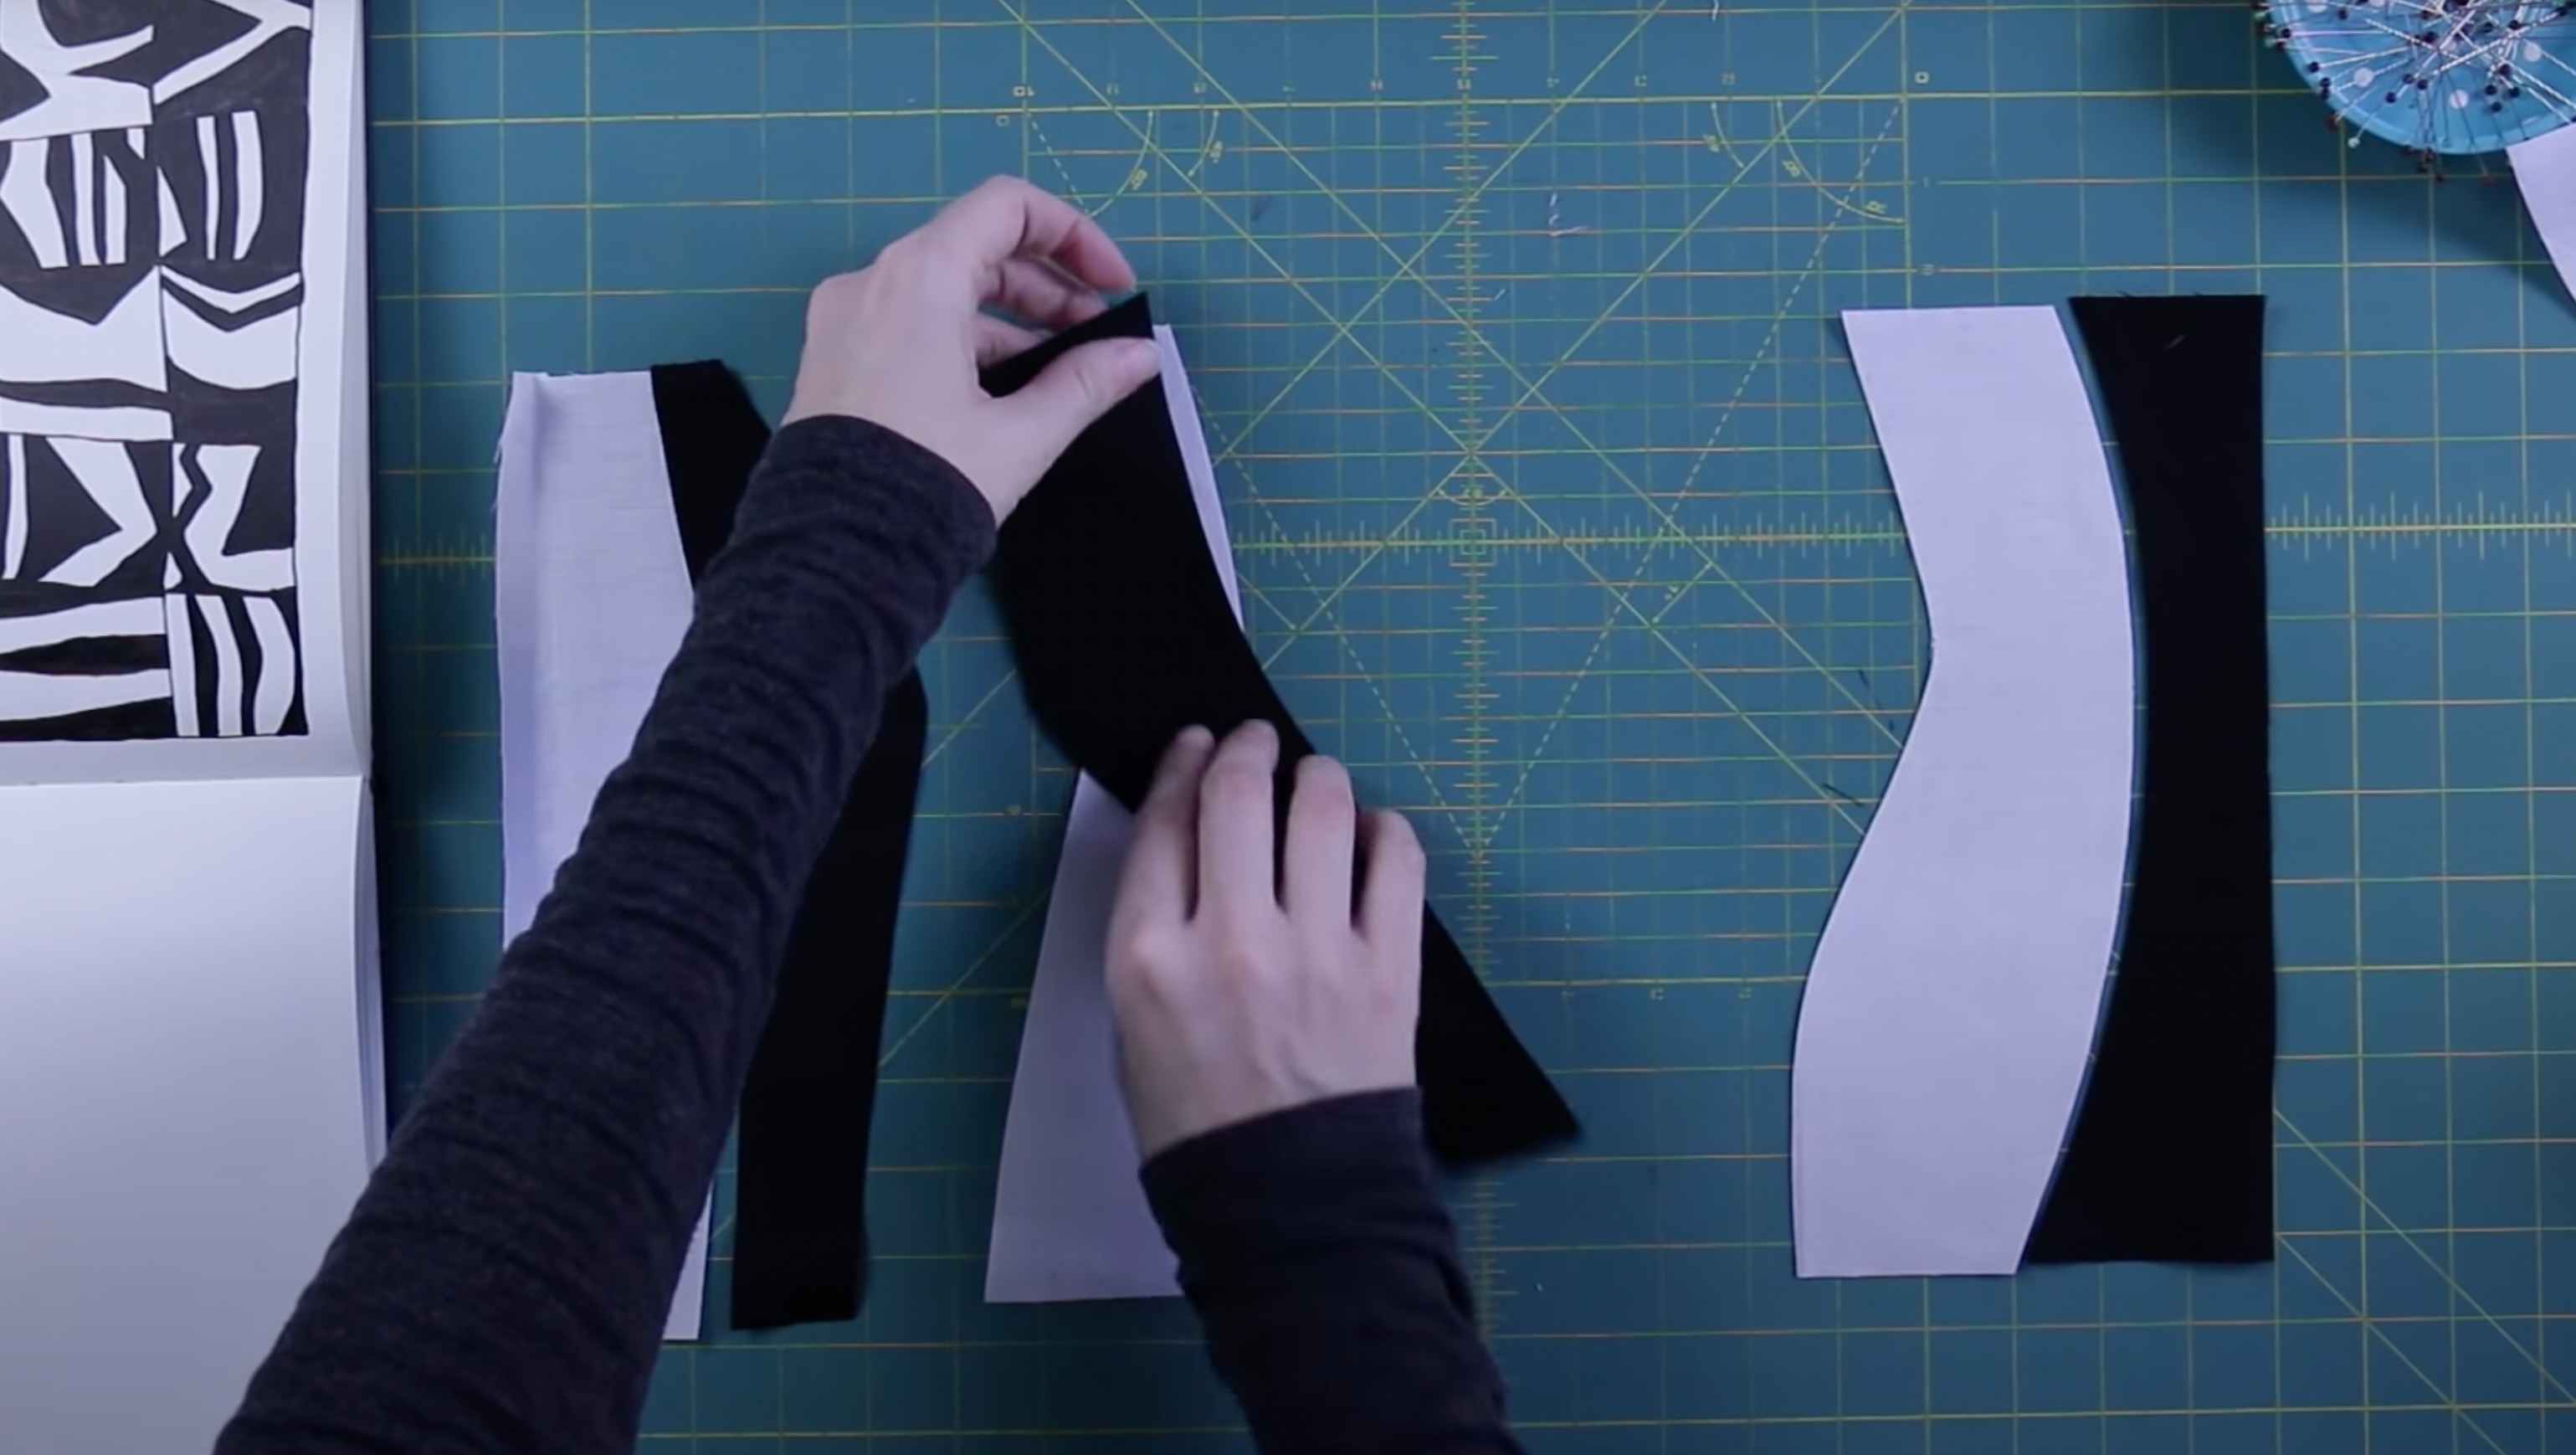
Tip: For stitching a curved line, you’re supposed to keep the convex piece on the bottom and the concave piece goes on the top. As I’m showing in the photo below. The piece on the right, will go on the top, because it’s concave.

Image shows creating improv curves

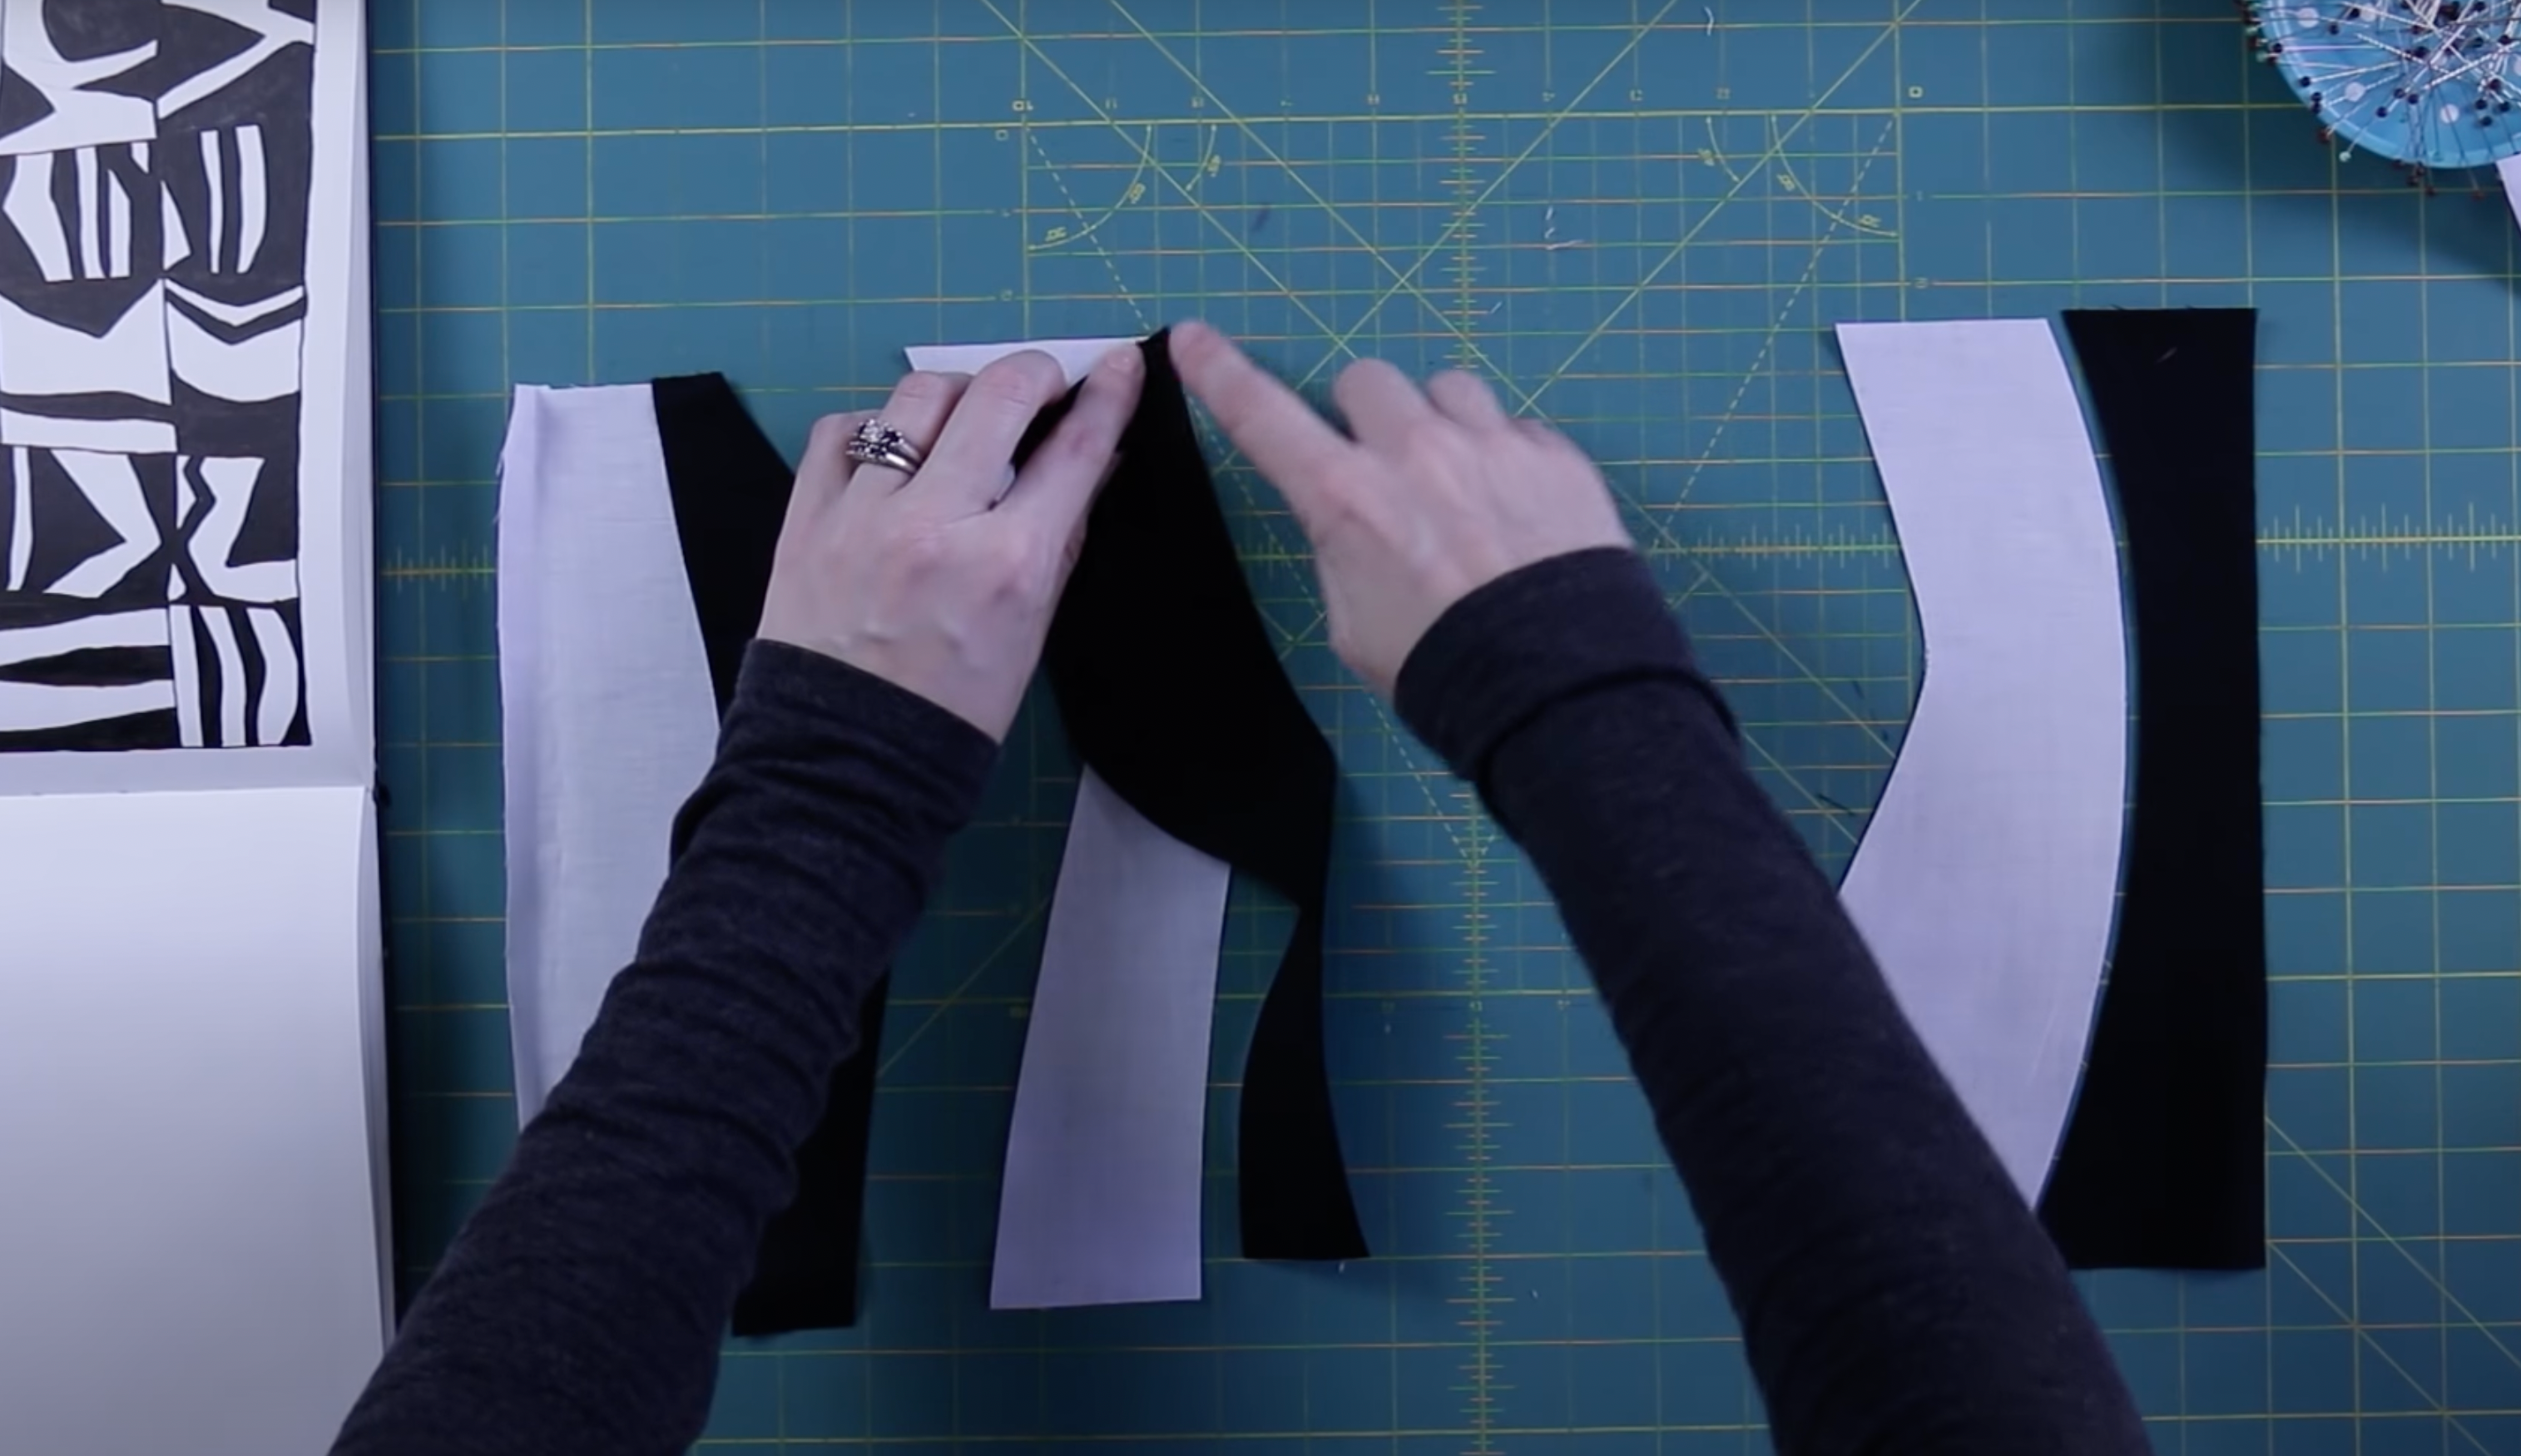
Put your pieces right sides together.

Image shows putting fabrics together

Whenever I’m using pieces that don’t quite fit together, I always look for where the quarter inch seam line is going to go so I’m looking for this divot right where my fingertips are in the picture.

Image shows looking for the divot

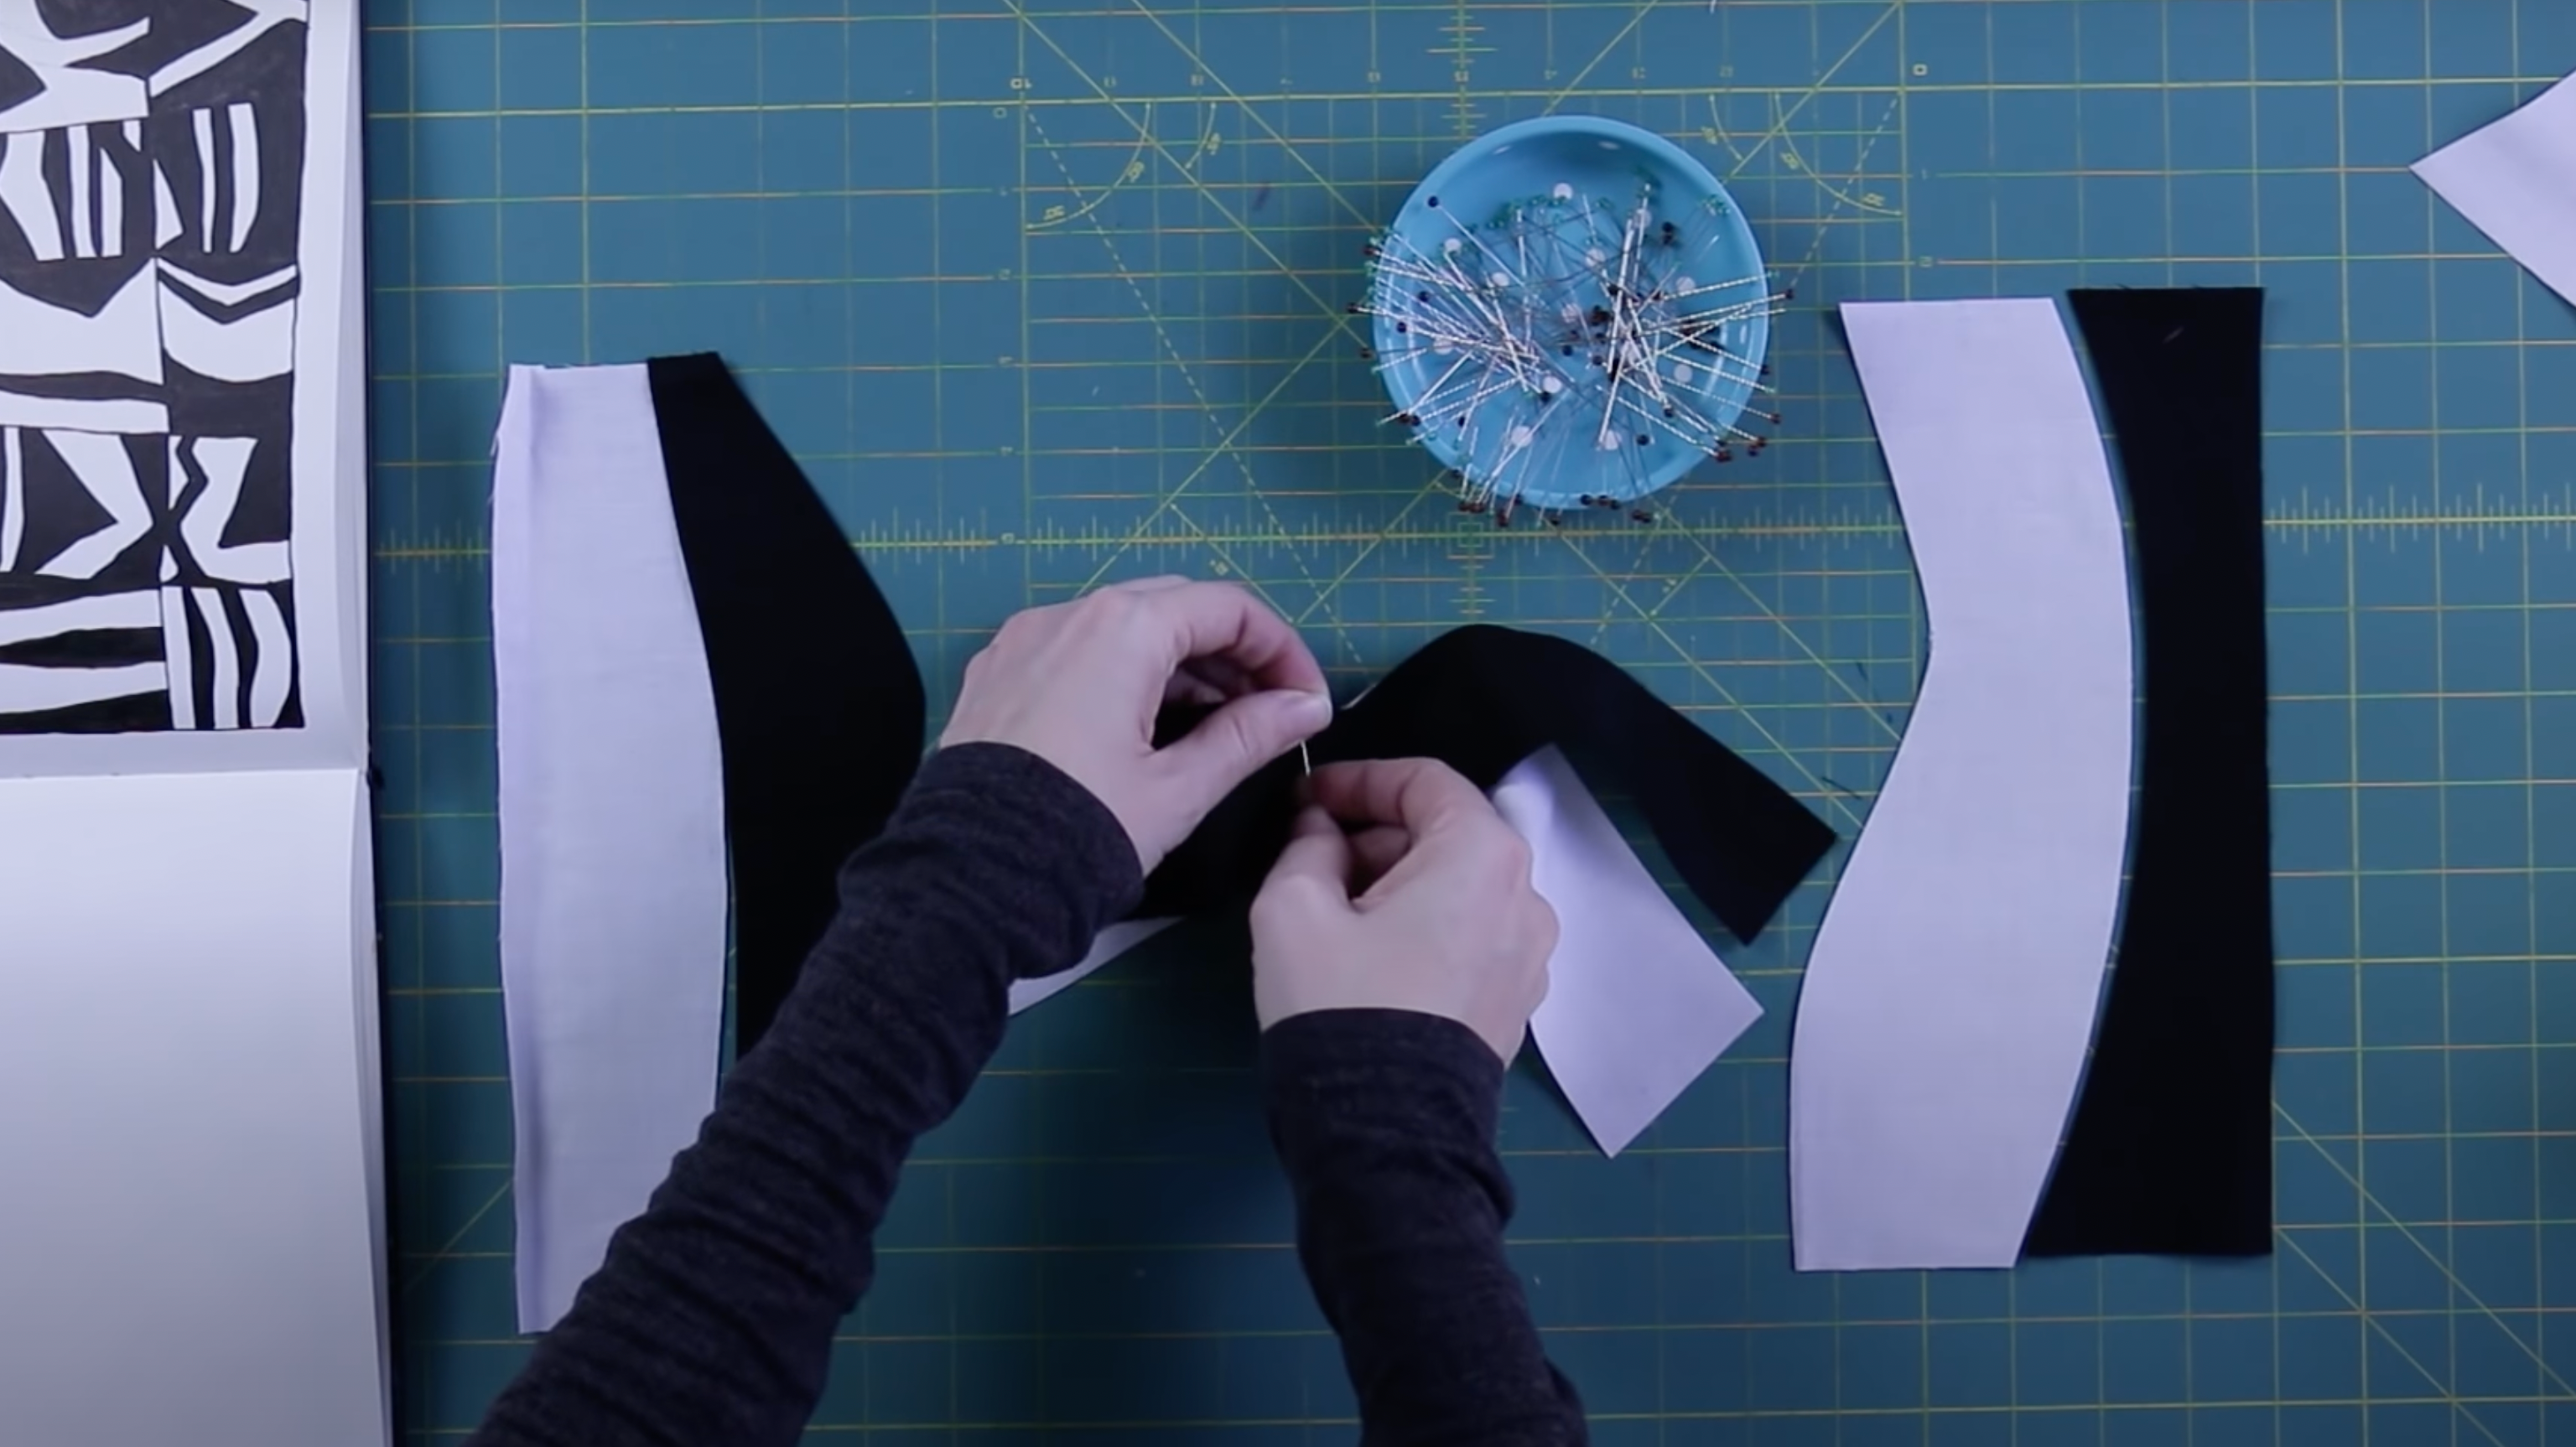
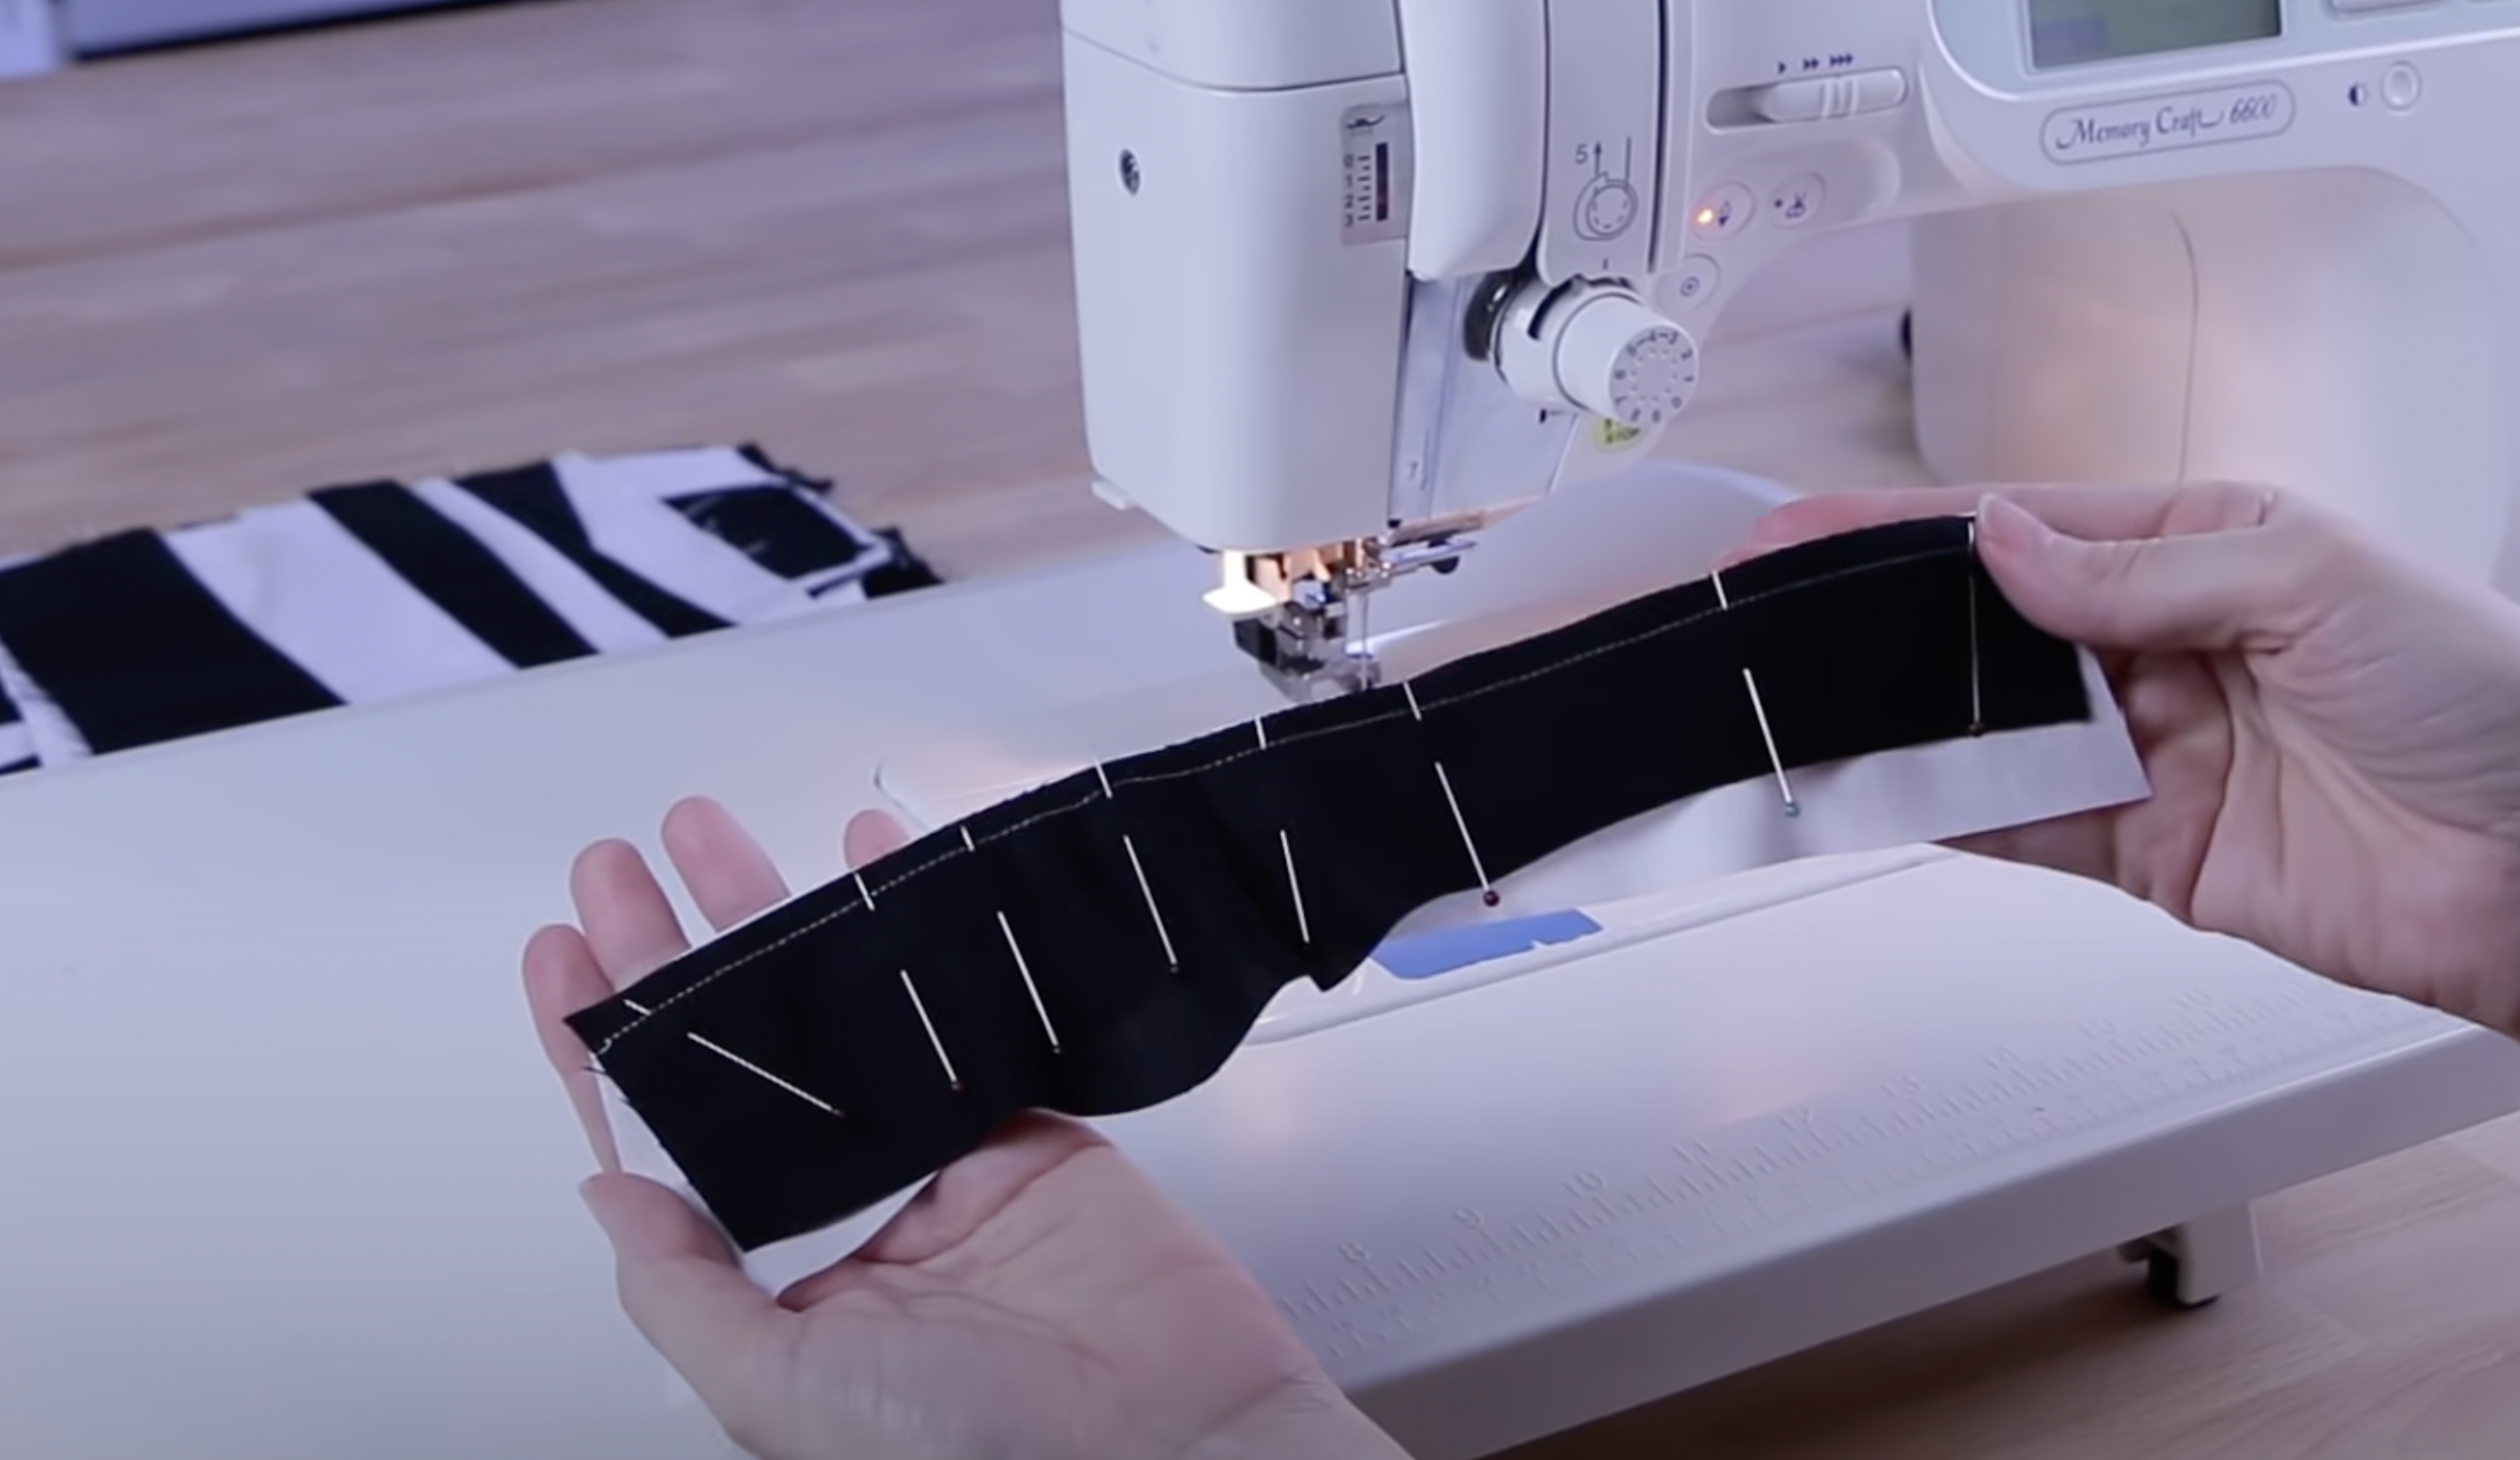
Start pinning the beginning

Image shows starting to pin improvisationally curves

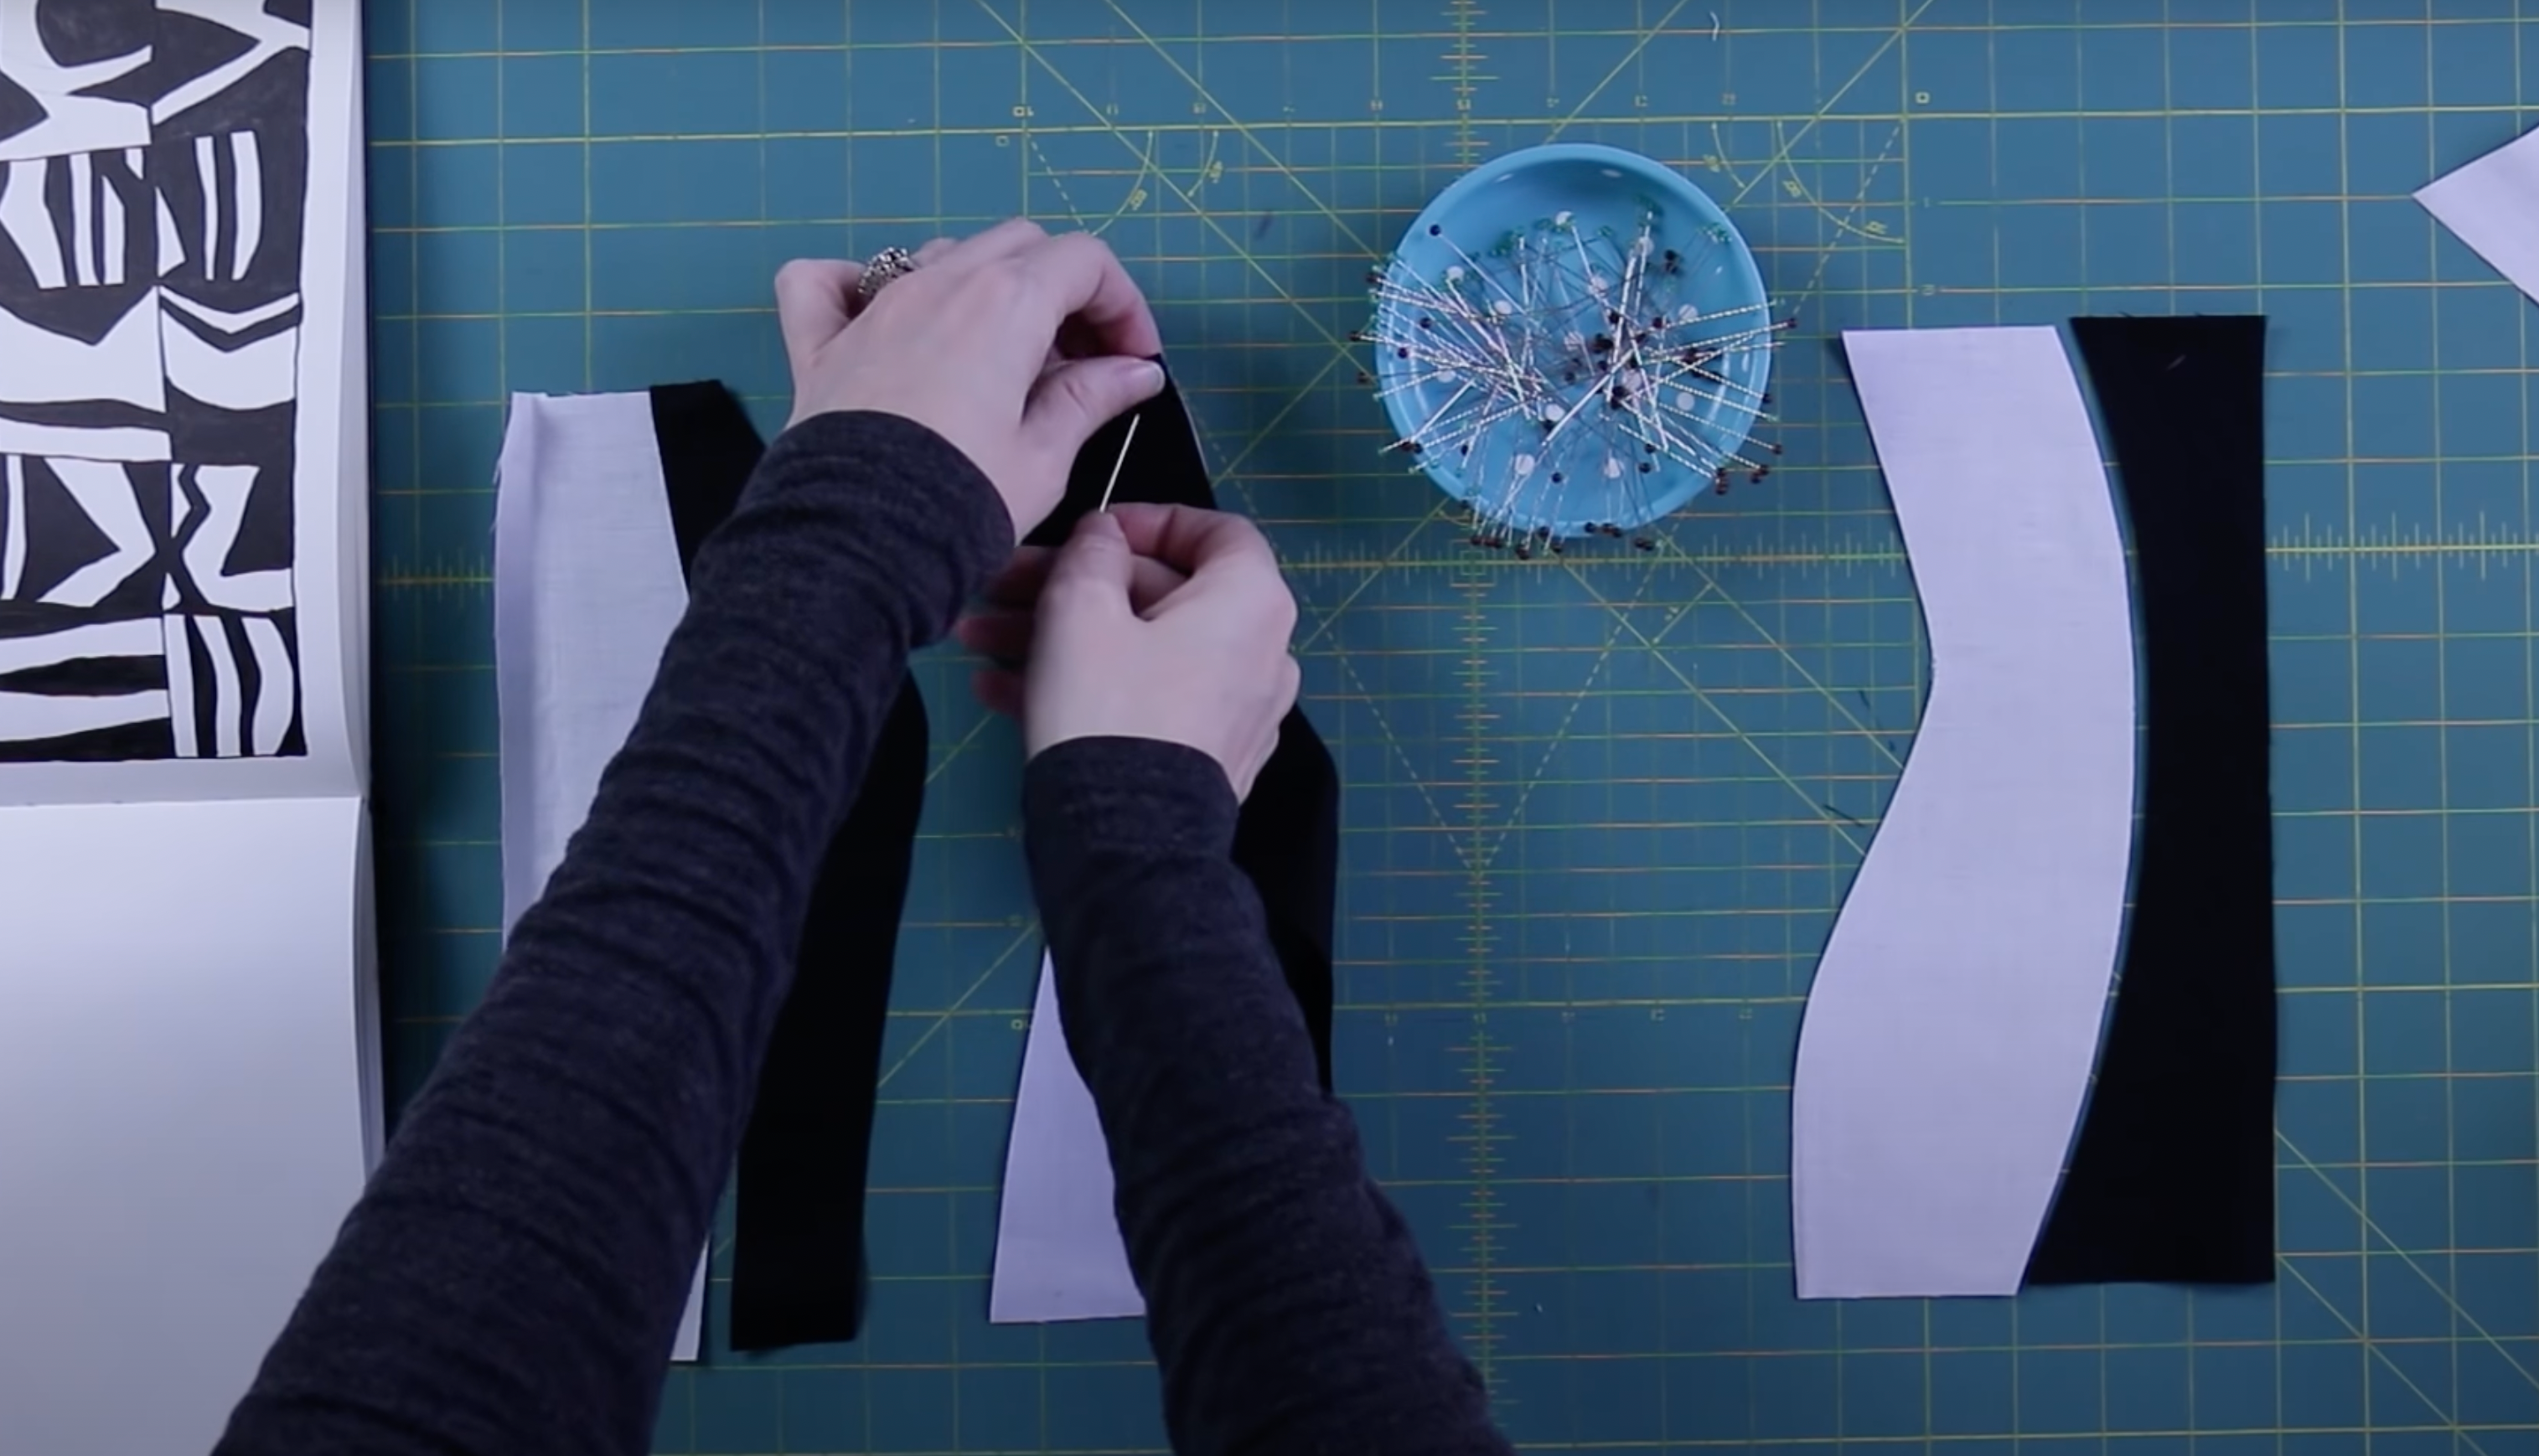
And continue pinning throughout. As you go take care to coax away any potential puckers. You may need to add more pins to some areas where the curve is more extreme.

Image shows pinning improvisationally curves

Once you have everything pinned, you can machine stitch with a regular quarter inch seam allowance (it need not be scant!).

Image shows pinned improv curves

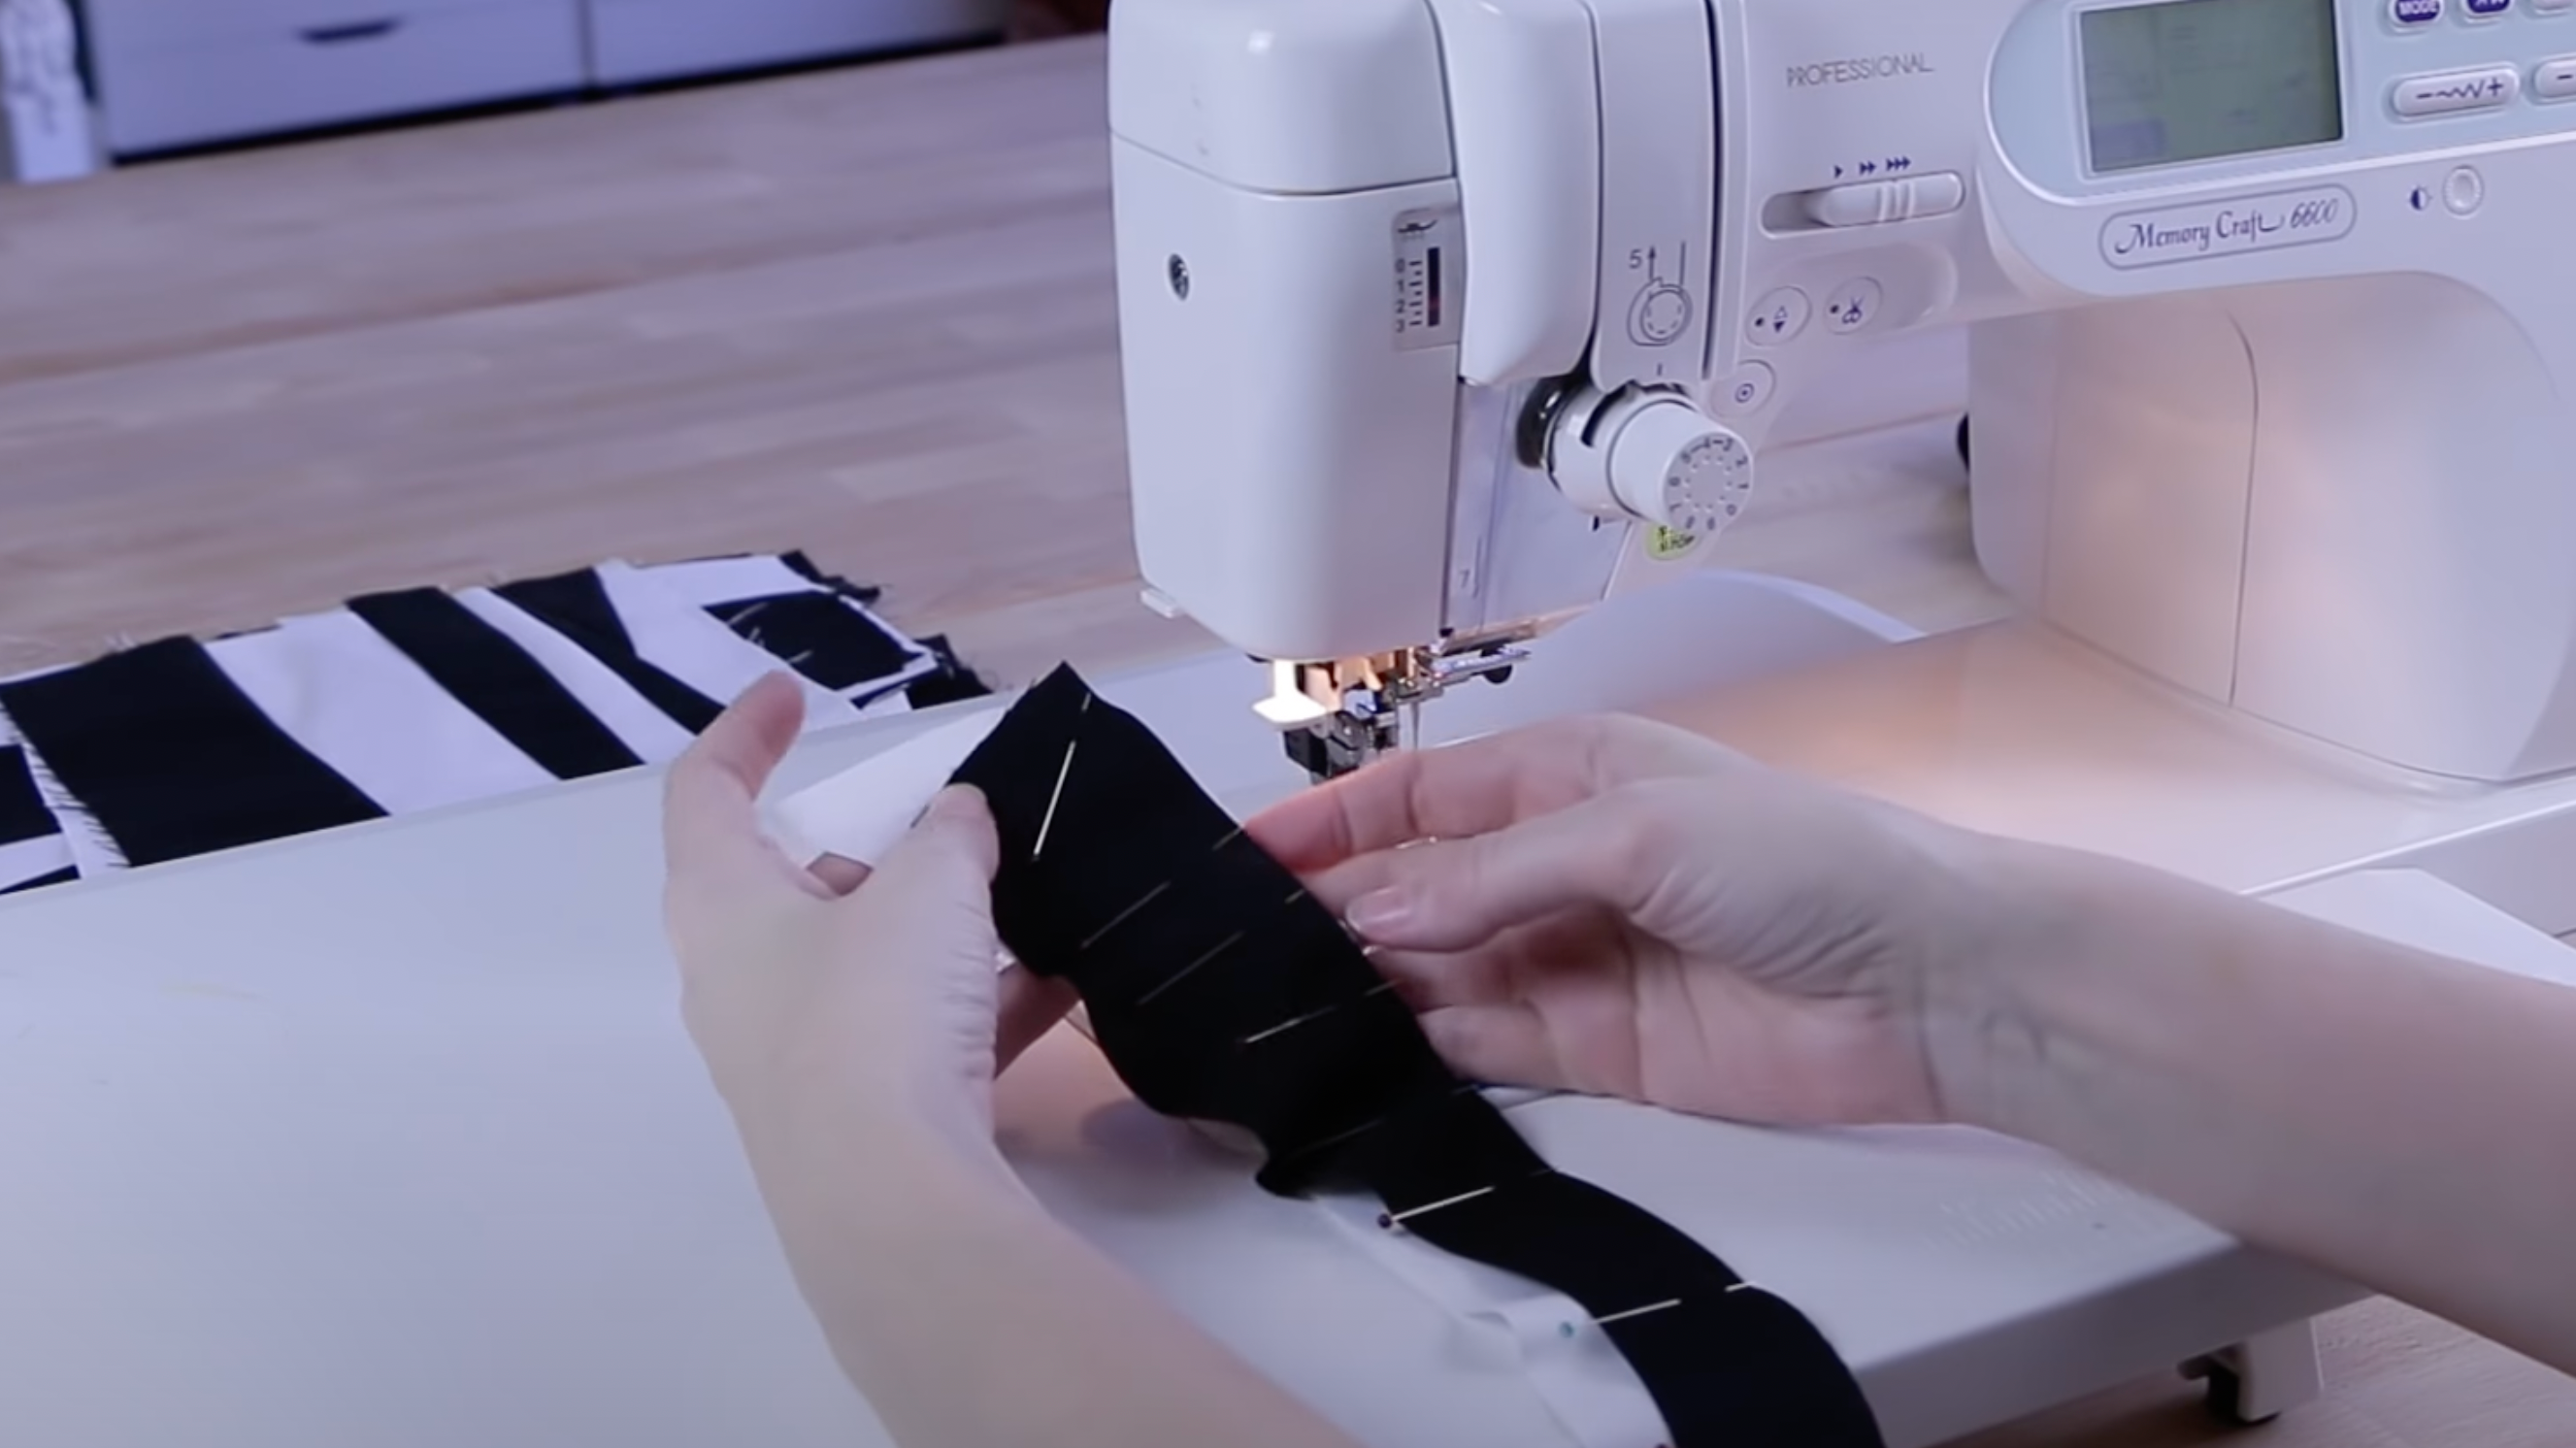
Go slow and watch for any puckers. If and when you feel a pucker, slow down or stop and fix it before proceeding.

How to Stitch Improv Curves

Step 3 – Press

Lastly, you’ll press your sewn seams. For my project, I needed to press the seams toward the dark side. But your sewing projects may differ.

To begin, I placed my unit on the pressing surface right side up.

Image shows pressing improvisationally pieced curves

Then I began finger pressing the seam toward the dark side.

Image shows finger pressing improv curves

Finally, I came through with my iron and pressed.

Image shows ironing improvisationally pieced curves

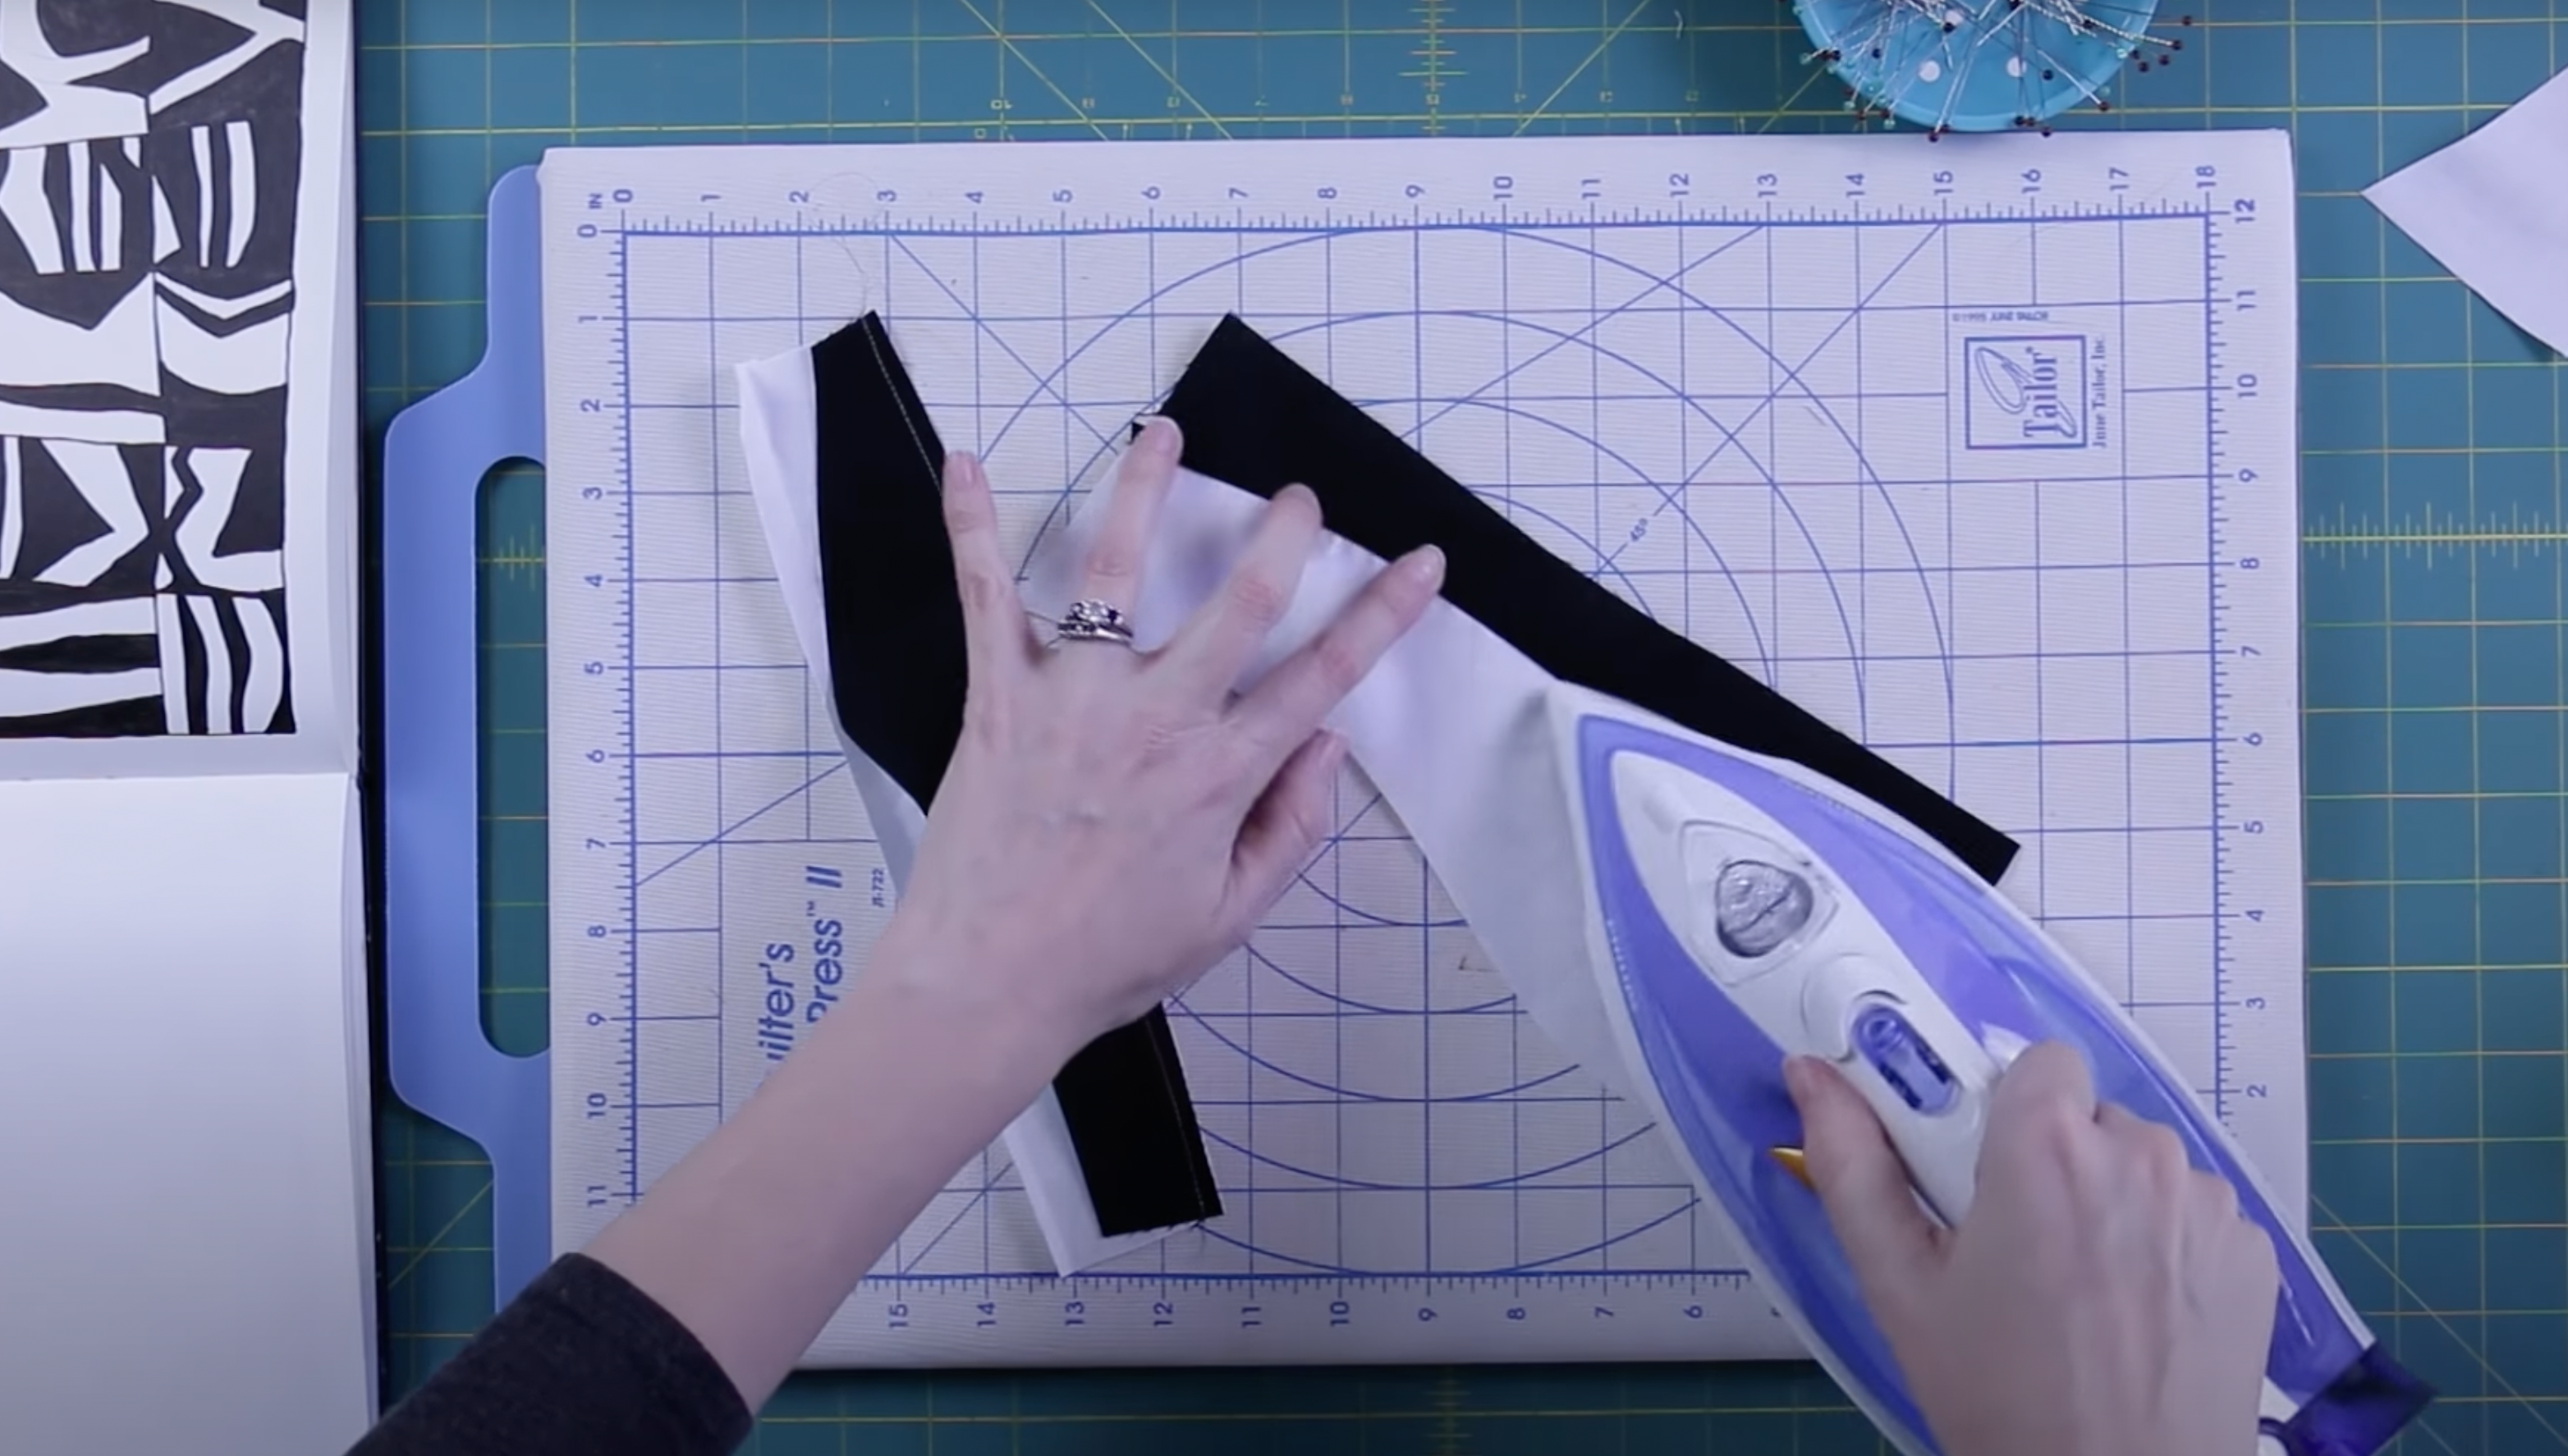
Tip: normally, you want to press your curved pieces, but with improv you can iron and make it wonkier!

And that’s my general technique for curved piecing.

Tutorial Takeaways & Tips:

This technique is kinda like trying sushi or oysters or shrimp, it’s kinda scary and icky.

Sure, improv curve piecing can be intimidating, but once you know the trick, it is so easy. You’ll wonder why you didn’t try it sooner.

  • When stitching avoid going over any puckers – easier said than done right? But when you feel a pucker, slow down or stop and fix it before proceeding.
  • Pinning the curves is the safest way to sew those curves. Remember, your fingers are not pins!
  • If you are a pinner sinner like me, just be careful when you are sewing. Take care of your fingers and either invest in a stiletto, or order take out Chinese tonight and save a chopstick for your improv curve stitching, or fight a porcupine to get a quill or two. Your choice but seriously, be careful.
  • Have fun with it! Let the process of improv sewing impact your work and the appearance of your fabric and blocks.

Recommended Products

Recommended Improv Links

What do you think, do you like the idea of trying curved piecing? It’s a fun technique, a great skill to know, and even a beginner could do it! But, not all improv quilts have curves. (Sure, now she tells me! Ha!)

If you want to see more of my improvised quilts then check out Rainbow Remix, Wavelength, and the Mini Wavelength. Or if you’re completely new to improv, you may want to start with our introduction post.

Previous Post: « The Stargazer 2019 Block of the Month Opens Soon!
Next Post: Stargazer BOM Colorways »

Reader Interactions

Trackbacks

  1. My #1 Favorite Way to Avoid the Scant Quarter Inch Seam Allowance - Bryan House Quilts says:
    November 8, 2019 at 11:25 am

    […] Improvisational Piecing […]

Primary Sidebar

New 2026 Block of the Month!

Graphic of Alchemy Quilt

Join the 2026 Block of the Month Program

Get my Modern Triangles Quilt Book

Get my Modern Rainbow Quilts Book

Image shows cover of the book "Modern Rainbow Quilts"

Make the Solstice Quilt!

Solstice Block of the Month by Bryan House Quilts

Get Your Invite!

Make Modern Triangles Logo

Make the Sparkler Quilt!

Image Shows Sparkler Quilt Top by Rebecca Bryan

Make the Echo (Echo!) Quilt

Echo BOM now open to join

Make the Wildflower Quilt!

Wildflower Block of the Month by Bryan House Quilts

Make the Stargazer Quilt!

Anne's Stargazer BOM

Make the Rainbow Triangles Quilt!

Rainbow Triangle BOM, modern triangle quilt, Rebecca Bryan

About

Hey there! I’m Rebecca, an author and teacher and freezer paper piecing evangelist. I’m also the founder of the Make Modern Triangles Quilt Club.

Disclosure

Just so you know, my site includes affiliate links from which I (it’s me! Rebecca!) receive payment or compensation. Something to consider as you peruse my website. Thanks!

Latest on Instagram

A scrappy quilt made from half-square triangles? Y A scrappy quilt made from half-square triangles? Yes please. 😍

The Hello Houston quilt is beginner-friendly, scrap-friendly, and full of playful color possibilities.

Save this one for your next “I need to use up these scraps” sewing day and comment ‘BLOG’ to find the full tutorial on the blog. 🧵✨

#freequiltpattern #quiltpattern #quiltingforbeginners #quilttutorial
The joy is in the journey. ✨ There’s something tr The joy is in the journey. ✨

There’s something truly so special about making these quilts. 

👉 Yes, it takes a long time. 
👉 Yes, it can be hard sometimes. 
👉 Yes, you will make mistakes. 

Sometimes you won’t feel inspired or motivated to sit down at your sewing machine. 

But while anyone can just go buy a quilt at a store, not everyone can make a beautiful handmade quilt that will last a lifetime and mean so much more. And when you get to experience that feeling that only quilters know when you are making a beautiful handmade quilt and get to give it to someone that you love, it will all be worth it. 🙌

That is a feeling like no other. Quilters, I know you know what i’m talking about! 

If you’ve been curious about getting started quilting, comment ‘FREE’ and i’ll send you the link to my free class to get started. 💌

#quiltingforbeginners #newquilter #quiltinglove #quiltingfun #quiltingtherapy
TODAY is the last chance to get in on the presale TODAY is the last chance to get in on the presale special for the NEW Alchemy block of the month!!! ✨

Sometimes when inspiration hits, you just have to run with it. And that is exactly what I did when I designed and made this quilt, so that I could share another block of the month with you this year! 

The Alchemy will be a bit more challenging than my other programs, but with freezer paper piecing being the main technique, it is still totally doable! 🙌

And of course, just like all of my other block of the month programs, you’ll get all the step-by-step instructions and video tutorials to make sure that you succeed. You’ll also get to connect and sew with the entire community to celebrate your progress and get support when you need it! 

Comment ‘ALCHEMY’ if you want to get in on the presale before it’s gone! 💕

#modernquilting #quiltinginspiration #blockofthemonthquilt #quiltpattern #quiltdesign
What would you add to the list? 👀⬇️ #quiltteacher What would you add to the list? 👀⬇️

#quiltteacher #quiltingtechniques #quiltingtips #quiltingfun
I always tell people that if you really want to ge I always tell people that if you really want to get started with quilting, you can buy everything that you need at Walmart. 🙌

👉 You don’t need the newest, fanciest sewing machine to get started. 
👉 You don’t need to order the latest, high-end fabric to practice with. 
👉 You don’t need a bunch of expensive tools to make something beautiful. 

And soooo many people don’t know this, but oftentimes local libraries offer sewing machines for rent or for use in the library, so if you want to try quilting without investing in your own machine, it’s a great option to explore to get you started! 🪡

So if you really want to give quilting a shot, head to your nearest supermarket, grab a few affordable fabrics and tools to start with, sign up for my free class, and see if it’s something that you like! Comment ‘FREE’ to sign up for the free class! 💌

Where is your favorite place to get affordable quilting supplies? Share in the comments! ⬇️

#quiltingtools #quiltingnotions #quiltingforbeginners #newquilter
Presale for the NEW Alchemy block of the month is Presale for the NEW Alchemy block of the month is LIVE!!! 🌟

I am sooo excited to make this quilt with you, and I can’t wait to see all of the beautiful color and fabric choices that you come up with!!! 

If you’ve been around for a while, you know that I LOVE the planning and picking phase of starting a new project. 

For a rainbow version of the Alchemy, it turns out we can use fat quarters! 

A fat quarter-friendly project just makes choosing fabrics so easy! Fat quarters are like potato chips, you can’t just have one... You simply collect them. 🧐 So if you are anything like me, you already have a stash of fat-quarters that you can choose from! 

If you want to get a head start in choosing your own fat quarter rainbow, you will need 12 different rainbow colors, and then you’ll need 2 fat quarters for each color, a light and a bright, for a total of 24 fat quarters. 🌈

Comment ‘ALCHEMY’ to join in on this block of the month program! We start in June. ✨

#quiltdesign #modernquilt #rainbowquilt #modernquilting #quiltersgonnaquilt
Follow on Instagram

Browse by Category

Archives

  • Instagram
  • Facebook
  • Pinterest
  • email
A scrappy quilt made from half-square triangles? Y A scrappy quilt made from half-square triangles? Yes please. 😍

The Hello Houston quilt is beginner-friendly, scrap-friendly, and full of playful color possibilities.

Save this one for your next “I need to use up these scraps” sewing day and comment ‘BLOG’ to find the full tutorial on the blog. 🧵✨

#freequiltpattern #quiltpattern #quiltingforbeginners #quilttutorial
The joy is in the journey. ✨ There’s something tr The joy is in the journey. ✨

There’s something truly so special about making these quilts. 

👉 Yes, it takes a long time. 
👉 Yes, it can be hard sometimes. 
👉 Yes, you will make mistakes. 

Sometimes you won’t feel inspired or motivated to sit down at your sewing machine. 

But while anyone can just go buy a quilt at a store, not everyone can make a beautiful handmade quilt that will last a lifetime and mean so much more. And when you get to experience that feeling that only quilters know when you are making a beautiful handmade quilt and get to give it to someone that you love, it will all be worth it. 🙌

That is a feeling like no other. Quilters, I know you know what i’m talking about! 

If you’ve been curious about getting started quilting, comment ‘FREE’ and i’ll send you the link to my free class to get started. 💌

#quiltingforbeginners #newquilter #quiltinglove #quiltingfun #quiltingtherapy
TODAY is the last chance to get in on the presale TODAY is the last chance to get in on the presale special for the NEW Alchemy block of the month!!! ✨

Sometimes when inspiration hits, you just have to run with it. And that is exactly what I did when I designed and made this quilt, so that I could share another block of the month with you this year! 

The Alchemy will be a bit more challenging than my other programs, but with freezer paper piecing being the main technique, it is still totally doable! 🙌

And of course, just like all of my other block of the month programs, you’ll get all the step-by-step instructions and video tutorials to make sure that you succeed. You’ll also get to connect and sew with the entire community to celebrate your progress and get support when you need it! 

Comment ‘ALCHEMY’ if you want to get in on the presale before it’s gone! 💕

#modernquilting #quiltinginspiration #blockofthemonthquilt #quiltpattern #quiltdesign
What would you add to the list? 👀⬇️ #quiltteacher What would you add to the list? 👀⬇️

#quiltteacher #quiltingtechniques #quiltingtips #quiltingfun
Follow on Instagram
© 2026 Bryan House Quilts