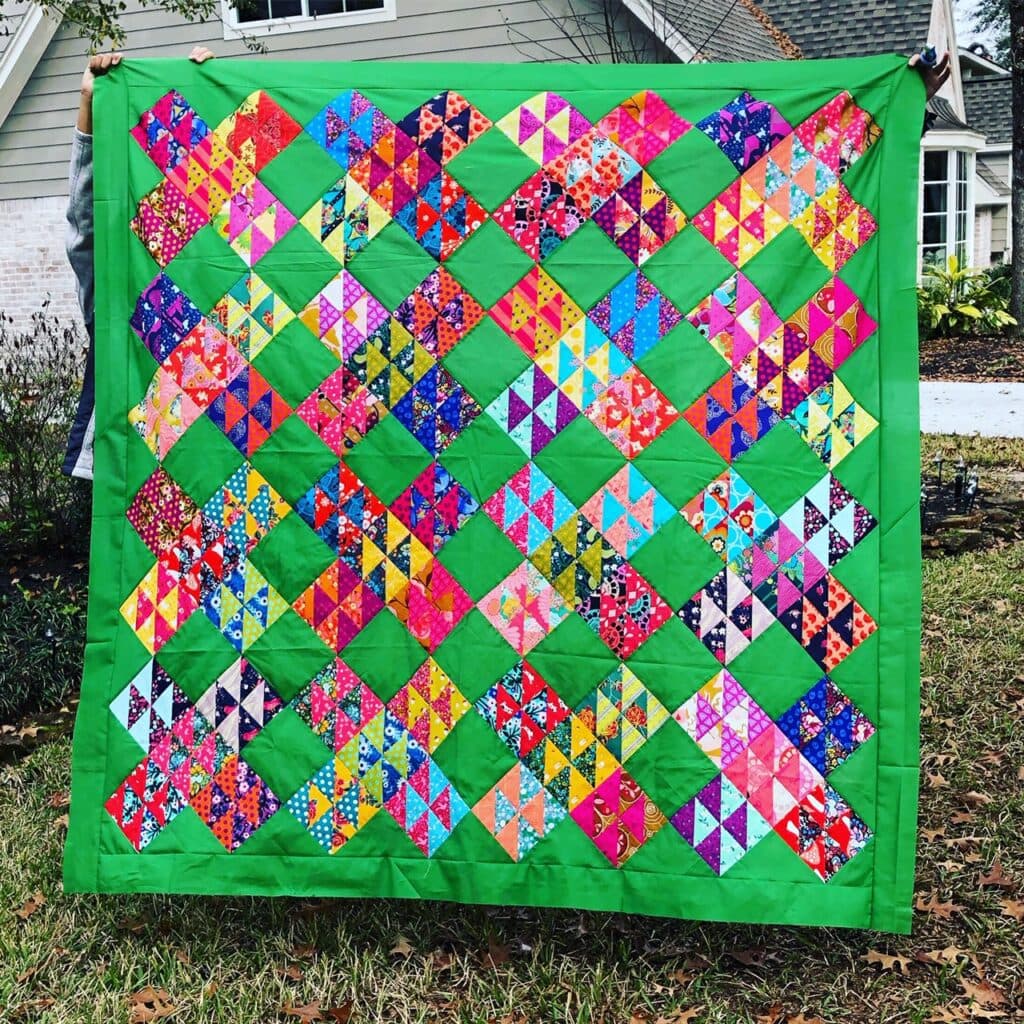
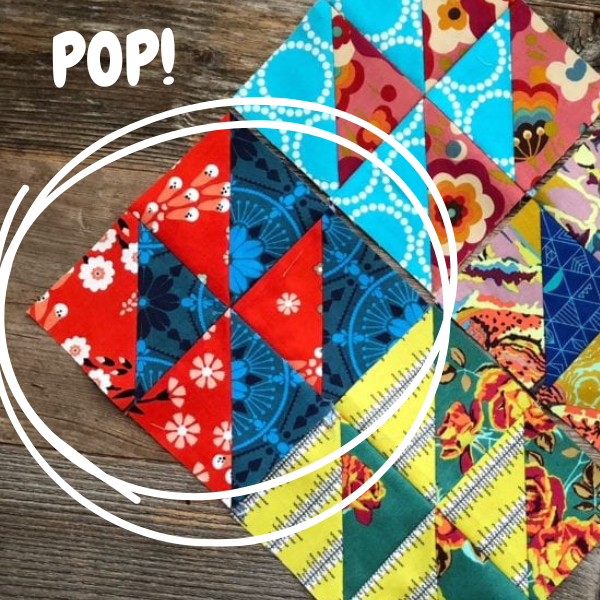
Learn how to make scrappy half square triangles that pop and harmonize in my Hello Houston quilt tutorial. This quilt is the perfect project to showcase your favorite prints, use up your larger scraps and experiment with color placement.
Make this quilt using the free tutorial below. These quilt blocks simmer on the back burner with a no-rush vibe. Make ’em when you can and you’ll get there eventually.
The first time I posted about this quilt was 6 years ago so it’s about time I showed you how to make it!
Finished HST: 3’’ x 3’’
Finished Quilt: 72 ⅜’’ x 72 ⅜’’
Home is where the sewing machine Is
My inspiration? After moving to Houston, 11 months after moving from St. Louis to the Netherlands (can you say stressful?!), I needed some scrappy quilting therapy. Something I could pick up for a quick sewing session and ease the day’s stress. My Hello Houston quilt was the antidote, which simply pair two scraps together to make half square triangle four-patch units.
how can i use my fabric scraps to make half square triangle quilt blocks?
The Hello Houston quilt tutorial is awesome confidence booster for pairing fabrics. Some quilters intuitively mix their scraps together for blocks. And some get a bit anxious working with so many choices and fabrics all at once. A quilter may not have the experience, struggle with color confidence or how to use mix prints. The process could stall in a decision gridlock. Oh, no!
Break the gridlock and indecision by using my scrappy quilters’ framework. Once you learn and practice the steps, using all kinds of prints and colors together becomes easier.
I’ll show you my process for pairing fabric scraps photo-by-photo. By showing you the options and the final choices, you will see the how and why I chose each pairing.
FABRIC Scrap size TO MAKE THE Scrappy HST BLOCKS
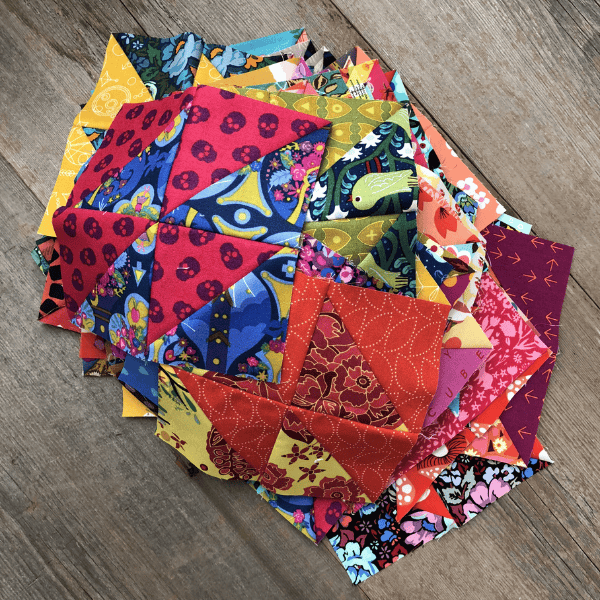
You will need 160 4 x 8 inch scraps to make a 72-inch square quilt. I have so many scraps about this size. Not enough to use in another quilt and perfect for scrappy quilts. I could make bunches of Hello Houston quilts with my extensive scrap stash.
Quick Fabric Selection tips FOR HELLO HOUSTON QUILT TUTORIAL
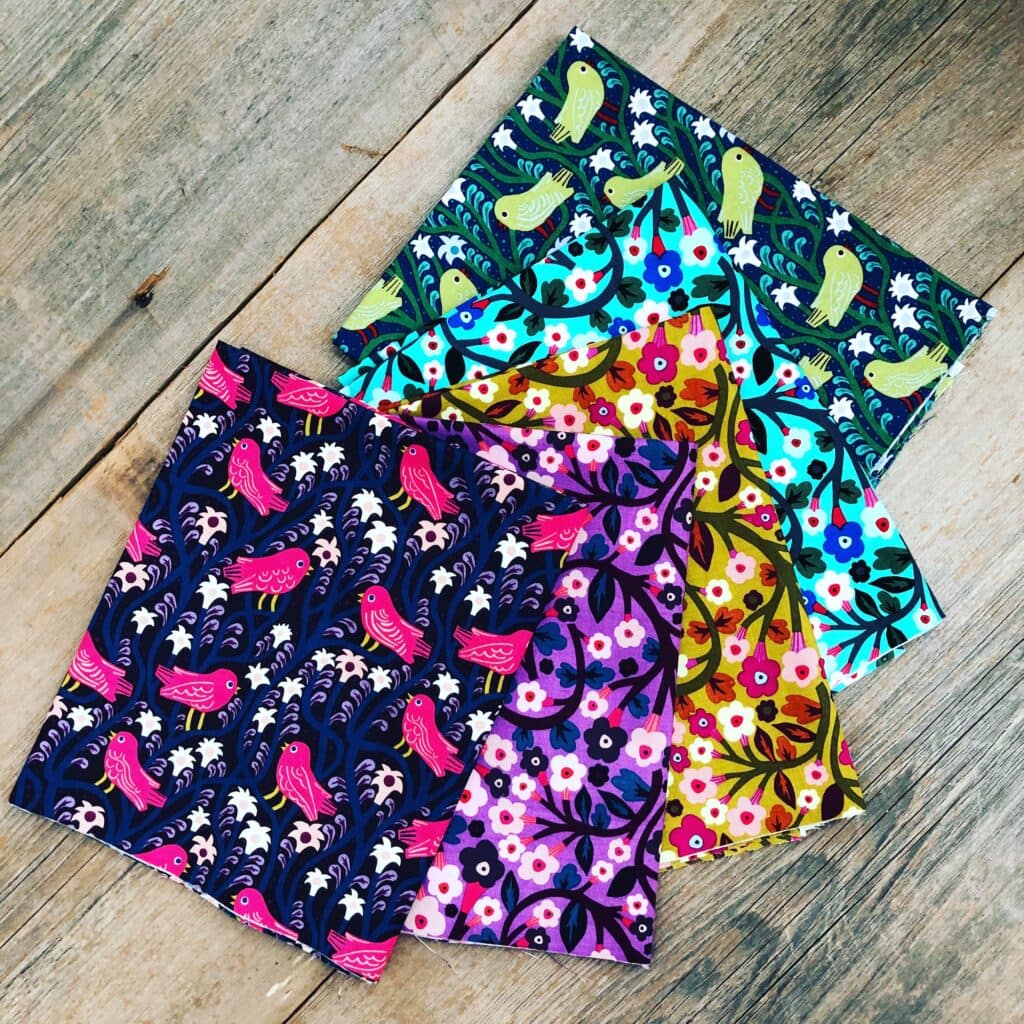
More variation is better in my opinion. The best way to approach fabric selection for Hello Houston is using as many different fabrics as possible with tons of contrast.
Adopt a playful, no judgment, anything-goes attitude. Pull out all of your favorite colors and fabrics. I’ll show you how I pair scraps together for half square triangles, using contrast in color, types of prints and scale.
How to pair up fabrics using color AS CONTRAST
I like to use simple approaches to color pairings using contrast.
Hello Houston is all about CONTRAST, starting with color.
My first step is to choose a fabric. Then I select an accent color from that same fabric to riff on. Knowing I want bright, saturated fabrics for this entire quilt, each pairing starts with a brightly colored fabric. Perfect pairs aren’t the goal; the goal is creating harmony and excitement in your half square triangles (at the micro level), then in the larger block combinations, and last, the final layout (the macro level).
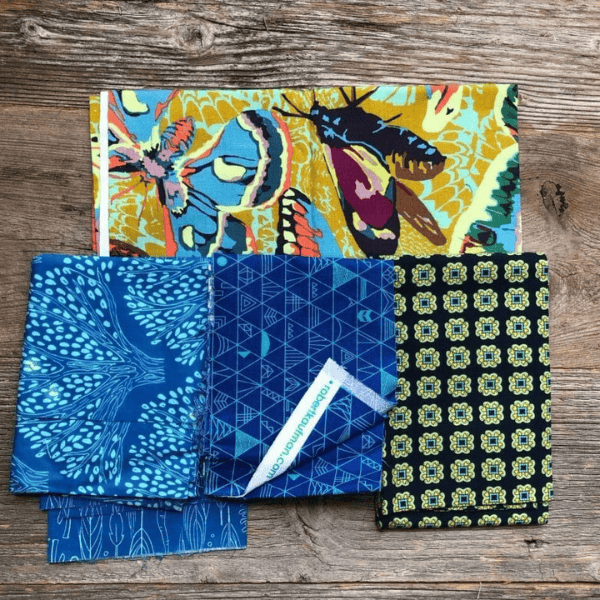
The main contrast in this pairing is color. In all, I found three ways to contrast with the main fabric in the pairing.
- Color. The butterfly print is loaded with accent color options. I auditioned blues and a green because they offer more contrast with the warmer chartreuse and orange. Blue is across the color wheel from orange and yellow so that’s an automatic contrast win!
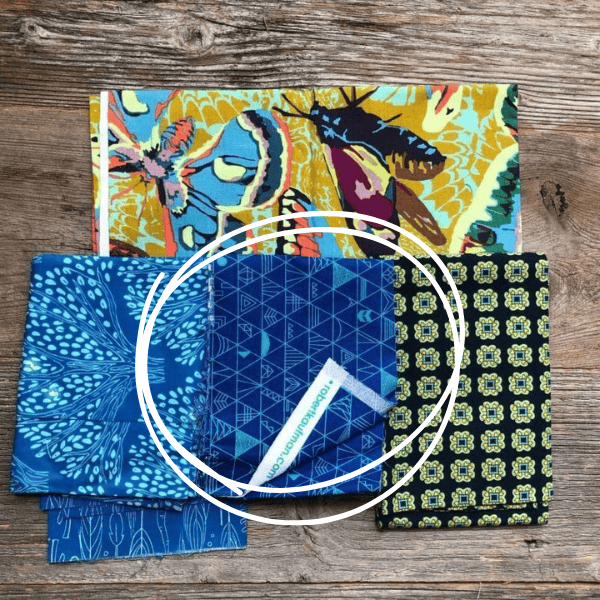
- Type of print – geometric, floral, organic (curvy) or tossed. Next, I consider accent fabrics based on the type of print. I picked four options and ultimately chose the dark blue geometric print because the lines and angles contrast with the organic, curved shapes in the butterfly fabric.
- Scale. Notice that all of the accent fabrics are small scale prints (½ inch or less motifs), which contrast more with the larger scale butterfly motifs.
My final choice…
PAIRING UP FABRIcs for HALF SQUARE TRIANGLES
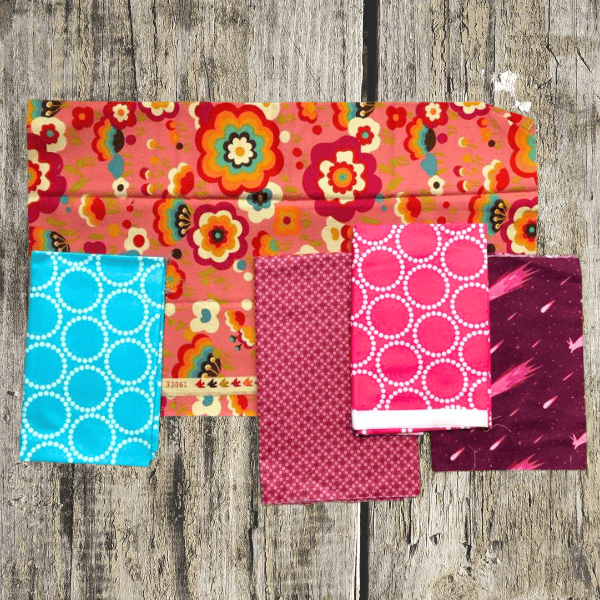
Here’s another example of pairing with contrast. I chose a large floral print where most of the colors were similar, except for the teal green accents.
I pulled similar warm colors in different values – dark, medium and light pinks – to build contrast. Well, nope. Nothing stood out like the other pairs I had created. I wanted a big visual pop in every pair. Bring on the bright teal!
This fabric also offers print contrast. The geometric circles pop against the organic flowers.
How to pair up fabrics using prints As CONTRAST
Mixing prints makes your scrappy quilt even more interesting. For my pairs, in addition to color, I also considered the type of print. For example, pair a large scale print with a smaller scale print, such as a “tossed (non-gridded) design or lines, stripes and geometric shapes.
Below, the accent fabric options include a tossed blue leaf print, an organic tone-on-tone leaf print and a linear arrow print.
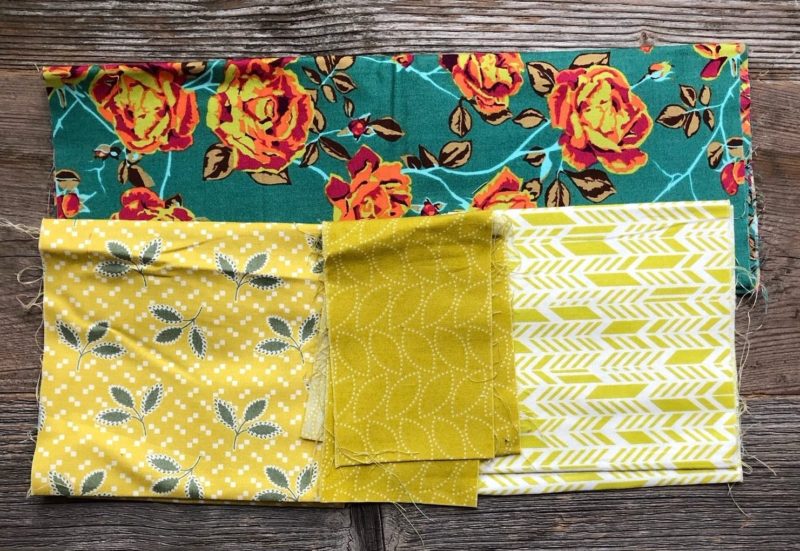
And then I found this stripe-y yellow fabric and oh yes!
This fabric works hard by:
- Harmonizing with the yellow bits in the main fabric
- Contrasting linear stripes against a floral organic motif
- Popping a bright yellow color next to the dark green background
How to pair up fabrics using SCALE AS CONTRAST
A funny thing about scale: it changes when you cut the fabric into smaller pieces. The scale also changes depending on the scale of the fabric next to it. Scale, you’re a tricky feature.
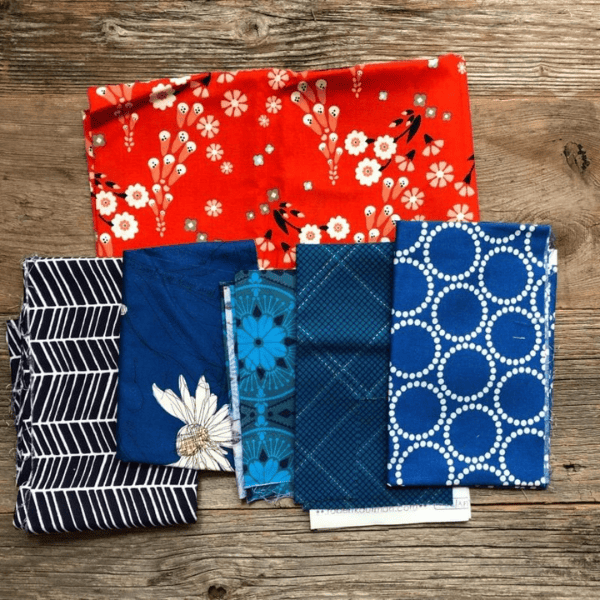
In this example, the fabrics vary from dainty flowers to large, medium dotted circles to medium lines to a large scale teal-on-navy print. Every blue fabric could work! In the end, I chose my favorite color combo which offers a bright pop, teal and red.
So far, you have learned at least three ways to choose and mix scraps in this Hello Houston quilt tutorial: color, contrast and scale. Dig in to your stash and have fun with it.
PART 2: Fabric Requirements and Cutting instructions
- Blocks: 160 various 4″ x 8″ fabric scraps
- Background/Borders: 2 ⅞ yards
- Backing: 4 ⅛ yards (based on 43 inches wide usable yardage)
- Batting: 75 x 75 inch square. (Cut a packaged queen size batting down)
- Binding: 302 inches or 8 strips cut on straight grain from ⅝ yard (43+ inches wide)
CUTTING Background fabric
From the green fabric cut: 6 Strips 6 ½’’ x WOF, subcut:
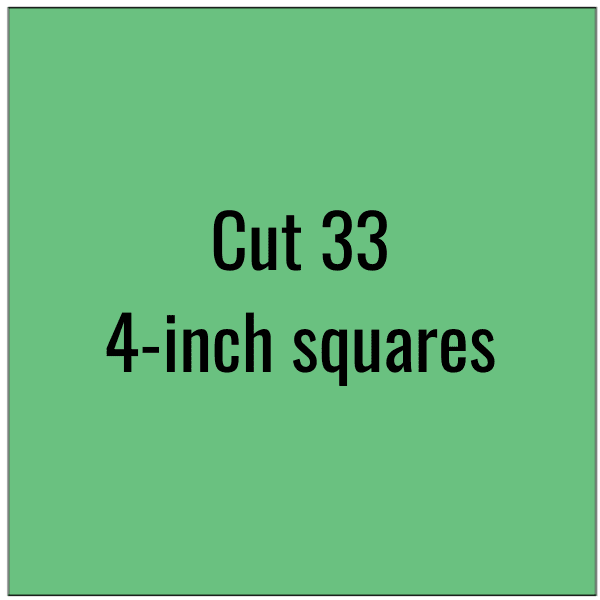
- 33 squares 4″ x 4’’
3 Strips – 6 ⅞’’ x WOF, subcut:
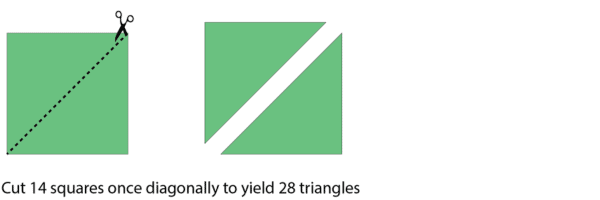
- 14 squares, 6 ⅞’’ x 6 ⅞’’. Cut each square in half diagonally once to yield 28 side setting triangles
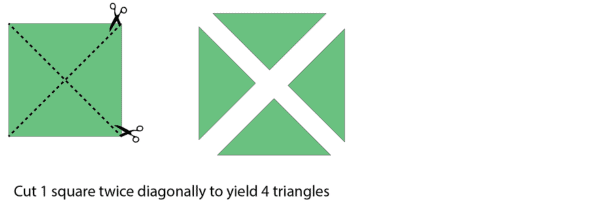
Cut 1 square 7 ¼’’ x 7 ¼’’. Cut the square in half diagonally twice to yield 4 corner triangles
6 Strips 2 ½’’ x WOF, then sew the strips together end to end to make one long continuous strip. Then subcut:
- 2 lengths 2 ½’’ x 68 ⅜’’
- 2 lengths 2 ½’’ x 72 ⅜’’
CUTTING Binding
Cut 8 strips 2 ½’’ on the straight grain of 5/8 yard.
HELLO HOUSTON QUILT TUTORIAL: PIECING
Seam allowances are 1/4” unless otherwise noted.
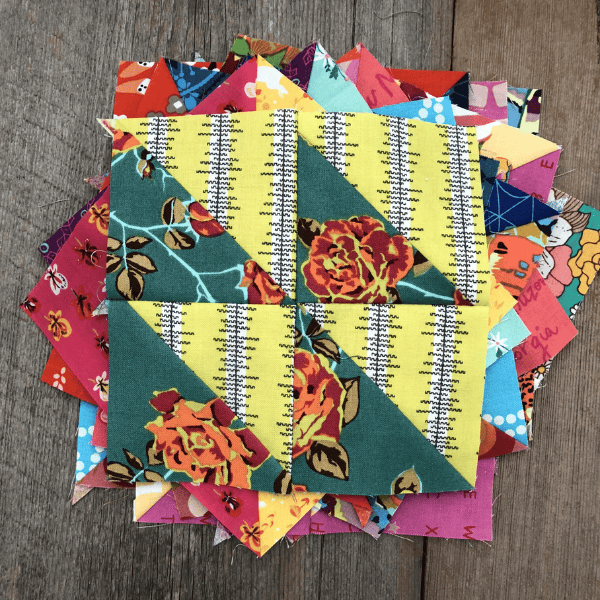
Make the Half Square Triangle Four Patch Blocks
If you’re new to half square triangle making, get up to speed with my 4 ways to make half square triangles tutorial. You’ve got this!
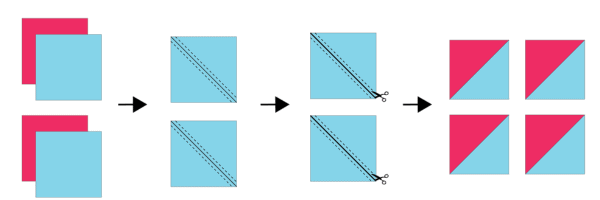
1. Grab two scraps of fabric and cut 2 squares 4’’ x 4’’ from each
2. On the wrong side of half the squares, draw a diagonal line from one corner to another using a fabric marking tool.
3. Sew 1/4 ’’ on either side of the marked diagonal line.
4. Cut along the marked diagonal line. Each pair will yield 2 Half Square Triangles (HSTs).
5. Press the seams to the dark side.
6. Trim the HSTs to 3 ½’’ x 3 ½’’.
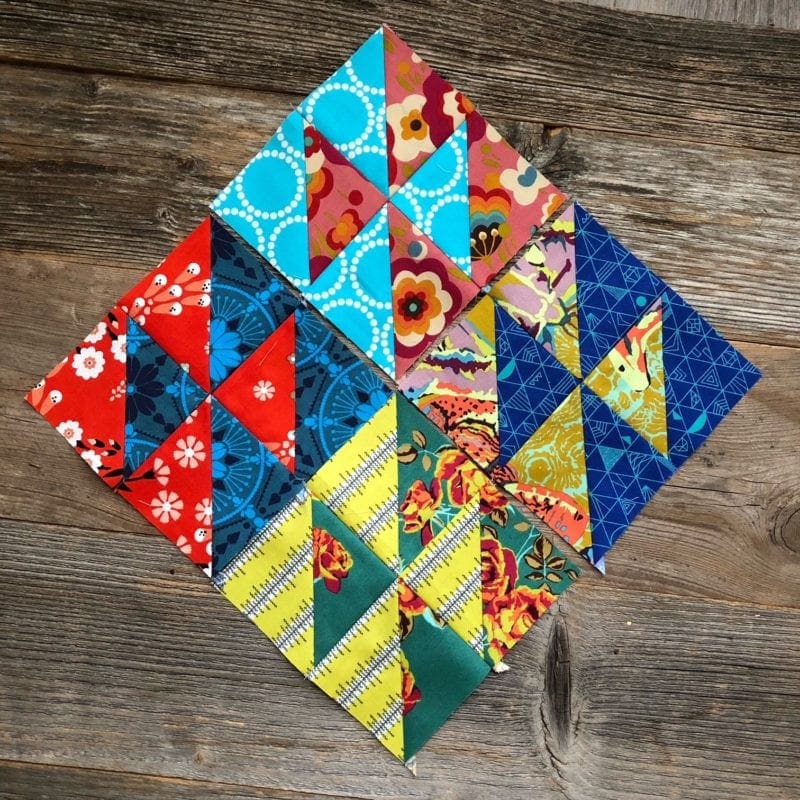
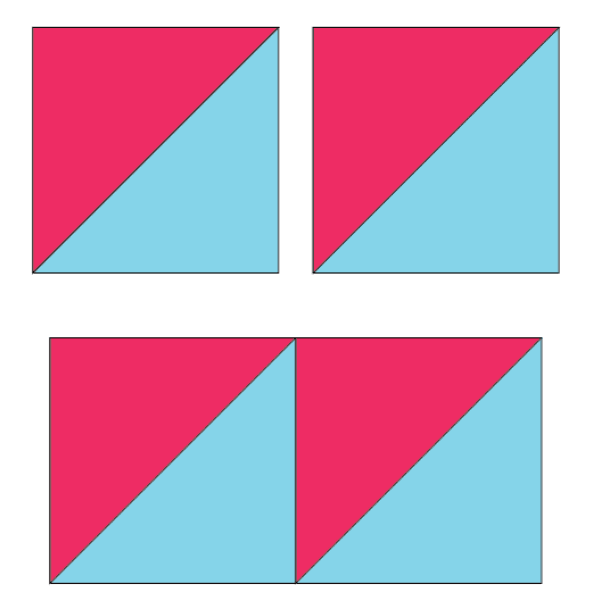
7. Arrange 2 each matching HST units and squares in 2 rows of 2 blocks as shown. Sew together in rows, pressing the seams open, then sew the rows together to create a 4-patch block. Press as desired.
Your HST Four-Patch should finish at 6 ½’’ x 6 ½’’ square.
8. Repeat Steps 1-7, to make 80 HST Four-Patch blocks.
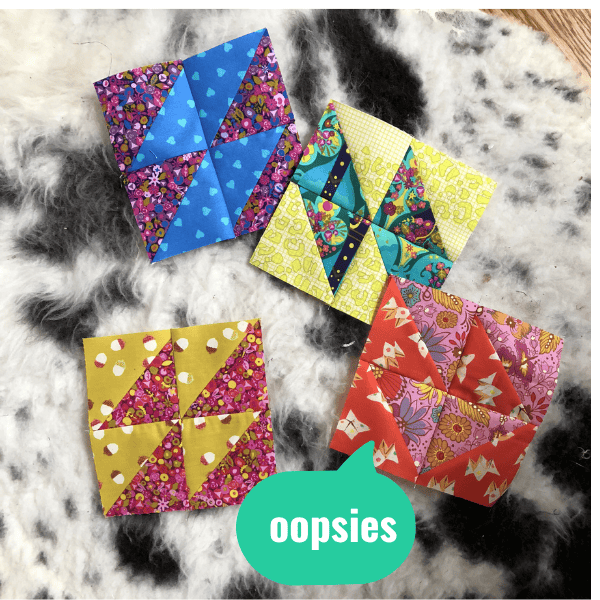
Tip: Made an oopsies in your 4-patch orientation? Don’t sweat it, simply add in your mistakes to your final quilt. We’re human. I betcha no one sees the oopsies in the final result!
Assemble the Quilt Top
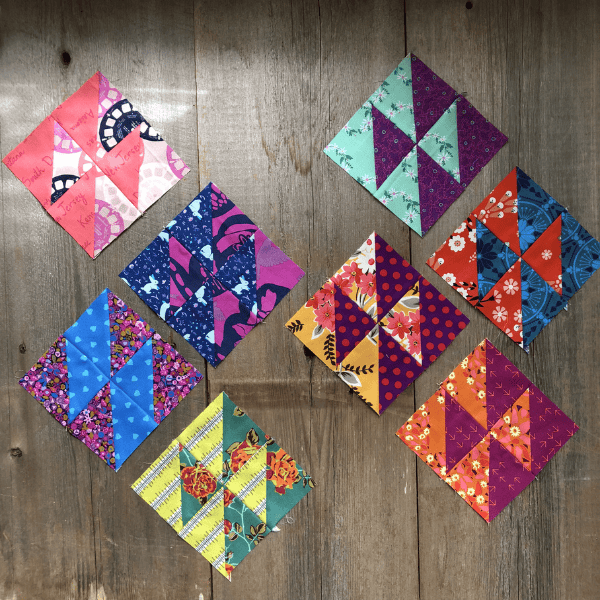
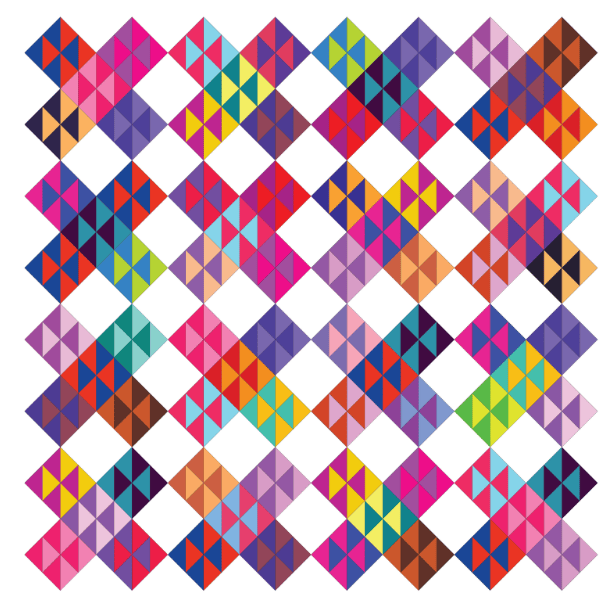
1. Lay out your 80 HST Four-Patch blocks on a design surface and arrange until satisfied with the color and value placement.
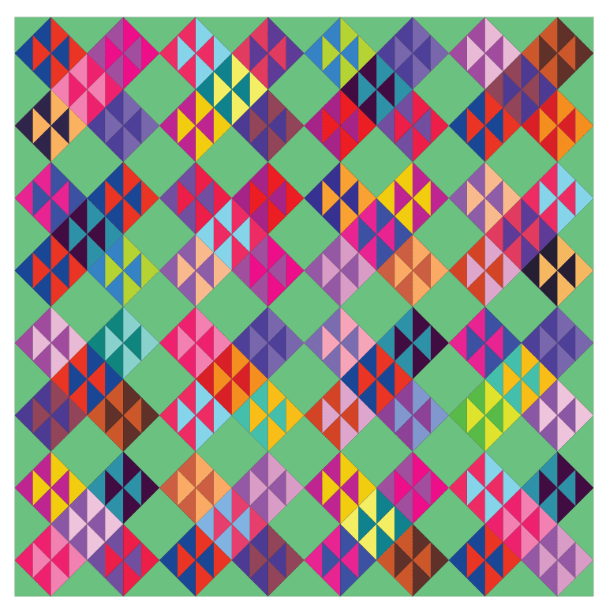
2. Then add in the background 33 squares, the 28 side setting triangles, and the 4 corner triangles.
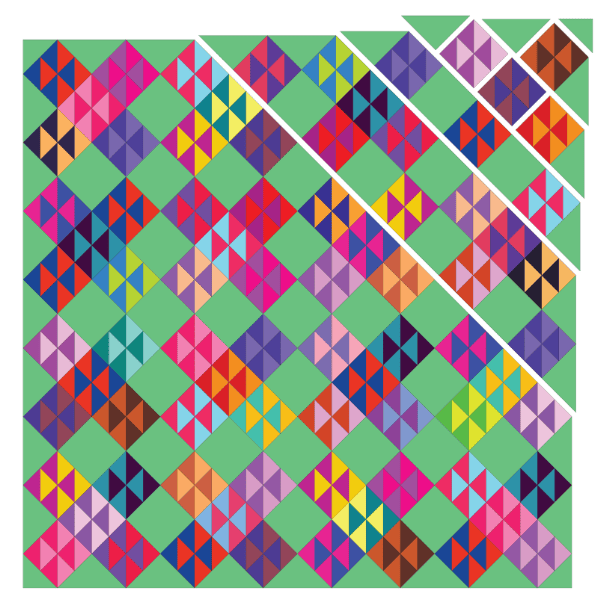
3. Assemble your quilt top into diagonal rows as shown in the assembly diagram, pressing the seams toward the background.
4. Sew the rows together. Press the seams open. (Careful with the edges of the flimsy at this point… the edges are all on the bias, which means it could stretch!)
5. Attach the 2 borders 2 ½’’ x 68 ⅜’’ to the top and the bottom, pressing the seams toward the background. Then attach the 2 borders 2 ½’’ x 72 ⅜’’ to each side. Press the seams toward the background. (Now with the borders attached, there’s no bias edges along the edges of your quilt flimsy. Phew!)

HEllo Houston quilt Tutorial – FinishING
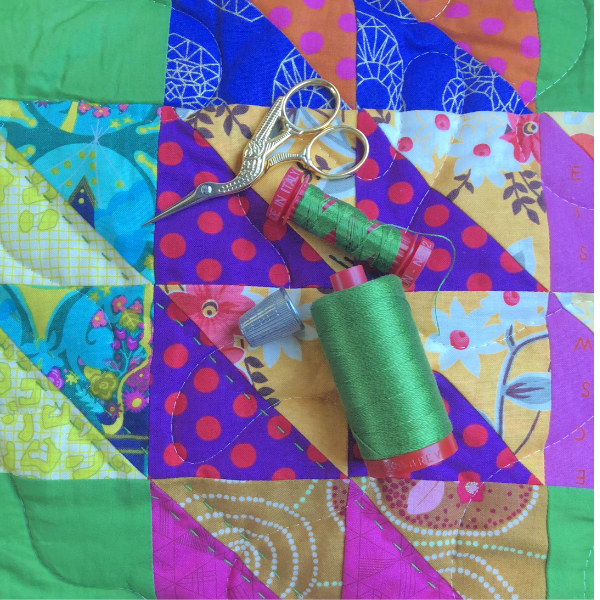
I wanted the cuddliest finish for my new scrappy beauty. So I used wool batting, double gauze backing, and hand quilting. This will be a quilt my kids fight over! Ha!
1. Trim the quilt backing to 72 ¼ inches x 72 ¼ inches.
2. Baste and quilt as desired.
3. Finish the binding as preferred.
My next steps?
I LOVE the texture of handquilting, so I’m hand quilting my Hello Houston. Yup, I’m doing it. It’s a slow process, but in my opinion, totally worth it.
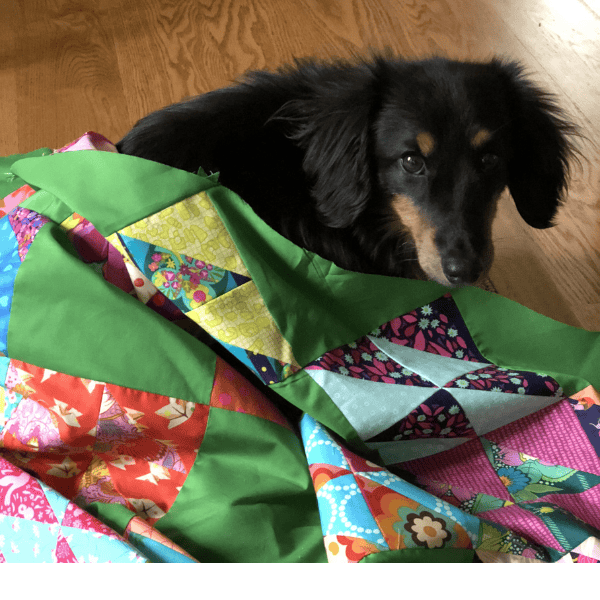
Who do I need by my side during hours of hand quilting?
Bruce Wayne, my quilting companion dog. Loyal, sweet and ready for cuddles anytime I put the needle down!
I hope you make this beginner-friendly scrappy HST quilt. You’ll enjoy the fun mash up with fabric prints and colors and the super easy construction. I sure enjoyed putting the Hello Houston quilt tutorial together for you.
Happy quilting!
xo Rebecca
PS. Try my easiest log cabin quilt tutorial for beginners – see the link below.
More FREE QUILTING resources
- The Four Best Ways to Make Half Square Triangles
- Easiest Log Cabin Quilt Tutorial for Beginners
- Cutest Nine-Patch Baby Quilt Tutorial
- Finish a Quilt – Stitch Methods for Quilt Tops


What an excellent tutorial on pairing scraps! Detailed and makes perfect sense – thank you. I’m itching to make this in all solid color scraps!
Looks like a fun, no stress quilt to build. I think it would be pretty too in pastels!
Thanks for this tutorial, I’m immediately smitten and am going to start collecting pairs of 4” squares straight away. I just wanted to check whether your square graphic has an error – it says to cut 33 4” squares, but I assume it is meant to be 6.5” squares?
I think there is an error. We are checking on it. Thanks!
Hi Heather, thanks for catching our oops! Yes, you need 4-inch squares, not 6.5-inch squares.
Just wondering if you double checked Heather’s comment about the size difference in the printed instructions and the graphic show for it, since the discrepancy is still there.
Susan, Heather caught our oops! Yes, use 4-inch squares. We also corrected the information in the blog post.
The background setting squares still need to be 6 1/2. because the HST units are 6 1/2.