• About
    • Privacy Policy
  • Teaching
    • Member/Student Login
    • Online Programs
  • Shop
  • Member/Student Login
  • Blog
    • Free Quilt Patterns – Scrappy Whirligig Quilt

Bryan House Quilts

Make an Amazing Jelly Roll Quilt: A Complete Tutorial

Modern Triangle Quilts· Sewing with Triangles· Tutorial

30 May
Title graphic for the complete tutorial to make an amazing jelly roll quilt.

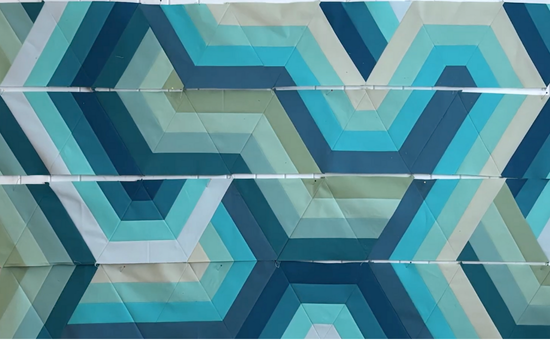
Make an amazing jelly roll quilt with my newest design, Pathways. Sewing this pattern is a happy medium between piecing blocks and color improv. Make it as shown or experiment with your own layout – either way you’ll love it!

Pathways, an amazing jelly roll quilt pattern with a modern slant

Here’s how the tutorial goes:

  1. Select the jelly rolls.
  2. Choose three color groupings with four colors in each group.
  3. Prepare the fabric by pressing and cut the strips into pieces.
  4. Piece two fabric strips then join sets of two strips in each color grouping
  5. Cut triangles from the strip sets and then layout the triangles following the assembly diagram.
  6. Sew triangle pairs together.
  7. Sew the rows together from top to bottom.
  8. Square up the quilt edges by trimming off the points.

Key Highlights

  • Choosing colors: Learn how to choose color groupings with two assorted solid fabric rolls.
  • Unique design: Experience a modern design and assembly for jelly roll quilting.
  • Step-by-step instructions: for cutting, sewing, and piecing strips of fabric into an original design.
  • Bonus: Get a free modern triangle block pattern and class.

Lining up the stripes can be a bit tricky. It’s totally doable and I’ll show you how as I walk you through the tutorial. Making a jelly roll quilt takes some planning.

Watch the video or follow the step-by-step instructions with photos below.

Sew an Amazing Jelly Roll Quilt: Step-by-Step Guide

1: Selecting and Preparing Jelly Roll Patchwork Fabrics
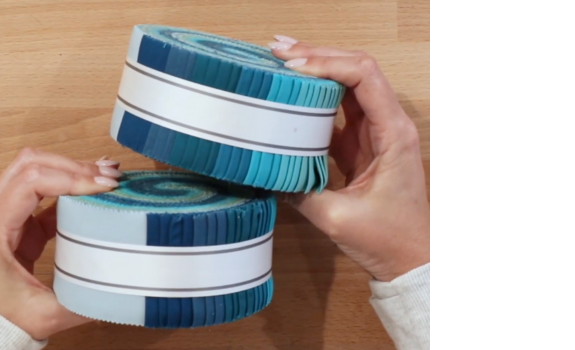
Two Kona cotton jelly rolls
Unrolling strips from jelly rolls

Open the jelly rolls and sort into three color groupings. My groups are olive, turquoise and blue from Kona Cotton “Midnight Oasis” jelly roll. The good news: All of the colors in a jelly roll are curated to work together. Check!

Make sure you have enough contrast between your color groups. Choose light, medium and dark versions of each color. Saturation (how intense a color appears) will make the contrast sharper, like a deep navy blue paired with a sky blue. Contrast and saturation will create the “boing” that makes your Pathways quilt design pop.

I designed alternate layouts and colorways to give you some ideas. Guess which one is “Splat, the quilt formerly known as Pathways”. Hehe.
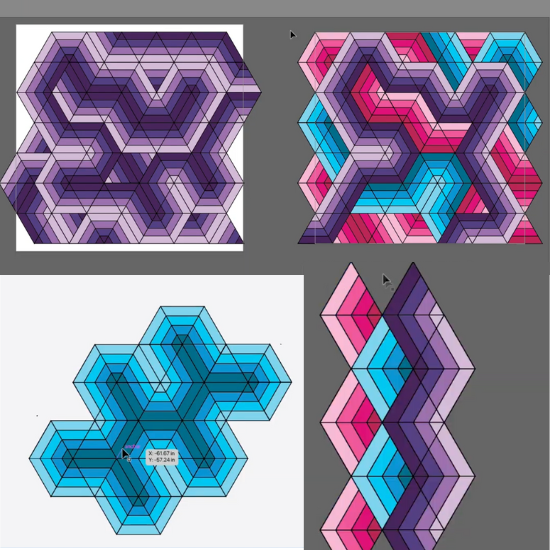
Alternate layouts and colors to make an amazing jelly roll quilt

Learn about choosing easy analogous color combinations like I did in Pathways. Read about mixing bright colors together and color schemes for quilts for in depth lessons and examples.

2. Piecing the Strip Sets

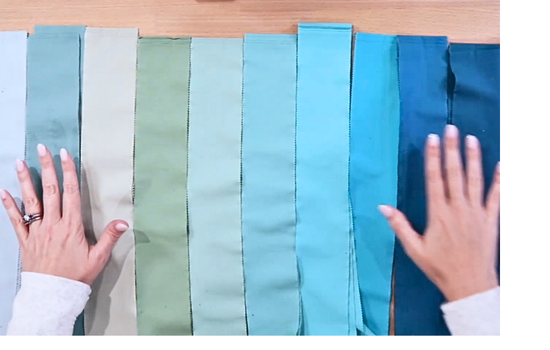
Choose one color group of four strips. Lay out your strips from darkest to lightest.
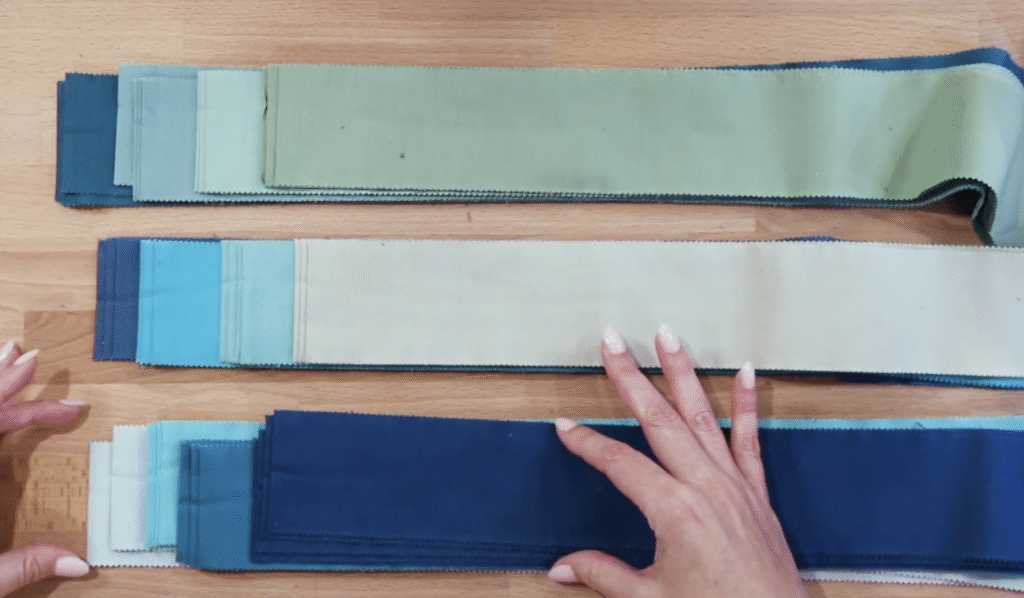
Color groups sorted from jelly roll strips

Sew two adjacent strips together on the long edges. Sew the remaining two strips together. Then, sew the two sets of two strips together. Tada!
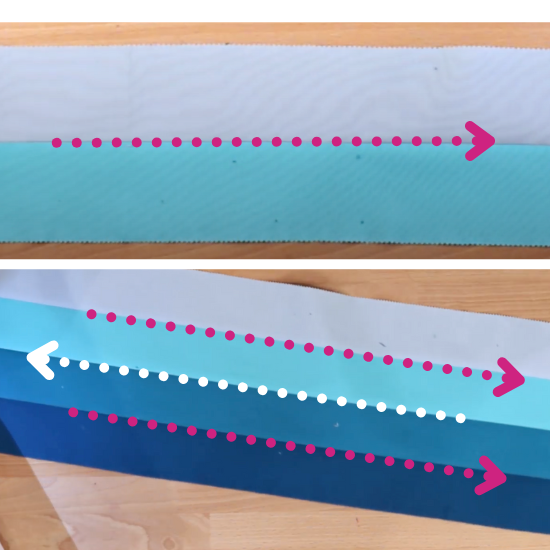
Diagram about sewing direction with strips
Alternate sewing direction with each strip

TIP: Prevent the seam from warping by alternating the sewing direction when piecing the strip sets together.

Repeat this process to make a total of 4 strips sets (one strip set equals 4 strips) from each from two color groupings and one set of 7 strips from one color group.

At this point, you should have 13 strip sets from 3 color groups:

  1. 4 – Olive 
  2. 7 – Turquoise
  3. 4 – Blue
13 strip sets from 3 color groups

Make sure to press your seams open as you sew.

Match the Pathways layout or arrange your strips in different directions. They can be laid out into sets or columns. Do this step to help you see the overall design. (This is when I usually find out that I need another block or bungled the math!) When you’re satisfied, it’s time to cut out the triangles.

3: Cutting Triangles

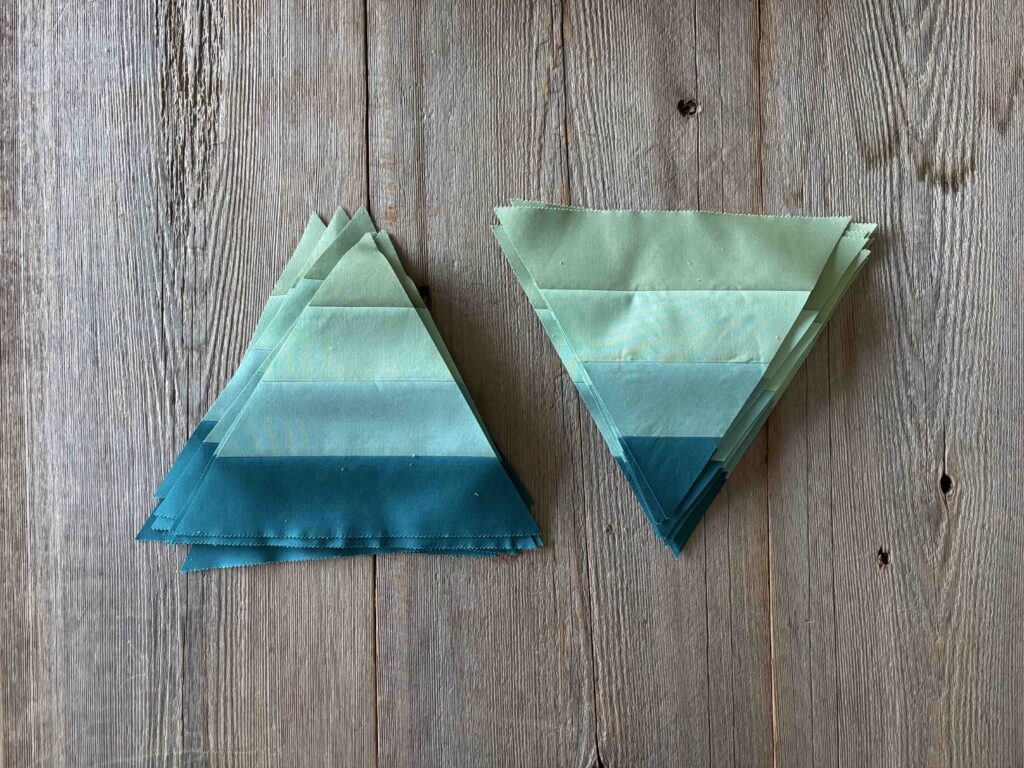
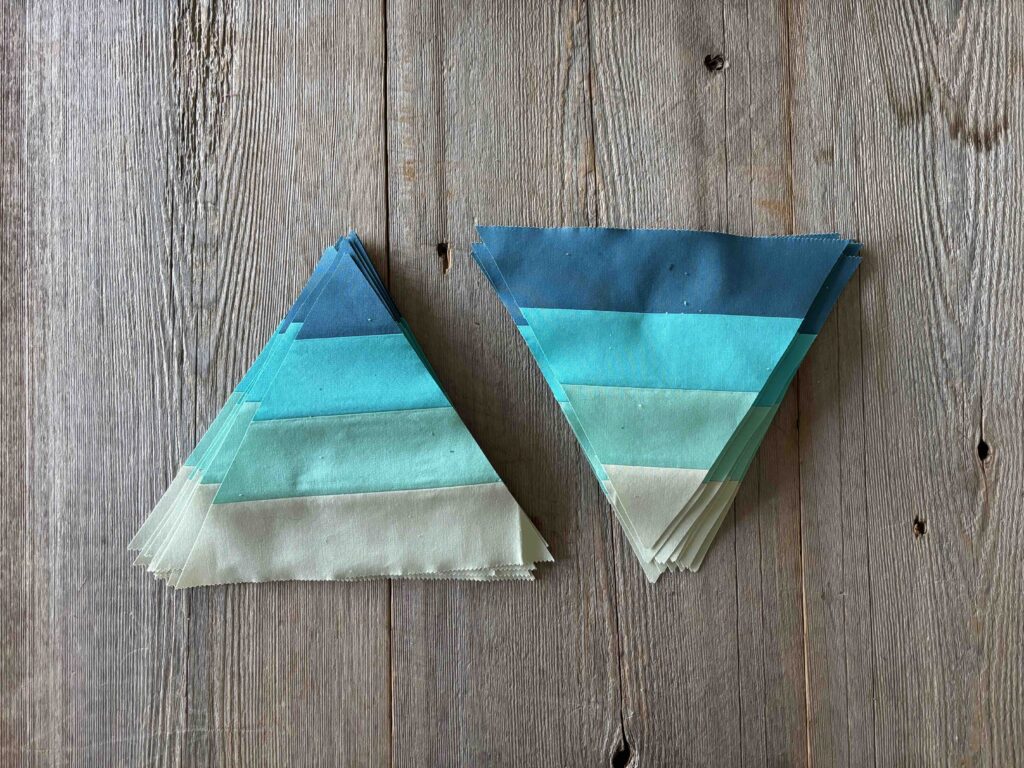
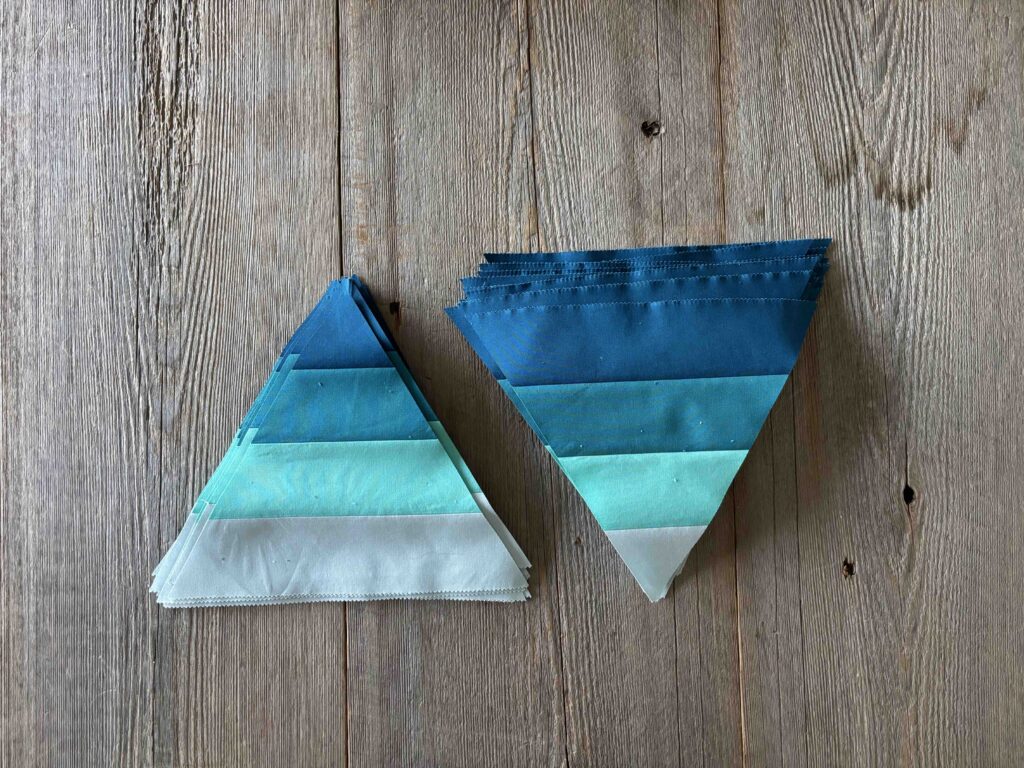
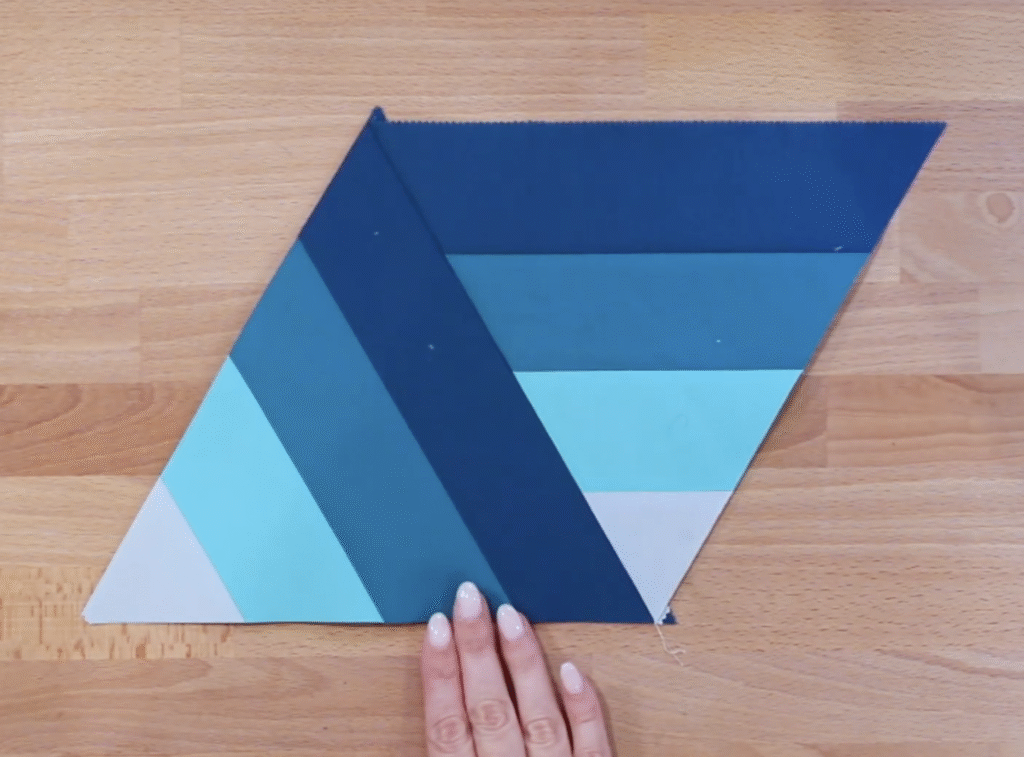
Next, we’ll be cutting our equilateral (60 degree) triangles from the strip sets.

If you don’t have an equilateral ruler, you can make your own from quilter’s template plastic or a cereal box. Download my triangle template from the link below.

Ok, here’s how to cut your equilateral triangles from your strip sets.
Cutting with an acrylic 60-degree ruler:

Line up the bottom edge of the strip set with a horizontal line on the mat. I used black washi tape as a guide for placing the ruler. Cutting on the right side of the ruler is more comfortable for right handers. After you cut off the first triangle, rotate the fabric so the cut end is on the left. Turn the triangle ruler upside down, match your edges and cut.
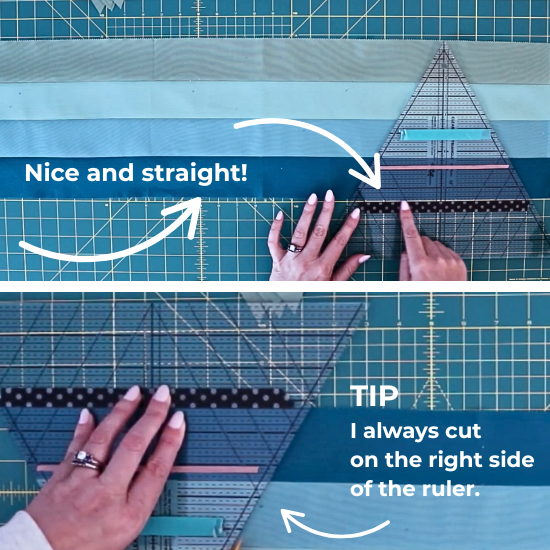
Lining up templates and rulers for cutting accurate triangles

You can use the template (link to download below) to make a template from cardboard or quilter’s template plastic.
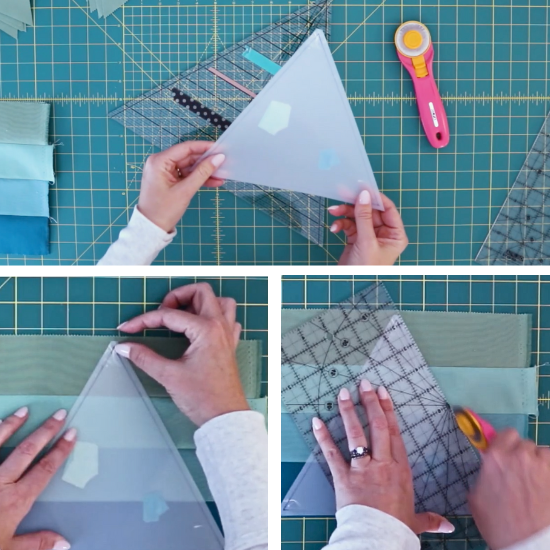
Using template plastic as a guide to cut triangles

Remember to use a ruler placed over the template when you cut – this will prevent “shaving” off the edges, which eventually makes your template uneven. Repeat the process to “make” 91 total triangles.
If you’re making your quilt just like my quilt you’ll make:
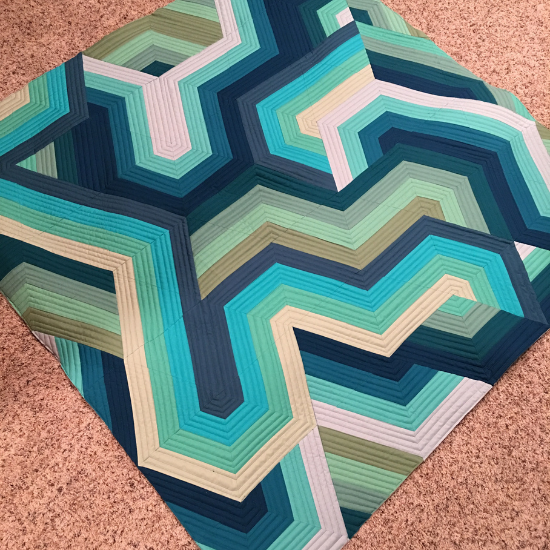
My Pathways quilt in olive, teal and blue jelly roll strips.
  • 27 Olive Triangles
  • 36 Turquoise Triangles
  • 28 Blue triangles

4. Layout Pathways

Once you have all your triangles in the layout you want, it’s time to start assembly! Use a design wall, table or floor to play with layouts.

Here’s my layout:

5. Quilt Assembly

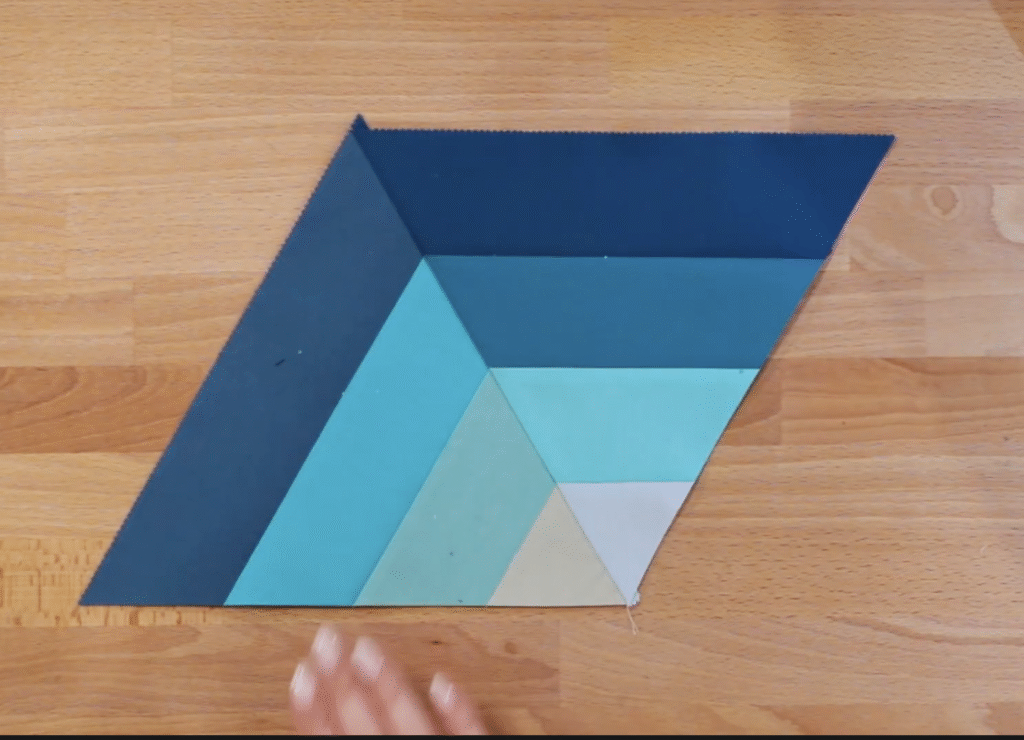
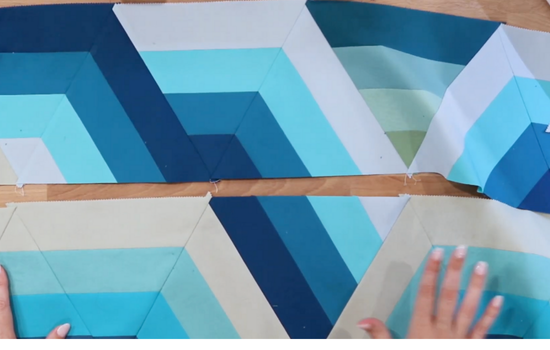
Start assembly by sewing your triangles into sets of two triangles. Then sew the sets together to make the rows.

As you assemble your pathways, you’ll be sewing them into 3 different types of joins:

  • Where there are dead ends
  • Where it creates turns
  • Where it creates stripes
Dead end joins
Dead end joins
Turn joins
Turn stripes join
Stripe joins
Create stripes join

Sewing the “dead end” and the “turning” pairs are easiest; but I found the stripe pairs to be more challenging. 

In this segment, I’ll walk you through how to sew the triangles into rows. I’ll be sewing my top row with you. 

First let’s sew the triangles into pairs. Let’s start with the easiest pairs in the first row.
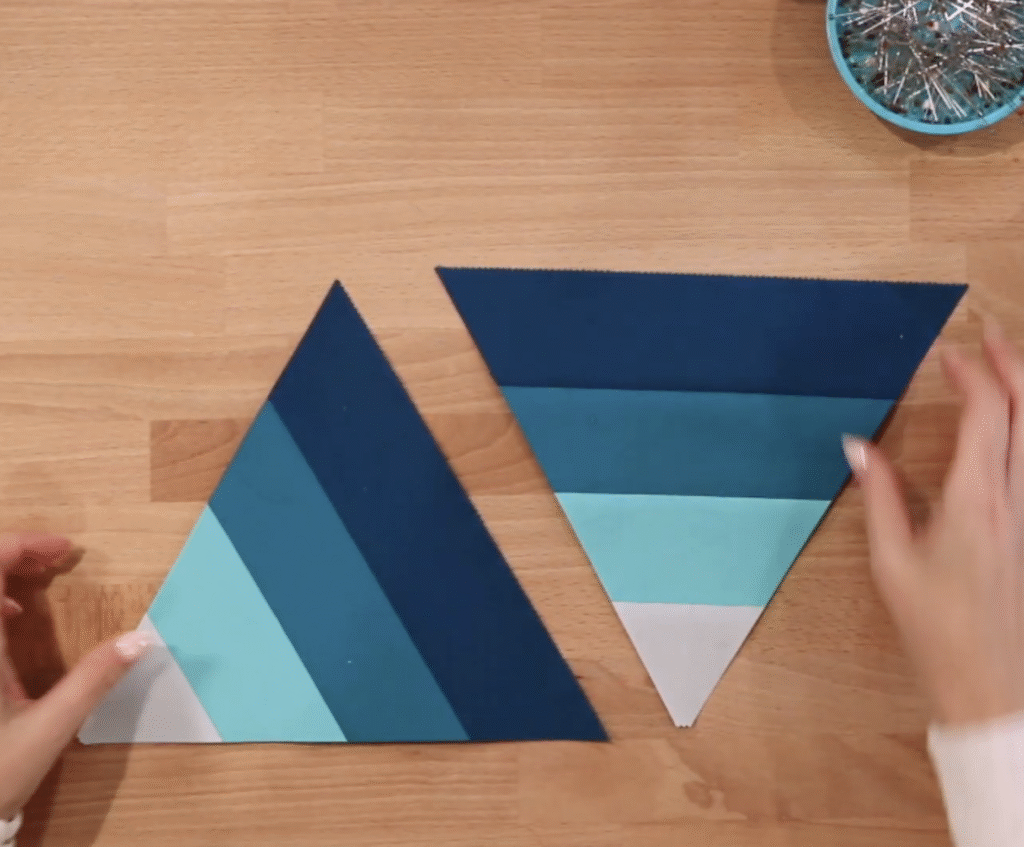
Place right sides together, match the points and sew the seam. Then follow these directions for pressing all of your pairs.

  1. Set the seam on the wrong side. My seams need to alternate for nesting them into rows later so it’s facing to the right.
  2. Finger press the seam open on the right side.
  3. Press the seam on the right side. Press again with Best Press starch.
  4. Place a wooden clapper on the seam while it cools.
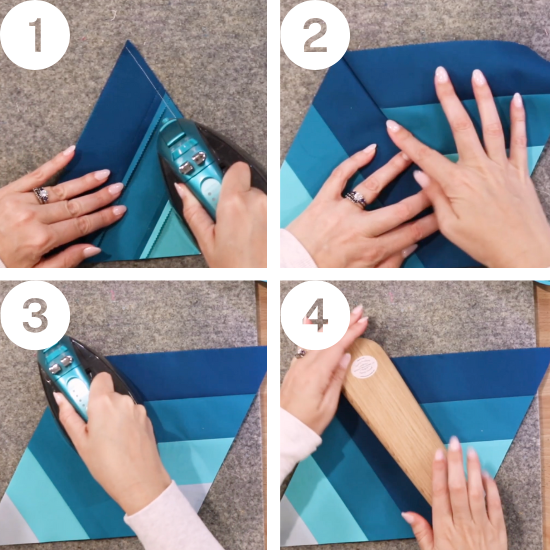
Pressing directions

The turn joins require matching the inside seams first, and then the points. Extra fabric can be worked in near the points.

  • Choose your pair.
  • Lay right sides together. You may be short at a point or two, but that’s okay.
  • Match the seams and place a pin to hold it.
  • Sew your seam and check the right side for accuracy before pressing. NOTE: I rarely rip and fix seams unless it’s reeeeally obvious. The overall design is what others see, not the mismatch!
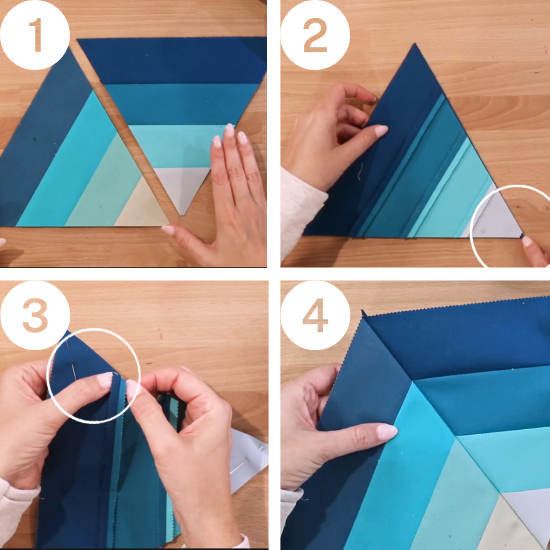
Show how to line up triangles to sew seam accurately
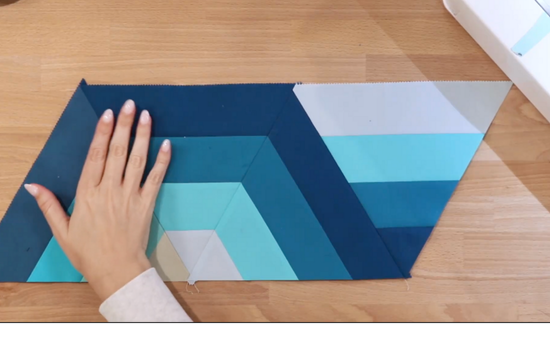
4 triangles sewn to create the beginning of the row.

6. ASSEMBLING STRIPE PAIRS

Ok, now to sew the more challenging stripe pairs.

The stripes become straight lines, unlike the turn joins.

  1. Lay right sides together
  2. Match the right flap of the seam allowance to the left flap on the opposite side. This connects the seams at the quarter inch seam allowance mark.
  3. Pin in place at each seam along the joining edge.
  4. Check your seam on the right side before pressing.
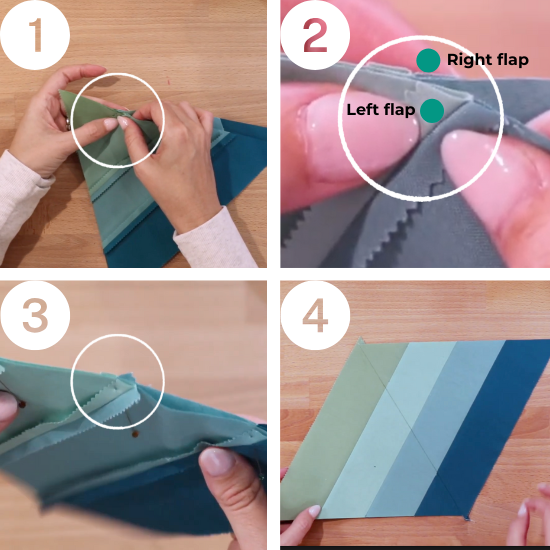
Show how to assemble stripe pairs.

7. FiNAL ROW ASSEMBLY

Show how to lay out rows before sewing the seams.

First, check your seam allowances to see where they may be a little short. You can make slight adjustments (fudging) to get straight seams before joining into rows. Or not!

How to check for accurate ¼ inch seam allowances before sewing the row seams.

Match the rows together.

Match up rows

Line up the rows and pin together where the seams meet.

Match individual seams

Sew the rows together from top to bottom. When you’re finished, turn the quilt to the right side and check the seams for alignment.
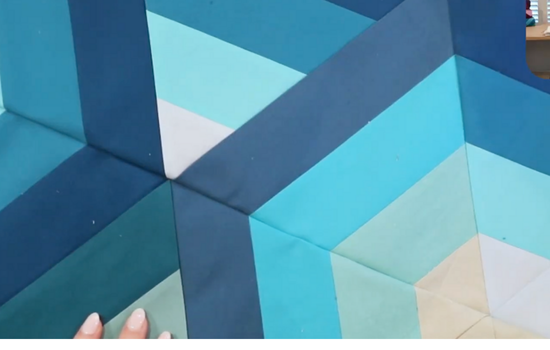
Check quilt top for accuracy

Press to set the seams. Next, I finger press the seams open while ironing. Then give it a final press on the right side with Best Press starch.
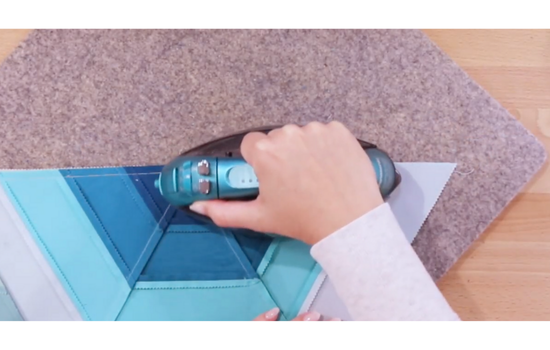
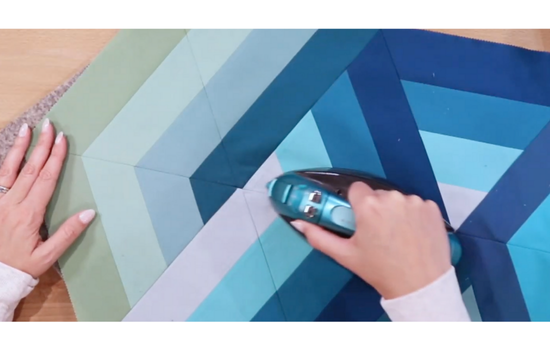
Set seam with iron
Final press on quilt top

You can leave the points on the quilt or square up the top. I measure point to point with a ruler and match my horizontal line with the quilting mat line.
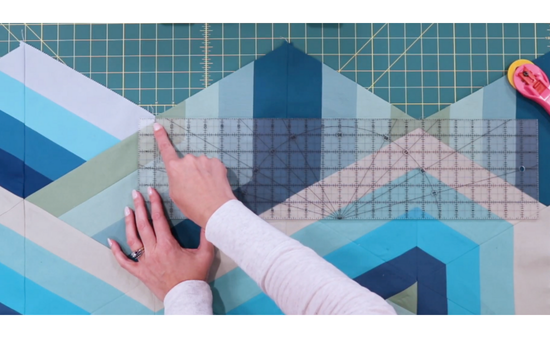
Square up edges with ruler and rotary cutter

Quilting with straight line stitching is my favorite way to finish a modern triangle quilt. I used a 40 weight thread in teal so the stitching would show more.
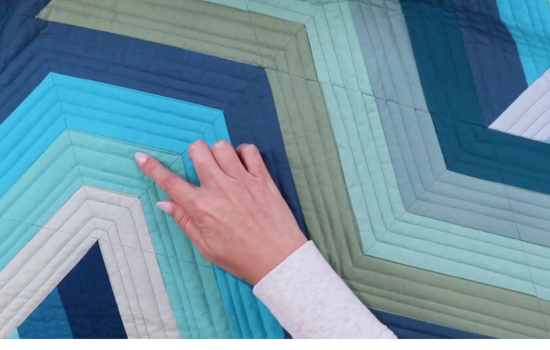
Quilting to finish top with straight line quilting, perfect for an amazing jelly roll quilt pattern with a modern slant.

Ta da! My quilt is done!

Completed quilt top.

Ready to make an amazing jelly roll quilt? Pathways is a fun way to show your creative side. From choosing the color groups to laying out the triangles, put your unique twist on this modern jelly roll twist.

Frequently Asked Questions

What is a jelly roll race quilt pattern?

This pattern uses fabric strips sewn end to end. This method is a fast patchwork shortcut because the strips are already cut for you. It’s a quick way to make a new quilt that looks fun and different every time.

Free Quilt Patterns from Jelly Rolls

Step This Way

Cross the Line

More Resources from Bryan House Quilts

  • Press Flatter Quilt Seams Like a Pro
  • Best Way to Cut Fabric Yardage

Quilting Resources – Pam and Nicky Lintott

Pam and Nicky Lintott have written many books with jelly roll quilt patterns. Visit Nicky and Pam Lintott’s website or see all their books about fun jelly roll patterns and fabric line combinations.

Previous Post: « Freezer Paper Piecing {Tutorial}
Next Post: Making Progress as We Please on BOM Quilts »

Reader Interactions

Comments

  1. Melanie Ayers says

    May 31, 2025 at 1:53 pm

    Love this quilt. It has such a modern look. Thanks for the tutorial.

Primary Sidebar

New 2026 Block of the Month!

Graphic of Alchemy Quilt

Join the 2026 Block of the Month Program

Get my Modern Triangles Quilt Book

Get my Modern Rainbow Quilts Book

Image shows cover of the book "Modern Rainbow Quilts"

Make the Solstice Quilt!

Solstice Block of the Month by Bryan House Quilts

Get Your Invite!

Make Modern Triangles Logo

Make the Sparkler Quilt!

Image Shows Sparkler Quilt Top by Rebecca Bryan

Make the Echo (Echo!) Quilt

Echo BOM now open to join

Make the Wildflower Quilt!

Wildflower Block of the Month by Bryan House Quilts

Make the Stargazer Quilt!

Anne's Stargazer BOM

Make the Rainbow Triangles Quilt!

Rainbow Triangle BOM, modern triangle quilt, Rebecca Bryan

About

Hey there! I’m Rebecca, an author and teacher and freezer paper piecing evangelist. I’m also the founder of the Make Modern Triangles Quilt Club.

Disclosure

Just so you know, my site includes affiliate links from which I (it’s me! Rebecca!) receive payment or compensation. Something to consider as you peruse my website. Thanks!

Latest on Instagram

Comment ‘FREEZER’ if you want to take my free clas Comment ‘FREEZER’ if you want to take my free class and learn this amazing technique! 👇

Freezer paper piecing tip number eight is to press every seam right after sewing it. 
 
Don’t wait until later or until all of your blocks are done. Press those seams right away!

It might feel like it slows you down in the moment, but it actually saves you time (and frustration) later.

When you press as you go, your seams stay crisp, and your pieces lay flat, which makes lining everything up so much easier. You’re not fighting bulky seams or trying to “fix” things at the end. 🙌

Plus, pressing helps set the stitches and keeps your fabric from shifting as you build your block.

Think of it as part of the sewing process, not an extra step.

Your blocks will be flatter, sharper, and way more accurate… and your future self will thank you!

Comment ‘FREEZER’ for my free class! 💕

#modernquilting #paperpiecing #foundationpaperpiecing #quiltingtechnique #quiltteacher
MAKE A TEST BLOCK!!! Please, I am begging you. 😅 MAKE A TEST BLOCK!!! Please, I am begging you. 😅

You’d think after 15 years of quilting I’d be able to skip it...

And every once in a while I convince myself that I don’t need a test block because I’ve made this block hundreds of times or my freezer paper piecing skills are good enough to skip it... 

And do you know what happens every time I convince myself that I don’t need a test block? 🙃

I almost always regret it and end up having a nice long date with Jack The Seam Ripper as a consequence. 

Learn from my mistakes so you don’t have to learn from your own and make the test block EVERY TIME!!!

Are you making test blocks? Tell me in the comments! ⤵️

#modernquilting #paperpiecing #foundationpaperpiecing #quiltingtechnique #quiltteacher
I can’t believe I’m saying this, but we’re nearing I can’t believe I’m saying this, but we’re nearing the final months of Dutch Summer! 🥹

Finished Dutch Summer Month 6 blocks are showing up in the Make Modern Triangles Club every day. We’re past the halfway point, and we’re really starting to stack up the blocks! Now that we’ve got a bunch of stacks of blocks, it’s such a fun time to play with arranging your blocks and see what your creativity comes up with. ✨

Once you get beyond the halfway point, you start the countdown to the BIG finish! 🎉

We’re feeling excited, motivated, and accomplished. We are covering some ground, folks! Swipe to see each month’s block so far, and drop a ‘DUTCH’ in the comments if you want to make your own! 💕

#quiltteacher #quiltingtutorial #quiltingtips #modernquilting #quiltcommunity
Comment ‘FREE’ if you’re a brand-new quilter and w Comment ‘FREE’ if you’re a brand-new quilter and want to learn an easy technique that will save you countless hours and allow you to fully enjoy the quilting process. ✨

Inside my free class, I’ll teach you the freezer paper piecing technique, a better way to foundation paper piece, and you’ll leave with a block pattern to start sewing right away! If you’ve been wanting to try out quilting, this is it! 💕

#modernquilting #paperpiecing #foundationpaperpiecing #quiltingtechnique #quiltteacher
Drop a “FREEZER” in the comments, and I’ll send yo Drop a “FREEZER” in the comments, and I’ll send you straight to my free class! 

FREEZER PAPER PIECING TIP NUMBER 7 ⬇️

Try a walking foot.

A lot of quilters don’t think to use it for piecing… but I LOVE it for freezer paper piecing.

It helps keep layers from shifting and makes seam allowances much more consistent. 

Especially helpful with triangles and bias edges. 😌

Are you using a presser foot for paper piecing? Follow along @bryanhousequilts to get more paper piecing tips, and comment ‘freezer’ to take my free class! ✨

#modernquilting #paperpiecing #foundationpaperpiecing #quiltingtechnique #quiltteacher
Every year, I design a new foundation pieced quilt Every year, I design a new foundation pieced quilt design, hosted in a virtual block of the month style program. ✨

Well... This year I designed TWO, so we’re having double the fun inside the Make Modern Triangles Club! 

Month by month, we make batches of simple, manageable blocks. Each set of blocks typically takes around 4 hours, depending on your skill level. 

Not only does it break up the project into smaller projects, but it ensures you get your sewing time, even if it’s just 10 minutes a day! 

In all of my block of the month programs, you get: ⤵️

✅ Project planning resources
✅ A project roadmap
✅ Step-by-step video masterclasses
✅ Connection and support from the group
✅ & MORE

We started sewing the Dutch Summer in January, and the Alchemy in June, but you can start ANYTIME and sew along! 

As a Club Member, you get immediate and unlimited access to the Make Modern Triangles Vault, our complete back catalogue of beloved Block of the Month quilts dating back to 2018. 

All you have to do is pick your project and start sewing! 

Comment ‘CLUB’ for details to join. 💕

#modernquilting #paperpiecing #foundationpaperpiecing #quiltingtechnique #quiltteacher
Follow on Instagram

Browse by Category

Archives

  • Instagram
  • Facebook
  • Pinterest
  • email
Comment ‘FREEZER’ if you want to take my free clas Comment ‘FREEZER’ if you want to take my free class and learn this amazing technique! 👇

Freezer paper piecing tip number eight is to press every seam right after sewing it. 
 
Don’t wait until later or until all of your blocks are done. Press those seams right away!

It might feel like it slows you down in the moment, but it actually saves you time (and frustration) later.

When you press as you go, your seams stay crisp, and your pieces lay flat, which makes lining everything up so much easier. You’re not fighting bulky seams or trying to “fix” things at the end. 🙌

Plus, pressing helps set the stitches and keeps your fabric from shifting as you build your block.

Think of it as part of the sewing process, not an extra step.

Your blocks will be flatter, sharper, and way more accurate… and your future self will thank you!

Comment ‘FREEZER’ for my free class! 💕

#modernquilting #paperpiecing #foundationpaperpiecing #quiltingtechnique #quiltteacher
MAKE A TEST BLOCK!!! Please, I am begging you. 😅 MAKE A TEST BLOCK!!! Please, I am begging you. 😅

You’d think after 15 years of quilting I’d be able to skip it...

And every once in a while I convince myself that I don’t need a test block because I’ve made this block hundreds of times or my freezer paper piecing skills are good enough to skip it... 

And do you know what happens every time I convince myself that I don’t need a test block? 🙃

I almost always regret it and end up having a nice long date with Jack The Seam Ripper as a consequence. 

Learn from my mistakes so you don’t have to learn from your own and make the test block EVERY TIME!!!

Are you making test blocks? Tell me in the comments! ⤵️

#modernquilting #paperpiecing #foundationpaperpiecing #quiltingtechnique #quiltteacher
I can’t believe I’m saying this, but we’re nearing I can’t believe I’m saying this, but we’re nearing the final months of Dutch Summer! 🥹

Finished Dutch Summer Month 6 blocks are showing up in the Make Modern Triangles Club every day. We’re past the halfway point, and we’re really starting to stack up the blocks! Now that we’ve got a bunch of stacks of blocks, it’s such a fun time to play with arranging your blocks and see what your creativity comes up with. ✨

Once you get beyond the halfway point, you start the countdown to the BIG finish! 🎉

We’re feeling excited, motivated, and accomplished. We are covering some ground, folks! Swipe to see each month’s block so far, and drop a ‘DUTCH’ in the comments if you want to make your own! 💕

#quiltteacher #quiltingtutorial #quiltingtips #modernquilting #quiltcommunity
Comment ‘FREE’ if you’re a brand-new quilter and w Comment ‘FREE’ if you’re a brand-new quilter and want to learn an easy technique that will save you countless hours and allow you to fully enjoy the quilting process. ✨

Inside my free class, I’ll teach you the freezer paper piecing technique, a better way to foundation paper piece, and you’ll leave with a block pattern to start sewing right away! If you’ve been wanting to try out quilting, this is it! 💕

#modernquilting #paperpiecing #foundationpaperpiecing #quiltingtechnique #quiltteacher
Follow on Instagram
© 2026 Bryan House Quilts