
Make an amazing jelly roll quilt with my newest design, Pathways. Sewing this pattern is a happy medium between piecing blocks and color improv. Make it as shown or experiment with your own layout – either way you’ll love it!

Here’s how the tutorial goes:
- Select the jelly rolls.
- Choose three color groupings with four colors in each group.
- Prepare the fabric by pressing and cut the strips into pieces.
- Piece two fabric strips then join sets of two strips in each color grouping
- Cut triangles from the strip sets and then layout the triangles following the assembly diagram.
- Sew triangle pairs together.
- Sew the rows together from top to bottom.
- Square up the quilt edges by trimming off the points.
Key Highlights
- Choosing colors: Learn how to choose color groupings with two assorted solid fabric rolls.
- Unique design: Experience a modern design and assembly for jelly roll quilting.
- Step-by-step instructions: for cutting, sewing, and piecing strips of fabric into an original design.
- Bonus: Get a free modern triangle block pattern and class.
Lining up the stripes can be a bit tricky. It’s totally doable and I’ll show you how as I walk you through the tutorial. Making a jelly roll quilt takes some planning.
Watch the video or follow the step-by-step instructions with photos below.
Sew an Amazing Jelly Roll Quilt: Step-by-Step Guide
1: Selecting and Preparing Jelly Roll Patchwork Fabrics
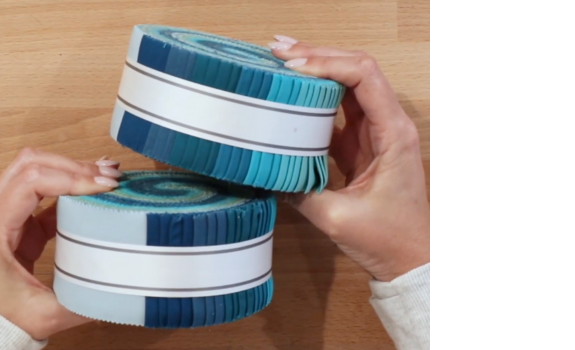
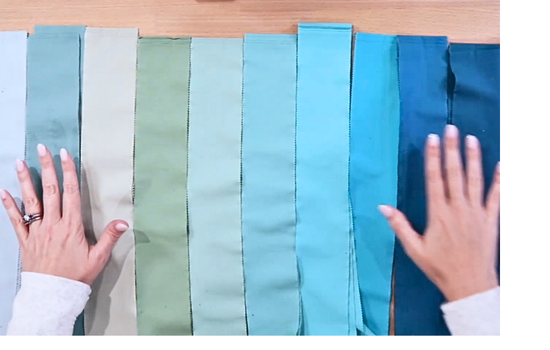
Open the jelly rolls and sort into three color groupings. My groups are olive, turquoise and blue from Kona Cotton “Midnight Oasis” jelly roll. The good news: All of the colors in a jelly roll are curated to work together. Check!
Make sure you have enough contrast between your color groups. Choose light, medium and dark versions of each color. Saturation (how intense a color appears) will make the contrast sharper, like a deep navy blue paired with a sky blue. Contrast and saturation will create the “boing” that makes your Pathways quilt design pop.
I designed alternate layouts and colorways to give you some ideas. Guess which one is “Splat, the quilt formerly known as Pathways”. Hehe.

Learn about choosing easy analogous color combinations like I did in Pathways. Read about mixing bright colors together and color schemes for quilts for in depth lessons and examples.
2. Piecing the Strip Sets
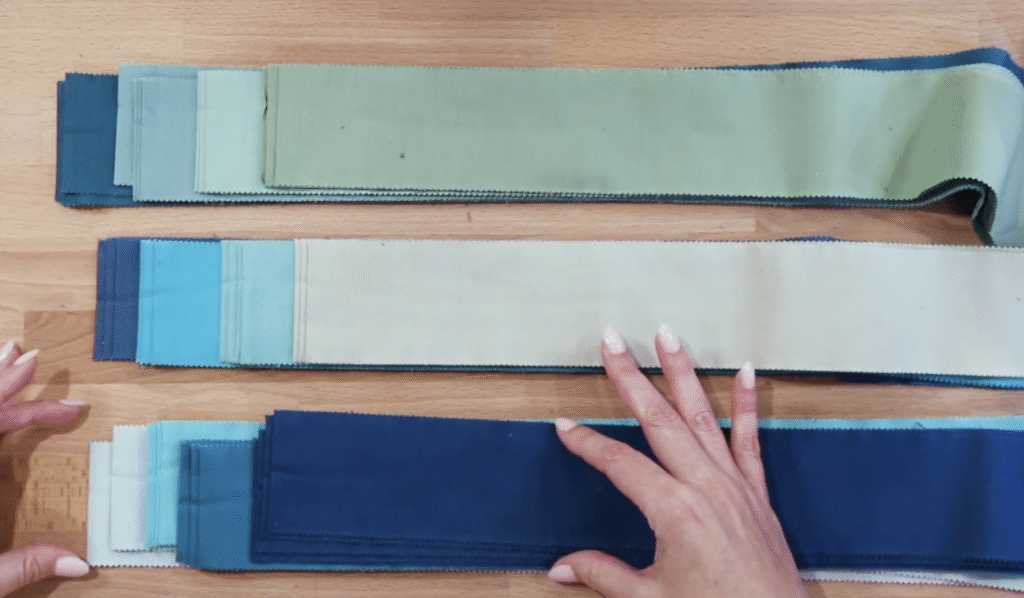
Choose one color group of four strips. Lay out your strips from darkest to lightest.
Sew two adjacent strips together on the long edges. Sew the remaining two strips together. Then, sew the two sets of two strips together. Tada!
TIP: Prevent the seam from warping by alternating the sewing direction when piecing the strip sets together.
Repeat this process to make a total of 4 strips sets (one strip set equals 4 strips) from each from two color groupings and one set of 7 strips from one color group.
At this point, you should have 13 strip sets from 3 color groups:
- 4 – Olive
- 7 – Turquoise
- 4 – Blue

Make sure to press your seams open as you sew.
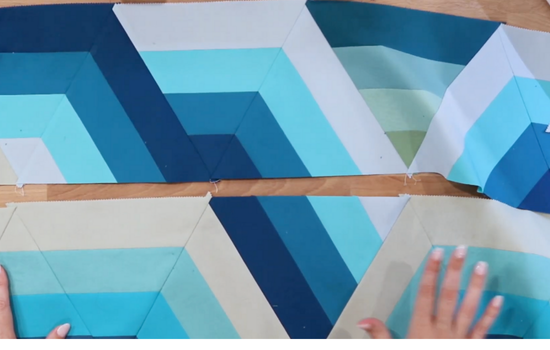
Match the Pathways layout or arrange your strips in different directions. They can be laid out into sets or columns. Do this step to help you see the overall design. (This is when I usually find out that I need another block or bungled the math!) When you’re satisfied, it’s time to cut out the triangles.
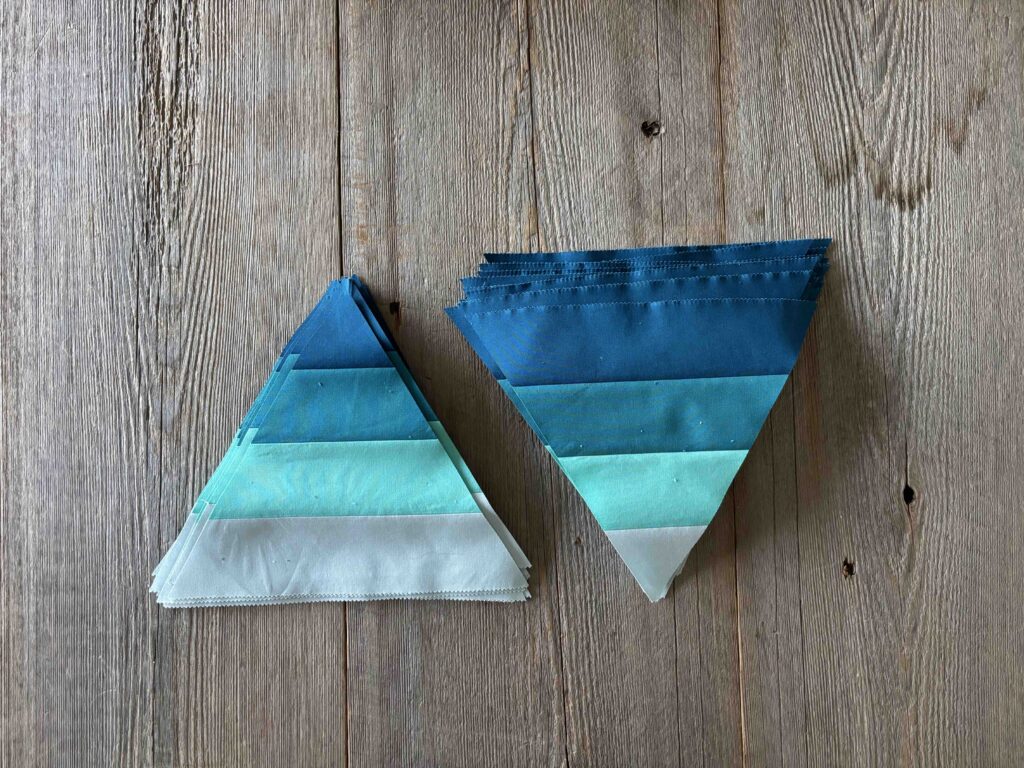
3: Cutting Triangles
Next, we’ll be cutting our equilateral (60 degree) triangles from the strip sets.
If you don’t have an equilateral ruler, you can make your own from quilter’s template plastic or a cereal box. Download my triangle template from the link below.
Ok, here’s how to cut your equilateral triangles from your strip sets.
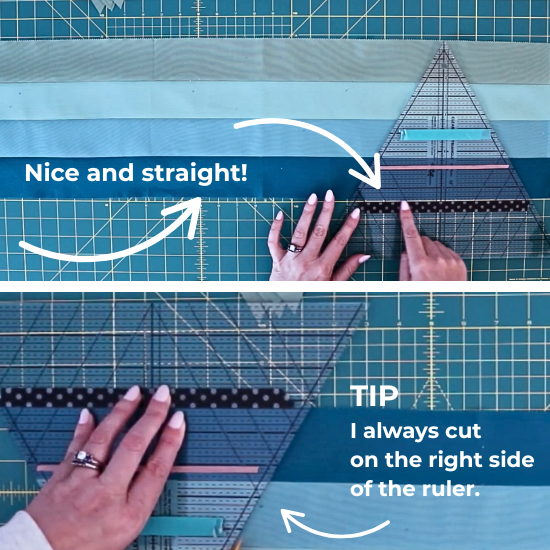
Cutting with an acrylic 60-degree ruler:
Line up the bottom edge of the strip set with a horizontal line on the mat. I used black washi tape as a guide for placing the ruler. Cutting on the right side of the ruler is more comfortable for right handers. After you cut off the first triangle, rotate the fabric so the cut end is on the left. Turn the triangle ruler upside down, match your edges and cut.
You can use the template (link to download below) to make a template from cardboard or quilter’s template plastic.
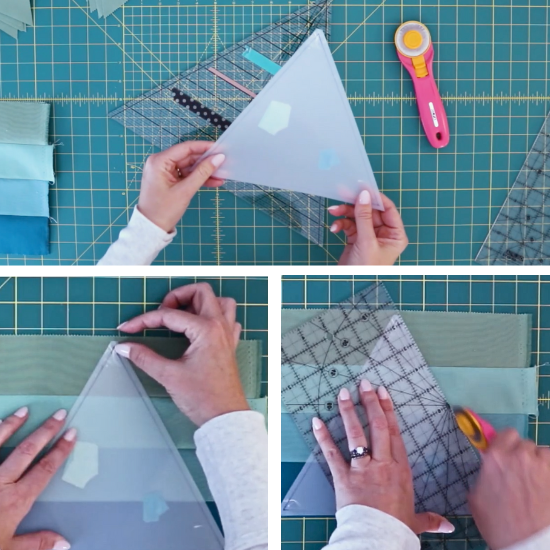
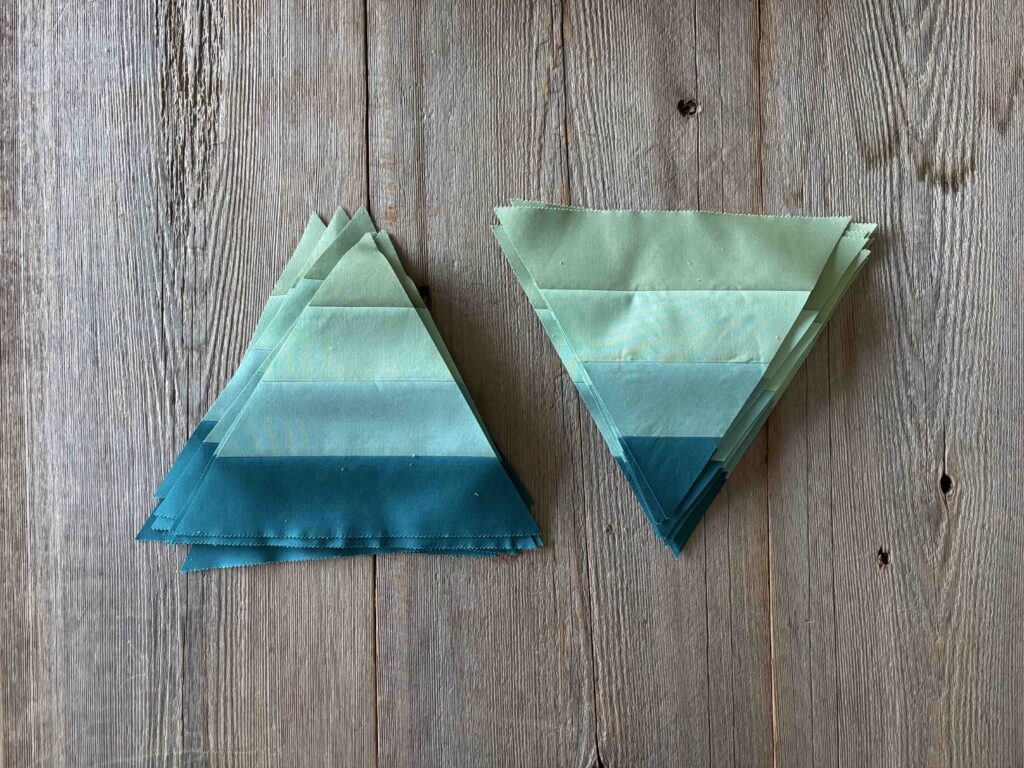
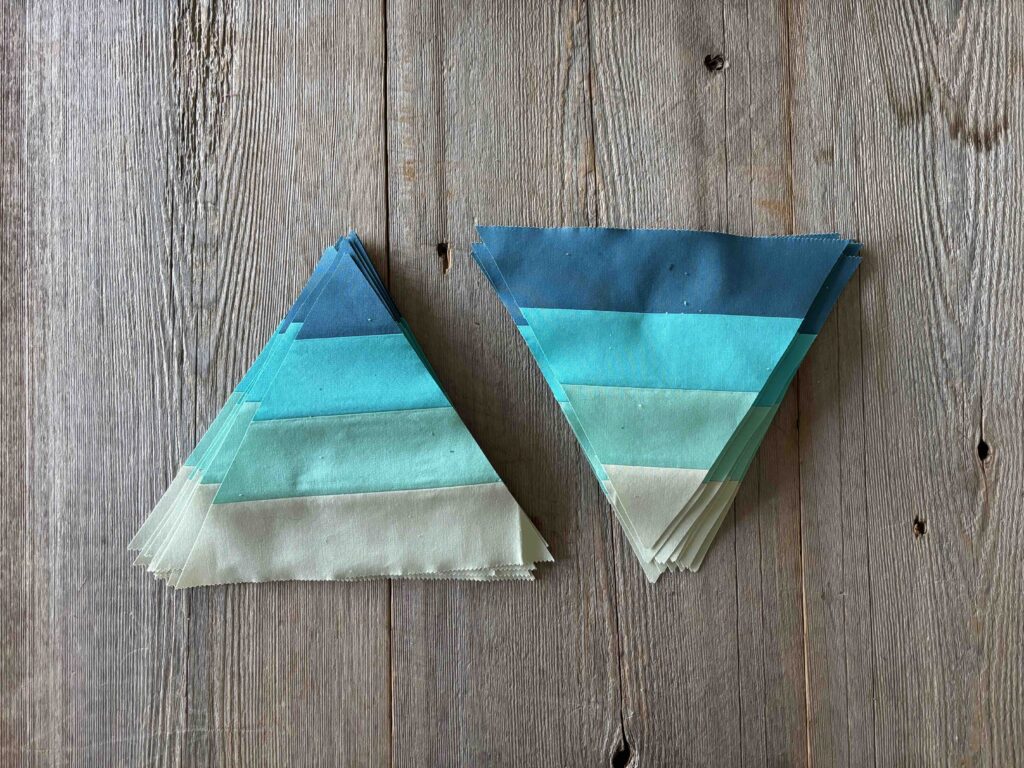
Remember to use a ruler placed over the template when you cut – this will prevent “shaving” off the edges, which eventually makes your template uneven. Repeat the process to “make” 91 total triangles.
If you’re making your quilt just like my quilt you’ll make:

- 27 Olive Triangles
- 36 Turquoise Triangles
- 28 Blue triangles
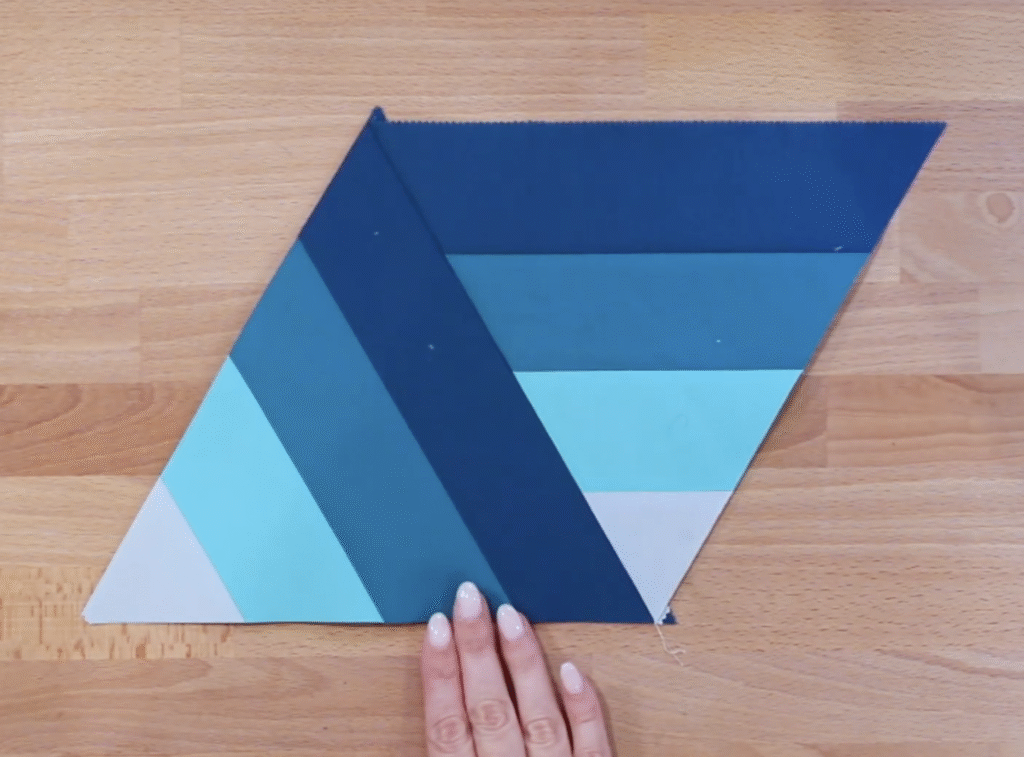
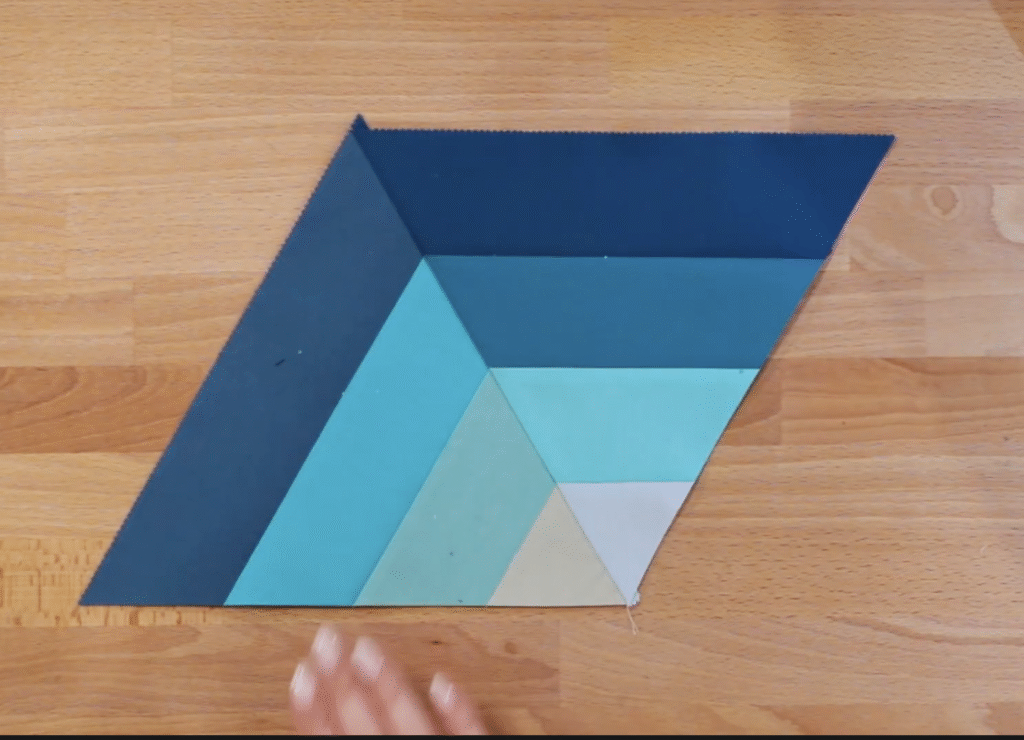
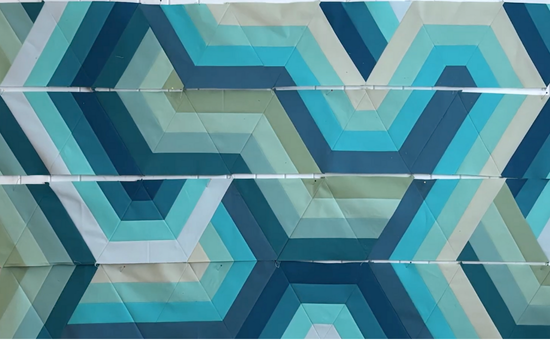
4. Layout Pathways
Once you have all your triangles in the layout you want, it’s time to start assembly! Use a design wall, table or floor to play with layouts.
Here’s my layout:

5. Quilt Assembly
Start assembly by sewing your triangles into sets of two triangles. Then sew the sets together to make the rows.
As you assemble your pathways, you’ll be sewing them into 3 different types of joins:
- Where there are dead ends
- Where it creates turns
- Where it creates stripes

Sewing the “dead end” and the “turning” pairs are easiest; but I found the stripe pairs to be more challenging.
In this segment, I’ll walk you through how to sew the triangles into rows. I’ll be sewing my top row with you.
First let’s sew the triangles into pairs. Let’s start with the easiest pairs in the first row.
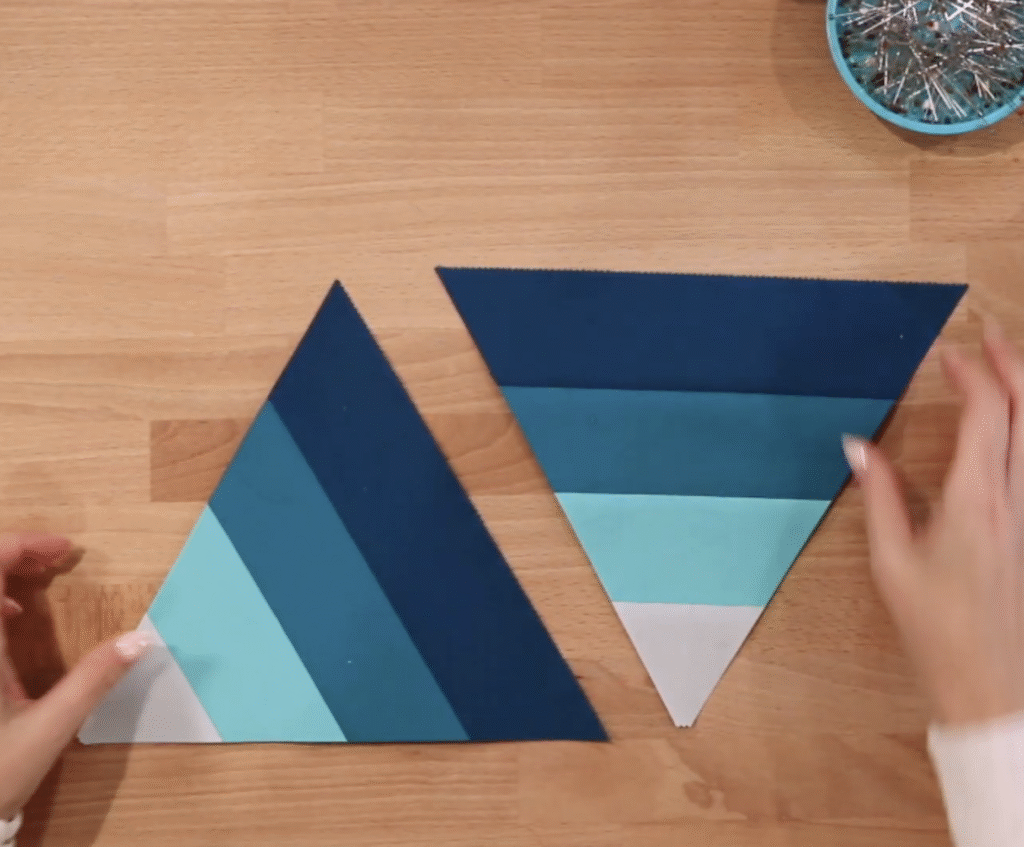
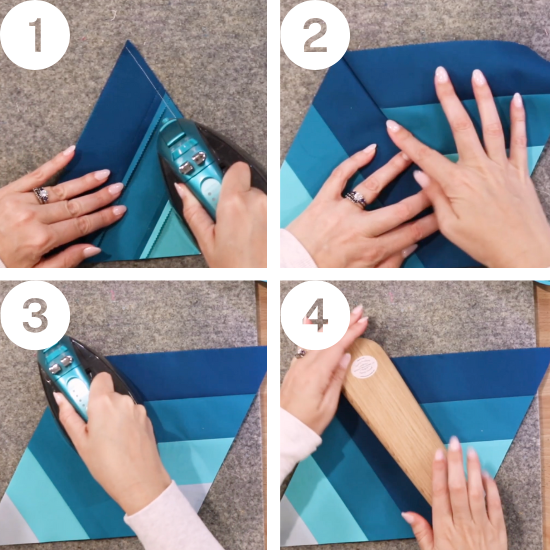
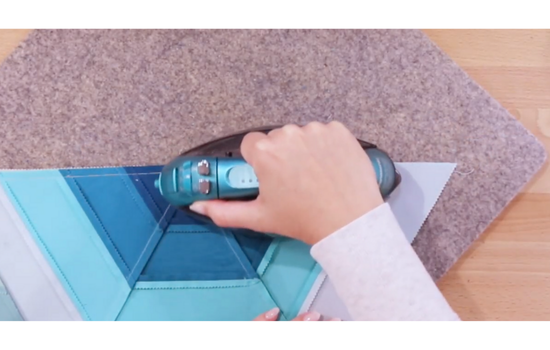
Place right sides together, match the points and sew the seam. Then follow these directions for pressing all of your pairs.
- Set the seam on the wrong side. My seams need to alternate for nesting them into rows later so it’s facing to the right.
- Finger press the seam open on the right side.
- Press the seam on the right side. Press again with Best Press starch.
- Place a wooden clapper on the seam while it cools.
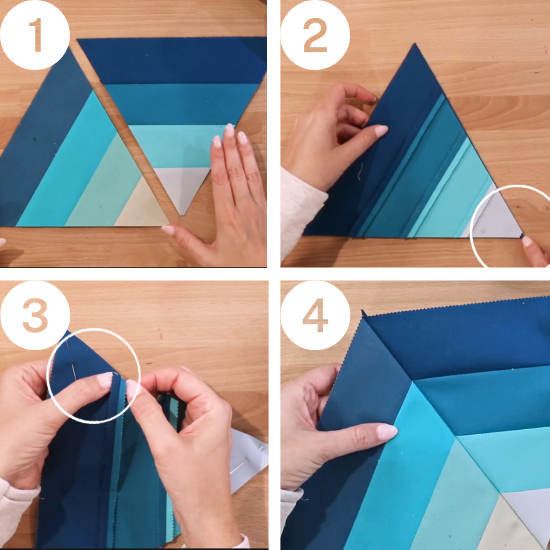
The turn joins require matching the inside seams first, and then the points. Extra fabric can be worked in near the points.
- Choose your pair.
- Lay right sides together. You may be short at a point or two, but that’s okay.
- Match the seams and place a pin to hold it.
- Sew your seam and check the right side for accuracy before pressing. NOTE: I rarely rip and fix seams unless it’s reeeeally obvious. The overall design is what others see, not the mismatch!
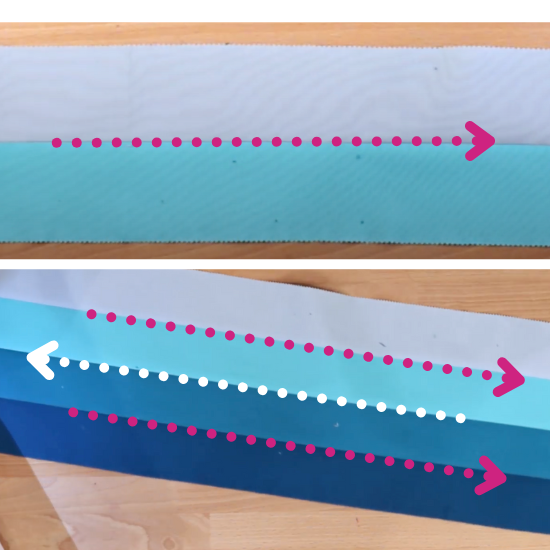
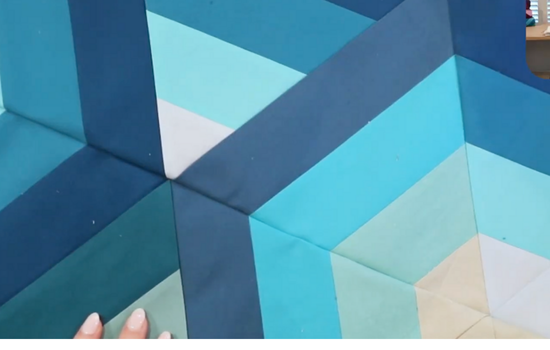
6. ASSEMBLING STRIPE PAIRS
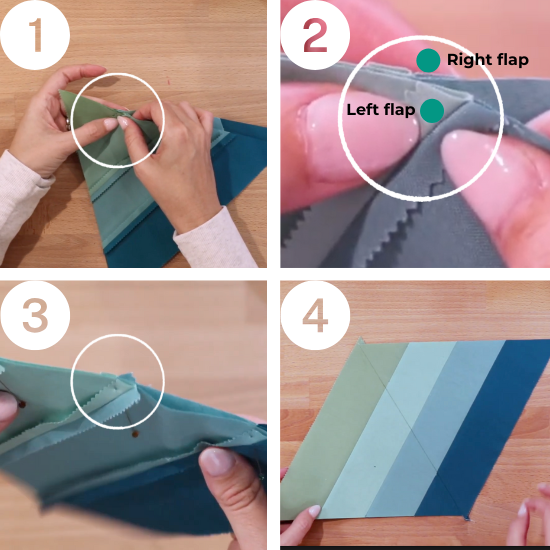
Ok, now to sew the more challenging stripe pairs.
The stripes become straight lines, unlike the turn joins.
- Lay right sides together
- Match the right flap of the seam allowance to the left flap on the opposite side. This connects the seams at the quarter inch seam allowance mark.
- Pin in place at each seam along the joining edge.
- Check your seam on the right side before pressing.
7. FiNAL ROW ASSEMBLY
First, check your seam allowances to see where they may be a little short. You can make slight adjustments (fudging) to get straight seams before joining into rows. Or not!

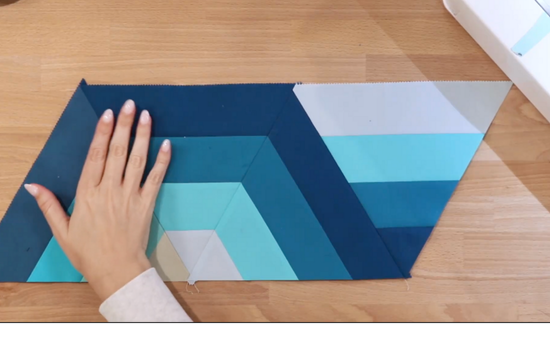
Match the rows together.
Line up the rows and pin together where the seams meet.

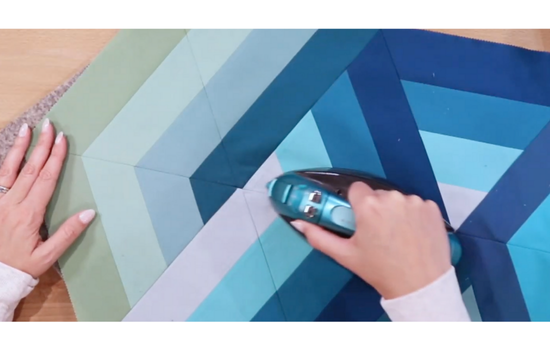
Sew the rows together from top to bottom. When you’re finished, turn the quilt to the right side and check the seams for alignment.
Press to set the seams. Next, I finger press the seams open while ironing. Then give it a final press on the right side with Best Press starch.
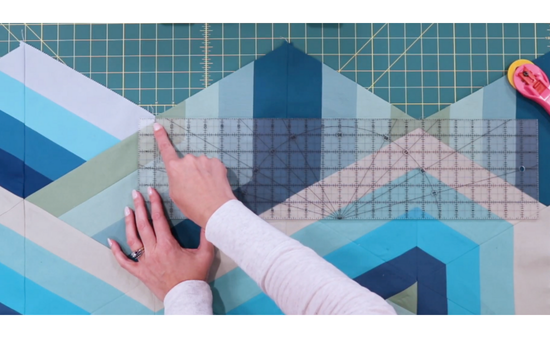
You can leave the points on the quilt or square up the top. I measure point to point with a ruler and match my horizontal line with the quilting mat line.
Quilting with straight line stitching is my favorite way to finish a modern triangle quilt. I used a 40 weight thread in teal so the stitching would show more.
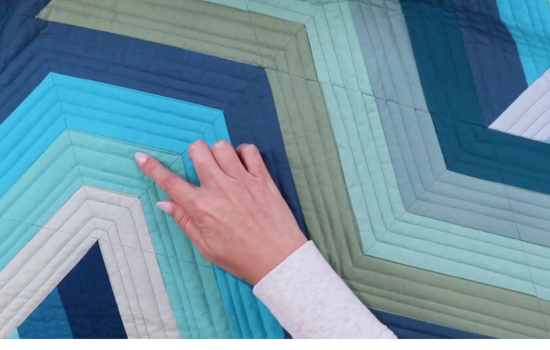
Ta da! My quilt is done!

Ready to make an amazing jelly roll quilt? Pathways is a fun way to show your creative side. From choosing the color groups to laying out the triangles, put your unique twist on this modern jelly roll twist.
Frequently Asked Questions
What is a jelly roll race quilt pattern?
This pattern uses fabric strips sewn end to end. This method is a fast patchwork shortcut because the strips are already cut for you. It’s a quick way to make a new quilt that looks fun and different every time.
Free Quilt Patterns from Jelly Rolls
More Resources from Bryan House Quilts
Quilting Resources – Pam and Nicky Lintott
Pam and Nicky Lintott have written many books with jelly roll quilt patterns. Visit Nicky and Pam Lintott’s website or see all their books about fun jelly roll patterns and fabric line combinations.

Love this quilt. It has such a modern look. Thanks for the tutorial.