
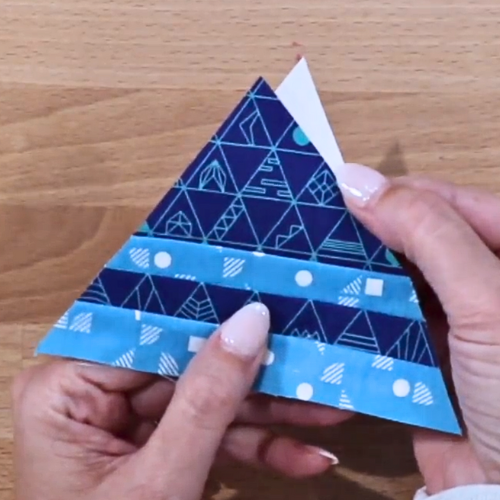
Fabric cutting templates are made for getting the best results with foundation paper piecing. Cutting the right shapes on the correct side of the fabric and cover the ENTIRE foundation makes sewing a lot more fun!
Also, I’m answering your burning questions about how to place your template on the fabric (face up, face down?) and how many layers to cut at one time. See my pro tips in the video below or follow along on the blog post.
Key Highlights
- Cutting templates save time and frustration
- Printable templates must be printed to scale using a “100%” or “Actual Size” setting.
- Create your own custom templates when a foundation piecing pattern doesn’t include them.
- Learn two effective methods for using fabric cutting templates: single-piece cutting and multiple-piece cutting with layering.
- How to position the templates on the grainline and correct side of the fabric for cutting.
Quilting Using Foundation Piecing with Fabric Cutting Templates
If you’ve struggled with having enough fabric to cover the paper foundations, I will show you how to get accurate pieces before you start sewing. You know, BEFORE you discover your fabric won’t cover the foundation paper. THAT dreaded gap between the fabric and the foundation. Save time and frustration with my rule of thumb tips from years of teaching foundation piecing.
In this blog post, I’m going to show you how to cut your fabric before you start foundation piecing using cutting templates. And if your foundation pattern doesn’t include cutting templates, I’ll show you how to easily make your own for ANY foundation pattern.
Read on or watch the video below for the step-by-step guide.
Printing and Preparing Foundations Before Sewing
Cutting templates are important for cutting accurate shapes for piecing. All of my patterns (okay, MOST) of my patterns include cutting templates. I personally use them and my Make Modern Triangles Club members learn how to use them for my block of the month quilts.
Tools: Ruler, Scissors, Cutter and Marker
When cutting templates are included with a foundation piecing quilt pattern, all you have to do is:
- Print on copy paper
- Check the 1’’ test box to make sure the scale matches the template and the printed copy of the template.
- Cut it out
Make your own cutting templates from the quilt block foundations
You can make your own if your quilt pattern didn’t come with them.
- Print an extra copy of each foundation or trace the foundation block on copy paper using a ruler.
- Vinyl quilter’s template material also works and is more durable.
- Measure the 1-inch test box with a ruler – you may need to tweak the printer settings to get the correct scale.
- Cut the foundation sections apart using paper scissors.
- Make sure to label your custom templates clearly with a permanent marker. This will help avoid confusion and allow you to reuse them later. Write the name, number and/or letters on the sections.
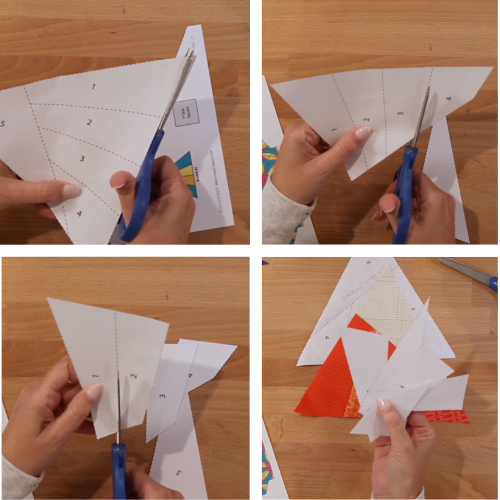
These DO NOT have seam allowances.
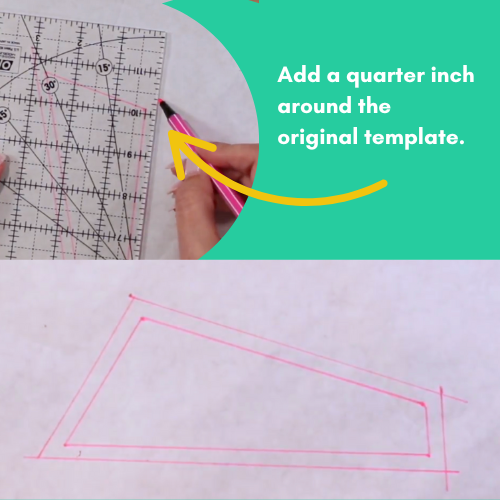
Adding seam allowances
If you’d rather have your cutting template with the seam allowances included, trace each section then add a quarter inch line around the traced edge. Then cut out the newly adjusted pieces.
PRO TIP: Make your cutting templates from the fabric.
How to use fabric cutting templates
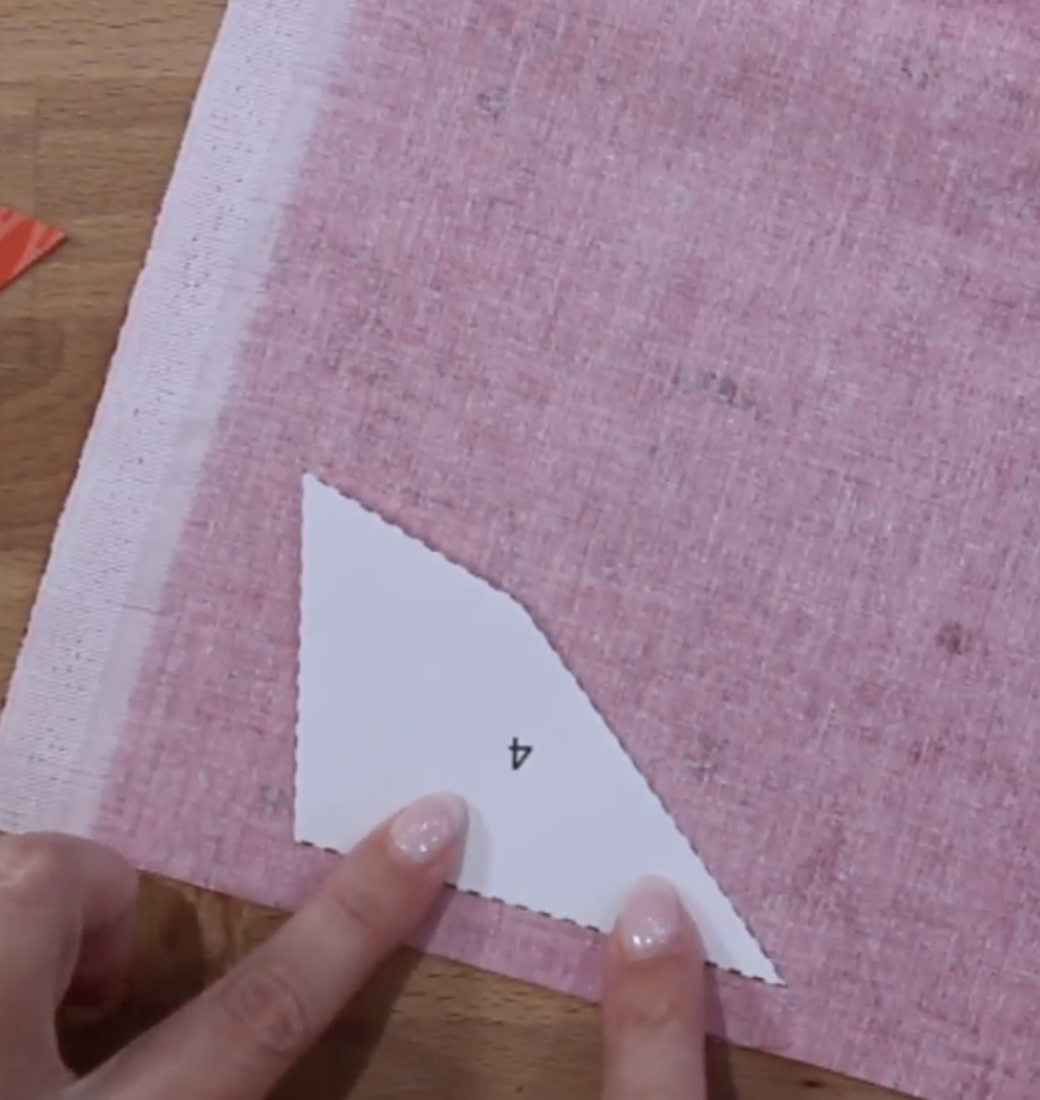
Step 1: Positioning Your Template Correctly
Place one edge of the template on the fabric along the grain to reduce stretching. If your template has a direction, keep it right-side up unless the pattern says to do otherwise. By aligning properly and cutting smartly, your final quilt will have neat and seamless designs.
Step 2: Cutting the Fabric
Depending on whether you need multiple pieces or just one, you will need to set up your fabric accordingly before cutting.
Two Methods for Using Fabric Cutting Templates with Foundation Piecing
Cutting fabric using templates has two main methods:
- Cutting multiple fabric pieces at the same time.
- Cutting just one layer.
For quilters who work with the same patterns, doubling up fabric can speed up the cutting process without losing accuracy. However, sometimes you will need to cut individual pieces.
PRO TIP: Cutting individual pieces lets you pay attention to detailed designs or prints, making sure they stay in the right direction. Let’s look closer at how these methods work!
Multiple pieces of fabric
Cutting multiple fabric pieces at the same time is a smart way to handle quilt patterns that repeat and mirrored sections. Here’s how to do it:
- Press out wrinkles and folds.
- Double up a piece of fabric: For mirrored sections, place all pieces with the markings right side up.
- Use yardage or fat quarter: I like to have at least one edge on the grainline and scraps aren’t always accurate for that.
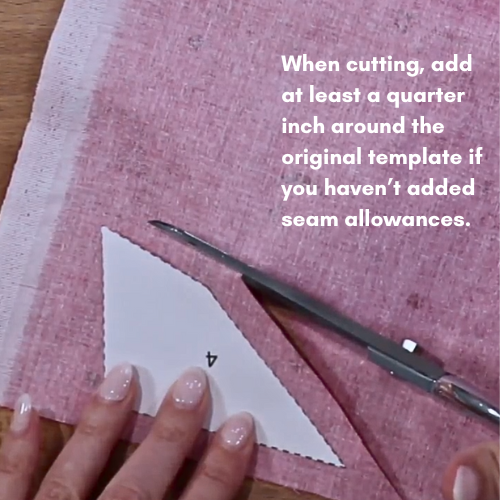
PRO TIP: Capture the essence of the shape. I know, this sounds cheesy. It’s tempting to cut rectangles (which wastes fabric) however, if you cut the approximate shape with a little extra past the quarter inch seam allowance, you will quickly match the pieces to the right foundation section when sewing. This way if you’ve got any pieces that have reverse (mirrored) pieces, you’ll be covered.
One piece of fabric
When cutting a single piece of fabric, place the wrong side of the template (waxy side) against the wrong side of the fabric.
Using tools like a rotary cutter, ruler, and cutting mat can help you be more accurate. I like to use scissors for one piece.
Again, align one edge of the template with the grainline whenever possible. For printed fabrics, pay attention to the direction to avoid upside-down images.
Cut the essence of the shape, which helps to:
- Avoid gaps – you’ll cover the entire foundation with the fabric when matching fabric shapes to the foundation paper shape.
- Saves fabric – when you cut a wedge versus a rectangle, you will conserve fabric.
This method can save you time when quilting big projects, especially quilts that need many identical parts. By sticking to the template’s measurements, you can keep all pieces uniform.
Key Points
Quilters understand that using the right tools and techniques leads to great results.
- Make sure your templates are set up correctly. Check the scale and match the grainline whenever possible.
- Check the directional design on the fabric when placing templates BEFORE cutting.
- Cut the essence of the shape. This shape-conserving method improves accuracy, reduces mistakes and ripping sessions! Your quilt pieces will fit together nicely when you sew.
- Check twice and cut carefully. Use rotary cutters and acrylic template sheets if reusing the templates and have a large number of pieces. With repeated use, paper and cardboard edges are sliced away, especially if they have seam allowance width included, and become less accurate.
Follow these steps to improve every foundation piecing project you make!
Learning how to cut fabric for foundation piecing with templates can improve your quilting projects. When you know how to use cutting templates well, you can work with more precision and efficiency. It is important to cut the essence of the shapes and place your templates correctly for the best results. With these skills, you’ll create beautiful quilt pieces that show off your creativity.
Frequently Asked Questions
What type of fabric do quilters prefer for foundation piecing?
For foundation piecing, choose good quality quilting cotton made for sewing quilts and embroidery. It’s best to use fabrics that do not stretch. Many stores now provide a free return option. This lets you try out different fabrics without any risk.
MORE QUILTING RESOURCES
