• About
    • Privacy Policy
  • Teaching
    • Member/Student Login
    • Online Programs
  • Shop
  • Member/Student Login
  • Blog
    • Free Quilt Patterns – Scrappy Whirligig Quilt

Bryan House Quilts

How To Make Jelly Roll Strips

Palette to Fabric· Planning a Quilt· Quilting Tools and Notions

6 Jun

Make jelly roll strips from your own fabrics using a winning combination of prints, blenders and solids. Pull it all together with color and you’re ready to sew a quilt anytime.

Make jelly roll strips from your own yardage

Key Highlights

  • Jelly rolls are popular pre-cut fabric bundles for quilting. pre-cut strips of fabric, measuring 2.5 inches wide and 42 inches long.
  • They’re ideal for quilters looking for convenience or a sampling of fabrics from a collection.
  • Making jelly roll strips at home saves money and uses the fabric you have.
  • Essential tools include a rotary cutter, cutting mat, and ruler.
  • Homemade jelly roll strips customize your quilt.

Why Make a Quilt with a Jelly Roll?

Jelly roll strip bundles are appealing to quilters for many reasons. They save time, are easy to store, offer a wide variety of fabrics from a collection, and work with hundreds of patterns designed for jelly roll strips.

Pre-cut bundles are great to have on a hand for convenience but they can be pricey. I buy them occasionally but I prefer to customize my color palette and use fabrics from my stash. In this blog post, learn how to make your own jelly roll strips into bundles with simple tools and choose fabrics for a curated bundle. By using fabrics you already love, you’re an A+ stash manager. You could even make the bundles ahead of time.

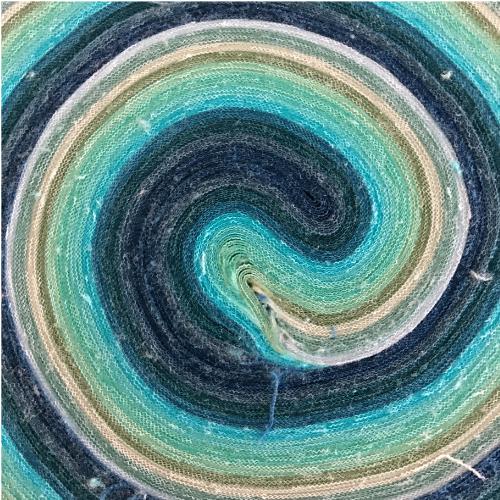
Jelly roll

What is a jelly roll for quilting?

A jelly roll for quilting is a collection of 40 2.5-inch wide strips, each measuring 2.5 inches wide and cut across the width of the fabric bolt, usually 42 inches long. These pre-cut strips are curated from a single fabric line, guaranteeing matching patterns and color schemes.

Normally manufactured with pinked edges to prevent fraying, they come bundled with a variety from a collection and few duplicates. Tightly wound into a roll, they are also easy to store.

Jelly Rolls Are Sewing Time-Savers

jelly roll bundles

Jelly rolls are pretty, colorful bundles of time-saving goodness. Ditch the cutting and choosing, mixing and matching fabrics. The whole process is simplified and sped up at the same time. Quilters grab the bundles and dive straight into quilting. Plus, patterns designed for jelly rolls guarantee the right amount of fabric on hand for a design.

Yes, they are great, but you can also save time and dollars if you make your own jelly roll strips.
Free pattern and class save your spot today

4 Reasons to Make Jelly Roll Strips from Your Fabrics
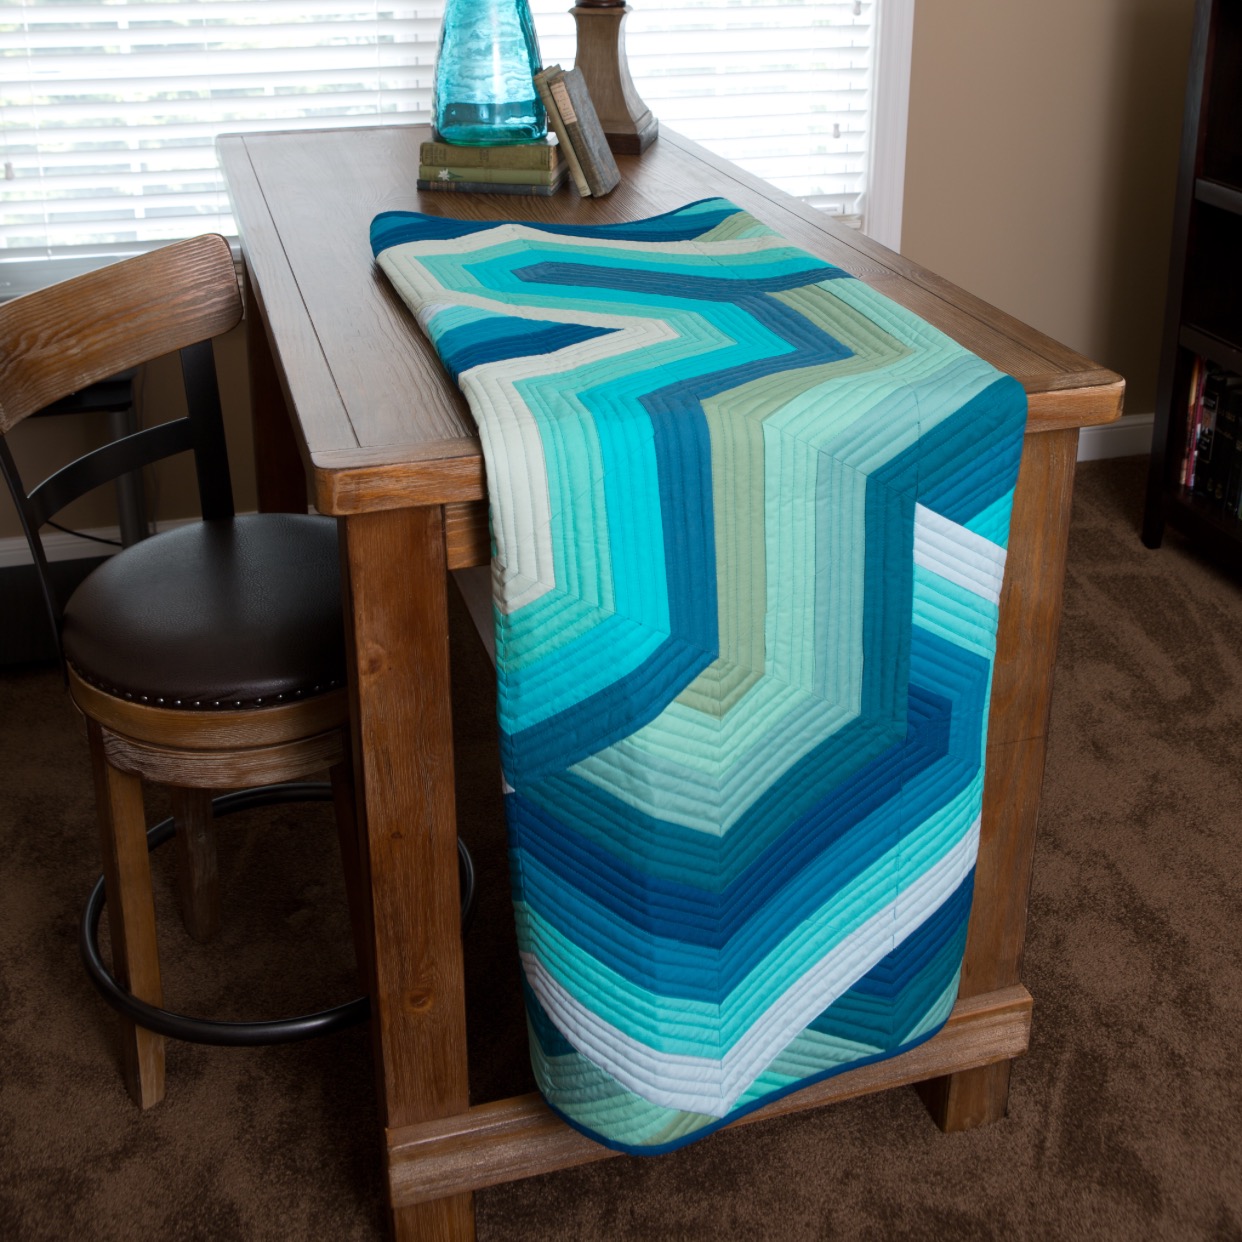
Pathways Jelly Roll Quilt by Bryan House Quilts

Making jelly roll strips from your own fabrics is worthwhile. Here are four “why’s” to consider:

  • Utilize your fabric scraps and leftovers: Use leftover yardage, strips and scraps from previous projects to create jelly roll strips. This reduces waste and lets you repurpose every fabric piece creatively.
  • Tame and use your stash: When I have too much fabric, I can’t remember what I have! And then I don’t use it like I could. Whittle away your yardage by turning them into bundles you’ll love and use.
  • Save money: Pre-cut jelly rolls can be pricey. By cutting your own fabric strips, you turn your sewing stash into a budget-friendly resource for quilting.
  • Customize fabric choices: Homemade strips allow you to personalize your quilt with unique colors, patterns, or themes. It’s ideal for quilters who want to create one-of-a-kind designs.

Choosing the Right Fabrics

A ready-to-sew jelly roll is a combination of fabrics that include different types of prints and solids by design, blenders and background fabrics. The other big player, of course, is color. We all know color is a big deal!
In Fabric 101: Types of Prints by Color, I show how prints are used in terms of color complexity (also known as color harmonies and color schemes): monotone fabrics, analogous fabrics, and multicolored fabrics as well as hue and saturation.

All of the above comes down to creating contrast and saturation in colors and prints from lightest to darkest. Honing your skills in creating contrast with both color and prints will help you make dynamic quilts and create your own jelly roll strip bundles.
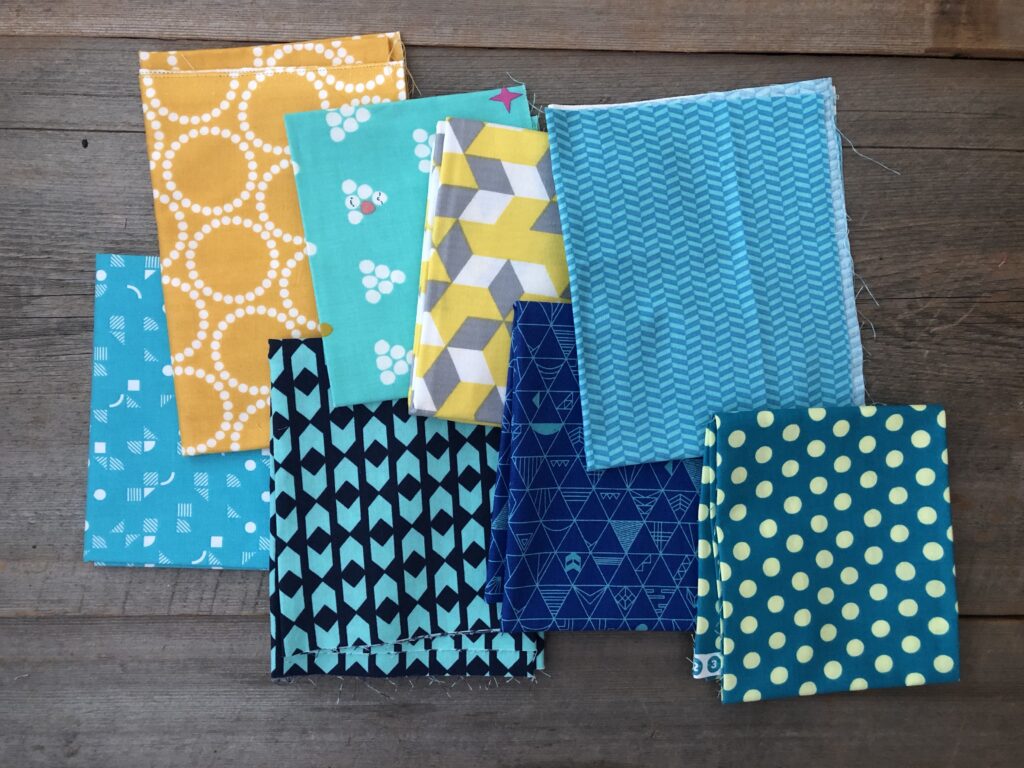
Build your bundle with:

  • at least 3 colors including their tints, tones and shades.
  • a minimum of five values of fabric, from light to dark.
  • smaller prints that read as solids, solids and blenders,
  • large-scale motifs
  • 50% or more of the fabrics are prints, unless its a solid color bundles

Select your color palette first. Next, you pull lots of those colors from your stash, more than you will use. Separate the fabrics into piles by value – light, medium and dark piles.

Check to make sure you have the right amount and types of prints by subdividing the piles in to low-volume, small and large prints. Keep editing and playing with selections until the selection is balanced with all of the colors and elements. Permission granted to roll around in fabric all afternoon – whatever it takes, right?

How to Make Jelly Roll Strips

To make your own strips, you need a few tools to help you make precise cuts.

First, a rotary cutter is a must-have; a sharp blade makes clean, straight cuts every time. I like using an ergonomic cutter. Pair this with a large 18 x 24 inch cutting mat to provide a stable surface and gridlines for measurements. Your ruler needs to be at least 6 inches wide and 24 inches long in order to cut a long strip.

Standard jelly roll strips are cut on the crosswise grain (perpendicular to the fold and straight grain).
Cutting


Step-by-Step Guide to Making Jelly Roll Strips

Consider the width of the fabrics you’ve selected; a standard jelly roll strips are cut across the full width of the fabric (around 42 inches). If using leftover yardage, measure to make sure it’s long enough.

Creating jelly roll strips involves a simple yet precise process. Begin by preparing your fabric; starching and pressing it flat on an ironing board ensures clean cuts and accurate strips.

Step 1: Preparing Your Fabric

Proper fabric preparation is key to achieving precise jelly roll strips. Begin by starching your fabric to add firmness, remove wrinkles and folds, and reduce fraying. Steam can help eliminate stubborn creases.

Next, align the selvage edges of the fabric—the woven edge that prevents unraveling. Make sure that the fabric hangs straight without ripples when folded on the manufacturer’s fold line.

Step 2: Measuring and Cutting Strips

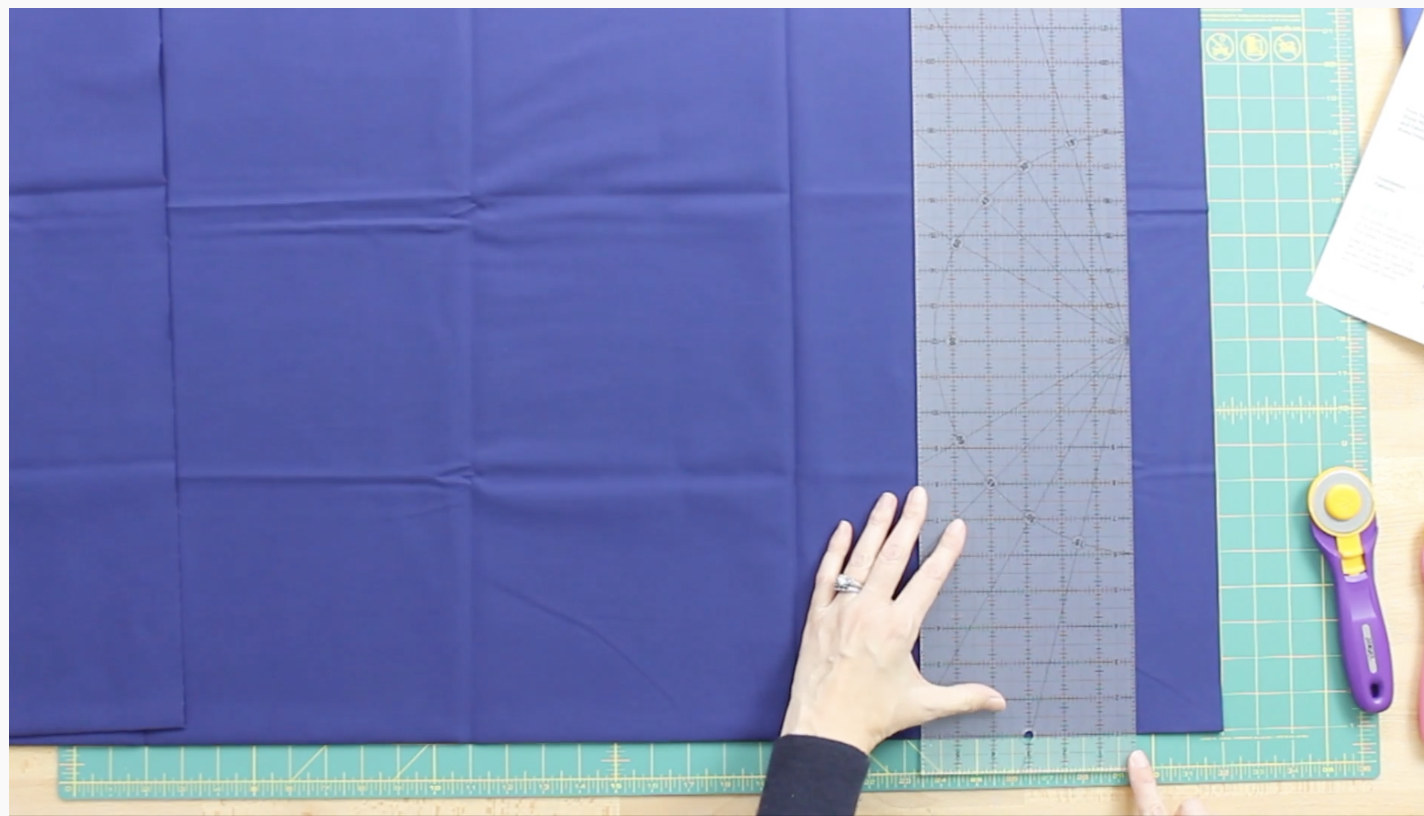
First, I squared the cut edges, which usually aren’t straight. The folded edge and cut edge should form a 90-degree angle.

  1. Lay the folded fabric edge closest to you along the 1-inch grid line on the cutting mat.
  2. Using a rotary cutter, trim the edges to eliminate uneven ends using the cutter and ruler.
  3. Lay the ruler on the fabric and measure out 2.5 inches from the cut edge.
  4. Hold the ruler steady and cut away toward the top edge.
  5. After each cut, slide the ruler 2.5 inches over for the next cut.

You’re almost done! Stack your strips into a neat pile, ready for sewing.

Pathways Jelly Roll Quilt

Try my super-friendly jelly roll design – Pathways. I’ll release it in the next few weeks so watch your email. just In time for your new “make jelly roll strips” skills?

Learning how to make jelly roll strips is a fantastic way to use your fabric stash and curate fabrics you already love. Now that you know the benefits of using precuts, you can easily transform your fabrics into perfectly sized strips. Remember, the key to a successful jelly roll is in the preparation and measuring, so take your time with those steps. Whether you’re a seasoned quilter or just starting out, making jelly roll strips opens up creative possibilities. So start cutting!

MORE QUILTING RESOURCES

  • Press Flatter Quilt Seams Like a Pro
  • Paper Piecing Using Freezer Paper: 12 Expert Tips
  • How to Choose Types of Batting for Quilt Projects
  • Applique Quilt Tutorial for Beginners

Free pattern and class save your spot today
Previous Post: « Making Progress as We Please on BOM Quilts
Next Post: Sewing Strips Together: 5 Expert Tips for Success »

Reader Interactions

Comments

  1. Joan Lichtenstein says

    June 7, 2025 at 4:16 pm

    How the heck do I roll up my home made jelly roll without it looking like it was rolled by 1st graders?

    • rebeccabryan says

      June 9, 2025 at 5:05 pm

      Ha! That’s a great question. Instead of a perfectly rolled jelly roll, I might go for an “artfully messy” roll up. I’m thinking “messy bun” versus a perfect “ballerina bun”.

      I love this question, and maybe someone out there has a better answer? But I hope this helps!?

Primary Sidebar

New 2026 Block of the Month!

Graphic of Alchemy Quilt

Join the 2026 Block of the Month Program

Get my Modern Triangles Quilt Book

Get my Modern Rainbow Quilts Book

Image shows cover of the book "Modern Rainbow Quilts"

Make the Solstice Quilt!

Solstice Block of the Month by Bryan House Quilts

Get Your Invite!

Make Modern Triangles Logo

Make the Sparkler Quilt!

Image Shows Sparkler Quilt Top by Rebecca Bryan

Make the Echo (Echo!) Quilt

Echo BOM now open to join

Make the Wildflower Quilt!

Wildflower Block of the Month by Bryan House Quilts

Make the Stargazer Quilt!

Anne's Stargazer BOM

Make the Rainbow Triangles Quilt!

Rainbow Triangle BOM, modern triangle quilt, Rebecca Bryan

About

Hey there! I’m Rebecca, an author and teacher and freezer paper piecing evangelist. I’m also the founder of the Make Modern Triangles Quilt Club.

Disclosure

Just so you know, my site includes affiliate links from which I (it’s me! Rebecca!) receive payment or compensation. Something to consider as you peruse my website. Thanks!

Latest on Instagram

Experienced quilters, share what I missed in the c Experienced quilters, share what I missed in the comments! 👇

Comment ‘FREE’ if you’re a beginner quilter and want to take my free class, give quilting a try, learn a new technique, or simply improve your skills! 

#modernquilting #paperpiecing #foundationpaperpiecing #quiltingtechnique #quiltteacher
I don’t know about you, but for me, quilting has n I don’t know about you, but for me, quilting has never been about just making quilts.

It’s about slow mornings, quiet time to myself, creating something with my hands, spending time doing something textile, not scrolling on the internet, spending more time creating and less time consuming...

And I think that’s exactly why so many people are being drawn to quilting today.

You want to get offline, learn something new, and have more quiet time that is just for you and your imagination. ✨

I think we could ALL use more of that in our lives, and if you want to give it a try, I’ve got a free class you can sign up for by commenting ‘FREE’ below. 💕

#modernquilting #paperpiecing #foundationpaperpiecing #quiltingtechnique #quiltteacher
I’ve taught thousands of quilters over the last de I’ve taught thousands of quilters over the last decade, and I’ve been quilting myself for over 15 years, and this is what I’ve learned. ⬇️

What’s stopping you from quilting isn’t that you don’t want to do it. It’s because you have already convinced yourself of something before even giving it a fair shot. 

You’re probably thinking something like...

👉 “I don’t think I’m creative enough.”
👉 “It looks too complicated.”
👉 “I wouldn’t know where to start.”
👉 “I don’t have enough time.”
👉 “What if I spend all that money and I’m terrible at it?”
👉 “I’ve never been good at sewing.”

If any of those thoughts have crossed your mind, can I let you in on a little secret?

Almost every quilter I know started with one of those ideas in their head, including me. 🤫

The beautiful quilts you see today didn’t begin as beautiful quilts, they began as just an idea and a willingness to try.

Nobody sits down at a sewing machine and automatically knows how to quilt.

You learn by just doing it, sewing stitch by stitch, and every time you enter your sewing room, it gets a little bit easier, and you start to enjoy it more and more. 

If something has been holding you back from quilting, I invite you to take my free class where you have nothing to lose and so much to gain. 

Comment ‘FREE’ to sign up. 💕

#modernquilting #quiltingtechnique #quiltpattern #quiltdesign #quiltersofig
Comment ‘FREEZER’ if you want to take my free clas Comment ‘FREEZER’ if you want to take my free class and learn this amazing technique! 👇

Freezer paper piecing tip number eight is to press every seam right after sewing it. 
 
Don’t wait until later or until all of your blocks are done. Press those seams right away!

It might feel like it slows you down in the moment, but it actually saves you time (and frustration) later.

When you press as you go, your seams stay crisp, and your pieces lay flat, which makes lining everything up so much easier. You’re not fighting bulky seams or trying to “fix” things at the end. 🙌

Plus, pressing helps set the stitches and keeps your fabric from shifting as you build your block.

Think of it as part of the sewing process, not an extra step.

Your blocks will be flatter, sharper, and way more accurate… and your future self will thank you!

Comment ‘FREEZER’ for my free class! 💕

#modernquilting #paperpiecing #foundationpaperpiecing #quiltingtechnique #quiltteacher
MAKE A TEST BLOCK!!! Please, I am begging you. 😅 MAKE A TEST BLOCK!!! Please, I am begging you. 😅

You’d think after 15 years of quilting I’d be able to skip it...

And every once in a while I convince myself that I don’t need a test block because I’ve made this block hundreds of times or my freezer paper piecing skills are good enough to skip it... 

And do you know what happens every time I convince myself that I don’t need a test block? 🙃

I almost always regret it and end up having a nice long date with Jack The Seam Ripper as a consequence. 

Learn from my mistakes so you don’t have to learn from your own and make the test block EVERY TIME!!!

Are you making test blocks? Tell me in the comments! ⤵️

#modernquilting #paperpiecing #foundationpaperpiecing #quiltingtechnique #quiltteacher
I can’t believe I’m saying this, but we’re nearing I can’t believe I’m saying this, but we’re nearing the final months of Dutch Summer! 🥹

Finished Dutch Summer Month 6 blocks are showing up in the Make Modern Triangles Club every day. We’re past the halfway point, and we’re really starting to stack up the blocks! Now that we’ve got a bunch of stacks of blocks, it’s such a fun time to play with arranging your blocks and see what your creativity comes up with. ✨

Once you get beyond the halfway point, you start the countdown to the BIG finish! 🎉

We’re feeling excited, motivated, and accomplished. We are covering some ground, folks! Swipe to see each month’s block so far, and drop a ‘DUTCH’ in the comments if you want to make your own! 💕

#quiltteacher #quiltingtutorial #quiltingtips #modernquilting #quiltcommunity
Follow on Instagram

Browse by Category

Archives

  • Instagram
  • Facebook
  • Pinterest
  • email
Experienced quilters, share what I missed in the c Experienced quilters, share what I missed in the comments! 👇

Comment ‘FREE’ if you’re a beginner quilter and want to take my free class, give quilting a try, learn a new technique, or simply improve your skills! 

#modernquilting #paperpiecing #foundationpaperpiecing #quiltingtechnique #quiltteacher
I don’t know about you, but for me, quilting has n I don’t know about you, but for me, quilting has never been about just making quilts.

It’s about slow mornings, quiet time to myself, creating something with my hands, spending time doing something textile, not scrolling on the internet, spending more time creating and less time consuming...

And I think that’s exactly why so many people are being drawn to quilting today.

You want to get offline, learn something new, and have more quiet time that is just for you and your imagination. ✨

I think we could ALL use more of that in our lives, and if you want to give it a try, I’ve got a free class you can sign up for by commenting ‘FREE’ below. 💕

#modernquilting #paperpiecing #foundationpaperpiecing #quiltingtechnique #quiltteacher
I’ve taught thousands of quilters over the last de I’ve taught thousands of quilters over the last decade, and I’ve been quilting myself for over 15 years, and this is what I’ve learned. ⬇️

What’s stopping you from quilting isn’t that you don’t want to do it. It’s because you have already convinced yourself of something before even giving it a fair shot. 

You’re probably thinking something like...

👉 “I don’t think I’m creative enough.”
👉 “It looks too complicated.”
👉 “I wouldn’t know where to start.”
👉 “I don’t have enough time.”
👉 “What if I spend all that money and I’m terrible at it?”
👉 “I’ve never been good at sewing.”

If any of those thoughts have crossed your mind, can I let you in on a little secret?

Almost every quilter I know started with one of those ideas in their head, including me. 🤫

The beautiful quilts you see today didn’t begin as beautiful quilts, they began as just an idea and a willingness to try.

Nobody sits down at a sewing machine and automatically knows how to quilt.

You learn by just doing it, sewing stitch by stitch, and every time you enter your sewing room, it gets a little bit easier, and you start to enjoy it more and more. 

If something has been holding you back from quilting, I invite you to take my free class where you have nothing to lose and so much to gain. 

Comment ‘FREE’ to sign up. 💕

#modernquilting #quiltingtechnique #quiltpattern #quiltdesign #quiltersofig
Comment ‘FREEZER’ if you want to take my free clas Comment ‘FREEZER’ if you want to take my free class and learn this amazing technique! 👇

Freezer paper piecing tip number eight is to press every seam right after sewing it. 
 
Don’t wait until later or until all of your blocks are done. Press those seams right away!

It might feel like it slows you down in the moment, but it actually saves you time (and frustration) later.

When you press as you go, your seams stay crisp, and your pieces lay flat, which makes lining everything up so much easier. You’re not fighting bulky seams or trying to “fix” things at the end. 🙌

Plus, pressing helps set the stitches and keeps your fabric from shifting as you build your block.

Think of it as part of the sewing process, not an extra step.

Your blocks will be flatter, sharper, and way more accurate… and your future self will thank you!

Comment ‘FREEZER’ for my free class! 💕

#modernquilting #paperpiecing #foundationpaperpiecing #quiltingtechnique #quiltteacher
Follow on Instagram
© 2026 Bryan House Quilts