Updates to this Tutorial
Hey there! I’ve updated this with new content and new videos. The original tutorial below.
Explore my entire series of selvage quilt tutorials:
- How to cut and store fabric selvages
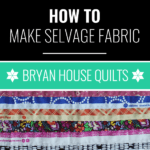
- How to make Selvage Fabric
- The Criss Cross Selvage Block Tutorial
- How to make Selvage Binding
- 25 Creative Ways to Bind your Quilt
[clear-line]
I have a finish and a tutorial to share with you today!
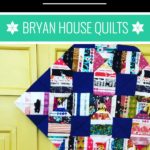
In March, the Houston Modern Quilt Guild arranged a scrap swap. I was lucky enough to draw Tammy, who had a lovely bundle of Anna Maria Horner strips.
Here’s what I made for her:
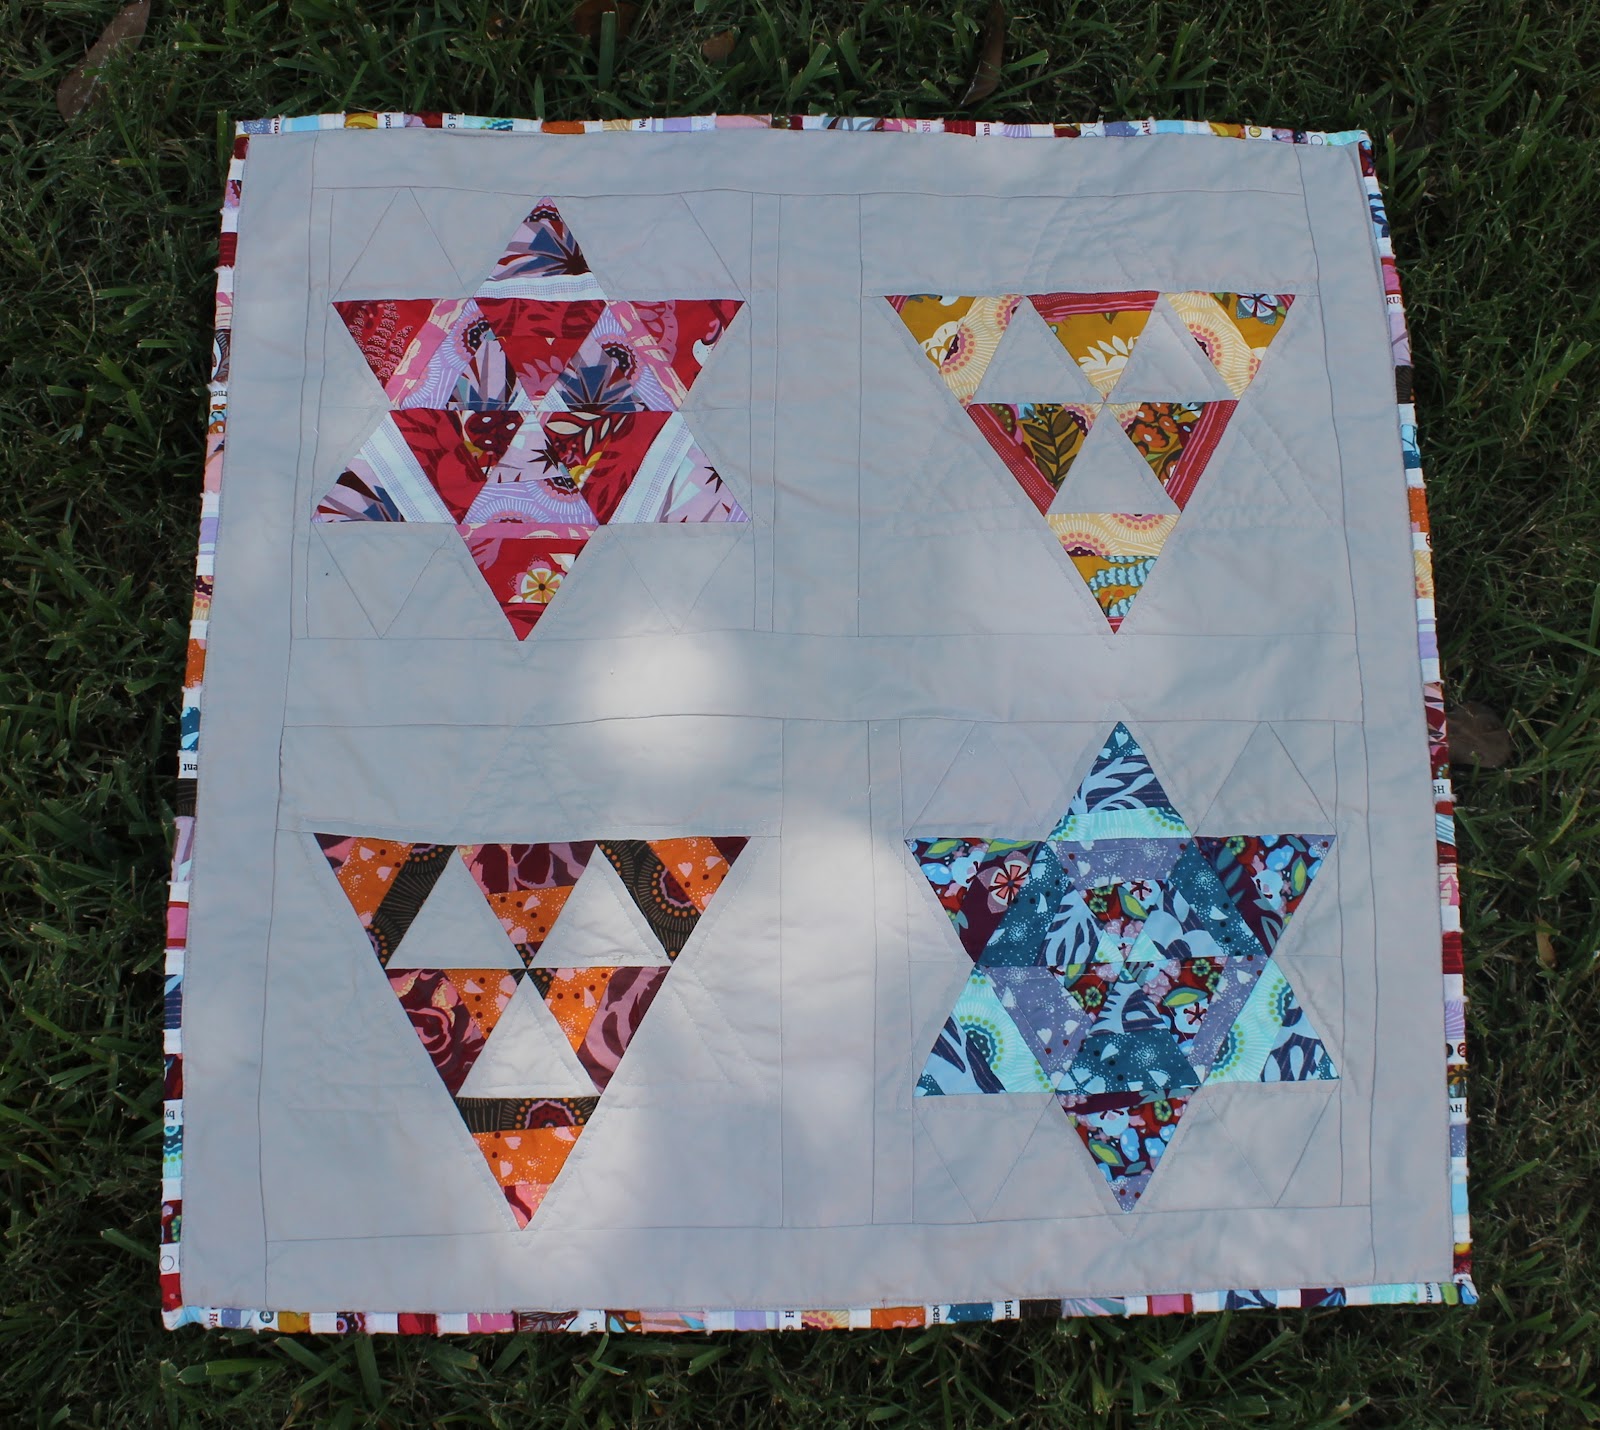
The strips Tammy gave to me all had the selvedges, so I was left to wonder: “Does she want me to use the selvedges?”
I hope she did because I did! 🙂
The binding on her quilt is made from all the selvedges, which I had cut off and saved.
Today, I’m sharing how I made the binding using the selvedges.
Note: this tutorial assumes a knowledge of the steps involved in binding a quilt. (Here’s an in-depth tutorial.) If you are familiar with binding a quilt then using the selvedges to make the binding strip should be pretty straight forward. So, I will only point out what is different than your basic binding.
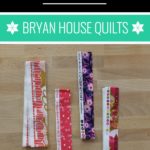
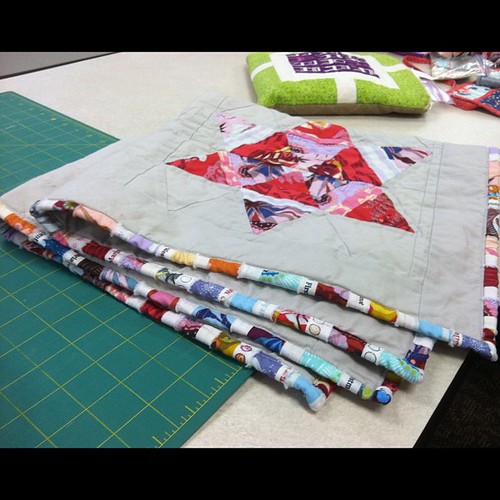
First, sew the selvedges into one piece of fabric.

This creates your binding yardage. As opposed to sewing the selvedge pieces right sides together, I tucked each selvedge 1/4″ under the previous selvedge, see Jacquie’s Spider Web Block Tutorial for a more thorough explanation.
Next, cut your strips from your yardage.

Then sew your strips together using the same tuck under technique from above.

Now, iron your binding in half and admire your work.
It’s like a fabric lolly pop, ya’ll!
 |
| mmmmmm! |
Now, sew the binding on as you normally would.

But when you get to the part where you sew your binding strip ends together, instead of sewing right sides together, use the tuck under technique again.
 |
| See? Tucked under. |
Hand or machine stitch your binding to finish as you normally would.
Then you are done!
I think it creates a beautiful effect and it is pretty easy too. I can’t wait to use this technique again.
What do you think? Questions will be answered in the comments.
Related Tutorials
Explore my entire series of selvage quilt tutorials:

This is great. I had never seen a selvege binding before seeing yours. I love it.
I'll feel bad to ever cut away selveges again!!!
I have to try this soon. Thanks for the tutorial.
Gorgeous! What a clever idea, Becca!
Very awesome! You are a rock star!
Oh awesome.. like! Its such a pretty quilt too!
Wow, what a great idea! It looks especially nice on this quilt with its white background. Good thinking!
You are on to something great! I think a bunch of folks will grab this idea, me included! Thanks!
Love this idea! Makes for a fun binding!
una idea estupenda, gracias por compartirla!
What a wonderful idea. I am going to have to start saving those selvage edges. How much do you keep of the selvage? It looks like about one and half inches.
Yes, I don't measure but I usually leave quite a bit of fabric on the selvage. I'd say at least an inch and a half.
Thank you!
Now this is just the ticket for not making me feel so guilty for tossing all these in the trash:https://www.facebook.com/pages/Aurora-Colorado-Emergency-Responder-Quilts/401592493230782
Thanks so much for sharing your great idea. I wouldn't have thought of it myself.
I like my binding on the bias. This would be cool with selvages also!
Gosh love this idea must try it, many thanks!
Oh my god. I love. Thanks so much for a great tutorial!
these were all pre-washed ????? because some bindings do strange contortions when washed
You know I have heard selvages perform differently in the wash than the rest of the yardage.
This yardage was not prewashed, but I did wash the quilt after finishing it and it and the selvage binding came out beautifully and cuddly.
The bottom picture shows the quilt after washing.
I like this idea. Thanks for sharing. I love to save my selvages and now I have another use for them. I recently made Scrappy pot holders using scraps and selveges. Check me out at: http://www.quiltingandsewingarts.com
Fantastic idea. I have a lot of selvedges cut one inch. I think that would make a great binding for my next scrappy quilt.
This is a great idea and and a very good tute 🙂
It makes a very pretty binding. Thanks for the tutorial.
Hugs
This is very very pretty, but I am wondering if it is rather bulky to work with? I've made a few selvage quilts, and there is some layering. How was it?
Hi Susan, thanks for commenting. I didn't find it to be overly bulky. It can be a bit bulky, but it's not unmanageable. And maybe that was due to how wide one cuts the selvedges. As you can see I prefer to cut my selvages fairly wide.
The only tricky part is the mitered corners; but it's only tricky if the seam hits just right.
Another great option for using selvages. A very pretty finish. 🙂
This is amazing!!! Thank you so much for this wonderful idea I love it!!! Going to make some selvage binding this week!
It’s a really fun project! Enjoy!