So, I’m no professional photographer and for years I let a bad grade in a high school photography class intimidate me and keep me from enjoying the art of taking pictures. But within the past couple of years, I made a committment to improve my photo taking skill set. I’m glad I got over my fears and happy to share a bit of what I’ve learned with you and with Beth’s Quilt Photography Workshop Link Up.
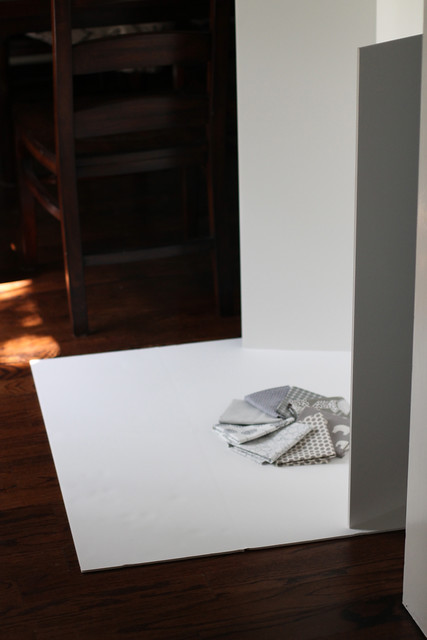
This month, Beth’s call was to blog about how we photograph our stash. First, I’ll share my set up. In the picture below, you can see the two white trifold poster boards on my dining room floor in media-res. This set up works well for me in that I let you, the viewer, see only what I want you to see. You can’t see the mess or the toys, or in some cases little arms and feet of the little ones in the background. Sometimes, they like to help. 🙂
Also, the white boards are functional in that they take the light from the window and reflect it back upon the fabric. My dining room is fairly dark even on bright days (boo!) but the white backdrops help make the most of the natural light coming from the window.
Next up, before I take pictures of my fabric I make sure the fabrics looks nice. I tend to like the look of uniformity so I make sure to fold it all the same way. For this shoot (look at me with the lingo!), I had to refold some fabrics and even press them (gasp and boo, so much work!). And then I arrange my fabrics so they look pretty – in this case a swirl and a stack.
Depending on if I’m in a rush I will shoot in Manual or Aperture priority. Those are my favorite modes. I’ve only recently been confident in the Manual setting, so I feel cooler than I actually am. 🙂 For these photos I must have been in a rush because I shot in Aperture priority, so the shutter speeds are a bit fast, which works for me because I sometimes prefer to under-expose my shots.
Next I will show you how I process my photos. I usually process them in the computer program on my computer – iPhoto.
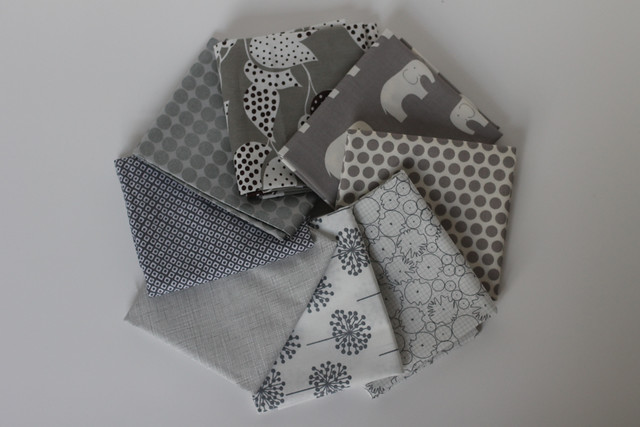
Here’s the image of the swirl of gray fabrics before processing. A swirl array lets the viewer see what each fabric looks like. This shot is kind of gray and there’s a lot of background. But it’s a good shot because I can work with it – everything’s in the frame and it’s all in focus.
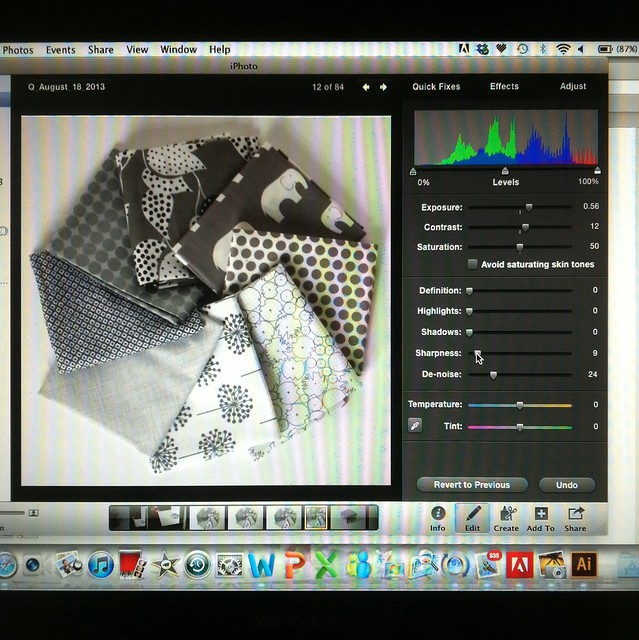
Here’s an iPhone shot of how processed this image. As I was saying sometimes I like to underexpose my shots just a bit. The reason being that I like to make sure I don’t loose any details in the white fabrics by over exposing them. Then I bump up my exposure during processing. So here’s what I did: bumped up my exposure, and the sharpness, and then de-noised the shot a bit. I also cropped the picture too.
Here’s the final image of the gray swirl post processing.
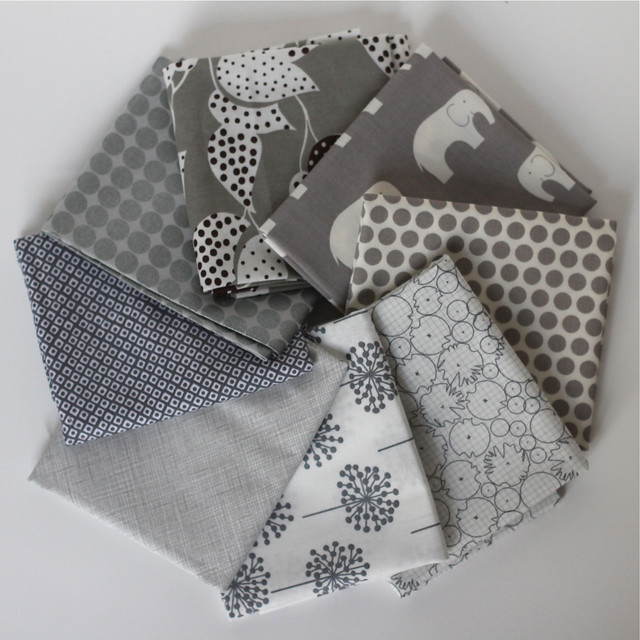 |
| f/2.5, ISO 800, 50 mm, 1/320 |
Here’s the image of the gray stack before processing. I like the stacks because they look so pretty and you can get a nice blur while still seeing the fabric. This shot is again kinda gray – but it’s workable in that what I want is in focus and everything’s in the frame. 
Here’s an iPhone shot of how I processed this photo. I bumped up the exposure, contrast and the saturation. I also cropped the sucker.
Here’s the final image of the gray stack post processing.
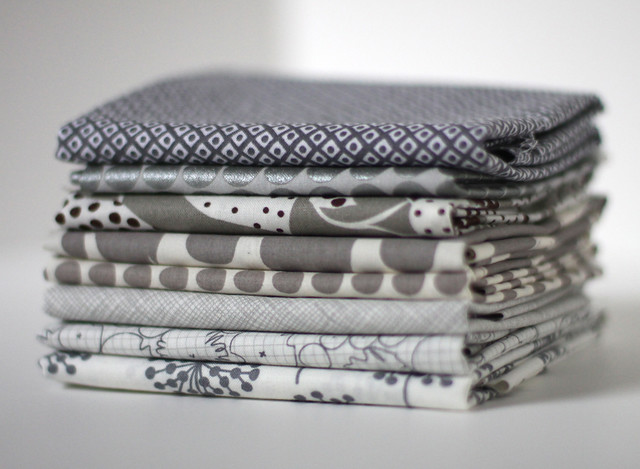 |
| f 1.4, ISO 800, 50 mm, 1/1600 |
That’s all for now. The thing about my experience with photography and what works for me is that I find I am learning so much that this will likely change. It will be fun to see how I take pictures next year. And maybe after I go read all the other contributors’ posts.
Thanks for visiting!


Love the photos! Thanks for sharing the process. Need to try soon
Thank you! And thanks for commenting.
Those white boards are life savers aren't they? You don't have to tidy up or get the kids out of their jammies before a shoot!!!
Thanx for sharing the pointers!
Nini~
What a great idea to use white boards. I would never have thought to do that!
🙂 Kelly @ My Quilt Infatuation
Great Tutorial Becca! I definitely need to work on taking better pictures of my projects!
Thanks Kassi!
Love your pictures!!! I will try the iPhoto software – thanks for the tips!!!
Yay – another iPhoto user. I do a lot of the same things as you – definitely a fan of the white board to hide any mess in the background!
Great tips! I could really use that white board idea to hide the mess in my house. Thanks for joining in.
This is great – I am such a novice so it's helpful to see your in-progress process. Thanks!
your set up is fantastic! thanks so much for sharing such detailed info about where & how you shoot, as well as your editing. very informative.
I tried using Aperture mode today for the first time–what a difference it made! The white board seems like a really cheap light box solution, so that's a great tip. Thank you for sharing how you process your photos, too. I am always curious how much gets done to photos at everyone else's blogs. (LOVE that fabric combo, too.)
Great post, Becca! I've been avoiding buying white boards, but seeing how you use them has changed my mind (imagine, no more rearranging the house just to take a photo!).
Great idea for the set up. I totally agree the fabric has to look good which can mean ironing it, sigh! Great photos!
Nice photos Becca. Thanks for sharing the tips. I am always exasperated with my lack of photographic skill. Guess I have never concentrated on learning how to do it properly.