Many of us have a love hate relationship with Half Square Triangles (HSTs). The fact that countless quilt patterns can be made from just HSTs makes them quite appealing. But making them can be QUITE the chore. There are several ways to try to diminish the work, but alas they don’t make themselves.
I’ve found that you really just have to pick your poison when it comes to making HSTs. And today, I’m going to share with you a poison, er I mean one way I like to quickly make a bunch of HSTs. This method works really well if you are making a quilt with a limited fabric story.
This red and white ocean waves quilt that I made a few years ago would be a good example. When I made this quilt I used Thangles, which worked really well.

Have you ever tried Thangles before? They are really fantastic. While I loved Thangles because I literally made around 400 HSTs in a few hours, I then had to remove all the papers from those 400 some HSTs. Which took a long long long time.
It turns out that I am making a quilt with just 2 colors again, and at my friend Amy‘s suggestion I just marked my fabrics with my own grid. And that worked well. So that’s what I’m sharing with you today.
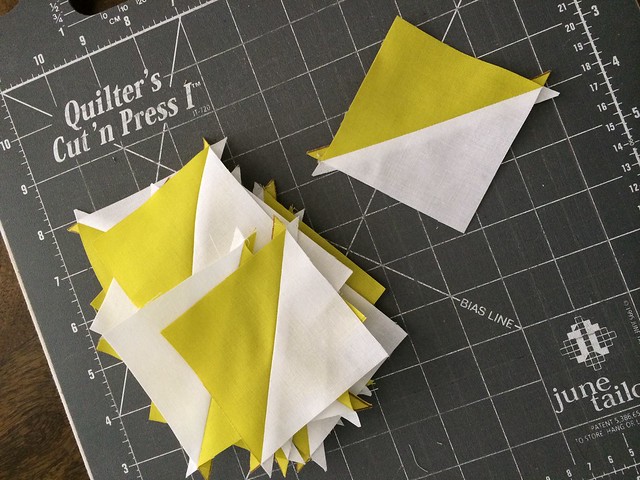
In this example, I made 40 HSTs, 2 1/2” finished, in about 30 minutes (apart from trimming). I use 2 colors – Kona White and Kona Wasabi. In general you will be marking the fabric with a box grid and diagonals, using the diagonals as sewing guides, and then cutting along all the marked lines.
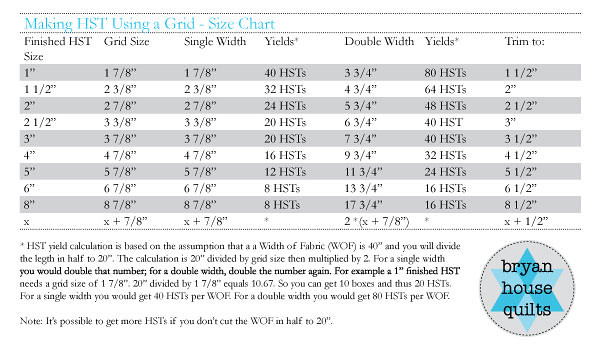
After the tutorial there’s a chart with a bunch of different HSTs grid sizes for you to pin and save for later.
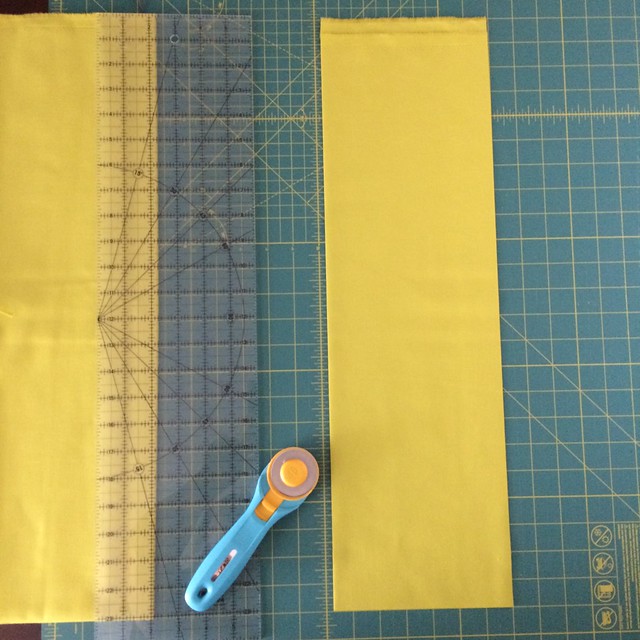
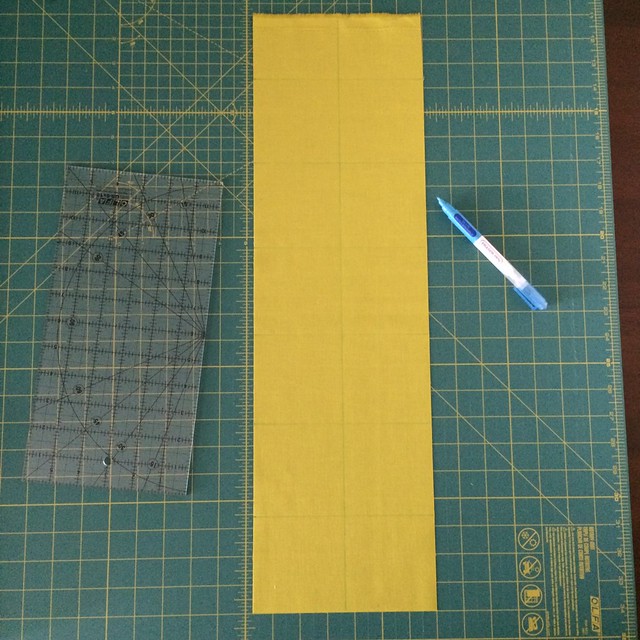
Step 1: Cut a single or double width of fabric depending on how many HSTs you need to make. Since I am making a bunch of HSTs, I am going to show a double width.
For 2 1/2” finished HSTs I cut a strip 6 3/4” x WOF (Width of Fabric, selvage to selvage) from each of my white and wasabi. (If you are curious that math is 3 7/8” x 2 for a double width.) Then I cut the widths at the fold and separate the two pieces. (Note: to maximize the number of HSTs you can get from a WOF don’t cut it in half.) So now, I have 2 wasabi pieces and 2 white pieces.
(Not shown but for a single width, cut a strip 3 3/8” x WOF. It should yield at least 20 HSTs.)
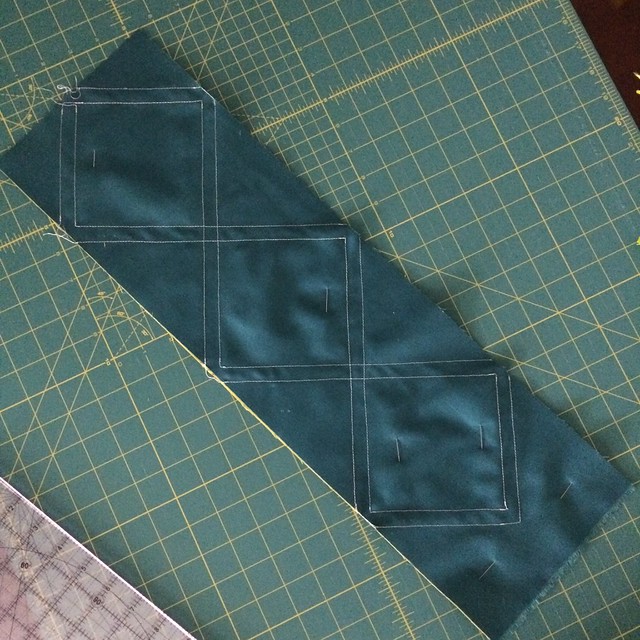
Step 2: Mark the grid on the two pieces of darker fabric. In my case, I marked on the wasabi pieces.
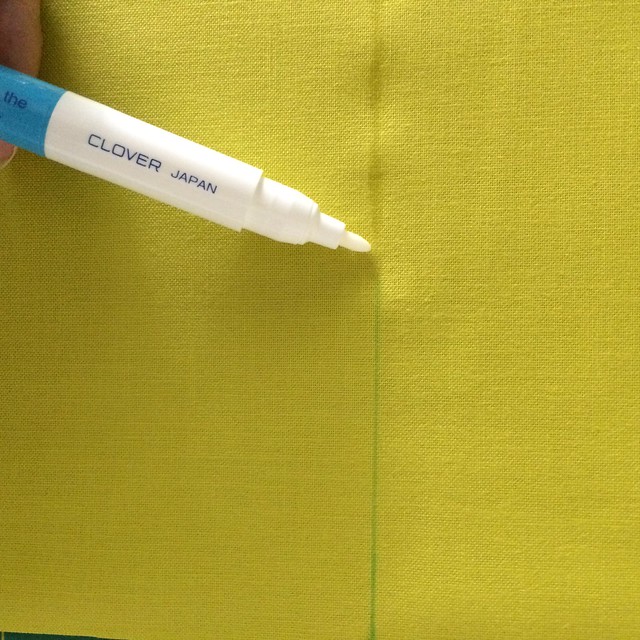
First mark the vertical line, which will be parallel to either side of the fabric and for 2 1/2” finished HSTs will be 3 3/8” away from either side, or the exact middle. (Skip this part for a single width.)
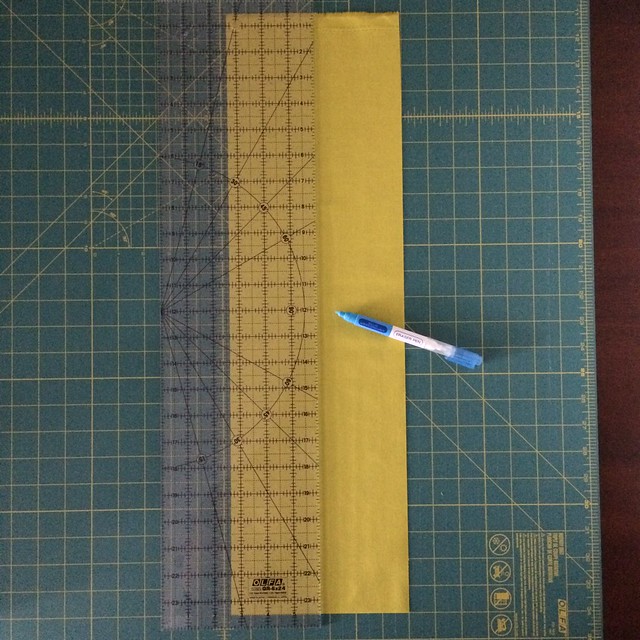
Then mark the horizontal lines. For 2 1/2” finished HSTs draw a line 3 3/8” away from the edge of the fabric.
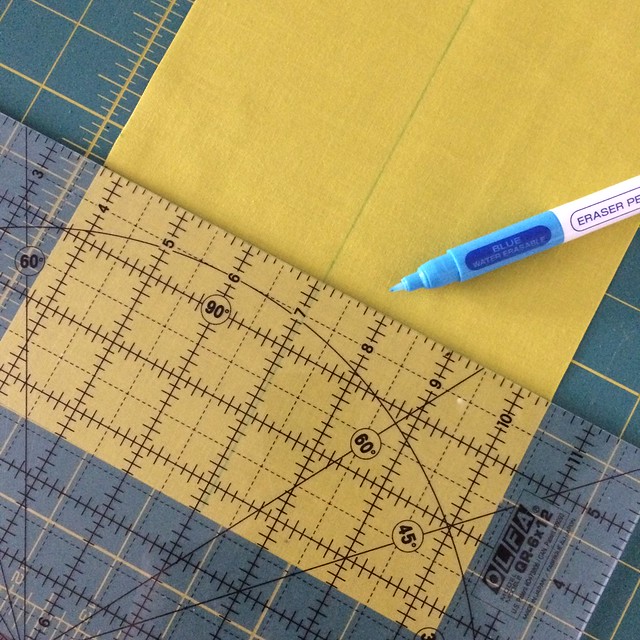
Then mark a second horizontal line 3 3/8” from the first line.
For finished 2 1/2” HSTs continue marking horizontal lines 3 3/8” away from the previous line until you’ve used up all the space on your strip.
Tip: Use a fabric marking pen that erases easily just in case you were to mess up. Ask me how I know. 🙂
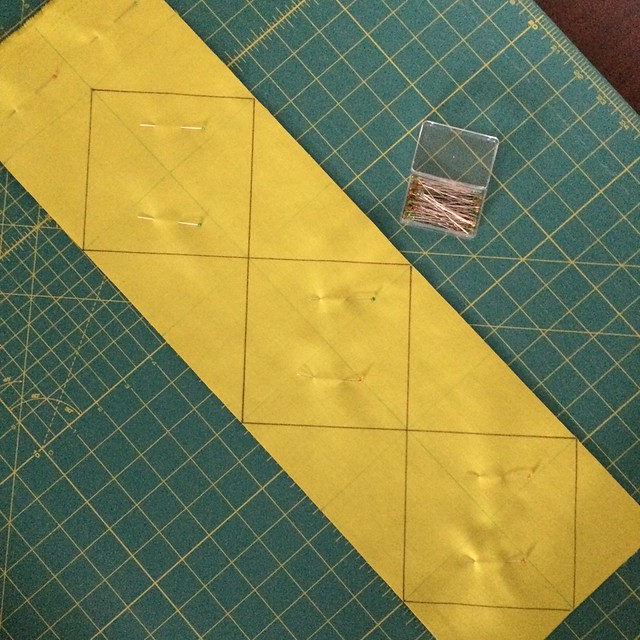
And finally, complete your grid by adding diagonal lines through all the boxes. (I wised up and used a darker pen to show you.)

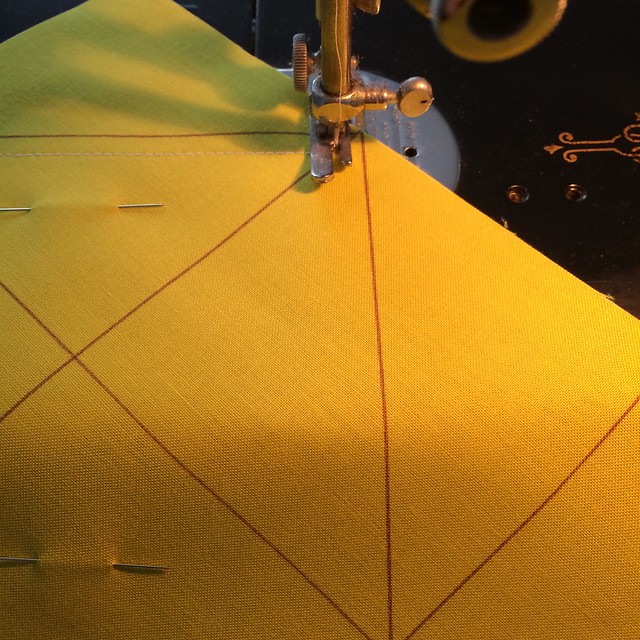
Step 3: Then pair colors right sides together and pin. Remember I’m pairing white and wasabi. Tip: Pin away from the marked lines.
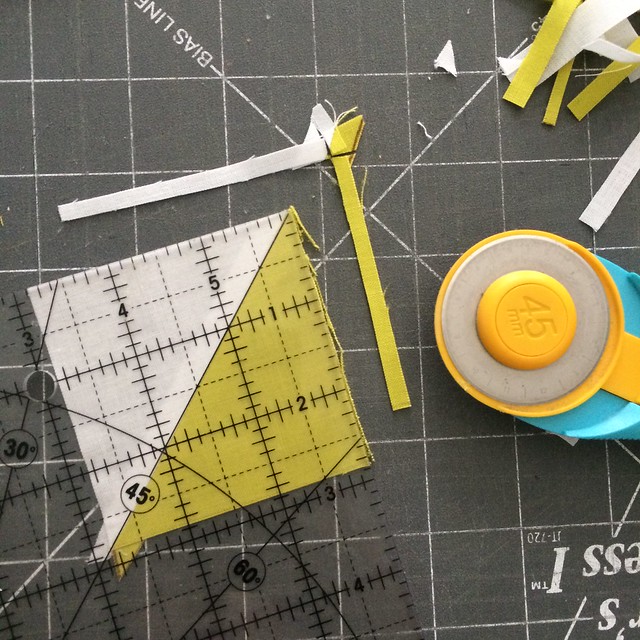
Step 4: Sew 1/4” away from the diagonal lines on both sides. Tip: Because you will be cutting into your seams, decrease your stitch length so that the stitches are less likely to unravel.

I’d like to take the time to say that I love the color Wasabi, but it doesn’t photograph with my sewing notions does it?!
Once all the sewing is finished your strip will look like this.
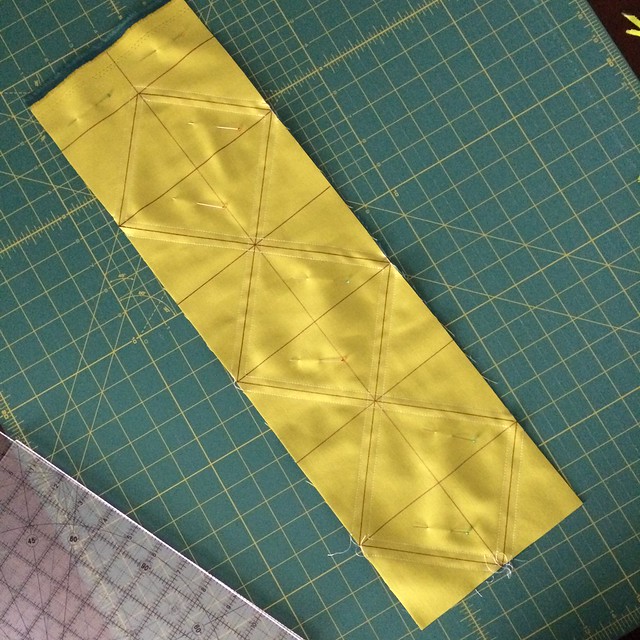
On this darker color you can see the seams better. (would it have been easier to change thread? Perhaps, but how else would I have know that Wasabi + Everglade = not the best?)
Step 5: Cut along all the marked lines. And tada! Forty(!) HSTs in no time.
Like this:
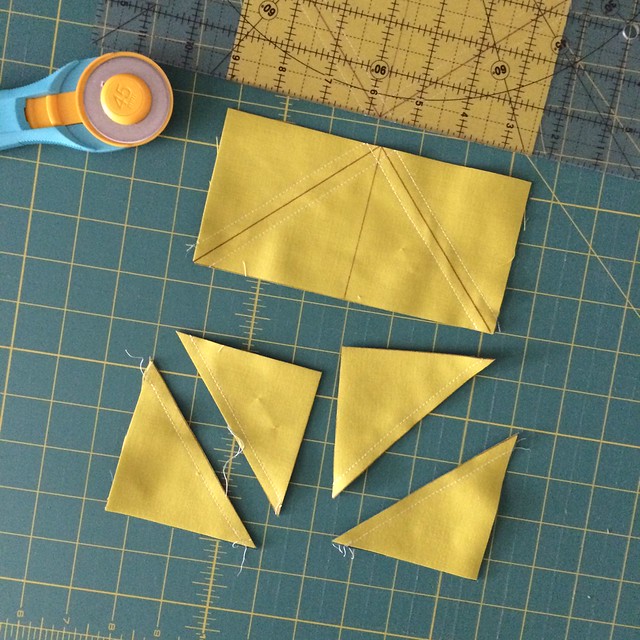
Or, like this:
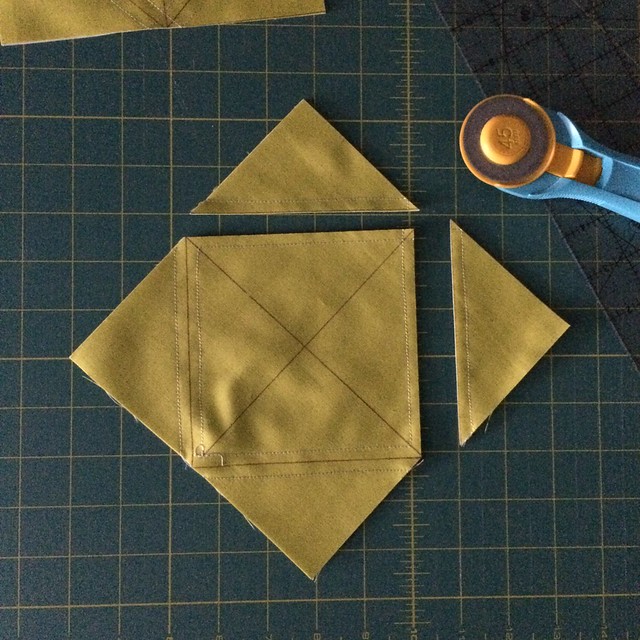
Step 6: Depending on your pressing preference, press seams either open or toward the darker fabric.
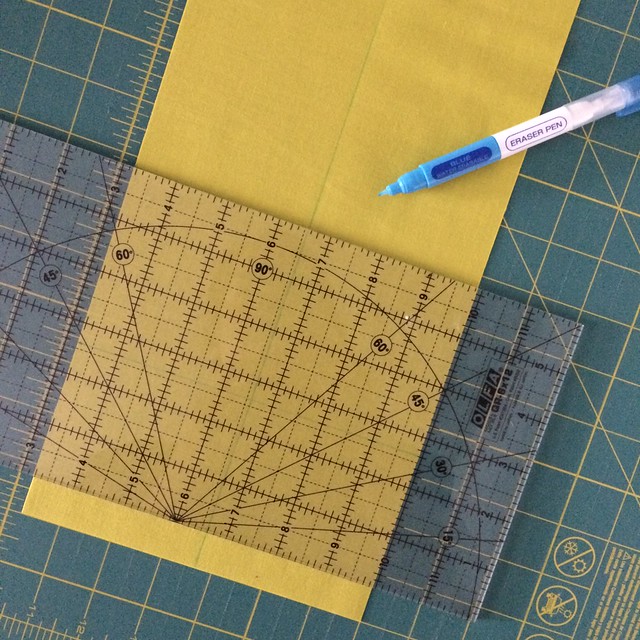
Step 7: For maximum accuracy, trim each HST down to 2 1/2”.
As with any HST triangle technique, this method has it’s downsides. One being you have to do some math to figure out where to mark your grids. And then you have to mark your grids. I’ve tried to make it a bit easier by making this table of common HST sizes for you.
Now, who will invent something that trims HSTs for us?!
Thanks for stopping by! I’ll answer questions in the comments…

Genius!!!! I'm one of the nut-jobs that likes making HST (in pairs of 2) that is; but I might just have to give this a try for my next HST project.
So awesome!!! I can't wait to use this tutorial!!!! Can you come over and cook and fold laundry so i can do this this weekend???? ♥♥♥
What a smart way to make HSTs. Brilliant! I have recently fell into that love-hate relationship with HSTs, because they are so much fun to design with .
Thanks for doing so many maths for us 🙂
Holy wow! Thanks for showing this! And thanks to Amy too. I've been wanting to try the paper, but really didn't want to have to tear all that away. This may be a salvation!
what a great tutorial and resource – thanks !
I was trying to print it so I could keep it in my sewing room but maybe it's not printable ?
I'll work on adding a printable version. Do you just want the table or entire tutorial? Thanks!
Fabulous tutorial and idea!!!! A printable version of the entire tutorial would be awesome. Thank you so much for sharing this with us.
Great idea! Have you tried a Bloc_Loc ruler? Google them – the HST trimming rulers make the trimming job so so so much better.
a tutorial for the method and the chart would be really helpful !
Thanks so much !
Great !!!I love HST :-)))))
I do hope you know that Thangles is copy write protected!!! And that the method you are using above has nothing to do with the way Thangles are used. So why are you using Thangles in your title? Perhaps you are trying to get search engines to direct people to your site.
Well, I hadn't thought about being unable to use a copyright protected word. I'll have to investigate further.
Simple solution: call your method "Paperless Half Square Triangles" or "Paperless Triangle Piecing (PTP)" or come up with another name.
The beauty of Thangles is that you do NOT use the 7/8" measurements ever, but your method does — so the two are really not a match.
The beauty of your method — no paper to rip.
Copyright protection is something you may wish to honor, especially with your own book coming out soon.
Just my humble opinion — since I know you and I've known the creator of Thangles since she came up with the idea nearly 20 years ago.
It seems nothing is new under the sun. Even before the paper Thangles came out I learned Becca's method from a shop owner in Hiawassee, GA and have been teaching it ever since. She learned it from a magazine but I can't remember which one. Maybe AQS or the NQA's "Quilting Quarterly".
Regarding a trimming tool: the closest thing I've seen to speed this up is made by Block Loc.
It has gained a lot of people on Trading Forex with Options” options trading alerts course when you spent time learning everything from it according to their need.
I love this! Thank you so much. I’m not so good at math so this is great. I hear of this method before but the way you explain it I think I’ll try it!!!!