• About
    • Privacy Policy
  • Teaching
    • Member/Student Login
    • Online Programs
  • Shop
  • Member/Student Login
  • Blog
    • Free Quilt Patterns – Scrappy Whirligig Quilt

Bryan House Quilts

Candy Corn Quilt {A Sizzix Halloween Tutorial}

finished quilts· Tutorial

28 Sep
Hi everyone, I’ve been sharing glimpses of my Candy Corn Quilt on Instagram and teases on my blog for weeks now. Today I’m showing you the finish AND the tutorial with you all. Yah! 

If you’ve been following along, you’ll know that I’ve been working with Sizzix for a few months. They send me a set amount of dies each month and I share a tutorial with you all on here on my blog and a second one over at Sizzix’s blog. I’ve had this quilt idea in my head from the get-go so I’m excited to finally have it finished on my couch and the tutorial to share with you all. 

Because October is my favorite. 
🙂 

Materials: 
3 1/2 Yards assorted Halloween Fabrics (I’m using Spellbound by Cotton and Steel)
2 1/2 Yards black fabric
1/2 Yards for binding
4 Yards for backing

Sizzix Materials: 
Bigz Pro 2 1/2” strip cutting die 
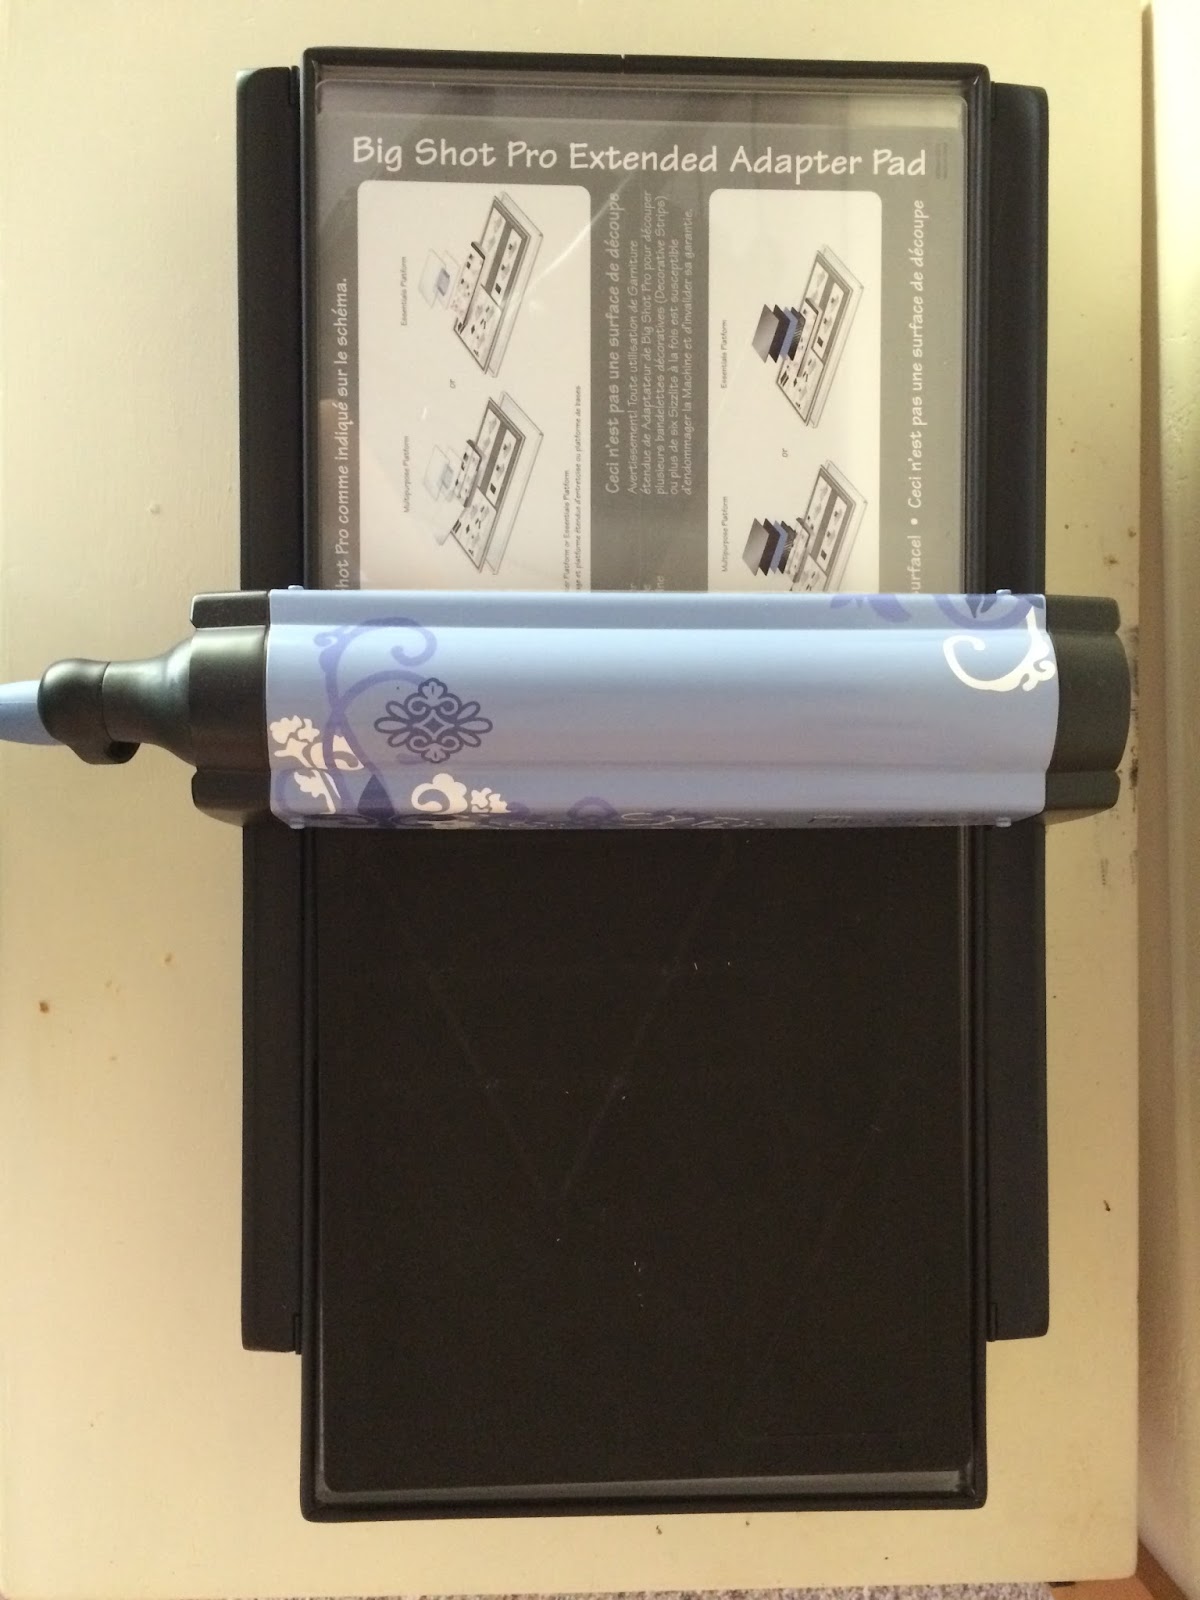
Big Shot Pro Machine
Bigz Pro 6 1/2” Right and Isosceles Triangle die

First you are going to start by cutting 2 1/2” strips by Width of Fabric (WOF) or selvage to selvage from the halloween fabrics. I sent my fabric through my Big Shot Pro Sizzix machine using my 2 1/2” strip cutting die to easily cut my strips. Cut a minimum of 39 strips. This will make 13 strip sets. Since I recommend cutting more than the minimum for this quilt, let’s say cut 45 strips to make 15 strip sets.

To cut the background triangles, first cut a minimum of 13 WOF 6 1/2” from the black background fabric. Let’s say cut 15 widths. These extra strips will account for any imperfections in the die cutting that may occur.

Next, using the Halloween fabric you are going to sew the 2 1/2” strips into groups of 3. For my strips I tried to keep the colors going from light to dark to mimic a candy corn. But this is your quilt; you do what you love. But, be sure to keep that seam allowance a very scant 1/4”. Muy importante.

(The triangle die we will be using is 6 1/2” wide so we want to ensure our strip sets are also going to be 6 1/2” wide. Hence the scant 1/4” seam.)

To finish off the strip sets, press the seams open or to one side. Do whichever you prefer. The strips sets will be 6 1/2” x WOF. Make at least 13 strip sets. I recommend making more strip sets to account for any potential cutting mistakes in the next step.

Super fancy organization system for strip sets. 
Once all the strip sets are pieced, you are going to use your Sizzix machine and triangle die to cut the candy corn and background triangles. 

Let’s start with the fun candy corn triangles first. I’m using the Bigz Pro 6 1/2” Right and Isosceles Triangle die but I’m only using the Isosceles portion of the die. One important thing to mention is that you want line up the top portion of the strip set up with the top of the triangle. This is especially important if your strip sets aren’t quite 6 1/2” wide as they should be in theory. 
(Sometimes I lose focus on keeping my seam allowances that scant 1/4”, ahem) 
Now, to maximize the number of candy corn triangles cut from each strip set, you are going to fold the strip set accordion style over the triangle die. Adjust the folded fabric accordingly and then do a final check to make sure the strip set is still lined up with the triangle point. 
Double check to make sure you have the fabric in the Sizzix sandwich – plastic plate on bottom, die blades up, fabric, and then plastic plate on top. Then send your fabric through the Sizzix machine. 

Then carefully remove the extra fabric on the sides. You may need to use scissors to cut them apart.

Then unfold that extra fabric and realign it on the die cutter and cut more triangles from the excess. 

And send the Sizzix sandwich through again. 
From each strip set I was able to cut 9 triangles. (The picture shows 10 triangles, but realistically it ends up being 9.) 
Using the Sizzix machine and the 6 1/2” isosceles triangle die, cut 114 black background triangles from the 6 1/2” strips of black background fabric.  
After cutting the candy corn triangles and background triangles, all in all you should have 114 candy corn triangles and 114 background triangles. 
Ok, now for the sewing!!! 
First set aside 6 candy corn triangles and 6 black background triangles. 
Next, we are going to make 108 pairs of triangles. Each pair will have 1 background triangle and 1 candy corn triangle.
Because we are working with irregular shapes, you will want to line up the match points. (Match points are where the seam line will intersect.) So with right sides together align the match points and pin as needed. Sew the pairs together. Make 108 pairs. Press seams open. 

Now, you will be sewing the pairs into rows. Each row has 9 pairs. I wanted my rows to have a random, scrappy look so I used the paper bag method. That’s where you throw all of your pairs into a paper bag and shake it all around like shake n’ bake. Then whichever pair you pull out is the pair you sew. Pretty high tech. 🙂 
So, sew 12 rows each with 9 pairs of triangles. Then press seams open. 
Finally, to complete the rows, you will sew one more triangle onto each row. To six rows, you will sew a black triangle onto the left side of the row. To six rows, you will sew a candy corn triangle to the right side of the row. 
For quilt top assembly, first lay out your rows on your design surface and play with the arrangement until satisfied. (I just made sure my purples are mints weren’t bunching together in one section.) Make sure all the candy corns are pointing up. 

Now we are going to sew the rows into pairs of rows. Get two rows and line up the points and get your pins ready (yah!).

With right sides together align and pin the rows together. Then sew the row together. Sew the 12 rows into 6 pairs of rows. Press seams open. 

Continue sewing assembling the quilt top by sewing the pairs of rows together. Press the seams open. 

To finish the quilt you can opt to keep the angle sides or you can square up the quilt top. I decided to square up my quilt top this time. 
Quilt and bind using your favorite method and enjoy! 

Thank you!!

Previous Post: « Quilting: you can do it! {MQWS Blog Hop}
Next Post: Lucy in the Sky {Modern Rainbow} »

Reader Interactions

Comments

  1. Dorothy Finley says

    September 28, 2015 at 6:37 am

    So I made "this" quilt in 2013 without your fancy cutting machine. It was called "Candy Corn", the pattern was by Lissa Alexander and it was in the Quilt Magazine. Strip piecing, 60 degree triangle
    acrylic ruler by Clearview, sew together—————easy peasy. Sometimes, I think you new "modern"
    quilters make things harder and more expensive than what they need to be.

    • rebeccabryan says

      September 28, 2015 at 2:45 pm

      Hi Dorothy,

      Yes, for sure you don't *need* a sizzix machine etc, to make a candy corn quilt. It should be noted though, that my triangles are not 60 degree or equilateral triangles. So the ruler you mention would yield a bit different look.

      Nothing revolutionary for sure.

      But this quilt and the die cutting system are all things I was and am excited to show. However I realize not all techniques and gadgets are suited to all people.

      Is your quilt out for the season? I bet it's lovely.

    • java diva says

      September 29, 2015 at 7:41 pm

      I use a sizzix a lot, I am betting this quilt is much faster with die cuts than a ruler, but I'm new to triangles.

  2. The Joyful Quilter says

    October 5, 2015 at 12:19 am

    What a FUN idea!! I recently purchased a triangle die, but never considered PIECING before using the cutter. It would work well for the Rainbow Scrap Challenge that I am participating in for single colors, too!

Primary Sidebar

Get Your Free Ticket to Quilters Paradise Holiday! 🎁

New 2026 Block of the Month!

Graphic of Alchemy Quilt

Join the 2026 Block of the Month Program

Get my Modern Triangles Quilt Book

Get my Modern Rainbow Quilts Book

Image shows cover of the book "Modern Rainbow Quilts"

Make the Solstice Quilt!

Solstice Block of the Month by Bryan House Quilts

Get Your Invite!

Make Modern Triangles Logo

Make the Sparkler Quilt!

Image Shows Sparkler Quilt Top by Rebecca Bryan

Make the Echo (Echo!) Quilt

Echo BOM now open to join

Make the Wildflower Quilt!

Wildflower Block of the Month by Bryan House Quilts

Make the Stargazer Quilt!

Anne's Stargazer BOM

Make the Rainbow Triangles Quilt!

Rainbow Triangle BOM, modern triangle quilt, Rebecca Bryan

About

Hey there! I’m Rebecca, an author and teacher and freezer paper piecing evangelist. I’m also the founder of the Make Modern Triangles Quilt Club.

Disclosure

Just so you know, my site includes affiliate links from which I (it’s me! Rebecca!) receive payment or compensation. Something to consider as you peruse my website. Thanks!

Latest on Instagram

I was ready to give up on foundation paper piecing I was ready to give up on foundation paper piecing altogether, and then I was introduced to freezer paper piecing, and it changed my whole world forever.

Let’s talk about Freezer Paper Piecing versus traditional Paper Foundation Piecing. 👇

The techniques are similar, both methods focus on precision and ease of assembly, but with Freezer Paper Piecing, you get to reuse your templates without turning them into confetti! 🎉 MAJOR WIN!

All you have to do is trace a few copies onto freezer paper or use printable sheets for your printer. It’s versatile, efficient, and saves you tons and tons of time.

🌟 The key benefits of freezer paper piecing: 🌟

👏 Reuse & Recycle: No more wasteful piles of ripped paper templates.
👏 Easy Removal: Templates peel off effortlessly, leaving your masterpiece intact.
👏 Versatility: From intricate designs to straightforward patterns, freezer paper can be used for any foundation.

WAY MORE TIME TO QUILT! 🙌

In all of my programs, we use the Freezer Paper Piecing method, and anyone can learn this, even first-time quilters! I’ve got a NEW block-of-the-month quilt design coming soon, so follow along if you’re looking for a faster and easier way to paper-piece! ✨

#modernquilting #paperpiecing #foundationpaperpiecing #quiltingtechnique #quiltteacher
Want to make a witchy little Modern Triangle with Want to make a witchy little Modern Triangle with me? 🧙‍♀️🧵

I’m teaching a FREE class, and we’re getting a little spooky with this one! 🤓

I’ll show you my favorite way to make Modern Triangles using my no-waste, no picking method, and then we’re turning our triangle into a WITCH HAT. ✨

And yes, beginners are absolutely welcome!

I’ll walk you through it step by step, show you how these simple little triangles can be arranged into much more complex-looking designs, and we’ll spend some time actually PLAYING with what we make.

PLUS, if you show up live, you’ll get my exclusive Spooky Witch Hat Modern Triangle pattern FREE so you can keep sewing after class. 🎁

Come hang out, learn something new, make a witch hat, and have some fun with me!

Comment WITCHY, and I’ll send you the link to save your free spot! 🧙‍♀️

#modernquilting #paperpiecing #foundationpaperpiecing #quiltingtechnique #quiltteacher
Tell me you’re a quilter without telling me you’re Tell me you’re a quilter without telling me you’re a quilter. 😂🧵

I’ll go first: I can find quilt inspiration in approximately ANYTHING. I own fabric that is apparently too special to actually use, and “one more seam” has never once meant one more seam.

Your turn. 🤓 Finish the sentence in the comments 👇 

#modernquilting #paperpiecing #foundationpaperpiecing #quiltingtechnique #quiltteacher
A couple of weeks ago, I picked my colors for next A couple of weeks ago, I picked my colors for next year’s “Starburst” Block of the Moth, and I had to laugh at myself because even though I started with a few pretty pinks and yellows as my inspiration...

I devolved back to rainbows for my final selection. I do love a rainbow gradient! So glorious, so delicious!

Honestly, sometimes it takes me several, several, several rounds to get the colors just how I want them. 😭  But the good news is, I do have the rainbow fabric on hand!

Now I can Netflix and sew... as I work on my Starburst sample! Hooray!

Who else just can’t resist a rainbow palette??? Follow along @bryanhousequilts to be the first to see my latest “Starburst” design! 💫

#modernquilting #paperpiecing #foundationpaperpiecing #quiltingtechnique #quiltteacher
SWIPE to see the big finish, my completed Peppermi SWIPE to see the big finish, my completed Peppermint Twist Dutch Summer! 🤍

The joy really is in the journey with my Block of the Month programs, where every single month you make one block, sew your whole batch, and, month by month, start to see the design come together with each new block.

And that’s why ANYONE can make this quilt! Yes, even a first-timer! 

You don’t have to sit down and make an entire quilt all at once. You make one batch of blocks, then another, and another... You learn as you go, watch your skills develop, and slowly start seeing the whole quilt come together.

And then one day, all those individual triangles you’ve been making come together and you’ve made THIS. 🥹

I absolutely love how this Peppermint Twist version of Dutch Summer turned out, and seeing all of the blocks together makes me want to do the whole thing all over again in another color palette! 😂

If you want to make your own version of the Dutch Summer, comment ‘DUTCH’ and I’ll send you the details! 💌

#modernquilting #paperpiecing #foundationpaperpiecing #quiltingtechnique #quiltteacher
We’re deep into the ‘ber months, which means cozy We’re deep into the ‘ber months, which means cozy sewing season is in FULL swing! 🙌

👉 We’re chugging along with the Alchemy block of the month, five months in! 
👉 We’re celebrating SO MANY big finishes of our Dutch Summer block of the month quilt tops
👉 I’ve been planning our next block of the month... 

There’s SO much good stuff going on over here, and I can’t wait to reveal my latest design to you so soon, along with all of the projects I’ve been sewing!!! 

Follow along to see my next block-of-the-month design reveal in November! ✨

#modernquilting #paperpiecing #foundationpaperpiecing #quiltingtechnique #quiltteacher
Follow on Instagram

Browse by Category

Archives

  • Instagram
  • Facebook
  • Pinterest
  • email
I was ready to give up on foundation paper piecing I was ready to give up on foundation paper piecing altogether, and then I was introduced to freezer paper piecing, and it changed my whole world forever.

Let’s talk about Freezer Paper Piecing versus traditional Paper Foundation Piecing. 👇

The techniques are similar, both methods focus on precision and ease of assembly, but with Freezer Paper Piecing, you get to reuse your templates without turning them into confetti! 🎉 MAJOR WIN!

All you have to do is trace a few copies onto freezer paper or use printable sheets for your printer. It’s versatile, efficient, and saves you tons and tons of time.

🌟 The key benefits of freezer paper piecing: 🌟

👏 Reuse & Recycle: No more wasteful piles of ripped paper templates.
👏 Easy Removal: Templates peel off effortlessly, leaving your masterpiece intact.
👏 Versatility: From intricate designs to straightforward patterns, freezer paper can be used for any foundation.

WAY MORE TIME TO QUILT! 🙌

In all of my programs, we use the Freezer Paper Piecing method, and anyone can learn this, even first-time quilters! I’ve got a NEW block-of-the-month quilt design coming soon, so follow along if you’re looking for a faster and easier way to paper-piece! ✨

#modernquilting #paperpiecing #foundationpaperpiecing #quiltingtechnique #quiltteacher
Want to make a witchy little Modern Triangle with Want to make a witchy little Modern Triangle with me? 🧙‍♀️🧵

I’m teaching a FREE class, and we’re getting a little spooky with this one! 🤓

I’ll show you my favorite way to make Modern Triangles using my no-waste, no picking method, and then we’re turning our triangle into a WITCH HAT. ✨

And yes, beginners are absolutely welcome!

I’ll walk you through it step by step, show you how these simple little triangles can be arranged into much more complex-looking designs, and we’ll spend some time actually PLAYING with what we make.

PLUS, if you show up live, you’ll get my exclusive Spooky Witch Hat Modern Triangle pattern FREE so you can keep sewing after class. 🎁

Come hang out, learn something new, make a witch hat, and have some fun with me!

Comment WITCHY, and I’ll send you the link to save your free spot! 🧙‍♀️

#modernquilting #paperpiecing #foundationpaperpiecing #quiltingtechnique #quiltteacher
Tell me you’re a quilter without telling me you’re Tell me you’re a quilter without telling me you’re a quilter. 😂🧵

I’ll go first: I can find quilt inspiration in approximately ANYTHING. I own fabric that is apparently too special to actually use, and “one more seam” has never once meant one more seam.

Your turn. 🤓 Finish the sentence in the comments 👇 

#modernquilting #paperpiecing #foundationpaperpiecing #quiltingtechnique #quiltteacher
A couple of weeks ago, I picked my colors for next A couple of weeks ago, I picked my colors for next year’s “Starburst” Block of the Moth, and I had to laugh at myself because even though I started with a few pretty pinks and yellows as my inspiration...

I devolved back to rainbows for my final selection. I do love a rainbow gradient! So glorious, so delicious!

Honestly, sometimes it takes me several, several, several rounds to get the colors just how I want them. 😭  But the good news is, I do have the rainbow fabric on hand!

Now I can Netflix and sew... as I work on my Starburst sample! Hooray!

Who else just can’t resist a rainbow palette??? Follow along @bryanhousequilts to be the first to see my latest “Starburst” design! 💫

#modernquilting #paperpiecing #foundationpaperpiecing #quiltingtechnique #quiltteacher
Follow on Instagram
© 2026 Bryan House Quilts