• About
    • Privacy Policy
  • Teaching
    • Member/Student Login
    • Online Programs
  • Shop
  • Member/Student Login
  • Blog
    • Free Quilt Patterns – Scrappy Whirligig Quilt

Bryan House Quilts

Candy Corn Quilt {A Sizzix Halloween Tutorial}

finished quilts· Tutorial

28 Sep
Hi everyone, I’ve been sharing glimpses of my Candy Corn Quilt on Instagram and teases on my blog for weeks now. Today I’m showing you the finish AND the tutorial with you all. Yah! 

If you’ve been following along, you’ll know that I’ve been working with Sizzix for a few months. They send me a set amount of dies each month and I share a tutorial with you all on here on my blog and a second one over at Sizzix’s blog. I’ve had this quilt idea in my head from the get-go so I’m excited to finally have it finished on my couch and the tutorial to share with you all. 

Because October is my favorite. 
🙂 

Materials: 
3 1/2 Yards assorted Halloween Fabrics (I’m using Spellbound by Cotton and Steel)
2 1/2 Yards black fabric
1/2 Yards for binding
4 Yards for backing

Sizzix Materials: 
Bigz Pro 2 1/2” strip cutting die 
Big Shot Pro Machine
Bigz Pro 6 1/2” Right and Isosceles Triangle die

First you are going to start by cutting 2 1/2” strips by Width of Fabric (WOF) or selvage to selvage from the halloween fabrics. I sent my fabric through my Big Shot Pro Sizzix machine using my 2 1/2” strip cutting die to easily cut my strips. Cut a minimum of 39 strips. This will make 13 strip sets. Since I recommend cutting more than the minimum for this quilt, let’s say cut 45 strips to make 15 strip sets.

To cut the background triangles, first cut a minimum of 13 WOF 6 1/2” from the black background fabric. Let’s say cut 15 widths. These extra strips will account for any imperfections in the die cutting that may occur.

Next, using the Halloween fabric you are going to sew the 2 1/2” strips into groups of 3. For my strips I tried to keep the colors going from light to dark to mimic a candy corn. But this is your quilt; you do what you love. But, be sure to keep that seam allowance a very scant 1/4”. Muy importante.

(The triangle die we will be using is 6 1/2” wide so we want to ensure our strip sets are also going to be 6 1/2” wide. Hence the scant 1/4” seam.)

To finish off the strip sets, press the seams open or to one side. Do whichever you prefer. The strips sets will be 6 1/2” x WOF. Make at least 13 strip sets. I recommend making more strip sets to account for any potential cutting mistakes in the next step.

Super fancy organization system for strip sets. 
Once all the strip sets are pieced, you are going to use your Sizzix machine and triangle die to cut the candy corn and background triangles. 

Let’s start with the fun candy corn triangles first. I’m using the Bigz Pro 6 1/2” Right and Isosceles Triangle die but I’m only using the Isosceles portion of the die. One important thing to mention is that you want line up the top portion of the strip set up with the top of the triangle. This is especially important if your strip sets aren’t quite 6 1/2” wide as they should be in theory. 
(Sometimes I lose focus on keeping my seam allowances that scant 1/4”, ahem) 
Now, to maximize the number of candy corn triangles cut from each strip set, you are going to fold the strip set accordion style over the triangle die. Adjust the folded fabric accordingly and then do a final check to make sure the strip set is still lined up with the triangle point. 
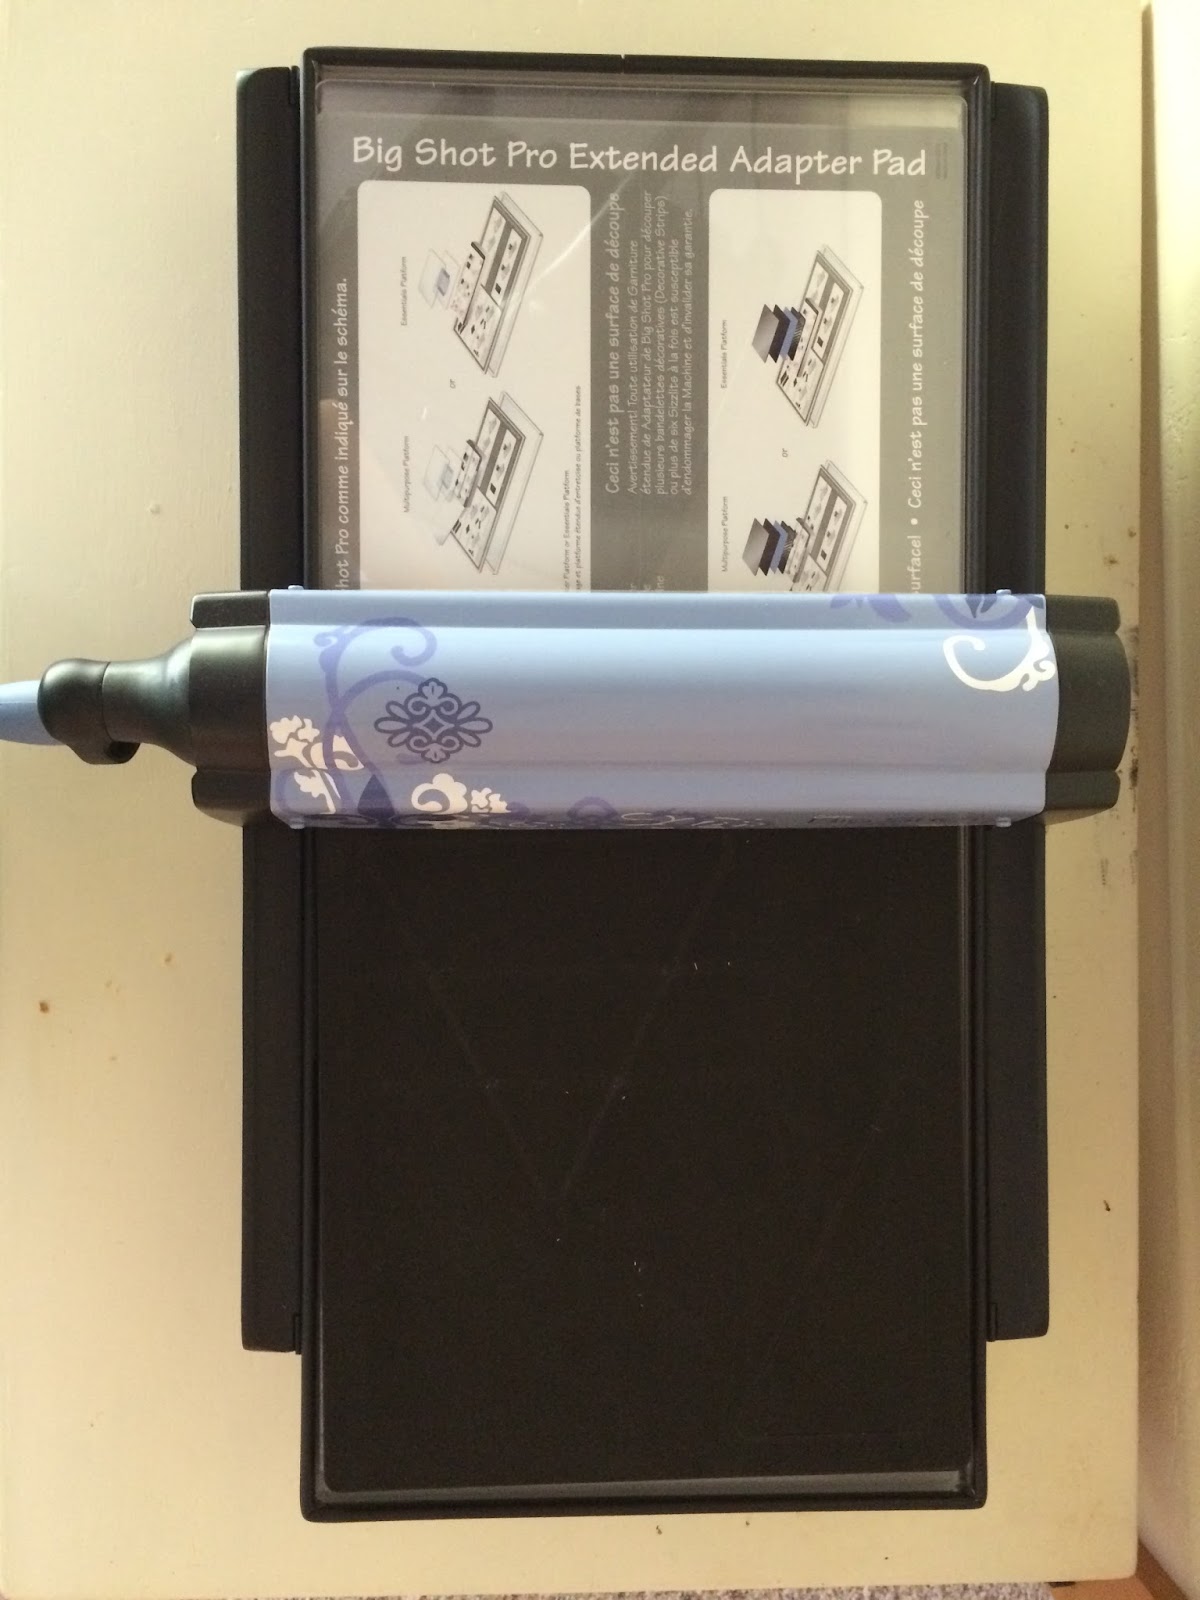
Double check to make sure you have the fabric in the Sizzix sandwich – plastic plate on bottom, die blades up, fabric, and then plastic plate on top. Then send your fabric through the Sizzix machine. 

Then carefully remove the extra fabric on the sides. You may need to use scissors to cut them apart.

Then unfold that extra fabric and realign it on the die cutter and cut more triangles from the excess. 

And send the Sizzix sandwich through again. 
From each strip set I was able to cut 9 triangles. (The picture shows 10 triangles, but realistically it ends up being 9.) 
Using the Sizzix machine and the 6 1/2” isosceles triangle die, cut 114 black background triangles from the 6 1/2” strips of black background fabric.  
After cutting the candy corn triangles and background triangles, all in all you should have 114 candy corn triangles and 114 background triangles. 
Ok, now for the sewing!!! 
First set aside 6 candy corn triangles and 6 black background triangles. 
Next, we are going to make 108 pairs of triangles. Each pair will have 1 background triangle and 1 candy corn triangle.
Because we are working with irregular shapes, you will want to line up the match points. (Match points are where the seam line will intersect.) So with right sides together align the match points and pin as needed. Sew the pairs together. Make 108 pairs. Press seams open. 

Now, you will be sewing the pairs into rows. Each row has 9 pairs. I wanted my rows to have a random, scrappy look so I used the paper bag method. That’s where you throw all of your pairs into a paper bag and shake it all around like shake n’ bake. Then whichever pair you pull out is the pair you sew. Pretty high tech. 🙂 
So, sew 12 rows each with 9 pairs of triangles. Then press seams open. 
Finally, to complete the rows, you will sew one more triangle onto each row. To six rows, you will sew a black triangle onto the left side of the row. To six rows, you will sew a candy corn triangle to the right side of the row. 
For quilt top assembly, first lay out your rows on your design surface and play with the arrangement until satisfied. (I just made sure my purples are mints weren’t bunching together in one section.) Make sure all the candy corns are pointing up. 

Now we are going to sew the rows into pairs of rows. Get two rows and line up the points and get your pins ready (yah!).

With right sides together align and pin the rows together. Then sew the row together. Sew the 12 rows into 6 pairs of rows. Press seams open. 

Continue sewing assembling the quilt top by sewing the pairs of rows together. Press the seams open. 

To finish the quilt you can opt to keep the angle sides or you can square up the quilt top. I decided to square up my quilt top this time. 
Quilt and bind using your favorite method and enjoy! 

Thank you!!

Previous Post: « Quilting: you can do it! {MQWS Blog Hop}
Next Post: Lucy in the Sky {Modern Rainbow} »

Reader Interactions

Comments

  1. Dorothy Finley says

    September 28, 2015 at 6:37 am

    So I made "this" quilt in 2013 without your fancy cutting machine. It was called "Candy Corn", the pattern was by Lissa Alexander and it was in the Quilt Magazine. Strip piecing, 60 degree triangle
    acrylic ruler by Clearview, sew together—————easy peasy. Sometimes, I think you new "modern"
    quilters make things harder and more expensive than what they need to be.

    • rebeccabryan says

      September 28, 2015 at 2:45 pm

      Hi Dorothy,

      Yes, for sure you don't *need* a sizzix machine etc, to make a candy corn quilt. It should be noted though, that my triangles are not 60 degree or equilateral triangles. So the ruler you mention would yield a bit different look.

      Nothing revolutionary for sure.

      But this quilt and the die cutting system are all things I was and am excited to show. However I realize not all techniques and gadgets are suited to all people.

      Is your quilt out for the season? I bet it's lovely.

    • java diva says

      September 29, 2015 at 7:41 pm

      I use a sizzix a lot, I am betting this quilt is much faster with die cuts than a ruler, but I'm new to triangles.

  2. The Joyful Quilter says

    October 5, 2015 at 12:19 am

    What a FUN idea!! I recently purchased a triangle die, but never considered PIECING before using the cutter. It would work well for the Rainbow Scrap Challenge that I am participating in for single colors, too!

Primary Sidebar

New 2026 Block of the Month!

Graphic of Alchemy Quilt

Join the 2026 Block of the Month Program

Get my Modern Triangles Quilt Book

Get my Modern Rainbow Quilts Book

Image shows cover of the book "Modern Rainbow Quilts"

Make the Solstice Quilt!

Solstice Block of the Month by Bryan House Quilts

Get Your Invite!

Make Modern Triangles Logo

Make the Sparkler Quilt!

Image Shows Sparkler Quilt Top by Rebecca Bryan

Make the Echo (Echo!) Quilt

Echo BOM now open to join

Make the Wildflower Quilt!

Wildflower Block of the Month by Bryan House Quilts

Make the Stargazer Quilt!

Anne's Stargazer BOM

Make the Rainbow Triangles Quilt!

Rainbow Triangle BOM, modern triangle quilt, Rebecca Bryan

About

Hey there! I’m Rebecca, an author and teacher and freezer paper piecing evangelist. I’m also the founder of the Make Modern Triangles Quilt Club.

Disclosure

Just so you know, my site includes affiliate links from which I (it’s me! Rebecca!) receive payment or compensation. Something to consider as you peruse my website. Thanks!

Latest on Instagram

Experienced quilters, share what I missed in the c Experienced quilters, share what I missed in the comments! 👇

Comment ‘FREE’ if you’re a beginner quilter and want to take my free class, give quilting a try, learn a new technique, or simply improve your skills! 

#modernquilting #paperpiecing #foundationpaperpiecing #quiltingtechnique #quiltteacher
I don’t know about you, but for me, quilting has n I don’t know about you, but for me, quilting has never been about just making quilts.

It’s about slow mornings, quiet time to myself, creating something with my hands, spending time doing something textile, not scrolling on the internet, spending more time creating and less time consuming...

And I think that’s exactly why so many people are being drawn to quilting today.

You want to get offline, learn something new, and have more quiet time that is just for you and your imagination. ✨

I think we could ALL use more of that in our lives, and if you want to give it a try, I’ve got a free class you can sign up for by commenting ‘FREE’ below. 💕

#modernquilting #paperpiecing #foundationpaperpiecing #quiltingtechnique #quiltteacher
I’ve taught thousands of quilters over the last de I’ve taught thousands of quilters over the last decade, and I’ve been quilting myself for over 15 years, and this is what I’ve learned. ⬇️

What’s stopping you from quilting isn’t that you don’t want to do it. It’s because you have already convinced yourself of something before even giving it a fair shot. 

You’re probably thinking something like...

👉 “I don’t think I’m creative enough.”
👉 “It looks too complicated.”
👉 “I wouldn’t know where to start.”
👉 “I don’t have enough time.”
👉 “What if I spend all that money and I’m terrible at it?”
👉 “I’ve never been good at sewing.”

If any of those thoughts have crossed your mind, can I let you in on a little secret?

Almost every quilter I know started with one of those ideas in their head, including me. 🤫

The beautiful quilts you see today didn’t begin as beautiful quilts, they began as just an idea and a willingness to try.

Nobody sits down at a sewing machine and automatically knows how to quilt.

You learn by just doing it, sewing stitch by stitch, and every time you enter your sewing room, it gets a little bit easier, and you start to enjoy it more and more. 

If something has been holding you back from quilting, I invite you to take my free class where you have nothing to lose and so much to gain. 

Comment ‘FREE’ to sign up. 💕

#modernquilting #quiltingtechnique #quiltpattern #quiltdesign #quiltersofig
Comment ‘FREEZER’ if you want to take my free clas Comment ‘FREEZER’ if you want to take my free class and learn this amazing technique! 👇

Freezer paper piecing tip number eight is to press every seam right after sewing it. 
 
Don’t wait until later or until all of your blocks are done. Press those seams right away!

It might feel like it slows you down in the moment, but it actually saves you time (and frustration) later.

When you press as you go, your seams stay crisp, and your pieces lay flat, which makes lining everything up so much easier. You’re not fighting bulky seams or trying to “fix” things at the end. 🙌

Plus, pressing helps set the stitches and keeps your fabric from shifting as you build your block.

Think of it as part of the sewing process, not an extra step.

Your blocks will be flatter, sharper, and way more accurate… and your future self will thank you!

Comment ‘FREEZER’ for my free class! 💕

#modernquilting #paperpiecing #foundationpaperpiecing #quiltingtechnique #quiltteacher
MAKE A TEST BLOCK!!! Please, I am begging you. 😅 MAKE A TEST BLOCK!!! Please, I am begging you. 😅

You’d think after 15 years of quilting I’d be able to skip it...

And every once in a while I convince myself that I don’t need a test block because I’ve made this block hundreds of times or my freezer paper piecing skills are good enough to skip it... 

And do you know what happens every time I convince myself that I don’t need a test block? 🙃

I almost always regret it and end up having a nice long date with Jack The Seam Ripper as a consequence. 

Learn from my mistakes so you don’t have to learn from your own and make the test block EVERY TIME!!!

Are you making test blocks? Tell me in the comments! ⤵️

#modernquilting #paperpiecing #foundationpaperpiecing #quiltingtechnique #quiltteacher
I can’t believe I’m saying this, but we’re nearing I can’t believe I’m saying this, but we’re nearing the final months of Dutch Summer! 🥹

Finished Dutch Summer Month 6 blocks are showing up in the Make Modern Triangles Club every day. We’re past the halfway point, and we’re really starting to stack up the blocks! Now that we’ve got a bunch of stacks of blocks, it’s such a fun time to play with arranging your blocks and see what your creativity comes up with. ✨

Once you get beyond the halfway point, you start the countdown to the BIG finish! 🎉

We’re feeling excited, motivated, and accomplished. We are covering some ground, folks! Swipe to see each month’s block so far, and drop a ‘DUTCH’ in the comments if you want to make your own! 💕

#quiltteacher #quiltingtutorial #quiltingtips #modernquilting #quiltcommunity
Follow on Instagram

Browse by Category

Archives

  • Instagram
  • Facebook
  • Pinterest
  • email
Experienced quilters, share what I missed in the c Experienced quilters, share what I missed in the comments! 👇

Comment ‘FREE’ if you’re a beginner quilter and want to take my free class, give quilting a try, learn a new technique, or simply improve your skills! 

#modernquilting #paperpiecing #foundationpaperpiecing #quiltingtechnique #quiltteacher
I don’t know about you, but for me, quilting has n I don’t know about you, but for me, quilting has never been about just making quilts.

It’s about slow mornings, quiet time to myself, creating something with my hands, spending time doing something textile, not scrolling on the internet, spending more time creating and less time consuming...

And I think that’s exactly why so many people are being drawn to quilting today.

You want to get offline, learn something new, and have more quiet time that is just for you and your imagination. ✨

I think we could ALL use more of that in our lives, and if you want to give it a try, I’ve got a free class you can sign up for by commenting ‘FREE’ below. 💕

#modernquilting #paperpiecing #foundationpaperpiecing #quiltingtechnique #quiltteacher
I’ve taught thousands of quilters over the last de I’ve taught thousands of quilters over the last decade, and I’ve been quilting myself for over 15 years, and this is what I’ve learned. ⬇️

What’s stopping you from quilting isn’t that you don’t want to do it. It’s because you have already convinced yourself of something before even giving it a fair shot. 

You’re probably thinking something like...

👉 “I don’t think I’m creative enough.”
👉 “It looks too complicated.”
👉 “I wouldn’t know where to start.”
👉 “I don’t have enough time.”
👉 “What if I spend all that money and I’m terrible at it?”
👉 “I’ve never been good at sewing.”

If any of those thoughts have crossed your mind, can I let you in on a little secret?

Almost every quilter I know started with one of those ideas in their head, including me. 🤫

The beautiful quilts you see today didn’t begin as beautiful quilts, they began as just an idea and a willingness to try.

Nobody sits down at a sewing machine and automatically knows how to quilt.

You learn by just doing it, sewing stitch by stitch, and every time you enter your sewing room, it gets a little bit easier, and you start to enjoy it more and more. 

If something has been holding you back from quilting, I invite you to take my free class where you have nothing to lose and so much to gain. 

Comment ‘FREE’ to sign up. 💕

#modernquilting #quiltingtechnique #quiltpattern #quiltdesign #quiltersofig
Comment ‘FREEZER’ if you want to take my free clas Comment ‘FREEZER’ if you want to take my free class and learn this amazing technique! 👇

Freezer paper piecing tip number eight is to press every seam right after sewing it. 
 
Don’t wait until later or until all of your blocks are done. Press those seams right away!

It might feel like it slows you down in the moment, but it actually saves you time (and frustration) later.

When you press as you go, your seams stay crisp, and your pieces lay flat, which makes lining everything up so much easier. You’re not fighting bulky seams or trying to “fix” things at the end. 🙌

Plus, pressing helps set the stitches and keeps your fabric from shifting as you build your block.

Think of it as part of the sewing process, not an extra step.

Your blocks will be flatter, sharper, and way more accurate… and your future self will thank you!

Comment ‘FREEZER’ for my free class! 💕

#modernquilting #paperpiecing #foundationpaperpiecing #quiltingtechnique #quiltteacher
Follow on Instagram
© 2026 Bryan House Quilts