Want a beautiful quilt top finish? Tame triangles with a 5-step process!
A beautiful (flat!) quilt top finish starts with the inside of the quilt. Quilts are often smoke and mirrors – what happens on the inside – nesting, pressing and pounding – looks very different on the outside in a good way.
Who hasn’t hollered ‘Lay flat!’, ‘Match up!’ or ‘@%/#!’ at unruly triangle blocks? Those three-sided beauties get bent out of shape easily.
Yup. Been there.
Modern triangle blocks make fascinating quilts, however, we need to tame triangles so our best efforts shine.
Tame triangles with 5-step process
Make Modern Triangles members shared a bunch of ways to tame triangles during a recent Virtual Sew In. A funny conversation broke out about wacky, lesser-known tools that could save your quilt from the UFO pile. (Anyone call it the Unforgiving Oops pile?)
We chatted about pressing and all the steps involved. About how pressing solves piecing problems. Most of the time 🙂
No only did members improvise – they tamed their own frustration – while getting their blocks in line…literally. (Who’s the boss of this quilt?!)
IRON Resolve
Here’s what we learned.
Getting to done seems impossible when our seams won’t match up, points are missing and needle-breaking bumps litter the quilt top.
It isn’t just one thing or step that’s missing. Taming triangles and blocks comes down to an entire pressing process. With iron resolve (heh heh.) Follow the process and a beautiful finish is in your future!
Are you groaning about five steps at the ironing board with hot steam in your face – I get it.
If you’ve been, say, skimpy or impatient with pressing, you’ll be delighted with the difference in your finishes using this 5-step process.
There’s rarely a one-and-done seam press in quilting but don’t let that dampen your joy! Pressing is so satisfying when triangles do what you want and look amazing.
Note: You need an iron that works comfortably for you. A bad iron will break your resolve! I recently found out how much our members love their irons. Cordless irons are super popular like the mini cordless Panasonic. You can check it out here and in my shop here.
Start here to tame triangles with 5-step process
STEPS 1, 2 and 3: Set, nest and press
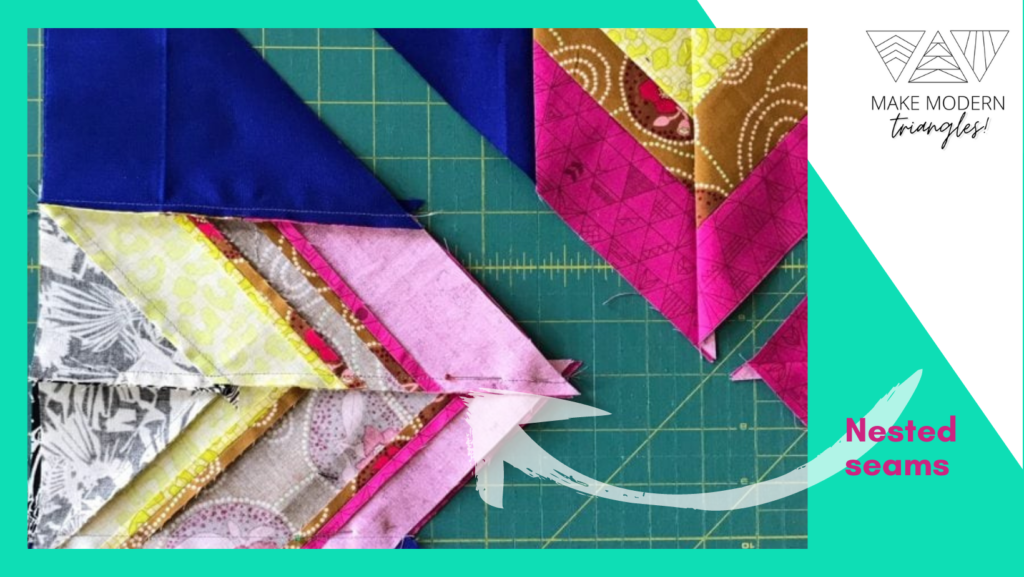
When blocks are sewn together, hundreds of seam intersections are created. Nesting – alternately folding seams to one side where the pieces meet – avoids bulky intersections and sewing through more than four layers.

It goes like this:
- Sew and then set the seam. Place your fabric just as you’ve sewn it on the ironing board and press as is.
- Open up the fabric and finger press the seam open, using the heat from your hands, the press the opened seam with your iron and plenty of steam.
- With the fabric still open, press the seam to one side. Any piece that joins it should have a seam pressed in the opposite direction. You can keep the seam open which also reduces bulk – and match with another open seam when piecing. Turn it over to the right and side and press again.
Our members added helpful tips:
When my seams aren’t matching up to sew, I spritz a little water on the fabric and press so it will shrink to fit.
I’m a long armer and sometimes I open up the seam a little to coax the nest together. And I can sew the offset right into the seam allowance. It really helps to reduce bulkiness in a small area.
Even when you nest with the best, triangle points (tiny and flimsy) and seams (on the bias) are unruly and unpredictable. Turns out, taming triangles requires pounding it out!
Step 4: Pound IT OUT
Reach for a pounding tool when you see a bulky knob of where seams intersect. I recommend giving the bump your best shot of steam and heat before pounding. No mercy!
Here’s what our members use:
I use a rubber mallet to beat down on the seams where they cross, but don’t pound for too long. Your arm might hurt afterwards!
I’ll admit that I’ve used the flat side of a meat tenderizer. Works great!
I’ve used a hammer on the fabric. Make sure you have something sturdy like wood under the fabric.
They advised pressing after pounding.
Now rest the fabric and let it dry properly.
Rest?

Step 5: REST with a WOODEN CLAPPER
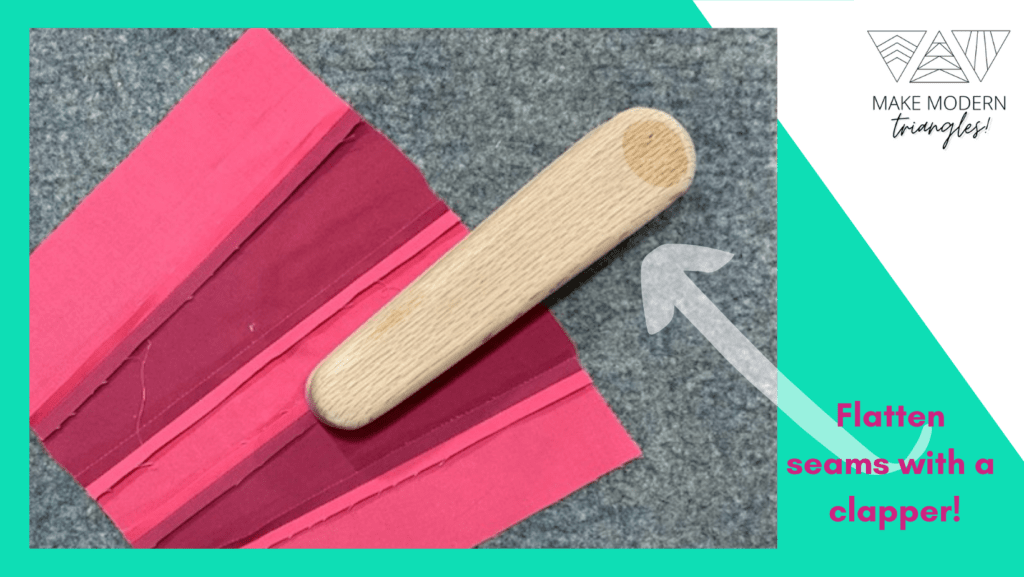
The wooden clapper is gaining a place on quilters’ ironing stations. Like a tailor’s block, the clapper is set on top of the seam after pressing, which holds in the heat while it dries. This creates flat, pretty seams! Learn more about wooden clappers.
Our members endorsed their beloved clappers:
I recently bought a wooden clapper and why did I wait so long?! The clapper keeps the fabric in position with heat.
Spray starch on the area, press and then place the clapper or tailor’s block on it. Use a wool mat underneath the fabric because it does a good job keeping it warm and flat.
Man, we love our clappers! Sooo satisfying to make crisp, flat seams on triangle blocks.
As always, we are so much better together! And who knew that pounding seams create so much joy?
Haven’t tamed triangles like this before? Try the 5-step process because you’ll be delighted with the results!
P.S. Did I mention how satisfying these tools are? Very satisfying. Very.


[…] Tame Triangles with 5-Step Process […]