My favorite machine quilt binding method is my tried-and-true method. After reading this post, you’ll have my favorite tips for a beautiful, professional finishing touch to your quilts.
Be honest, have you ever gifted a quilt that isn’t quite finished? Ha! Me too! Or maaaaaybe you have a few finished quilts that just need to be bound? Yikes! Me, too!
Sometimes you need to get that quilt finished in the quickest way possible… which means machine binding!
Want to know more about an easy way to machine bind a quilt? Read on and try it out.

There are a lot of different ways to machine bind a quilt and a ton of other binding tutorials available, so I won’t go into a full blown tutorial. Instead, I’ll share what I do differently when binding a quilt by machine.
Yup, I’m giving you my secret sauce method to bind a quilt that finishes beautifully and quickly.
Sometimes little feet are waiting for you to finish their first quilt, too!

So let’s go and learn an easier way to bind a quilt!
KEY TAKEAWAYS FROM MY MACHINE BINDING TUTORIAL
As you follow along the machine binding quilt tutorial, look for these key takeaways to attach binding:
- Attach binding to the back of the quilt first (not the front).
- Use thread to match your quilting thread.
- Match your stitch length on the binding to the quilting stitch length. When I started machine sewing the binding, I sewed the binding to the front of the quilt.
- Machine quilting is a fast way to add binding.
- Your finished quilt pile will grow!
When I first started to machine bind a quilt, I used to secure binding to the front of the quilt which is the usual way to bind a quilt.
Then I would wrap the binding around to the back and stitch in the ditch on the front side. Which means I couldn’t see where the stitching was landing on the quilt backing or binding.
On the binding or off the binding? In the woods or in the weeds?!
I got so-so results. Sigh.
Now, when I sew the binding to the top as the second step, I receive a cool reward: a nice straight seam ON the binding! More about that magic in a minute.
Sewing the binding strips to the back first was a little epiphany – I think I learned it from Red Pepper Quilts. Once you learn to machine bind a quilt starting on the back, there is no looking back!
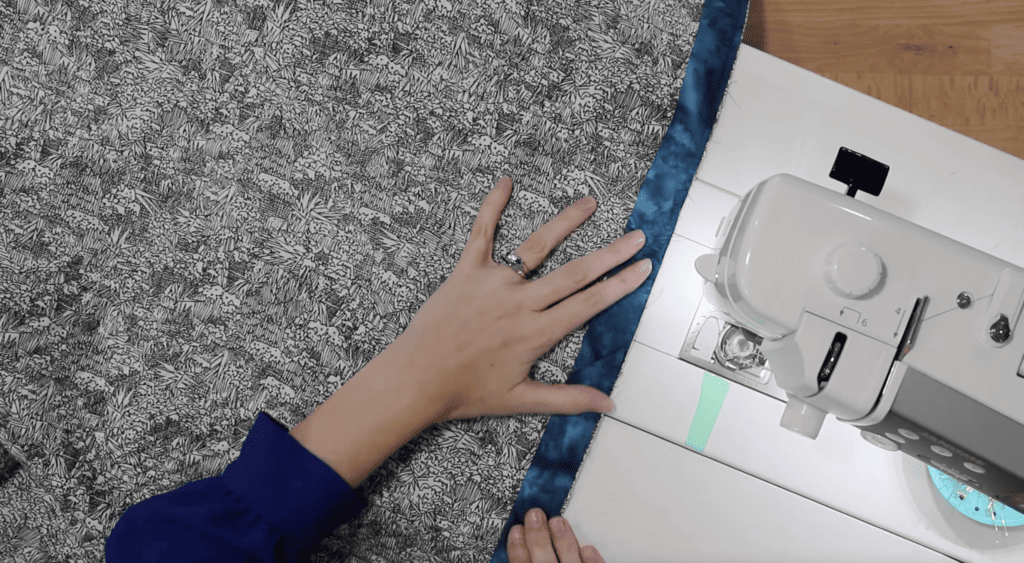
By sewing the binding strip to the back first, you’ll get a more consistent, tidier and prettier finish on the top and the back is already secure.
Your take-home message: Attach the binding strip to the back of the quilt first, instead of the front!
I have a feeling my binding method will become your preferred method, too!
WHY MACHINE BIND A QUILT?
Many quilters love hand binding and find it relaxing. But not me. If I decide to do hand binding? It won’t get done.
Even when I machine bind a quilt, I’m not relaxing!
Instead, I’m on a mission when I bind a quilt: Get it done quickly by using a sewing machine because it’s faster. I like faster and done.
Durable, too. The binding fabric stays put.
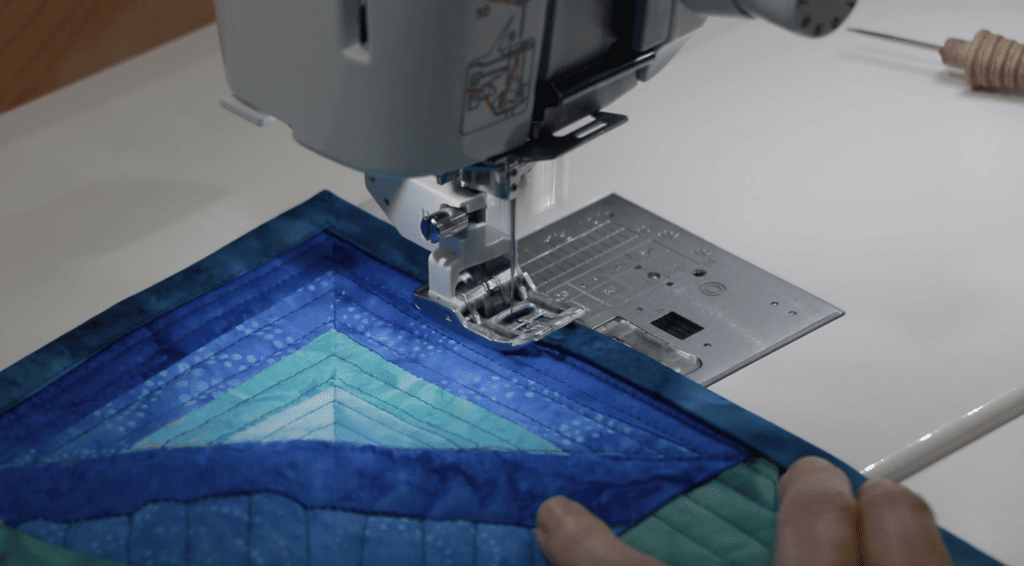
Dee shared with me: The quilt never comes back to me forrepairs after my grandkids and their pets roughhouse with them.
Fine tuning my technique to bind a quilt took a few years before I nailed down my fool-proof method. Now I machine bind 90% of my quilts.
And you won’t need years to perfect it!
MY MACHINE BINDING METHOD
Let’s get started with the how to machine bind a quilt. Again, I’m not covering every aspect of quilt binding, just what I do differently to get an attractive, less-effort finish when I machine bind a quilt.
There are many different techniques to machine bind a quilt and creative ways to do it.
Bottom line, I want to give you clear instructions so you can machine bind a quilt with this method.
If you need a comprehensive lesson for quilt bindings, check out the best binding tutorial IMHO like this wonderful tutorial here.
In this post, you’ll find a round up of answers to commonly asked questions about how to machine bind a quilt.
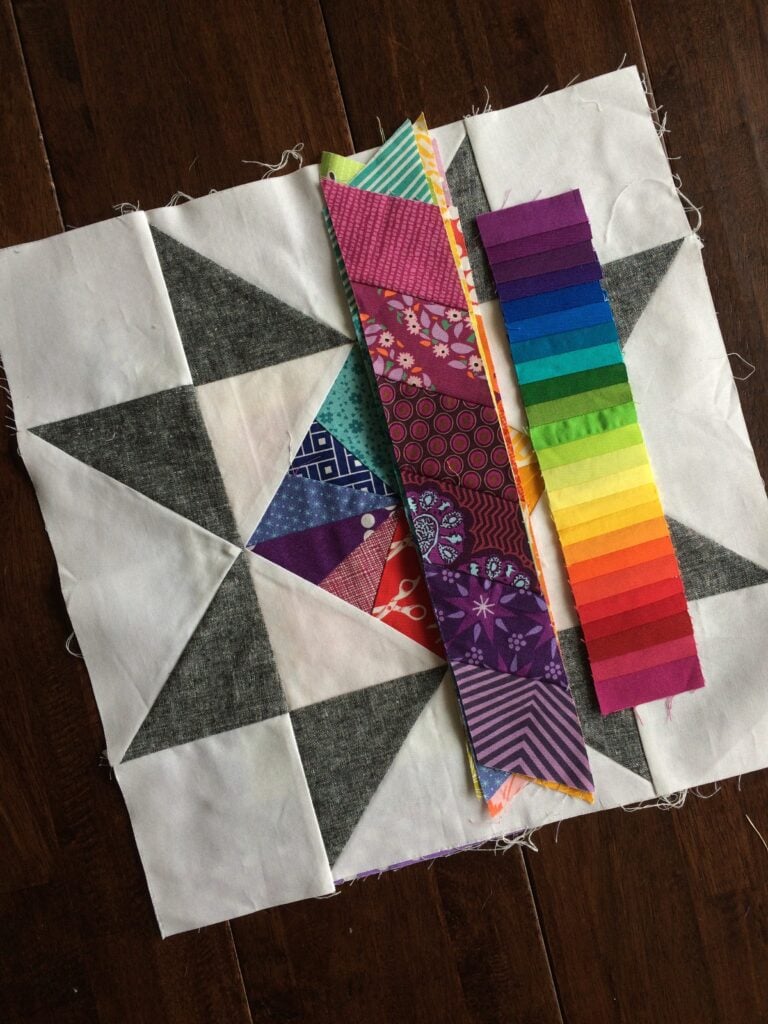
Setting Up Your Sewing Machine
I set up my sewing machine by changing the thread, stitch length, and the foot.
Thread: I usually match my binding stitches thread to the color I used in the quilting.
Stitch length: I set it to match the stitch length in the quilting, usually around 3.5mm. The binding stitches near the folded edge look better when they are similar to the quilting stitches.
Still, you may need to adjust the stitching length to 1.5mm-3.5mm long depending on the thickness of the binding and quilt top.
Pressor foot: Change the presser foot to a walking foot if you have one: A walking foot is helpful and I use mine often.
My sewing machine fusses at me if skip the walking foot when I try to machine bind. So I put the walking foot on to make us all happy!
It keeps the fabric moving in unison on the top and bottom sides, which means fewer buckles, ridges and gaps.
Binding strip: My binding strip is 2.5 inches wide before folding.
Seam allowance: I sew binding to the quilt sandwich with a quarter-inch seam.
Making the Quilt Binding
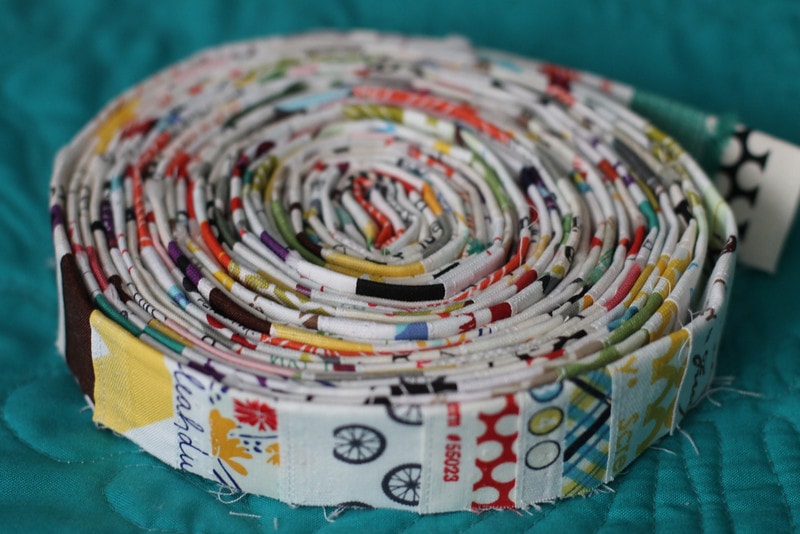
My tutorial focuses on the step of attaching the binding to the quilt. You will need to make the quilt bindings first. Check out this post here on commonly asked questions about making quilt binding.
Machine Binding Tutorial in Steps
Alright! Let’s get sewing!
STEP 1: Attach the binding to the back of the quilt
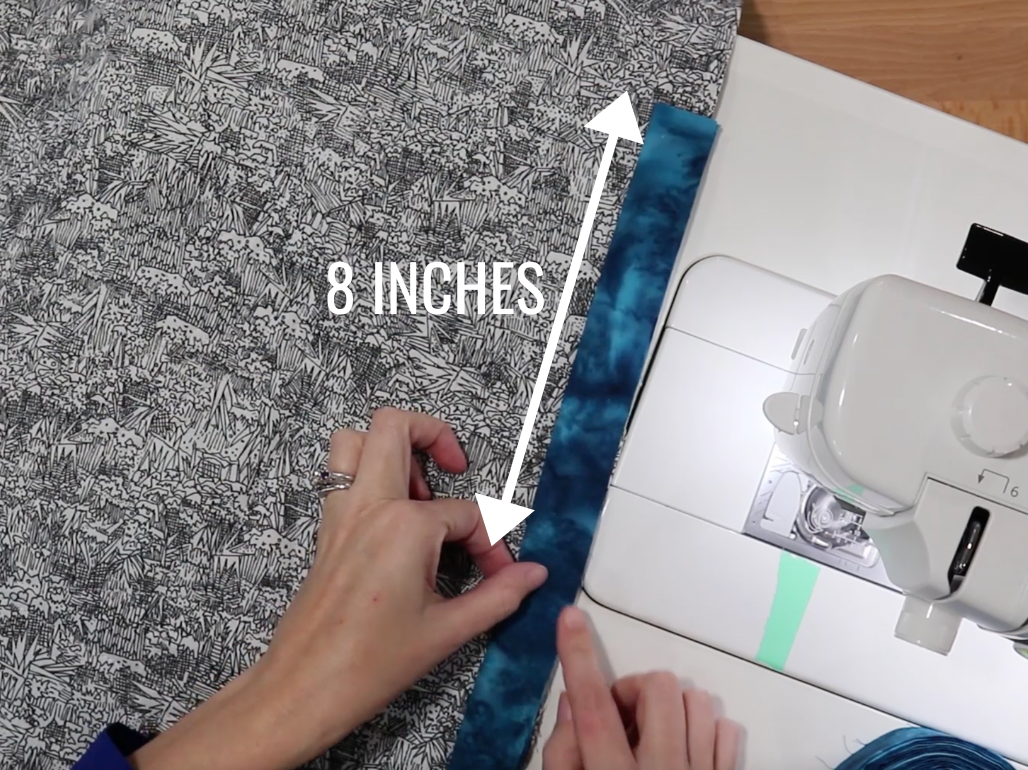
To start, I attach the binding strip to the back of the quilt, instead of the front, matching the raw edge of the quilt and the binding together.
Using a quarter-inch seam allowance, I start sewing on the binding at the halfway point on one of the sides, leaving an 8-inch binding tail (above).
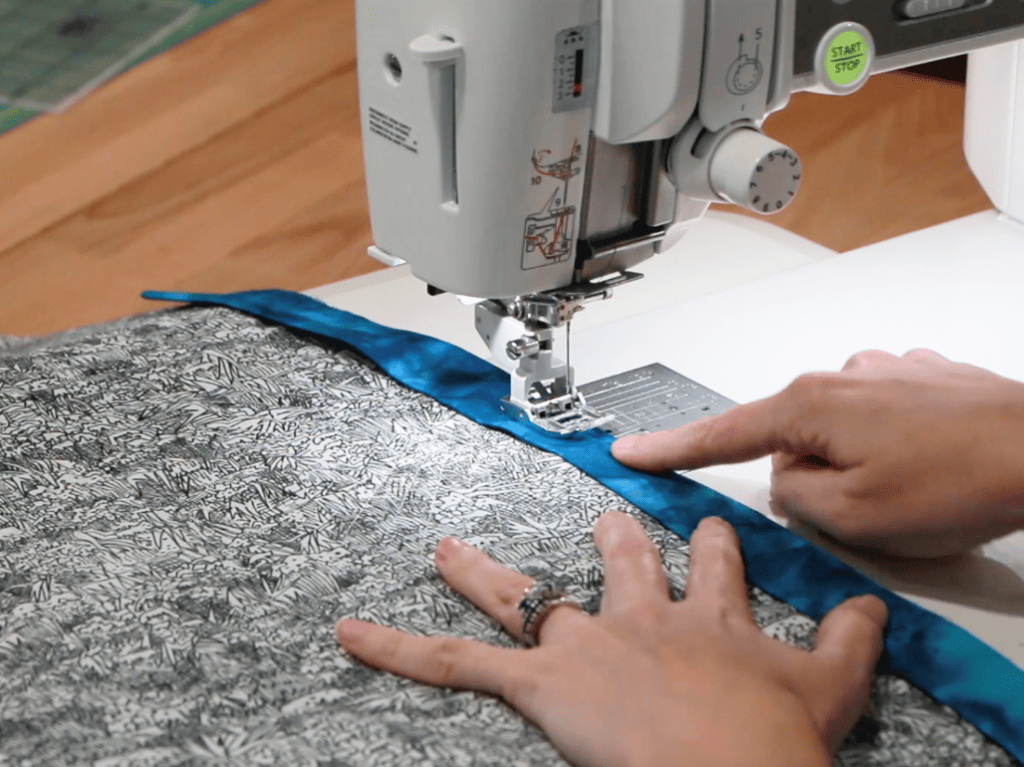
To start, I attach the binding to the back of the quilt, instead of the front, matching the raw edge of the quilt and the binding together.
Using a quarter-inch seam allowance, I start sewing on the binding about halfway down one of the sides, leaving an 8 to 12-inch binding tail loose behind the starting point (above).
STEP 2: MITERED CORNER
Continue to stitch towards the corner and stop a quarter inch away from the edge of the fabric.
Lock the stitch by stitching backward and then forward a few stitches. Cut the threads, lift the presser foot and move the quilt out from under it.
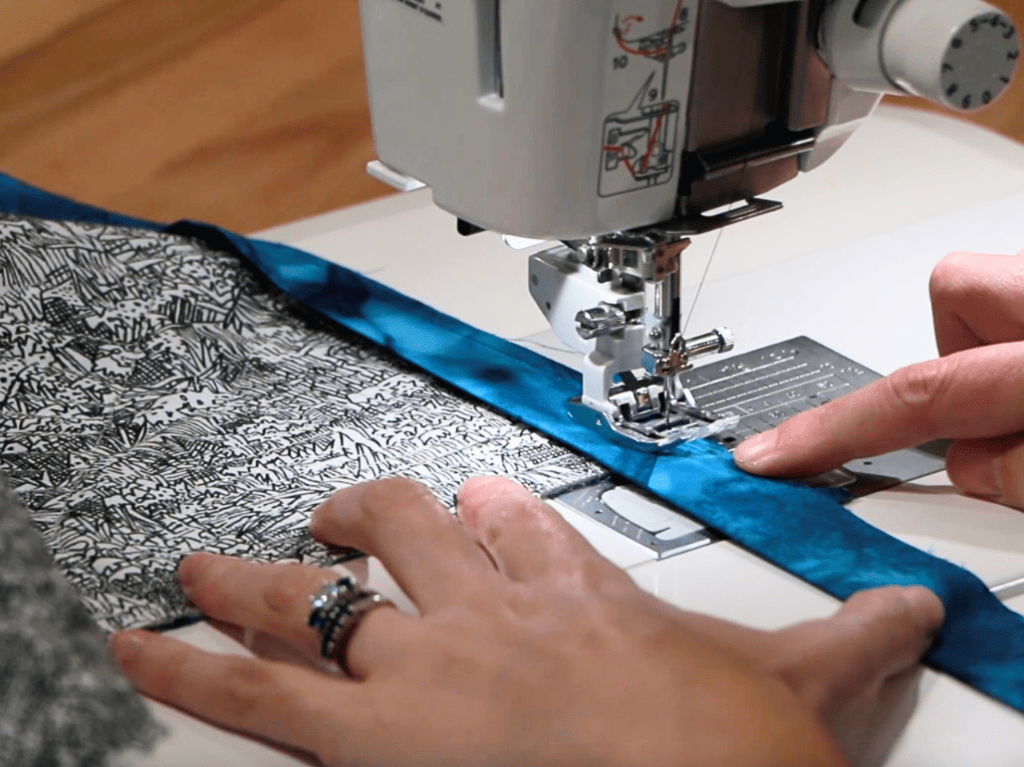
Rotate the quilt one turn to the left (below).
Fold the binding straight up off the top edge of the quilt, which will create a diagonal fold for a mitered corner. Make sure the long edge of the binding lines up with the edge of the quilt top.
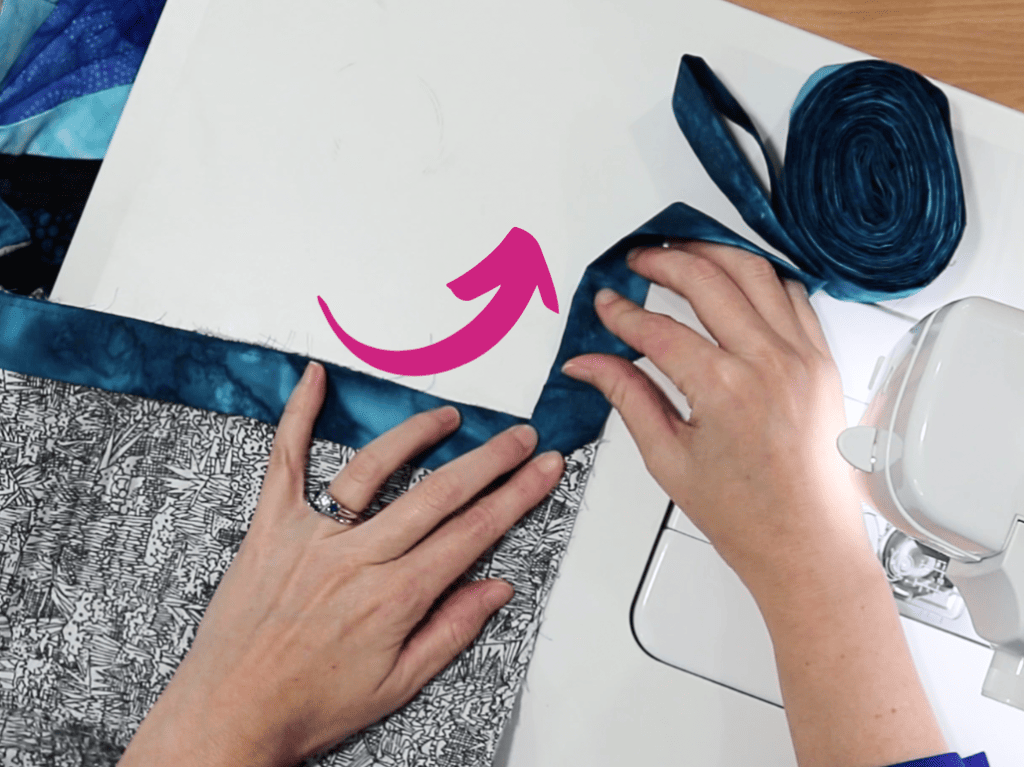
Next, keeping the diagonal fold in place with your fingers, fold the binding down over the it. Again, make sure that the edge of the binding lines up with the quilt’s raw edge. Nice!
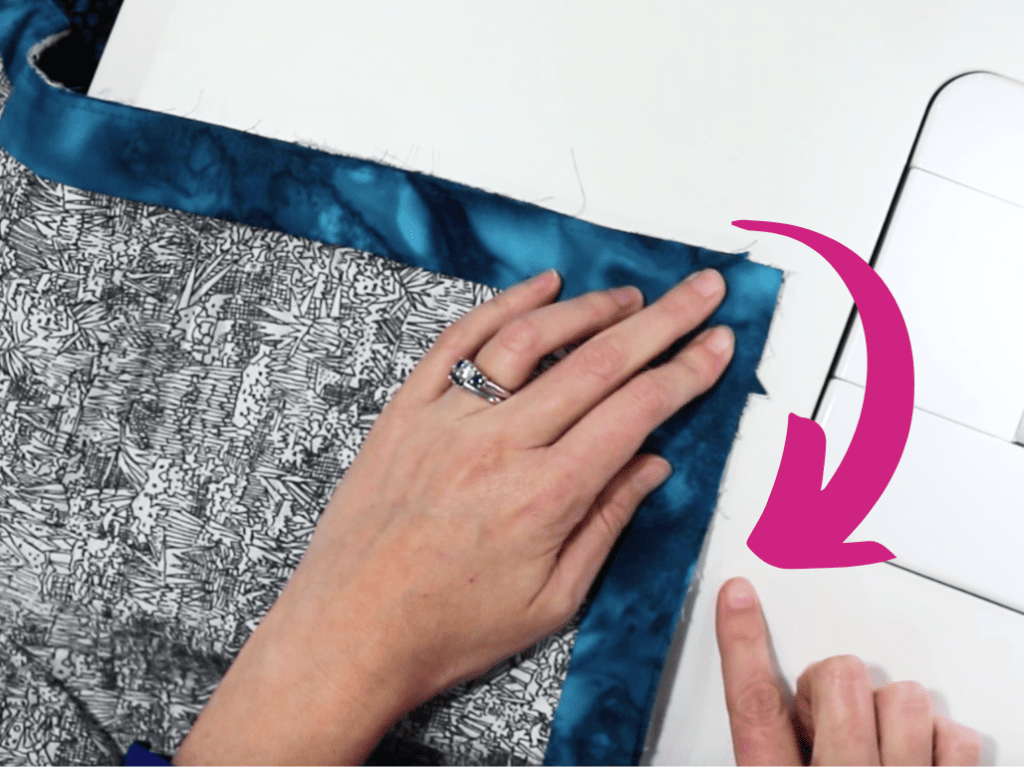
Start stitching and lock your stitch at the top edge. Then keep stitching until you reach the next corner.
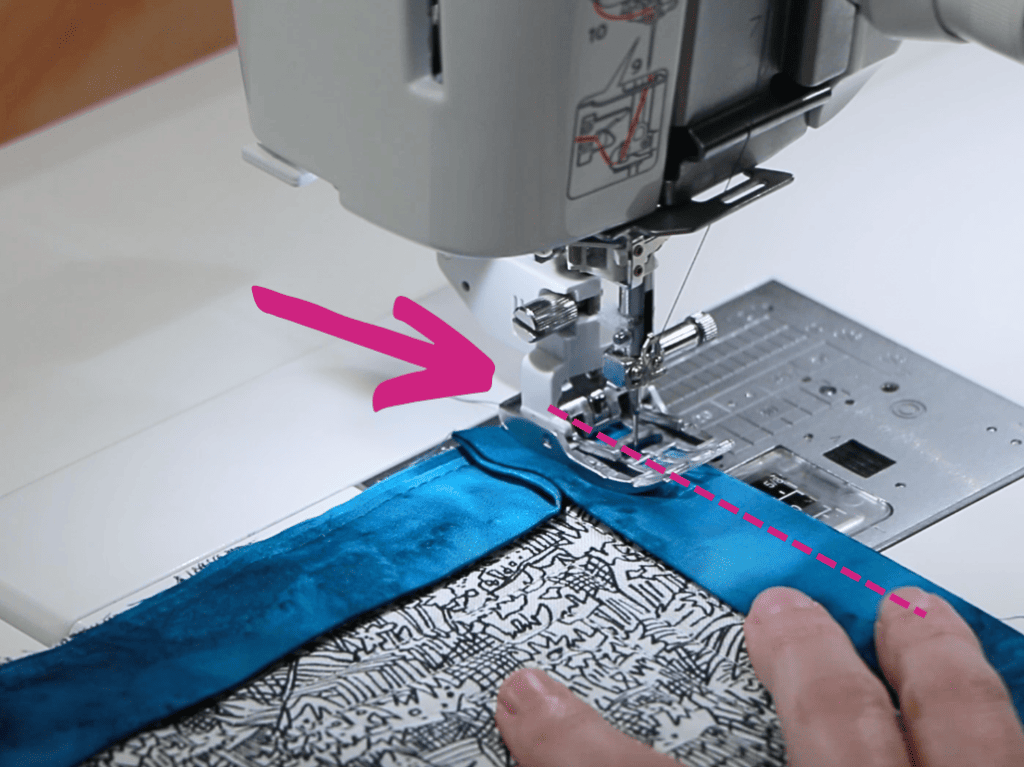
After you’ve sewn the four corners, your presser foot end up past the corner on the side where you started.
STEP 3: JOIN the BINDING STRIPS
The key to success for joining binding strips is leaving enough binding loose at each end. I like at least 8-12 inches so I have plenty of room to maneuver. The unsewn binding tails comes in handy!
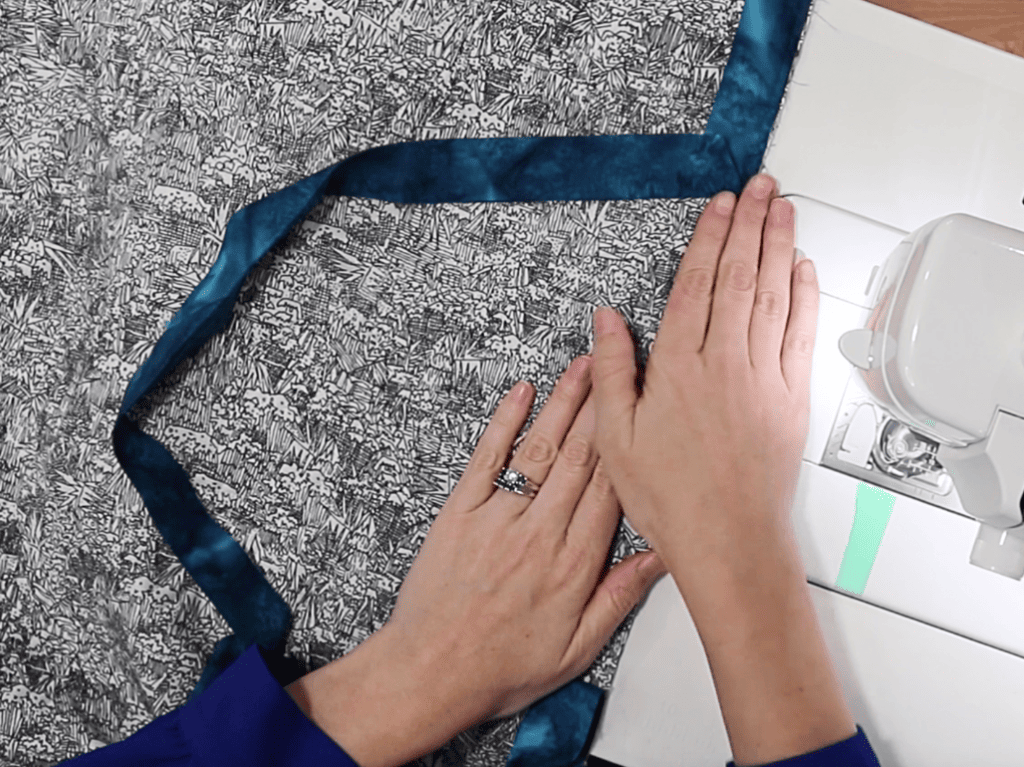
Cut an extra piece of binding 2.5 inches long for a spacer guide.
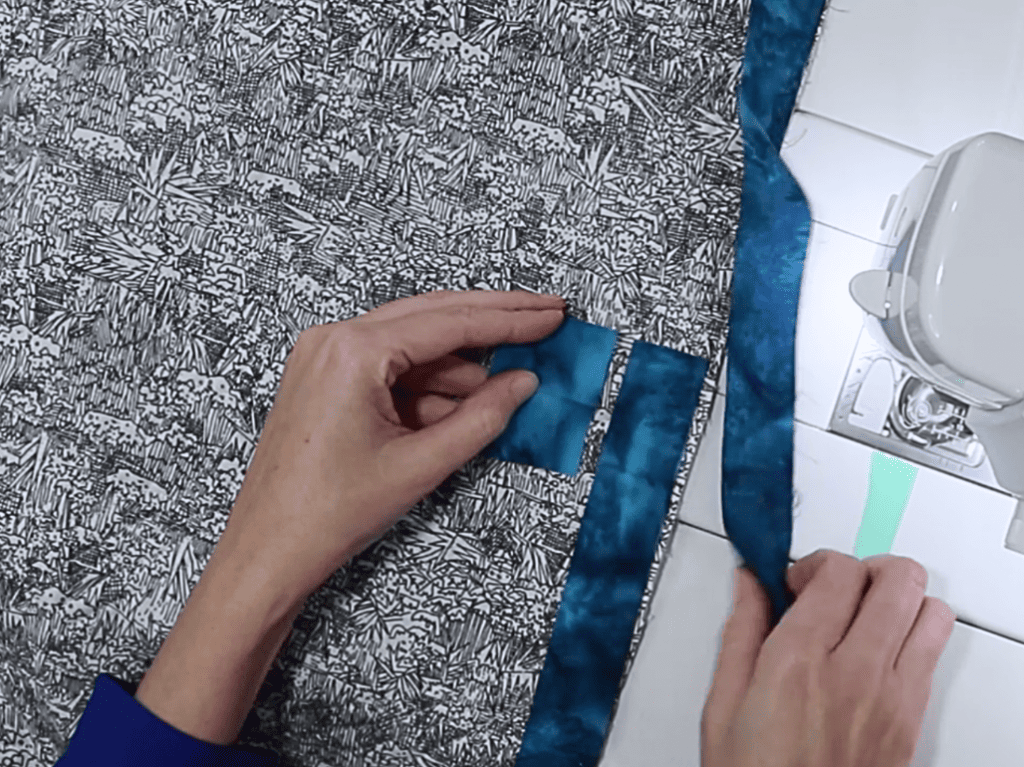
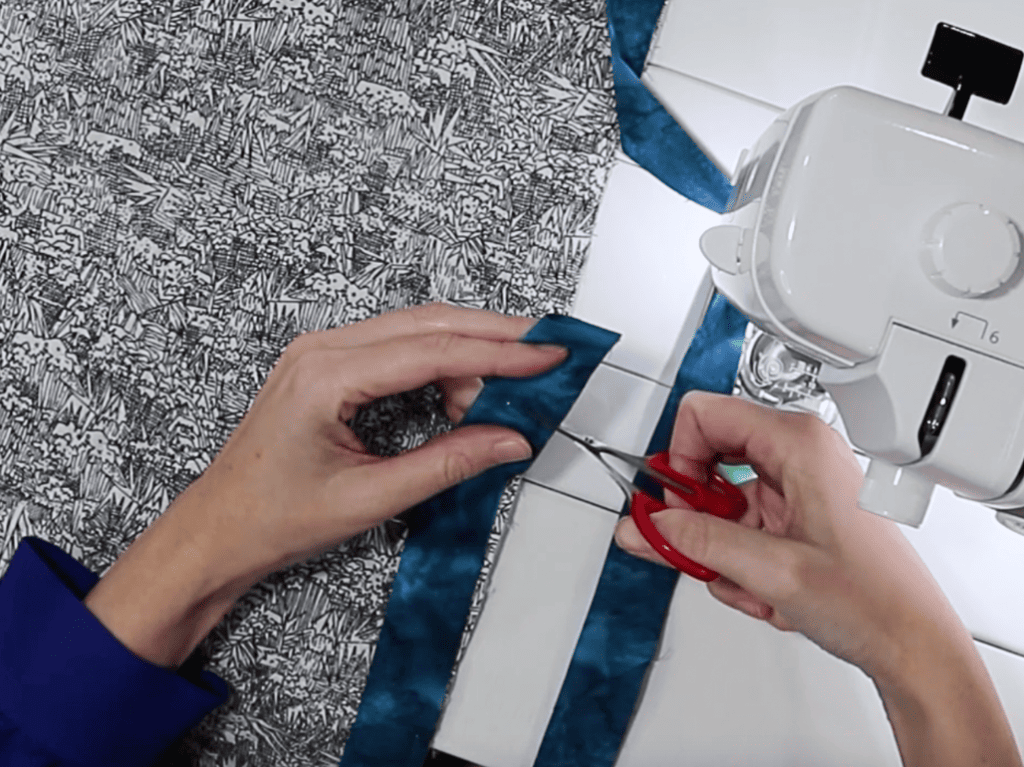
Trim off the excess binding on each end so that they overlap by 2.5 inches using the guide.
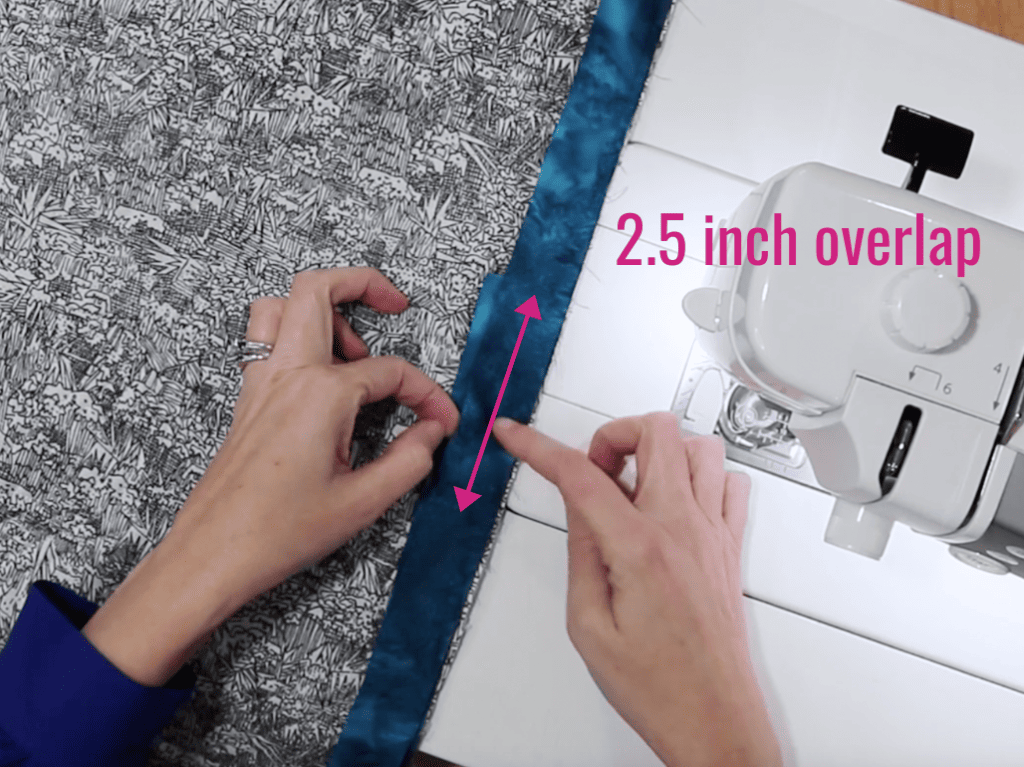
Unfold the ends and lay one on top of the other with right sides together. Make sure the edges lay at a 90-degree angle and line up straight.
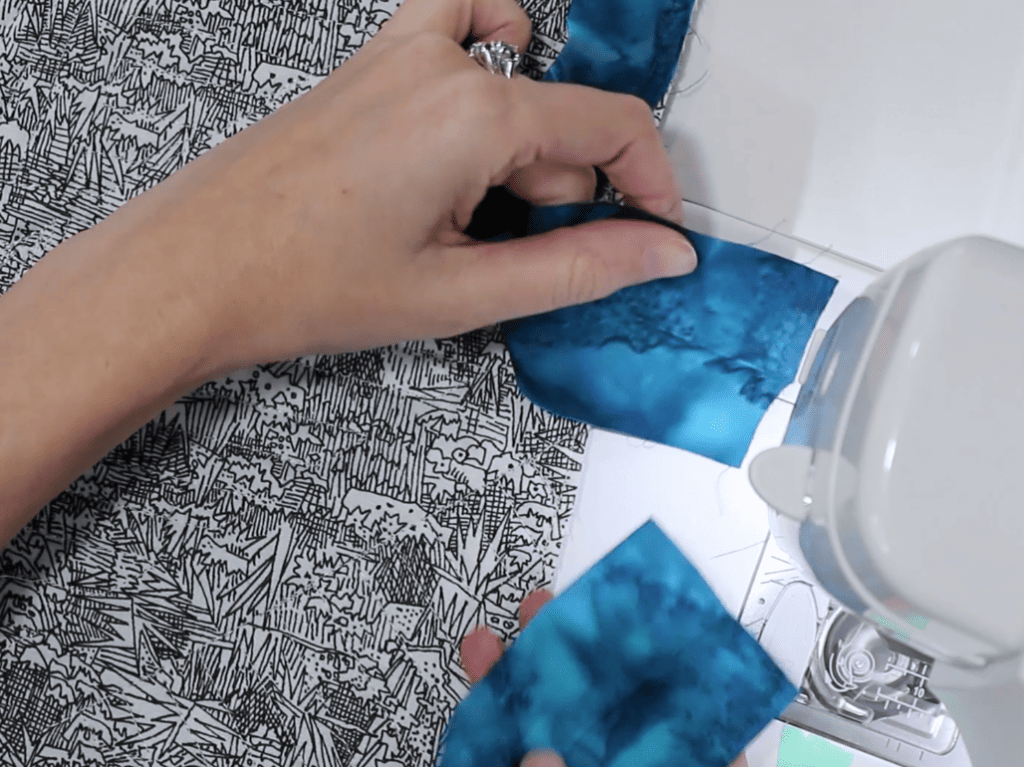
Lay one binding end over the other end, right sides together. Things get a little twisty at this point! Show the fabric that you’re the boss. They will form an L-shape.
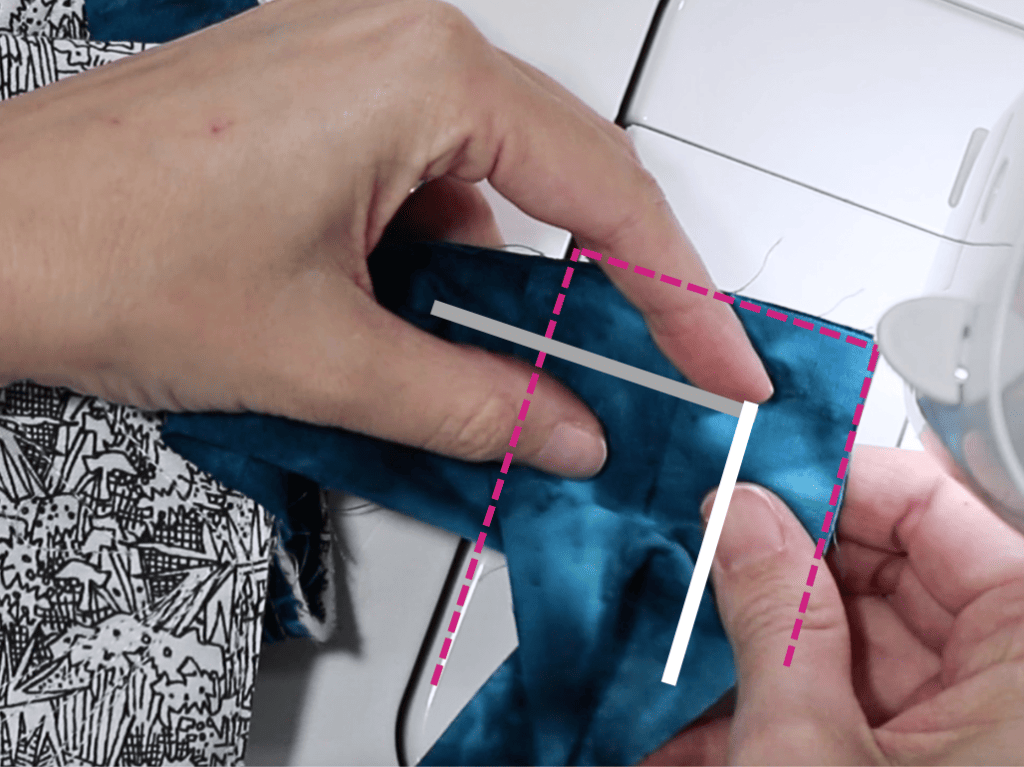
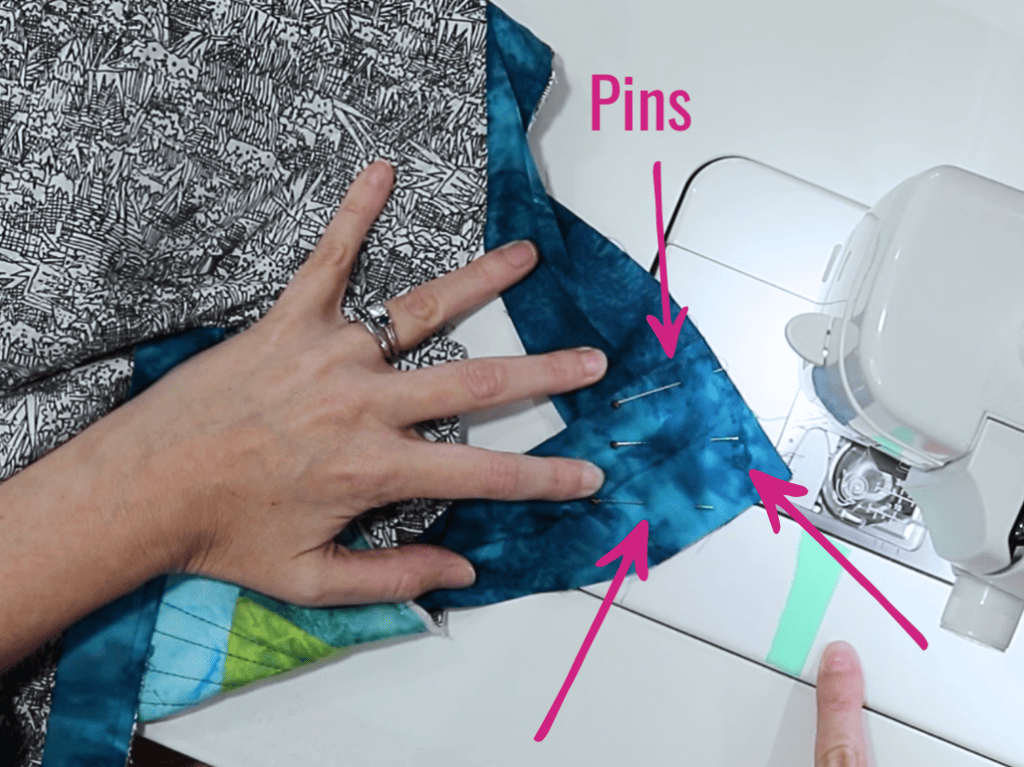
Pin the ends together so they lay nice and flat, edges even.
Place washi tape vertically at the quarter inch seam allowance line. This keeps your seam in a straight line as you sew.
You may need to wrestle with the quilt’s bulk to get the ends under the needle! Just a twee awkward.
Starting at the top corner where the binding pieces overlap (pink circle below), stitch in a straight seam to the lower corner.
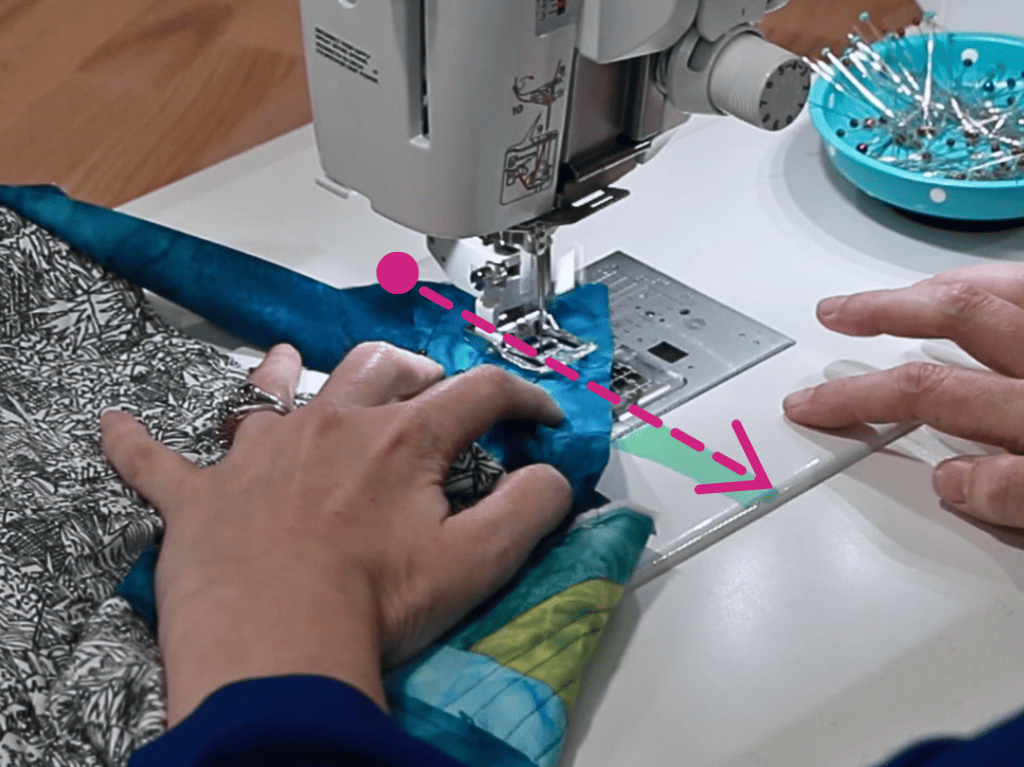
Some quilters use a ruler to mark the seam line from corner to corner before stitching. I usually eyeball it with my washi tape guide. Don’t let me stop you from using a marked line though.
Trim excess fabric to a quarter inch beyond the seam. Finger press the seam open then fold it in half to form the binding.
Lay it flat on the quilt edge with the raw edges matching. Finish sewing the quilt binding in a quarter inch seam.
Note: If it doesn’t lay flat, open up the binding and sew a ⅛ seam just barely inside of the original stitch line. This will take up a bit of extra fabric. Fold it back together and see if it fits. Repeat until your quilt binding lays flat.
STEP 4: MACHINE STITCH ON TOP OF THE BINDING ON THE FRONT
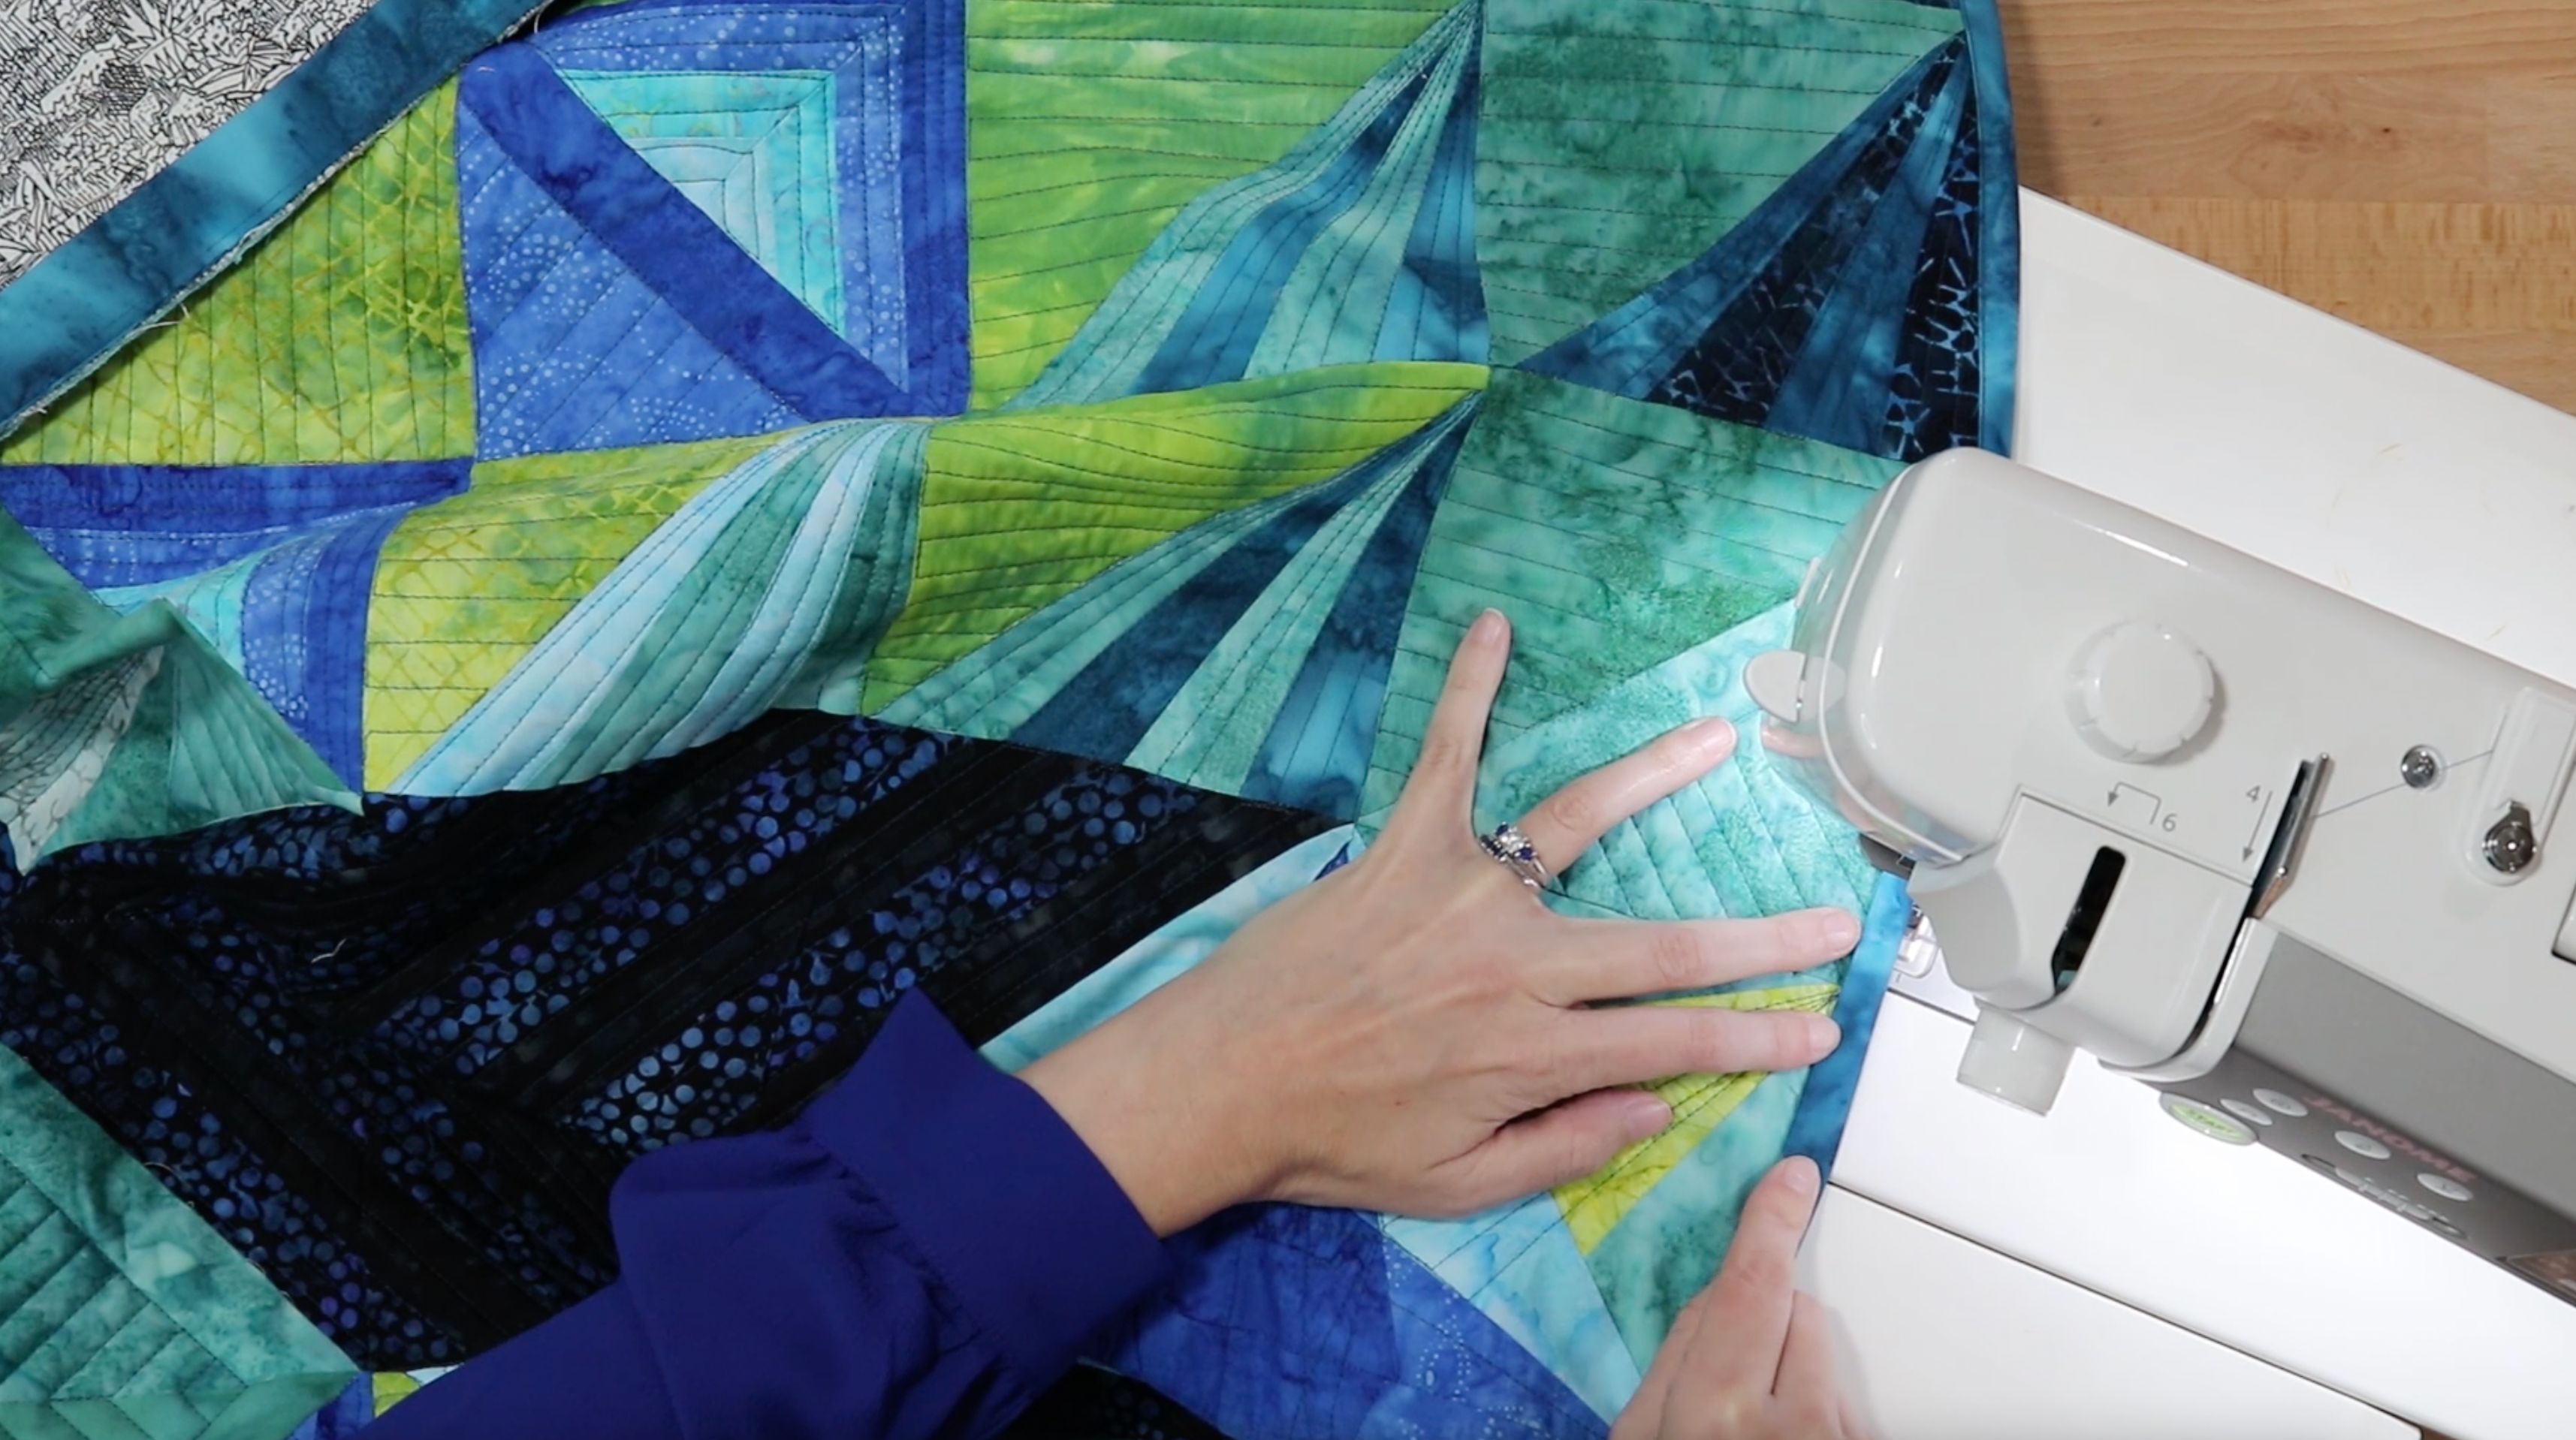
Once you’ve attached the binding to the back, flip that sucker over to the front. It’s time to machine bind the front.
Beginning with one corner, start wrapping the binding fold binding to the front. Usually, I just use my fingers, but clips and pins work, too. Full disclosure: I don’t use clips or pins anymore because I’ve bound a few quilts or ten.
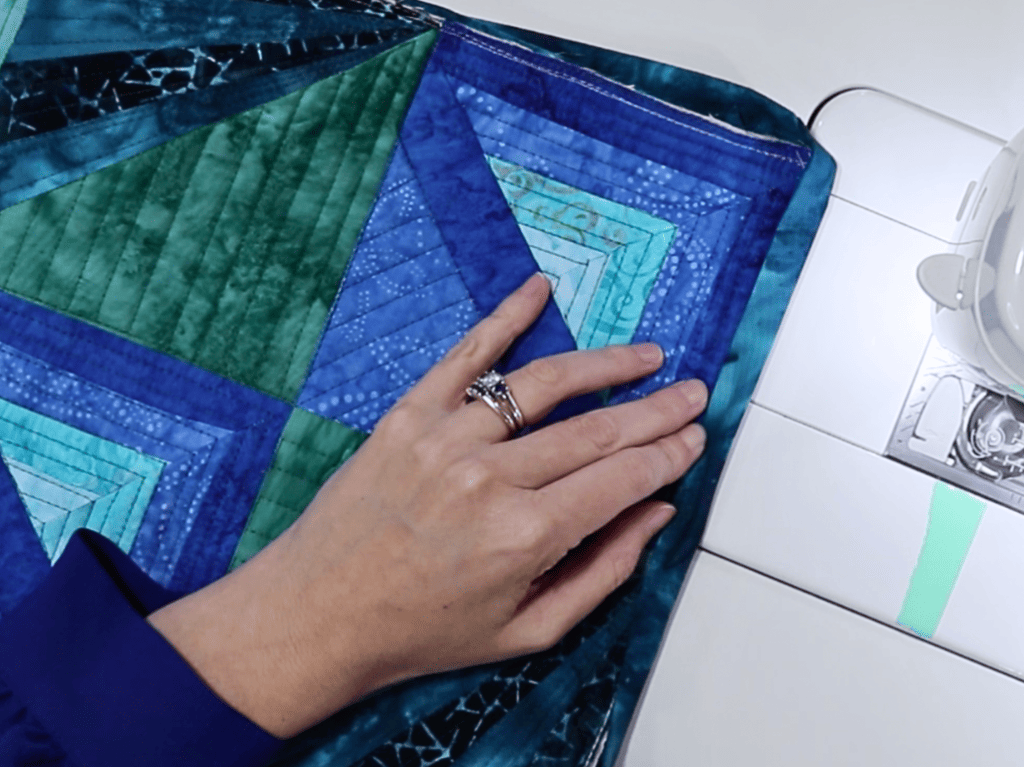
Once you’ve got the starting point pinned (or not pinned), put the quilt binding under the foot a quarter inch past the corner.
Before you start sewing, you’ll need to bring your bobbin thread to the top. So hold on to your top thread and then “needle down and needle up”.
Next, pull the top thread until the bobbin thread comes up. You’ll see it poke up through the hole in the stitch plate.
Now, pull each tail toward the back of the machine, Make sure your tails are at least six inches long.
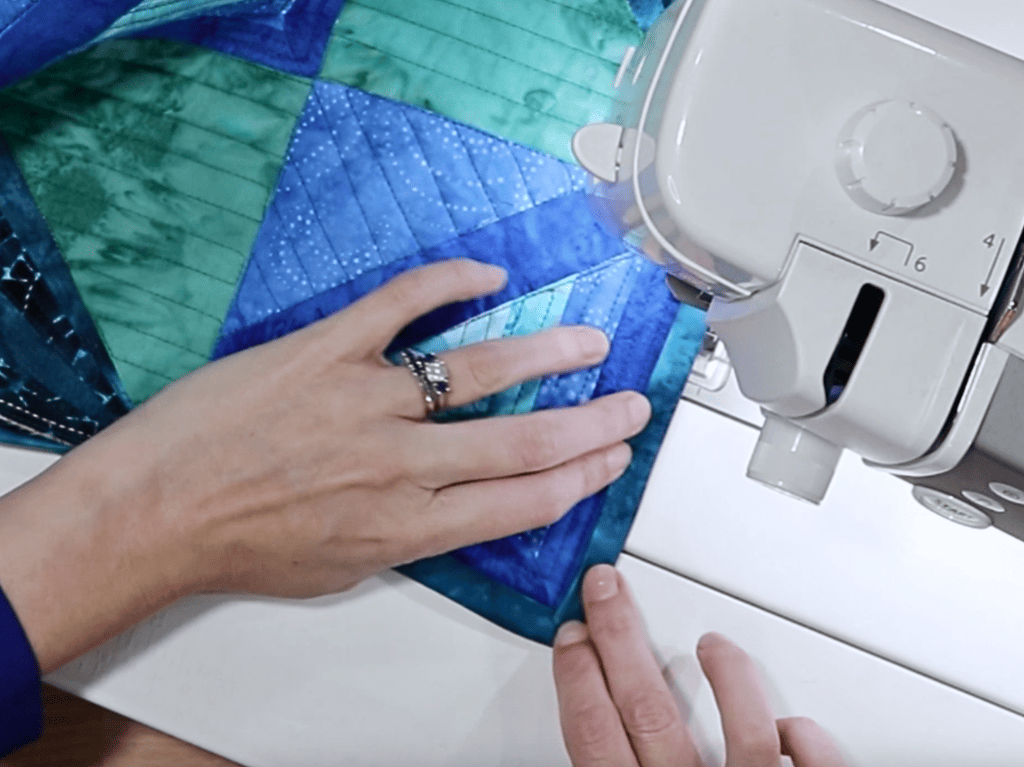
After the thread tails are set aside, lock stitch or stitch forward and backward a few stitches. Then continue sewing about 1/8 inch away from folded edge of the fold. Another term for this is edge stitching.
You’ll control where the stitching line finishes on the front as you stitch merrily along. So satisfying!
Be careful not to stretch the binding too much, especially if you’ve cut your strips on the crosswise (stretchy) grain of the fabric or cut diagonally on the fabric to make a bias binding.
Pulling and tugging causes gaps, bubbles and ridges. Gasp (ask me how I know these things). Clips are little miracle workers if you’re new to binding!
Can you see how much control you have over the seam line on the front of your quilt? Yup!
This little change makes the BIGGEST difference in your finished result.
Stop right there and admire your stitching. Good times!
How to miter a corner On the Quilt Front
Tidy, nicely mitered corners are easier to achieve when you can see the front of the quilt.
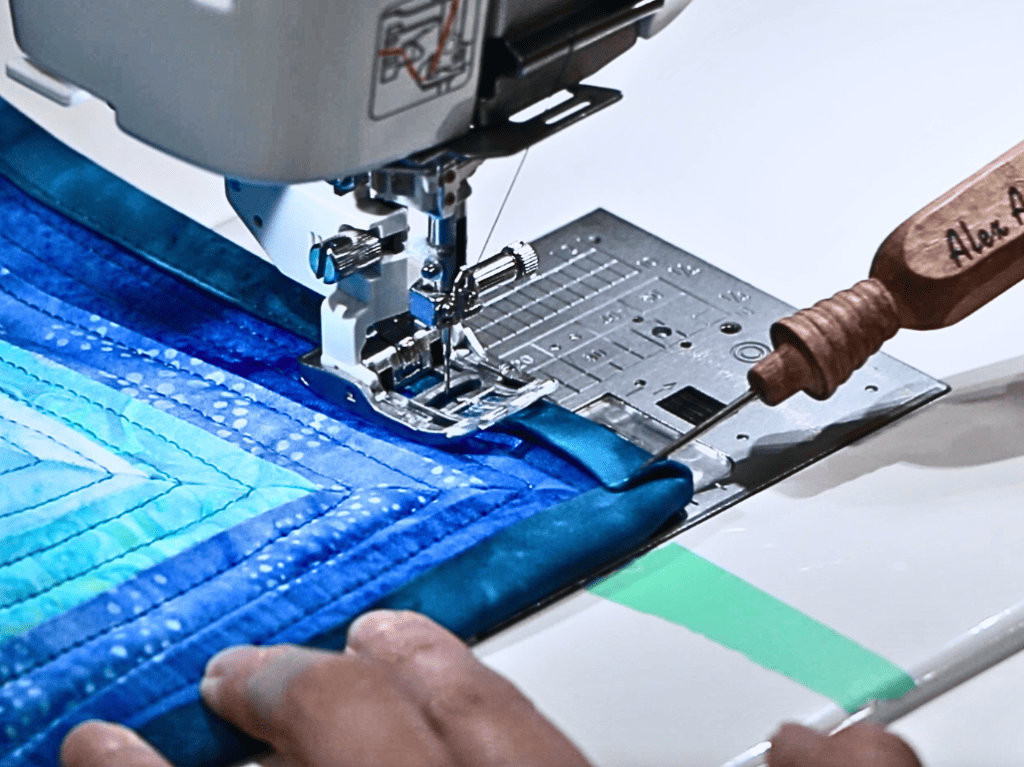
As you approach each corner you’ll need to pause and fold your corner into a miter. Make sure your needle position is “needle down” when you stop and start stitching.
This prevents the walking foot from tripping over the folds.
I love this part because I can see what the mitered binding looks like folded in place! It’s the simple things, right?
Try to pin away from where you’ll be stitching so that you can keep the pin in place for as long as possible. You just need to pin the top layers – not through all the layers.
Once everything is pinned to your satisfaction, begin stitching. When you get to 1/4” away from the corner, your needle needs to fall where the miter folds meet.
Stitch into the point where the mitered fold joins, then stop. Just to be extra safe – I put in a lockstitch. On my machine, the lockstitch is the circle within a circle button.
So easy when the needle stays in the down position for starting and stopping!
Pivot around the corner and continue stitching until all of the folded edges are sewn down.
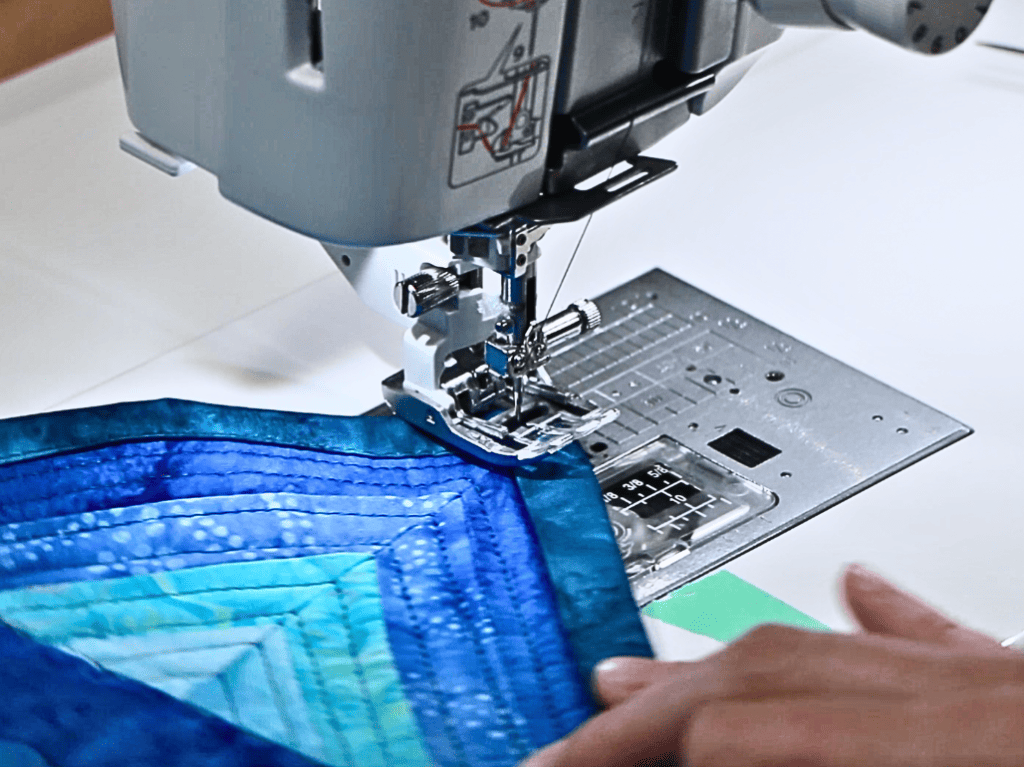
Done!
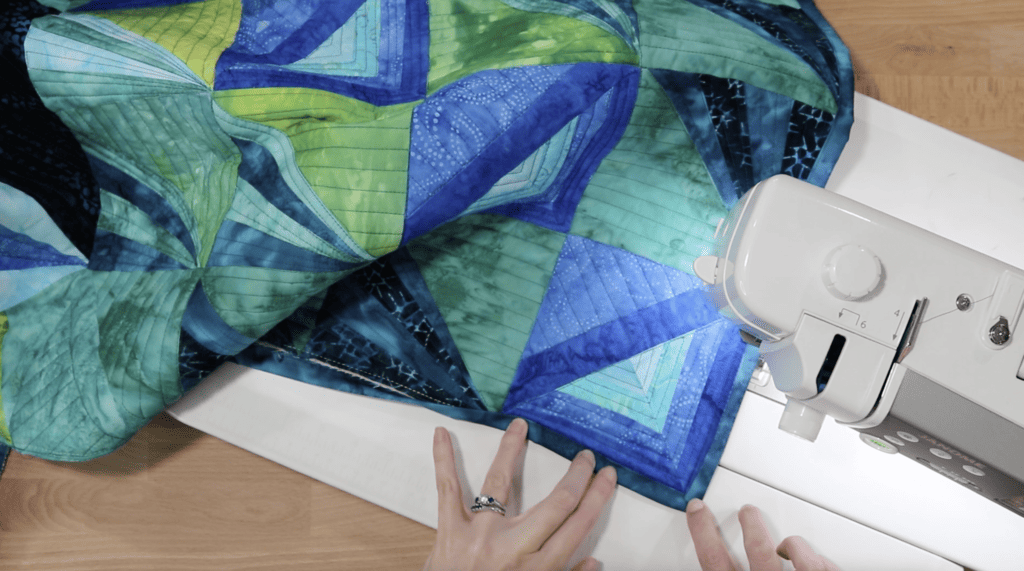
Quilt top bound with fabric used for piecing.
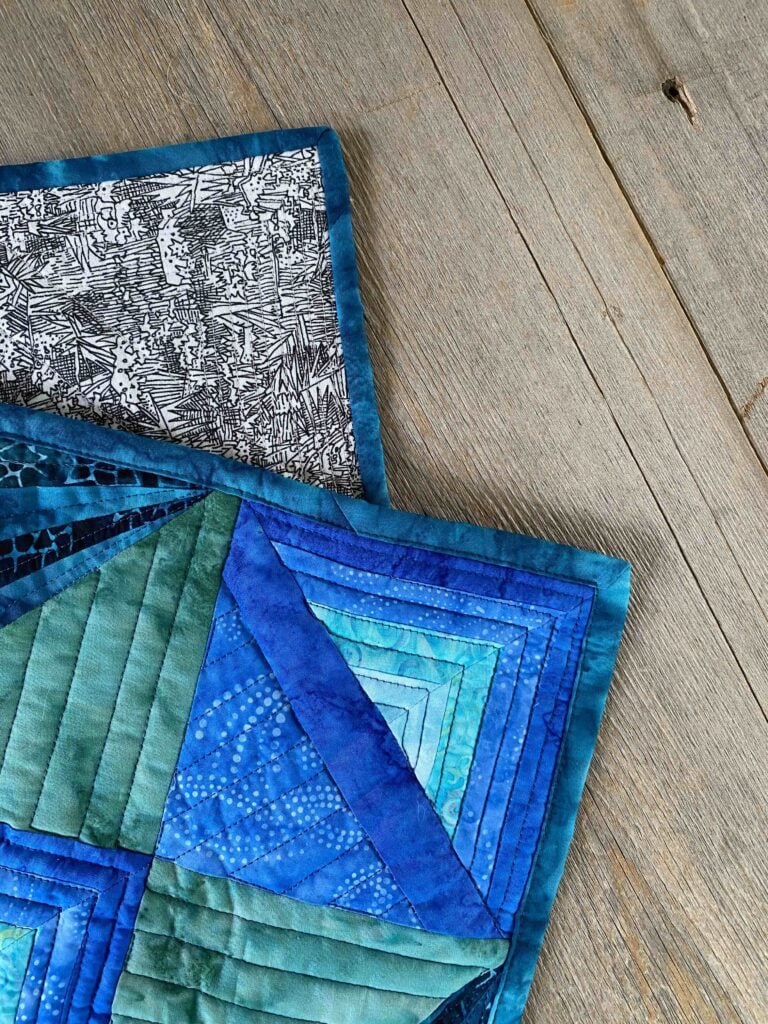
What does the back look like?
Many quilters ask, “Well, what does the back look like?”
The stitching on the back sometimes wanders off the binding. That’s why your thread should match the backing fabric and the machine quilting thread. This is worth the hassle of winding your bobbin in matching thread!
By sewing the binding to the back first and then edge stitching to secure binding to the front, wandering stitches are only seen on the back and tend to blend in.
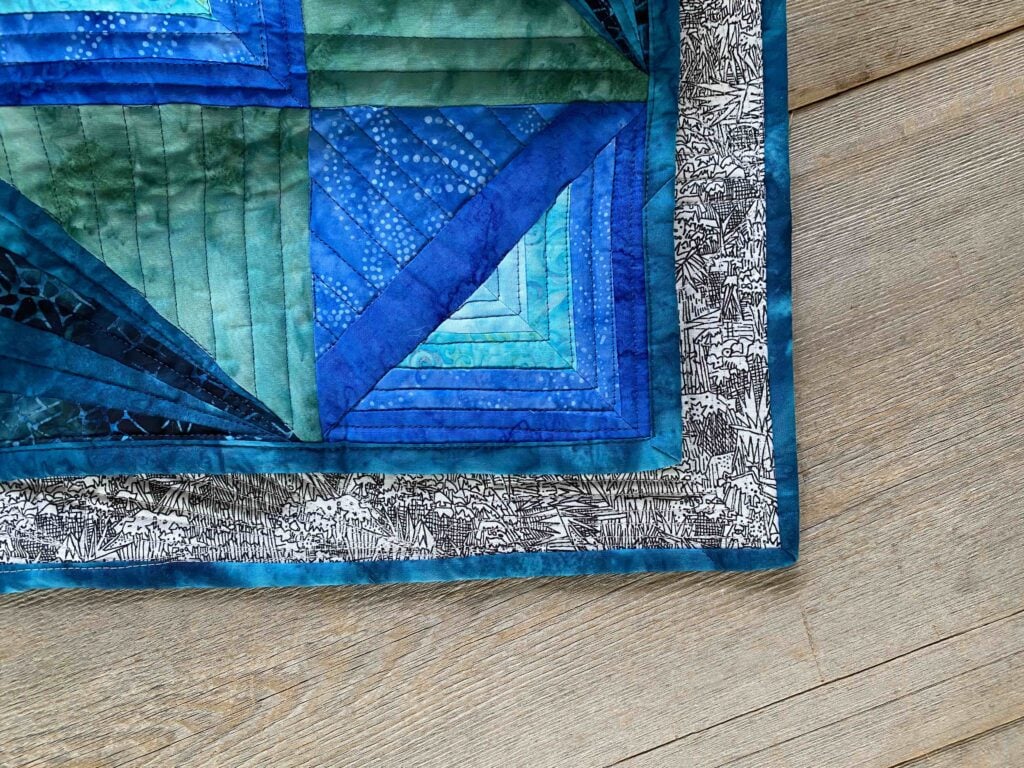
If you’re a beginner, your stitches will wiggle and wander. As you gain more experience, your seam lines will fall in line, so to speak!
Unless you’re like me and watch TV while you sew. My stitches still dribble around sometimes even though I’m a “professional”! Lol.
Prior to perfecting this machine binding technique, and it did take several go rounds in the binding process, my biggest frustration with machine binding was how stitches would wander on and off the binding. Sometimes the stitches would wander so much that portions of the binding weren’t even attached to the quilt!
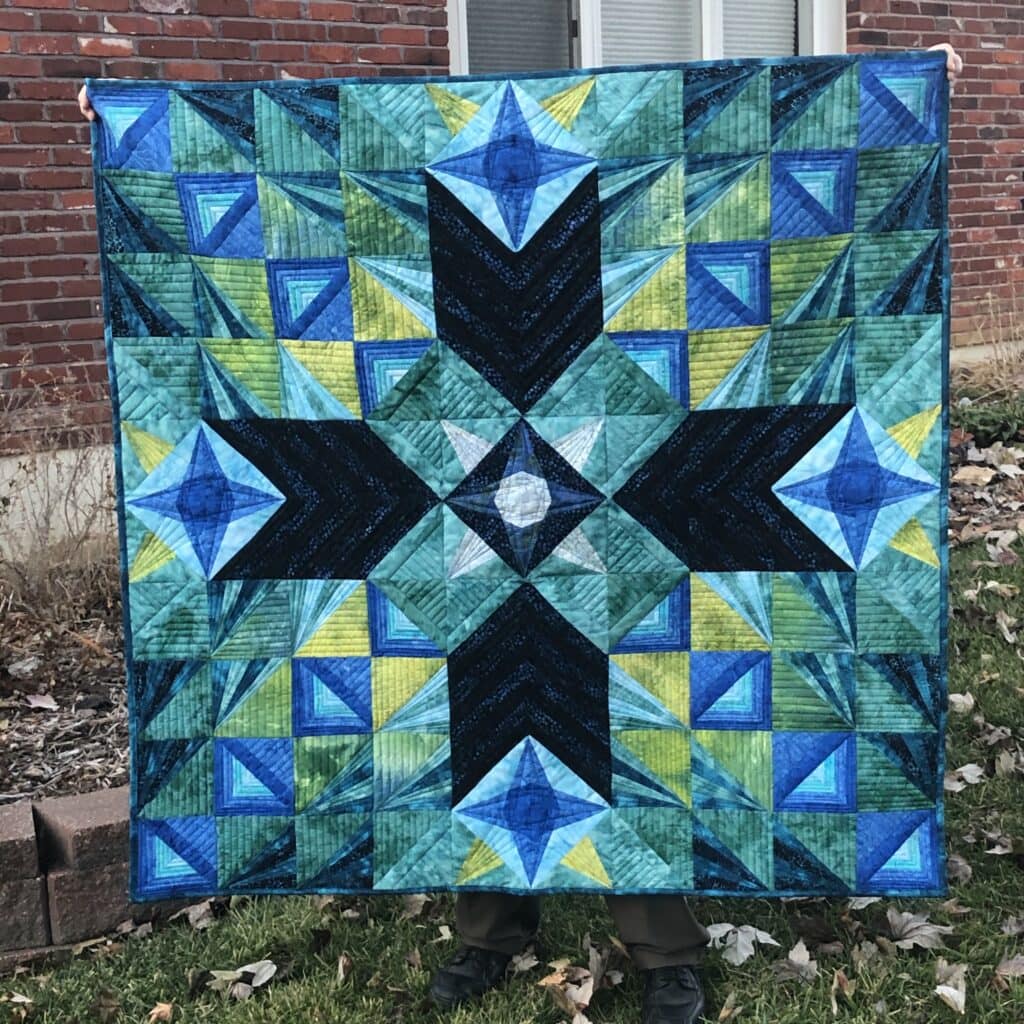
Ta Da! My mom’s Stargazer is finished:
WHY SHOULD YOU MACHINE BIND A QUILT?
Hand binding or machine sewing?
For me, machine binding a quilt is faster.
Even if I decided that attaching binding by hand was the way to go, that lonely quilt would linger undone for the ages and haunt my to-do list.
I hear you hand binders out there! Hand sewing is relaxing and it’s precise. When you bind a quilt by hand, the results are beautiful. When I machine bind using this technique, I’m given the gift of time. I skew on the side of more time!
Quilt Binding Tutorial Tips Round Up
My biggest aha moments came when I:
- attached the binding to the back (as I’ve shown above) and not the front,
- coordinated my thread and stitch length with the quilting,
- sewed a continuous stitch to attach the binding to the front.
Ready for your aha and ta-da moments? Give it a spin and let me know what you think in the Comments. Have a question or a helpful binding tip? Share that too!
YOU MAY ALSO LIKE
- How to Make Quilt Binding From Selvedges
- Quilt Binding Ideas: 25 Fab Finishes
- Take a free class with me! Sign up for the “Scrappy Whirligig” Class here
What are quilters saying about this quilt binding method?
Looks good! I like the control of seeing how the stitching on the front is going. Sometimes I glue baste the top and mitered corners. Then I don’t have to pin anything. – Cathy
Machine binding is totally my nemesis! I’ve gotten better but still not great. Like you, I have started attaching it to the back first, so that I’ll know at least that the front will look good. And like you, the stitching on the back wanders a little which I gotta admit drives me a little crazy. I’m still searching for the perfect method. – Saroy
This is the easiest looking method I have seen yet…I have tried just about every method out there and I always go back to doing it all by hand because I hate not being able to control where that back seam is going to end up. Thank you for the new method to try. – Sandi
Thanks for suggesting the walking foot — why didn’t I even think of that? It would be much easier and faster! THANKS!!! – Meri
I hate to hand stitch for the same reason – it will never be completed! Thank you for your tips. I do what you do and I’m pleased most times with outcome! – Ann
The most important takeaway for me is that you let the binding stitch show…ah ha! Larger stitch and matching thread! – mburg
I love binding by machine since I discovered a bi-level top stitching/binding foot after watching Rob on Mansewing using one. It was a game changer! I tried my walking foot but the bi-level foot was what I needed. I have a Brother sewing machine. – Terry
Thank you so much for the binding tutorial and thank you for “giving” me permission to attach to the back of the quilt first, then flip to front. I have tried machine binding a few times and failed miserably. I’ll be giving your technique a try with the week. Thank you again! – Melanie
I always do machine binding. And. like you, use a 2 1/2″ binding, sewn to the back. From the back, I fold the binding over the back seam and iron. That way when I pull it around to the front and sew with an eighth inch edge, it almost always shows on the back on the backing and not the binding. When I want the machine binding to look really good, I sew binding with a 1/8 – 1’4 inch contrasting flange and sew the binding down on the front (after wrapping around from the back) on the inside corner of the flange with thread the same color as the flange. – Carlie
Even with the black binding, this such a clear description I now look forward to finishing some of the projects languishing in my pile! (that I have just rediscovered – one of which is a Christmas wall hanging, lol) Thanks! – Alice
I don’t mind binding by hand, but my hands seem to mind. Been machine binding for a while, using pretty much your technique. However, the last one I did, I took a glue stick to hold the binding in place on the front as I sew. Have also used a wobble stitch to sew the binding down, that way of you get a bit crooked, it doesn’t show. – Pat
I glue my binding on after the initial stitching. I stitch it to the front, glue it to the back, and then sew it from the front using a wide decorative stitch that catches more than the edge of the binding on the front. On the back, the decorative stitch usually catches all the binding. With glue basting, I don’t need to worry about using the walking foot, either. – grrannyh
Rebecca, I have been doing machine binding from the back…poorly. The first time I tried this, I considered cutting it off the quilt. Uneven stitches and wonky corners…you get the picture. It’s gotten better over time, but just seeing how your quilt corners turned out is making me look forward to binding a baby quilt this weekend. And I’m especially looking forward to using your points on starting at the corner, a larger stitch length, and a different foot. And the one idea that has not worked for me is gluing. I have found that whenever I use glue in liquid or fabric form, it affects my needle, as though it’s struggling to get through it. THANK YOU! You are making a difference, and it’s appreciated. Loved seeing those sneakers ‘under the stars’. – Jeanette
Thanks for another great tutorial! I will try stitching to the back first. I know it is just to messy the other way around. Hate how the stitching wobbles all over the binding. Have not tried the glue idea but that may actually help. Will let you know how I make out on my next binding! – Stacey
I too sew my binding on by machine, using 2-1/4″ strips, starting on the back and then flipping it to the front. I used to use a walking foot or a bi-level foot, but since I now have a Pfaff with IDT, I use my open toe foot, lengthen my stitches, and move my needle to the left. I then sew, keeping the binding edge snug against the inside part of my foot – the stitching on the back never hits the binding and looks really nice. – Shari

I will have to try the sew to the back and stitch down on the front. I like the flange method because I do attach to the back and finish on the front. I only hand bind if I am making a quilt to be judged. It is too time consuming to hand bind most of my quilts. I want them to be used and I feel machine binding will stand the test of using and washing a lot.
I have 4 quilts ready to bind and I’ve always hand quilted them. But my hands are not cooperating and have been wanting to take a class on matching binding. I am looking for maybe having some time this week to try machine binding. Thanks!
I have used this binding method for year Is. I always use a decorative stitch on the top. I think it looks very nice. I am almost done with the quilts for my 35 nieces & nephews. So I have made many a quilts & give them all away.