• About
    • Privacy Policy
  • Teaching
    • Member/Student Login
    • Online Programs
  • Shop
  • Member/Student Login
  • Blog
    • Free Quilt Patterns – Scrappy Whirligig Quilt

Bryan House Quilts

Halfa Rainbow Pillow {Sizzix Tutorial}

Tutorial

30 Jun

Hi there!

I have a wee Sizzix pillow tutorial, let’s call it the “Halfa Rainbow Pillow”, for you today using the 5” x 2 1/2” Chevron Sizzix die.

Two of my daughters have these amazing window seats in their bedrooms and I have promised them pillows and window seat cushions. This past weekend we were able to get curtains hung in their freshly painted rooms (check and check, high five, yeah!). It only seemed fitting that I start to make good on my promise.

So I started with my middle daughter who has the ultimate girly rainbow MonStar quilt on her bed. (MonStar is a pattern from my book Modern Rainbow.) And I still have (well had) this delicious fat quarter bundle of Mirror Ball Dots by Michael Miller. So a pillow using these fabrics seems like a perfect fit.
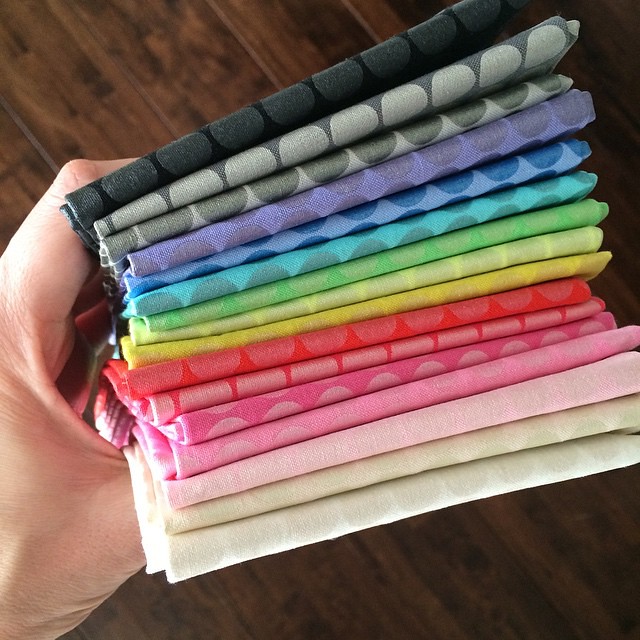
Fabric sammich. Healthier than a Big Mac right? I'm still hoarding this fat quarter bundle of Michael Miller mirror ball dots.

Ok, so choose 3 Fat Quarters and 1/2 yard for background fabric. (You probably could get away with less fabric.) I chose to work with the cool half of the rainbow: purple, blue, and aqua.

Make your Sizzix sandwich – bottom cutting pad, die cutter with blades up, fabric, and top cutting pad. I could have folded my fat quarter more economically. However narrow you cut it or fold it, consider keeping the tail. This will help nest more die cut shapes from the fabric. Also note that for this pattern, you’ll need to send half the fabric through the machine right sides up and the other half, right sides down. Cut 8 from each color – 4 from each side. Also cut 8 for the bottom background border and the top background border.

Once you get all your shapes cut out, divide them into two groups. If you were to cut these using a ruler, you would need to cut your 2 1/2” strips and then use your 60 degree angle line to cut these shapes into groups of 60 degree and 120 degree shapes. It’s kinda nice to just run the fabric through the Sizzix die cutting machine without thinking that hard! 🙂 
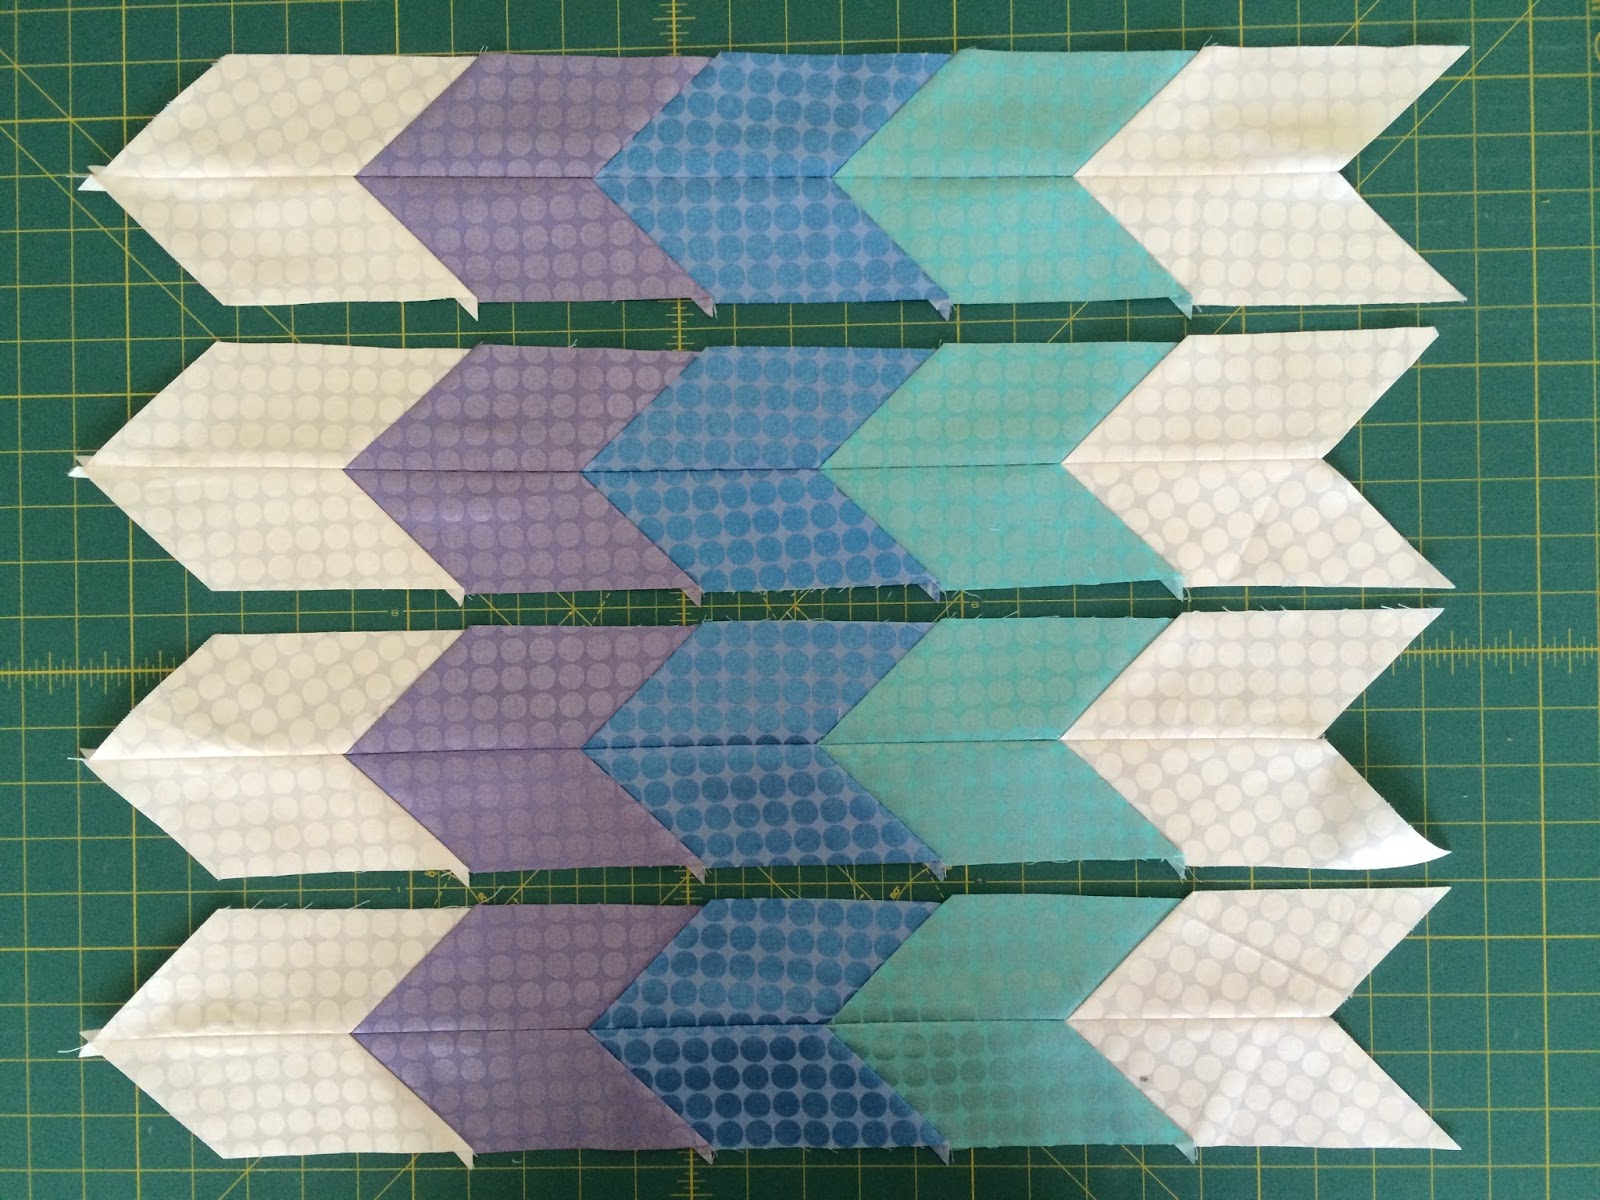
Ok, so two groups with 4 of each color in each group. We are going to sew 8 rows of these diamonds together – 4 rows with a forward slant and 4 rows with a backward slant. First lay out your rows – white, purple, blue, aqua, white. Then sew the diamonds together, end to end.

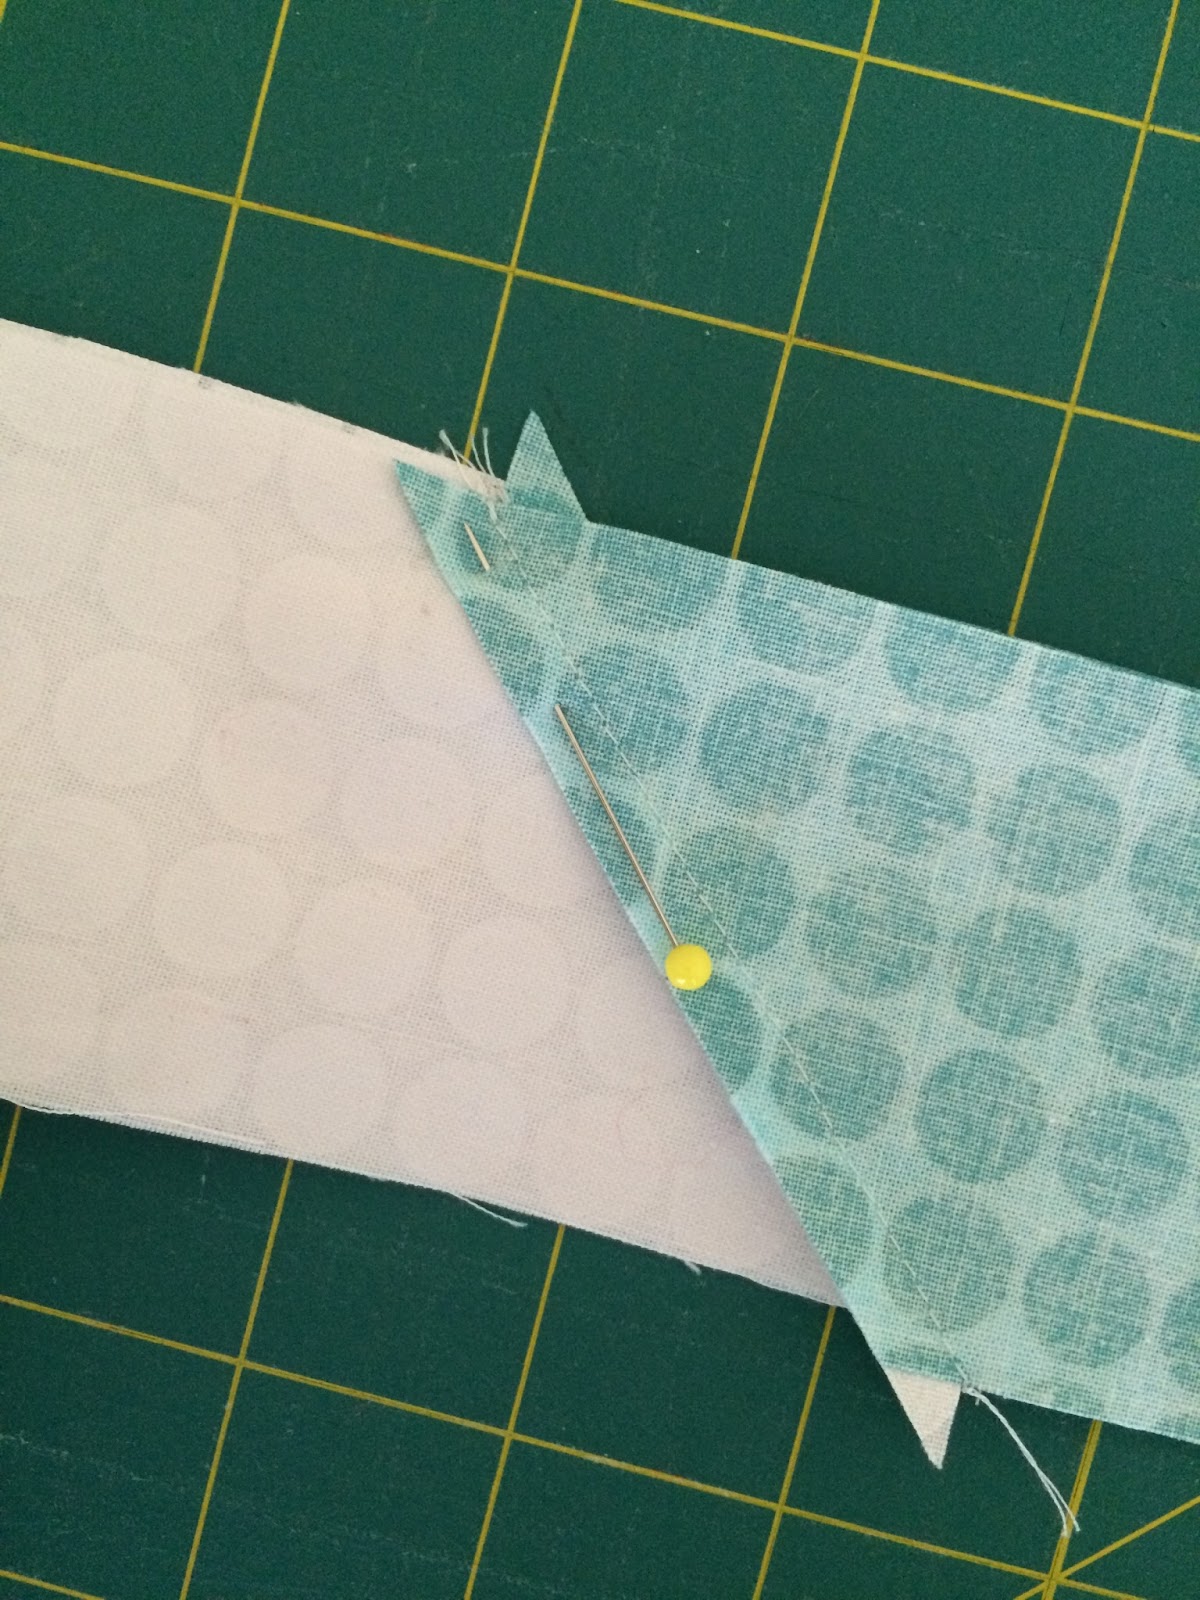
Lining up the diamonds can be a bit tricky. Once you know the trick it’s fairly straight forward. Instead of lining up them up, you’re going to stagger them by 1/4 inch to align the match points. Match points are where the seams align.

Once you have the 8 rows pieced,  press the seams to the side. Alternate directions as you press. You can see in my picture below that I’ve got the seams on the very bottom row are pressed to the right and the seams in the top row are pressed to the left. 
Next we are going to sew the rows together into pairs. The pairs will look a bit like an arrow. Make sure the arrows point in the same direction and the colors are also going the same direction. 

Working with two rows, align the seams with the right sides together. 

You can either pin the seams as I’ve shown in the picture below. 

Or, you can just nest the seams together without pinning as I show in this picture. This is my preferred method. 

Sew the 8 rows into 4 pairs and press the seams open. 

Repeat the process of sewing the rows together and sew the 4 pairs together to get the mini quilt top. Press the seams open and if you want trim the dog ears from the back. (The dog ears are those bits of fabric that stick out from the edges of the fabric and the seam allowances. They sometimes can show through the fabric once the project is quilted.) 
Now square up the top. I trimmed my top down so that the whole thing 
would be square at 16 1/2” x 16 12”. 

When trimming make sure to leave at least 1/4” seam allowance 
from the points closest to the edge, as I’ve shown below. 
Quilt as desired. I quilted echoing zig zags with straight line quilting using my walking foot. 
I also quilted in the ditch between each of the rows. 
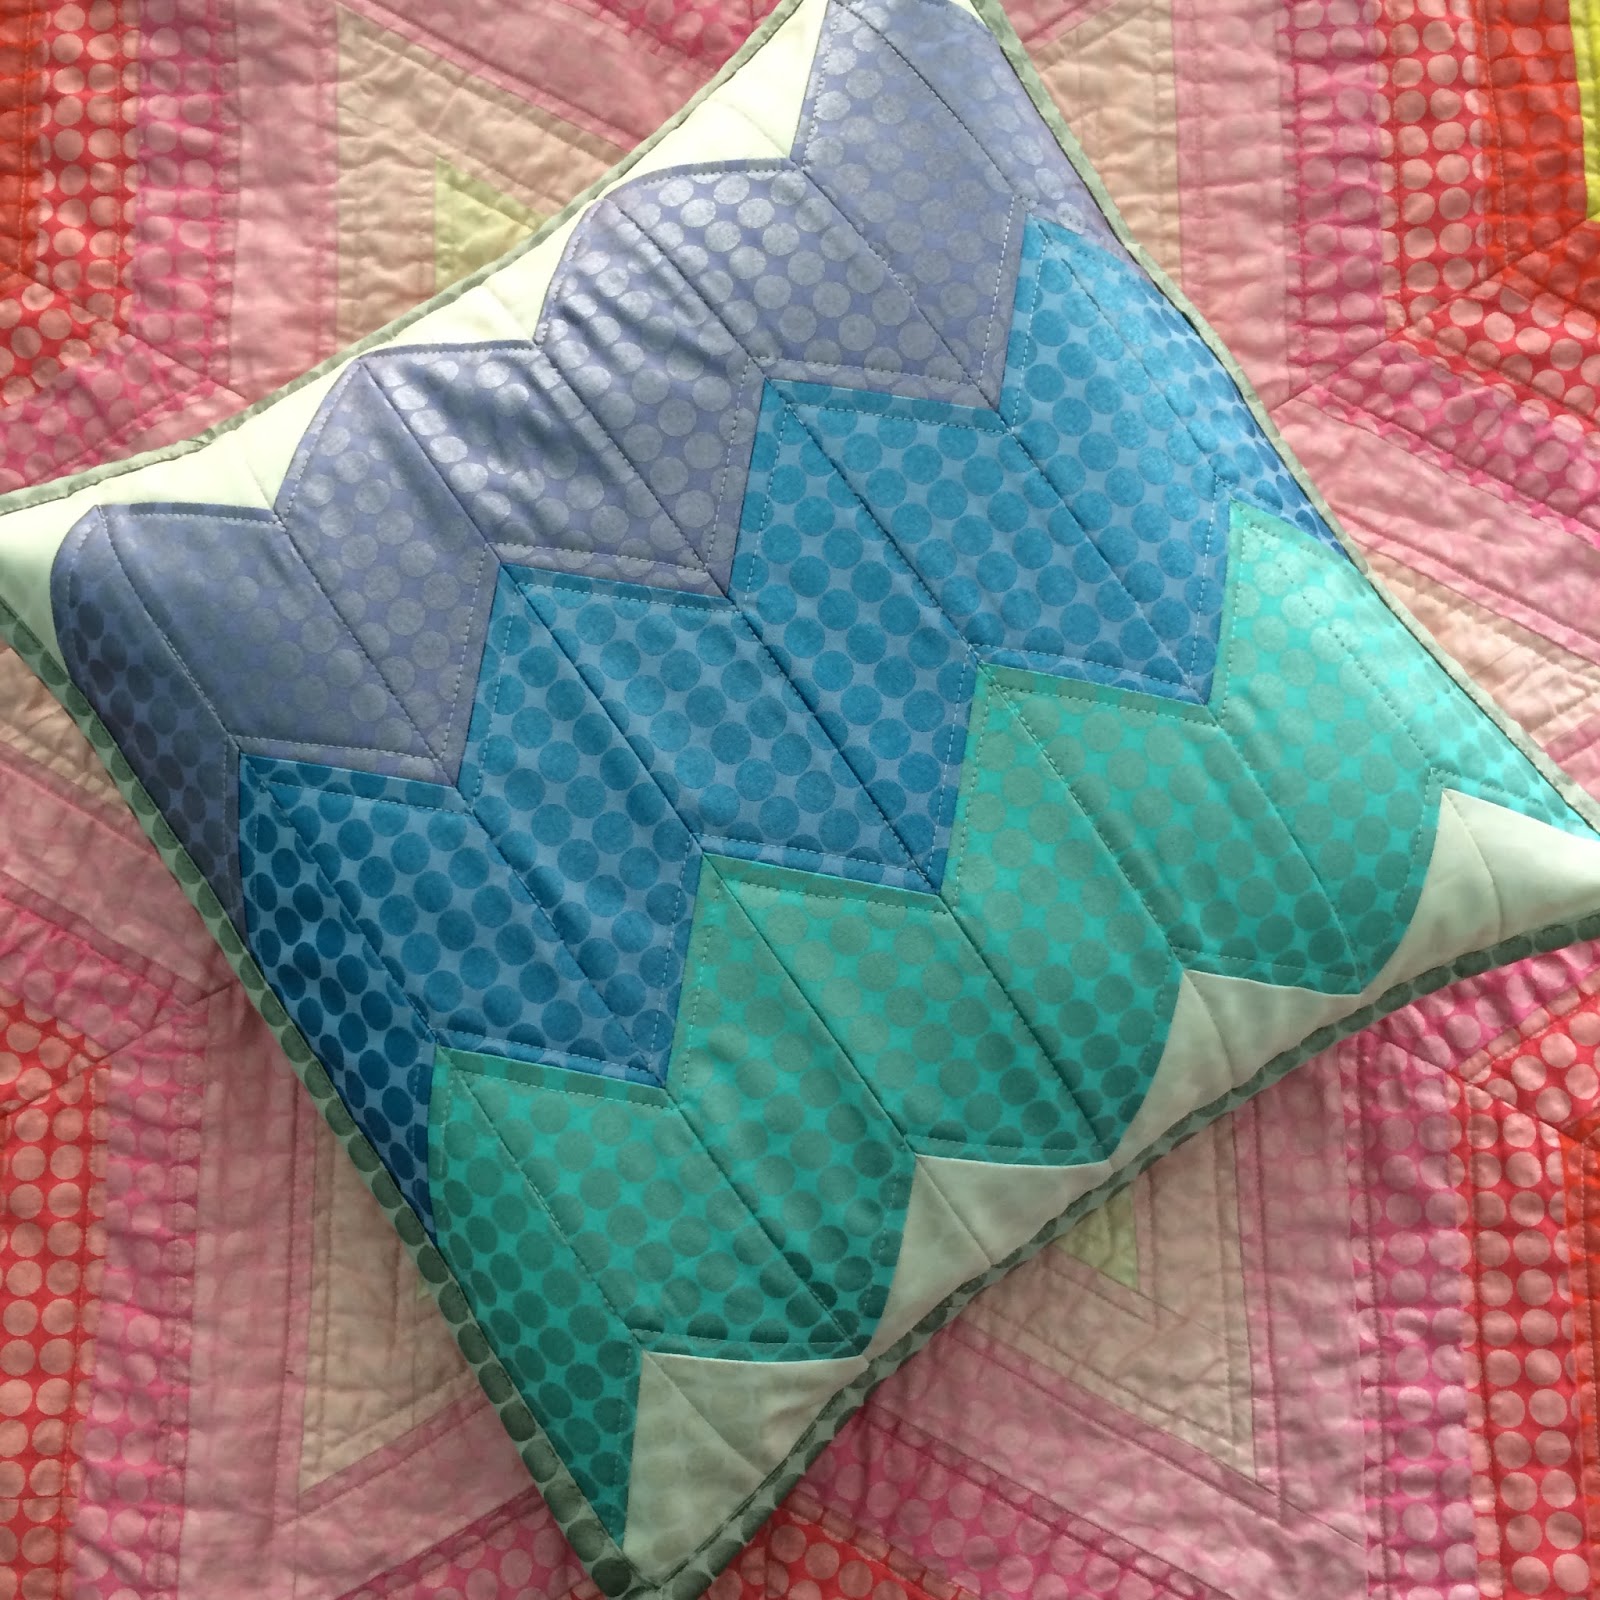
Finish as a mini or a pillow. I made a pillow with an envelope enclosure. Then I bound the whole thing with the silver gray Mirror Ball dots. 

I’ve had this super girly border print type fabric since QuiltCon 2012 and I finally had a chance to use it. So the back is a treat in of itself. Note to self, must buy more fabric for fun pillow backs! 

Here the pillow, all done and ready to be snuggled. 🙂 

And honestly, this fabric and rainbow combination is perfect for My Little Pony. 🙂 
And somehow, the pillow has already been put to good use at a tea party. Somehow Merida commandeered Elsa’s dress and now is lunching with Anna, hmmmmm. 

Thanks for tuning in guys! I’ll answer any questions in the comments. 🙂 

Previous Post: « Choosing Solids {A Work in Progress}
Next Post: This and that »

Reader Interactions

Comments

  1. Swedish Scrapper says

    June 30, 2015 at 9:05 am

    Fabulous design! What a fun backing too!

  2. Rosa says

    June 30, 2015 at 1:39 pm

    Great design and love your fabric choice!

  3. Paige29072 says

    July 1, 2015 at 12:24 pm

    Adorable pillow. I especially love the pillow backing fabric. Any chance you remember the manufacturer and what it's called?

Trackbacks

  1. 12 Inspiring Quilts Makes To Incorporate In Your Next Quilting Project / Sizzix Blog - The Start of Something You says:
    April 1, 2016 at 11:53 am

    […] aptly named Half Rainbow Pillow over at the Bryan House Quilts blog is the perfect pillow to brighten up a room. It is so easy to make with our Chevron Die that you […]

Primary Sidebar

New 2026 Block of the Month!

Graphic of Alchemy Quilt

Join the 2026 Block of the Month Program

Get my Modern Triangles Quilt Book

Get my Modern Rainbow Quilts Book

Image shows cover of the book "Modern Rainbow Quilts"

Make the Solstice Quilt!

Solstice Block of the Month by Bryan House Quilts

Get Your Invite!

Make Modern Triangles Logo

Make the Sparkler Quilt!

Image Shows Sparkler Quilt Top by Rebecca Bryan

Make the Echo (Echo!) Quilt

Echo BOM now open to join

Make the Wildflower Quilt!

Wildflower Block of the Month by Bryan House Quilts

Make the Stargazer Quilt!

Anne's Stargazer BOM

Make the Rainbow Triangles Quilt!

Rainbow Triangle BOM, modern triangle quilt, Rebecca Bryan

About

Hey there! I’m Rebecca, an author and teacher and freezer paper piecing evangelist. I’m also the founder of the Make Modern Triangles Quilt Club.

Disclosure

Just so you know, my site includes affiliate links from which I (it’s me! Rebecca!) receive payment or compensation. Something to consider as you peruse my website. Thanks!

Latest on Instagram

Experienced quilters, share what I missed in the c Experienced quilters, share what I missed in the comments! 👇

Comment ‘FREE’ if you’re a beginner quilter and want to take my free class, give quilting a try, learn a new technique, or simply improve your skills! 

#modernquilting #paperpiecing #foundationpaperpiecing #quiltingtechnique #quiltteacher
I don’t know about you, but for me, quilting has n I don’t know about you, but for me, quilting has never been about just making quilts.

It’s about slow mornings, quiet time to myself, creating something with my hands, spending time doing something textile, not scrolling on the internet, spending more time creating and less time consuming...

And I think that’s exactly why so many people are being drawn to quilting today.

You want to get offline, learn something new, and have more quiet time that is just for you and your imagination. ✨

I think we could ALL use more of that in our lives, and if you want to give it a try, I’ve got a free class you can sign up for by commenting ‘FREE’ below. 💕

#modernquilting #paperpiecing #foundationpaperpiecing #quiltingtechnique #quiltteacher
I’ve taught thousands of quilters over the last de I’ve taught thousands of quilters over the last decade, and I’ve been quilting myself for over 15 years, and this is what I’ve learned. ⬇️

What’s stopping you from quilting isn’t that you don’t want to do it. It’s because you have already convinced yourself of something before even giving it a fair shot. 

You’re probably thinking something like...

👉 “I don’t think I’m creative enough.”
👉 “It looks too complicated.”
👉 “I wouldn’t know where to start.”
👉 “I don’t have enough time.”
👉 “What if I spend all that money and I’m terrible at it?”
👉 “I’ve never been good at sewing.”

If any of those thoughts have crossed your mind, can I let you in on a little secret?

Almost every quilter I know started with one of those ideas in their head, including me. 🤫

The beautiful quilts you see today didn’t begin as beautiful quilts, they began as just an idea and a willingness to try.

Nobody sits down at a sewing machine and automatically knows how to quilt.

You learn by just doing it, sewing stitch by stitch, and every time you enter your sewing room, it gets a little bit easier, and you start to enjoy it more and more. 

If something has been holding you back from quilting, I invite you to take my free class where you have nothing to lose and so much to gain. 

Comment ‘FREE’ to sign up. 💕

#modernquilting #quiltingtechnique #quiltpattern #quiltdesign #quiltersofig
Comment ‘FREEZER’ if you want to take my free clas Comment ‘FREEZER’ if you want to take my free class and learn this amazing technique! 👇

Freezer paper piecing tip number eight is to press every seam right after sewing it. 
 
Don’t wait until later or until all of your blocks are done. Press those seams right away!

It might feel like it slows you down in the moment, but it actually saves you time (and frustration) later.

When you press as you go, your seams stay crisp, and your pieces lay flat, which makes lining everything up so much easier. You’re not fighting bulky seams or trying to “fix” things at the end. 🙌

Plus, pressing helps set the stitches and keeps your fabric from shifting as you build your block.

Think of it as part of the sewing process, not an extra step.

Your blocks will be flatter, sharper, and way more accurate… and your future self will thank you!

Comment ‘FREEZER’ for my free class! 💕

#modernquilting #paperpiecing #foundationpaperpiecing #quiltingtechnique #quiltteacher
MAKE A TEST BLOCK!!! Please, I am begging you. 😅 MAKE A TEST BLOCK!!! Please, I am begging you. 😅

You’d think after 15 years of quilting I’d be able to skip it...

And every once in a while I convince myself that I don’t need a test block because I’ve made this block hundreds of times or my freezer paper piecing skills are good enough to skip it... 

And do you know what happens every time I convince myself that I don’t need a test block? 🙃

I almost always regret it and end up having a nice long date with Jack The Seam Ripper as a consequence. 

Learn from my mistakes so you don’t have to learn from your own and make the test block EVERY TIME!!!

Are you making test blocks? Tell me in the comments! ⤵️

#modernquilting #paperpiecing #foundationpaperpiecing #quiltingtechnique #quiltteacher
I can’t believe I’m saying this, but we’re nearing I can’t believe I’m saying this, but we’re nearing the final months of Dutch Summer! 🥹

Finished Dutch Summer Month 6 blocks are showing up in the Make Modern Triangles Club every day. We’re past the halfway point, and we’re really starting to stack up the blocks! Now that we’ve got a bunch of stacks of blocks, it’s such a fun time to play with arranging your blocks and see what your creativity comes up with. ✨

Once you get beyond the halfway point, you start the countdown to the BIG finish! 🎉

We’re feeling excited, motivated, and accomplished. We are covering some ground, folks! Swipe to see each month’s block so far, and drop a ‘DUTCH’ in the comments if you want to make your own! 💕

#quiltteacher #quiltingtutorial #quiltingtips #modernquilting #quiltcommunity
Follow on Instagram

Browse by Category

Archives

  • Instagram
  • Facebook
  • Pinterest
  • email
Experienced quilters, share what I missed in the c Experienced quilters, share what I missed in the comments! 👇

Comment ‘FREE’ if you’re a beginner quilter and want to take my free class, give quilting a try, learn a new technique, or simply improve your skills! 

#modernquilting #paperpiecing #foundationpaperpiecing #quiltingtechnique #quiltteacher
I don’t know about you, but for me, quilting has n I don’t know about you, but for me, quilting has never been about just making quilts.

It’s about slow mornings, quiet time to myself, creating something with my hands, spending time doing something textile, not scrolling on the internet, spending more time creating and less time consuming...

And I think that’s exactly why so many people are being drawn to quilting today.

You want to get offline, learn something new, and have more quiet time that is just for you and your imagination. ✨

I think we could ALL use more of that in our lives, and if you want to give it a try, I’ve got a free class you can sign up for by commenting ‘FREE’ below. 💕

#modernquilting #paperpiecing #foundationpaperpiecing #quiltingtechnique #quiltteacher
I’ve taught thousands of quilters over the last de I’ve taught thousands of quilters over the last decade, and I’ve been quilting myself for over 15 years, and this is what I’ve learned. ⬇️

What’s stopping you from quilting isn’t that you don’t want to do it. It’s because you have already convinced yourself of something before even giving it a fair shot. 

You’re probably thinking something like...

👉 “I don’t think I’m creative enough.”
👉 “It looks too complicated.”
👉 “I wouldn’t know where to start.”
👉 “I don’t have enough time.”
👉 “What if I spend all that money and I’m terrible at it?”
👉 “I’ve never been good at sewing.”

If any of those thoughts have crossed your mind, can I let you in on a little secret?

Almost every quilter I know started with one of those ideas in their head, including me. 🤫

The beautiful quilts you see today didn’t begin as beautiful quilts, they began as just an idea and a willingness to try.

Nobody sits down at a sewing machine and automatically knows how to quilt.

You learn by just doing it, sewing stitch by stitch, and every time you enter your sewing room, it gets a little bit easier, and you start to enjoy it more and more. 

If something has been holding you back from quilting, I invite you to take my free class where you have nothing to lose and so much to gain. 

Comment ‘FREE’ to sign up. 💕

#modernquilting #quiltingtechnique #quiltpattern #quiltdesign #quiltersofig
Comment ‘FREEZER’ if you want to take my free clas Comment ‘FREEZER’ if you want to take my free class and learn this amazing technique! 👇

Freezer paper piecing tip number eight is to press every seam right after sewing it. 
 
Don’t wait until later or until all of your blocks are done. Press those seams right away!

It might feel like it slows you down in the moment, but it actually saves you time (and frustration) later.

When you press as you go, your seams stay crisp, and your pieces lay flat, which makes lining everything up so much easier. You’re not fighting bulky seams or trying to “fix” things at the end. 🙌

Plus, pressing helps set the stitches and keeps your fabric from shifting as you build your block.

Think of it as part of the sewing process, not an extra step.

Your blocks will be flatter, sharper, and way more accurate… and your future self will thank you!

Comment ‘FREEZER’ for my free class! 💕

#modernquilting #paperpiecing #foundationpaperpiecing #quiltingtechnique #quiltteacher
Follow on Instagram
© 2026 Bryan House Quilts