• About
    • Privacy Policy
  • Teaching
    • Member/Student Login
    • Online Programs
  • Shop
  • Member/Student Login
  • Blog
    • Free Quilt Patterns – Scrappy Whirligig Quilt

Bryan House Quilts

Crafty Traveler Blog Hop {Art Student Tote}

Uncategorized

20 Feb

Hi there!

Today I’m reviewing Anna Maria Horner‘s Art Student Tote as part of the Crafty Traveler Blog Hop 
 BeccaB-11 copy
Photo credit: Amanda Faucett Photography
Whenever I consider buying a pattern, I always scour the internet for reviews before I invest my time, fabric, and money. Well to get ready for her Sew South retreat, my friend Jennifer of Ellison Lane is hosting the Crafty Traveler Blog Hop which features a series of pattern reviews for handmade totes and bags. What a clever idea!
Several fantastic reviews of this bag pattern are already out there. In fact before I started my bag I consulted Holly’s, Alexandra’s,  and Sew to Speak’s. To be perfectly honest I had COMPLETE bag envy of Kristy’s version at Quilt Con last February. So I had to make one for myself.
I wanted a big, slouchy bag, mostly to shove a bunch of snacks and kid stuff in and take the kids to the park. Which is great, but when traveling this bag doubles as a purse and carryon. It looks good with a bunch of stuff in it or only slightly stuffed. The side straps allow you to adjust the shape depending how much stuff is stuffed into the bag.
So pack it up, run through the airport to catch your plane stroll elegantly through the airport, beverage in hand, with your awesome handmade bag. Arrive at your luxurious hotel room, unpack some things, cinch the side straps tighter, fix your make-up and head out for dinner. 
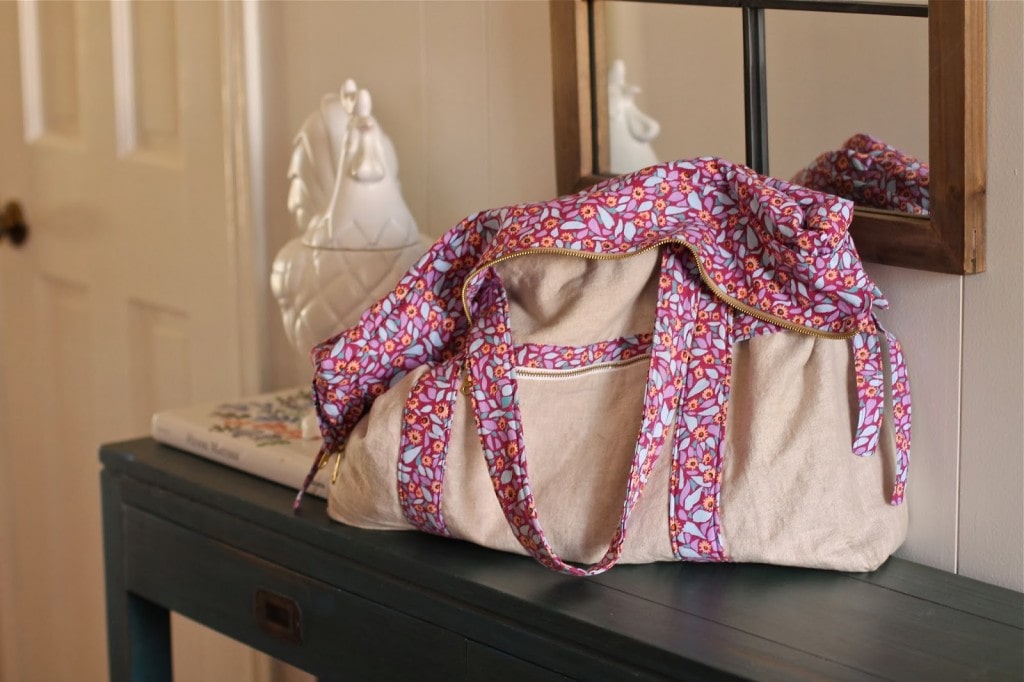
The slouchy version kinda loses its shape when laid down… 

I used linen blends for my fabric choices, which are more sturdy than quilting cotton. (My fabric choices were Essex Linen in Flax and Anna Maria Horner Field Study Linen.) To make a slouchy version, I used Shape Flex interfacing (SF101) only on the outer panels and pockets. 
If you do make a slouchy version it’s very important that the bottom isn’t slouchy. You want a firm bottom! (That’s what he said!) Otherwise, when you put stuff in the bag, it will completely lose it’s shape under the weight of The Stuff. 2 or 3 layers of Peltex fused together should do it. These layers will go at the bottom of the bag in between the outer panels and lining.
The pattern was fairly easy to follow and the bag is not terribly difficult to make. Compared to the Weekender Bag I made, this bag was a breeze. But I would say that prior experience reading a pattern and making a bag helps tremendously. 
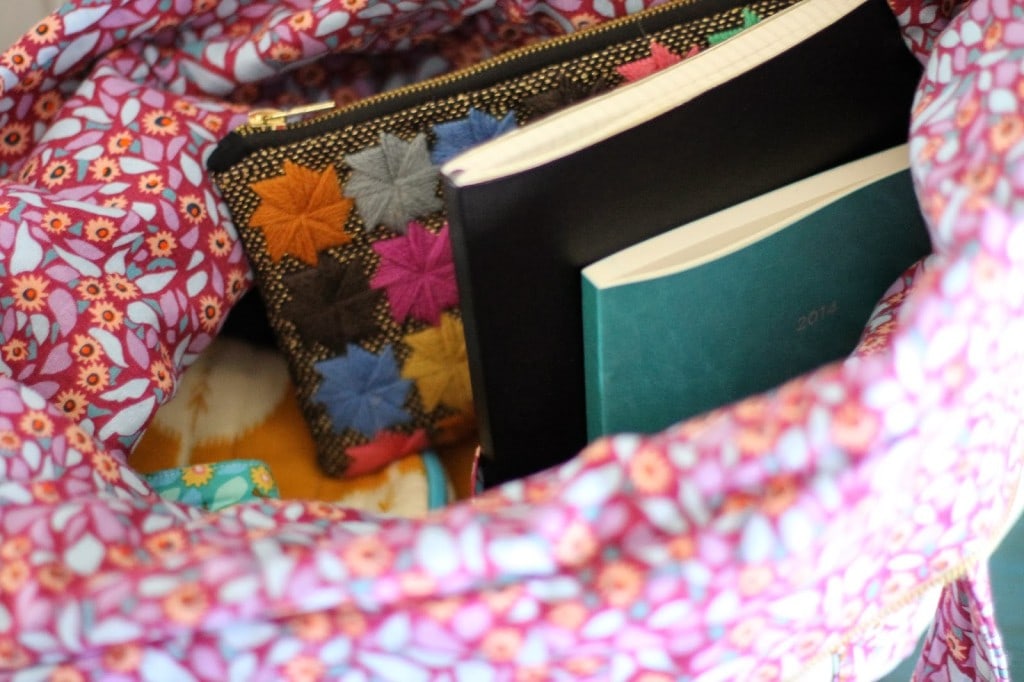
This inside holds a bunch.

Modifications and Difficulties: 

The one modification I made was to the top zipper panel.  I love the idea of a top zip but I shortened it quite a bit as Holly did. And here is where I did struggle. 
In preparing the top zippered extension panel, you are supposed to mark the fabric somewhere. My pattern pieces did not have the markings – or I had cut them off. I’m pretty sure I didn’t cut them off, but on the other hand I couldn’t check the trash. In any case I had to wing it. I’m not sure what I did is right, but Jennifer had a similar problem and offers a solution. 

Some thoughts:

– I made version B of the pattern.

– The pattern allows for lots of pockets! The outside pockets are perfect for car keys and cell phones. The inside pockets are great too. But with the slouchy version, the pockets are slouchy too. If I made it again, I might add a zippered pocket. Somehow. 

– I love the look of the bag with the extension zippered panels turned out. But with this slouchy version, at least, this look doesn’t really work. The handles get in the way and turn the panels back in. It’s possible with added sturdiness the bag could keep that shape. 
– I omitted the magnetic clasp. I wish I hadn’t. 
– Hardware for this bag is a focal point so get what you want. It doesn’t have to be expensive, but don’t settle. 
– Where suggested, do grade your seams. Grading, or trimming the seam allowances to different lengths, reduces bulk.  See this tutorial for more info.
– It is widely reported that the fabric requirements are overstated. I had quite a bit of fabric leftover, which I’m ok with. More for fun projects!
– If this size is too big you can always make the smaller version. Check out Jacey’s and Kristy’s. It’s nice to have such a versatile bag pattern.

Contest

The rest the Crafty Traveler Blog Hop is running from Feb 3- March 12. You can 
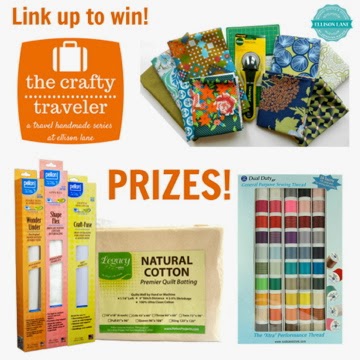
link-up your travel handmade project between the 6-12 of March for a chance to win one of three great prizes! (US only) 
#1: Free Spirit Fabric, Crafty Traveler Tote supplies and Dritz rotary cutter. 
#2: Box of 50 Coats Threads
#3: Pellon Prize Pack (Interfacing & Batting) 
To enter to win simply link up your project at ellisonlane.com on March 6. Please link from a new blog post but your project can be anything you’ve made to travel handmade within the last 6 months. You may also link from Flickr or Threadbias. 
Visit the other stops on the blog hop:

2/3: Patchwork Posse & Fabric Mutt
2/6: Random Thoughts Do or Di
2/10: Golden Willow Quilts
2/13: Between Quilts & The Sewing Chick
2/17: May Chappell & Modern Handcraft
2/20: Bryan House Quilts & Love By Hand  (today!)
2/24: Petit Lyons & Sew Many Possibilities 
2/27: Owen’s Olivia
3/3: Old Red Barn Co.  & Go Go Kim
3/6: Link-up opens at www.ellisonlane.com 
3/13: Winner’s announced! 

I think the next handmade travel item I’ll make will be some zippy pouches. What will you be making next?

Thanks so much Jennifer for arranging this blog hop! 

Previous Post: « Love a Challenge {Color me Happy!}
Next Post: Operation Recovery {WIP Wednesday} »

Reader Interactions

Comments

  1. Taryn @ from Pixels to Patchwork says

    February 20, 2014 at 10:40 pm

    Lovely bag! I love your slouchy version! The contrast fabric you chose is so pretty. I've been curious about this pattern, but I was worried it would be too difficult. Since it is easier than The Weekender, I might give it a shot some day!

  2. Kristy says

    February 21, 2014 at 5:25 pm

    I really like the fabric you chose and I think one of my version's downfalls was that it was just too slouchy. It looks good!!

    • rebeccabryan says

      February 24, 2014 at 2:01 pm

      Yes, maybe the better descriptor would be slouchier (more slouchy). Thanks!

  3. Nickon says

    February 22, 2014 at 11:00 am

    We Hold our Tutors to a Higher Standard, and Pay our Tutors More Fairly, than nearly any other Tutoring Company.Thus, we have Better (and more Experienced) Tutors.We accept only the top tutor applicants, and will never compromise our selectivity in order to artificially inflate our ranks. In addition, every member of the Team is required to have recently scored in the 95th percentile or above on any standardized test that he/she teaches.Math Tutor Austin, Math Tutor Atlanta, Math Tutor Houston, Math Tutor Seattle.
    Science Tutor Las Vegas | Math Tutor Hawaii | Math Tutor Las Vegas | Tutor for kids Las Vegas | Math Tutor Charlotte | Math Tutor Phoenix | Math Tutor Los Angeles | Math Tutor Boston | Math Tutor New York | Math Tutor Denver | Math Tutor Chicago | Math Tutor |

    • rebeccabryan says

      February 24, 2014 at 2:01 pm

      do you now?! no way!

  4. Holly says

    February 23, 2014 at 8:05 am

    Thanks for the great review! I bought this pattern from Anna Maria Horner at her QuiltCon workshop last year but haven't yet attempted it. Perhaps I should aim to make it to take to QuiltCon 2015? I'm so excited about the big announcement of QuiltCon that I've been going back over my QuiltCon posts from last year. I saw that you commented on one of my posts saying nice to meet you. I hope we see each other again in 2015!

  5. Nancy@OwensOlivia says

    February 26, 2014 at 1:58 am

    Such a pretty slouchy bag. Fabric choices are great too!

Primary Sidebar

Get Your Free Ticket to Quilters Paradise Holiday! 🎁

New 2026 Block of the Month!

Graphic of Alchemy Quilt

Join the 2026 Block of the Month Program

Get my Modern Triangles Quilt Book

Get my Modern Rainbow Quilts Book

Image shows cover of the book "Modern Rainbow Quilts"

Make the Solstice Quilt!

Solstice Block of the Month by Bryan House Quilts

Get Your Invite!

Make Modern Triangles Logo

Make the Sparkler Quilt!

Image Shows Sparkler Quilt Top by Rebecca Bryan

Make the Echo (Echo!) Quilt

Echo BOM now open to join

Make the Wildflower Quilt!

Wildflower Block of the Month by Bryan House Quilts

Make the Stargazer Quilt!

Anne's Stargazer BOM

Make the Rainbow Triangles Quilt!

Rainbow Triangle BOM, modern triangle quilt, Rebecca Bryan

About

Hey there! I’m Rebecca, an author and teacher and freezer paper piecing evangelist. I’m also the founder of the Make Modern Triangles Quilt Club.

Disclosure

Just so you know, my site includes affiliate links from which I (it’s me! Rebecca!) receive payment or compensation. Something to consider as you peruse my website. Thanks!

Latest on Instagram

If no one ever showed you this trick, get ready, b If no one ever showed you this trick, get ready, because it might change the way you do it forever! 

 Sew your binding to the BACK of your quilt first. Not the front!

When I first started machine binding, I did it the traditional way. I’d attach the binding to the front, wrap it around to the back, and then stitch in the ditch from the front.

The problem? I couldn’t actually SEE where my stitches were landing on the back. And sometimes the back ended up having a few surprises waiting for me. 😅

Then one day I thought, what if I just do this the other way around?

By attaching the binding to the back FIRST, I can wrap it around to the front and actually see where I’m stitching as I finish it. No more guessing what’s happening underneath!

It’s such a simple switch, but it makes getting a tidy, consistent finish SO much easier.

And when you’ve spent all that time piecing and quilting something beautiful, who doesn’t want the binding to look just as good?!

Give it a try on your next quilt and report back! With our finished quilt tops for the Dutch Summer, members will be binding them soon! Share in the comments how you do your binding! 🩷

#quiltteacher #quiltingtutorial #quiltingtips #modernquilting
I was ready to give up on foundation paper piecing I was ready to give up on foundation paper piecing altogether, and then I was introduced to freezer paper piecing, and it changed my whole world forever.

Let’s talk about Freezer Paper Piecing versus traditional Paper Foundation Piecing. 👇

The techniques are similar, both methods focus on precision and ease of assembly, but with Freezer Paper Piecing, you get to reuse your templates without turning them into confetti! 🎉 MAJOR WIN!

All you have to do is trace a few copies onto freezer paper or use printable sheets for your printer. It’s versatile, efficient, and saves you tons and tons of time.

🌟 The key benefits of freezer paper piecing: 🌟

👏 Reuse & Recycle: No more wasteful piles of ripped paper templates.
👏 Easy Removal: Templates peel off effortlessly, leaving your masterpiece intact.
👏 Versatility: From intricate designs to straightforward patterns, freezer paper can be used for any foundation.

WAY MORE TIME TO QUILT! 🙌

In all of my programs, we use the Freezer Paper Piecing method, and anyone can learn this, even first-time quilters! I’ve got a NEW block-of-the-month quilt design coming soon, so follow along if you’re looking for a faster and easier way to paper-piece! ✨

#modernquilting #paperpiecing #foundationpaperpiecing #quiltingtechnique #quiltteacher
Want to make a witchy little Modern Triangle with Want to make a witchy little Modern Triangle with me? 🧙‍♀️🧵

I’m teaching a FREE class, and we’re getting a little spooky with this one! 🤓

I’ll show you my favorite way to make Modern Triangles using my no-waste, no picking method, and then we’re turning our triangle into a WITCH HAT. ✨

And yes, beginners are absolutely welcome!

I’ll walk you through it step by step, show you how these simple little triangles can be arranged into much more complex-looking designs, and we’ll spend some time actually PLAYING with what we make.

PLUS, if you show up live, you’ll get my exclusive Spooky Witch Hat Modern Triangle pattern FREE so you can keep sewing after class. 🎁

Come hang out, learn something new, make a witch hat, and have some fun with me!

Comment WITCHY, and I’ll send you the link to save your free spot! 🧙‍♀️

#modernquilting #paperpiecing #foundationpaperpiecing #quiltingtechnique #quiltteacher
Tell me you’re a quilter without telling me you’re Tell me you’re a quilter without telling me you’re a quilter. 😂🧵

I’ll go first: I can find quilt inspiration in approximately ANYTHING. I own fabric that is apparently too special to actually use, and “one more seam” has never once meant one more seam.

Your turn. 🤓 Finish the sentence in the comments 👇 

#modernquilting #paperpiecing #foundationpaperpiecing #quiltingtechnique #quiltteacher
A couple of weeks ago, I picked my colors for next A couple of weeks ago, I picked my colors for next year’s “Starburst” Block of the Moth, and I had to laugh at myself because even though I started with a few pretty pinks and yellows as my inspiration...

I devolved back to rainbows for my final selection. I do love a rainbow gradient! So glorious, so delicious!

Honestly, sometimes it takes me several, several, several rounds to get the colors just how I want them. 😭  But the good news is, I do have the rainbow fabric on hand!

Now I can Netflix and sew... as I work on my Starburst sample! Hooray!

Who else just can’t resist a rainbow palette??? Follow along @bryanhousequilts to be the first to see my latest “Starburst” design! 💫

#modernquilting #paperpiecing #foundationpaperpiecing #quiltingtechnique #quiltteacher
SWIPE to see the big finish, my completed Peppermi SWIPE to see the big finish, my completed Peppermint Twist Dutch Summer! 🤍

The joy really is in the journey with my Block of the Month programs, where every single month you make one block, sew your whole batch, and, month by month, start to see the design come together with each new block.

And that’s why ANYONE can make this quilt! Yes, even a first-timer! 

You don’t have to sit down and make an entire quilt all at once. You make one batch of blocks, then another, and another... You learn as you go, watch your skills develop, and slowly start seeing the whole quilt come together.

And then one day, all those individual triangles you’ve been making come together and you’ve made THIS. 🥹

I absolutely love how this Peppermint Twist version of Dutch Summer turned out, and seeing all of the blocks together makes me want to do the whole thing all over again in another color palette! 😂

If you want to make your own version of the Dutch Summer, comment ‘DUTCH’ and I’ll send you the details! 💌

#modernquilting #paperpiecing #foundationpaperpiecing #quiltingtechnique #quiltteacher
Follow on Instagram

Browse by Category

Archives

  • Instagram
  • Facebook
  • Pinterest
  • email
If no one ever showed you this trick, get ready, b If no one ever showed you this trick, get ready, because it might change the way you do it forever! 

 Sew your binding to the BACK of your quilt first. Not the front!

When I first started machine binding, I did it the traditional way. I’d attach the binding to the front, wrap it around to the back, and then stitch in the ditch from the front.

The problem? I couldn’t actually SEE where my stitches were landing on the back. And sometimes the back ended up having a few surprises waiting for me. 😅

Then one day I thought, what if I just do this the other way around?

By attaching the binding to the back FIRST, I can wrap it around to the front and actually see where I’m stitching as I finish it. No more guessing what’s happening underneath!

It’s such a simple switch, but it makes getting a tidy, consistent finish SO much easier.

And when you’ve spent all that time piecing and quilting something beautiful, who doesn’t want the binding to look just as good?!

Give it a try on your next quilt and report back! With our finished quilt tops for the Dutch Summer, members will be binding them soon! Share in the comments how you do your binding! 🩷

#quiltteacher #quiltingtutorial #quiltingtips #modernquilting
I was ready to give up on foundation paper piecing I was ready to give up on foundation paper piecing altogether, and then I was introduced to freezer paper piecing, and it changed my whole world forever.

Let’s talk about Freezer Paper Piecing versus traditional Paper Foundation Piecing. 👇

The techniques are similar, both methods focus on precision and ease of assembly, but with Freezer Paper Piecing, you get to reuse your templates without turning them into confetti! 🎉 MAJOR WIN!

All you have to do is trace a few copies onto freezer paper or use printable sheets for your printer. It’s versatile, efficient, and saves you tons and tons of time.

🌟 The key benefits of freezer paper piecing: 🌟

👏 Reuse & Recycle: No more wasteful piles of ripped paper templates.
👏 Easy Removal: Templates peel off effortlessly, leaving your masterpiece intact.
👏 Versatility: From intricate designs to straightforward patterns, freezer paper can be used for any foundation.

WAY MORE TIME TO QUILT! 🙌

In all of my programs, we use the Freezer Paper Piecing method, and anyone can learn this, even first-time quilters! I’ve got a NEW block-of-the-month quilt design coming soon, so follow along if you’re looking for a faster and easier way to paper-piece! ✨

#modernquilting #paperpiecing #foundationpaperpiecing #quiltingtechnique #quiltteacher
Want to make a witchy little Modern Triangle with Want to make a witchy little Modern Triangle with me? 🧙‍♀️🧵

I’m teaching a FREE class, and we’re getting a little spooky with this one! 🤓

I’ll show you my favorite way to make Modern Triangles using my no-waste, no picking method, and then we’re turning our triangle into a WITCH HAT. ✨

And yes, beginners are absolutely welcome!

I’ll walk you through it step by step, show you how these simple little triangles can be arranged into much more complex-looking designs, and we’ll spend some time actually PLAYING with what we make.

PLUS, if you show up live, you’ll get my exclusive Spooky Witch Hat Modern Triangle pattern FREE so you can keep sewing after class. 🎁

Come hang out, learn something new, make a witch hat, and have some fun with me!

Comment WITCHY, and I’ll send you the link to save your free spot! 🧙‍♀️

#modernquilting #paperpiecing #foundationpaperpiecing #quiltingtechnique #quiltteacher
Tell me you’re a quilter without telling me you’re Tell me you’re a quilter without telling me you’re a quilter. 😂🧵

I’ll go first: I can find quilt inspiration in approximately ANYTHING. I own fabric that is apparently too special to actually use, and “one more seam” has never once meant one more seam.

Your turn. 🤓 Finish the sentence in the comments 👇 

#modernquilting #paperpiecing #foundationpaperpiecing #quiltingtechnique #quiltteacher
Follow on Instagram
© 2026 Bryan House Quilts