• About
    • Privacy Policy
  • Teaching
    • Member/Student Login
    • Online Programs
  • Shop
  • Member/Student Login
  • Blog
    • Free Quilt Patterns – Scrappy Whirligig Quilt

Bryan House Quilts

Mini-Christmas Quilted Tree Skirt Tutorial

Tutorial

10 Dec

Hey there! Check out the Tutorial Reboot! 
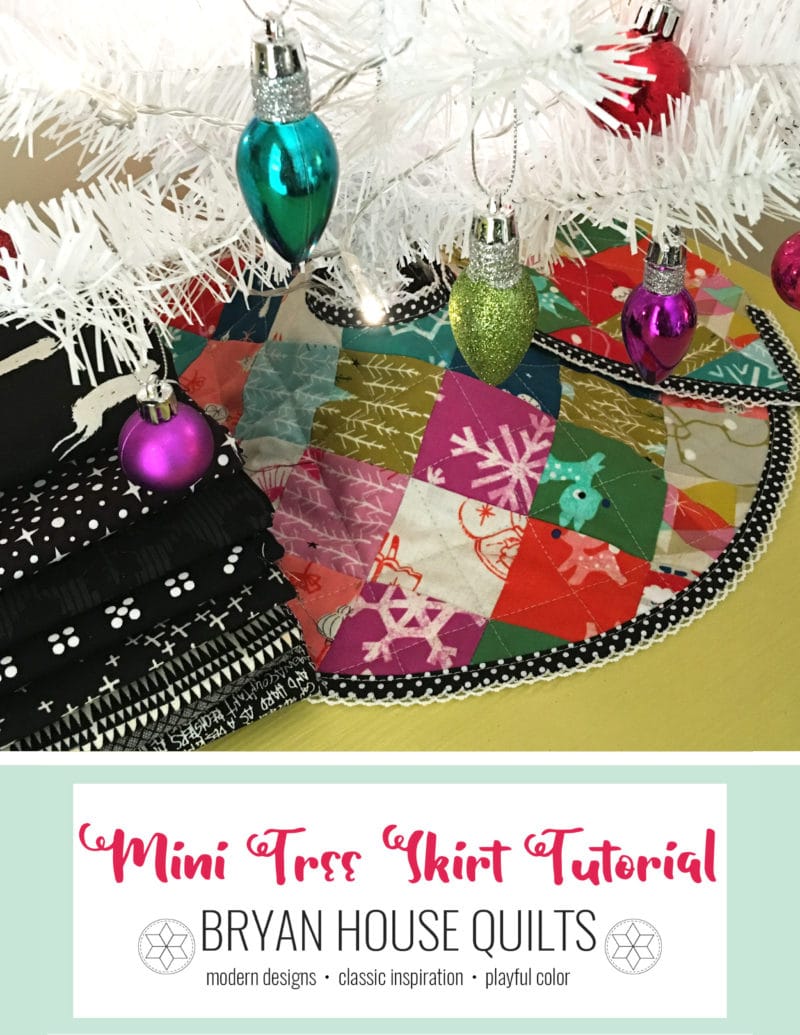
minichristmas-tree-tutorial

Back to the original post:

—

Is your mini-tree naked? Are its feet cold?
Well add some modesty to your tree and wrap it up in a wee quilted tree skirt. This is a fairly easy and quick project. It took me 2-3 hours to complete. I like getting things done, don’t you?

To start, you will need a pattern. I used a large pot lid to trace a half circle on a piece of paper. (Newspaper or tissue paper work better than plain white paper, but I worked with what I had.) Since, I wanted my skirt a couple inches bigger than the lid I measured two inches longer. I made tick marks every few inches around the lid.

Once you have your half-circle cut out, you will need a smaller half-circle in the center. I used my coffee cup to trace a smaller half-circle. See picture below. Once you’ve done that, cut it out.

Once you’ve got your half circle cut out, fold in half twice. You will get something like the pattern pictured below. I stapled it to keep it from slipping, but you can use a pin.

Using your pattern, cut out 8 pieces of fabric. In the picture below (hey! I found some newspaper!) you will see that I added 1/4 seam allowances. I guesstimated these as opposed to tracing. Also, you don’t have to add seam allowances. Not adding seam allowances will make your final product smaller. So you decide. I made one each way. If I had to do it over again, I would add seam allowances.

Once you’ve cut your 8 pieces of fabric, arrange them how you want. Here’s what I did. I used 3 different reds and 2 greens.

Next line up your pieces as shown below. You will have four pairs of fabric. Once they are lined up, machine sew on the right side. Press to the right.

You will now have four pieces (hey look my mom’s calling!):


Line your pieces as shown below – you will now have two pairs. Machine sew right side. Press seams to the right.


Now you should have two half-circles.


Lay the two halves right sides together as shown. (Again mom?) Stitch the halves together. Press. (Pressing the seams to the right or so they are pointing clockwise will make sewing the next few steps easier. See picture below.)

Now you will have a completed circle with a hole in the middle. I see mine didn’t come out the way I lined it up, but that’s probably because I wasn’t consistent with which side I sewed. I told you to sew on the right hand side, but I probably did left one time. Whoopsie daisy. No matter. We live with mistakes in this house.


Ok, we are ready to quilt!


Now, you will make your quilt sandwich. We are going to do a pillowcase binding. You want to lay your batting down first. Then your backing goes second, or in the middle. (If you were making a cheese sandwich, the backing would be the cheese.) Lay your backing so the right side is facing up. Finally, lay your pieced-top right side down. So, you will be sewing the right sides together, with your batting underneath that. Pin together, all the way around the circle.


Please note the following quilt sandwhich is wrong (so wrong!) and if you do it this way you will be disappointed and frustrated, like I was! Note how the backing and batting are in the WRONG places.


You’ve been warned.

Before we start sewing you will cut you quilt sandwich. This will be the opening for the tree skirt. You will cut on one side, a radius if you will. It should look like this. A round of cheese (hmm must be hungry).


Now, we are going to sew our sandwich together. So exciting! You are going to sew all around the inner and outer edges of your circle and on the edge of one of the cut, using a 1/4 seam is fine. You will want to put your machine in the needle down position. This will make it easier to pivot on the corners.

You will want to leave an opening so you can turn your quilt right-side out. So start here:

Then continue sewing the outer edge. Sew up the other side of the cut to the inner circle back the the edge you started and …

Finish sewing here:


Ok, I’ll wait. Go sew all the way around the edges, leaving an opening. Your sewing might look something like this.

Ok! Now that you’ve sewn all the way around your quilt, trim off the extra fabric like so:


Don’t forget to trim the corners. This will help you get a sharp corner once you turn it right-side out. Also, you may want to clip around the edges of the circle as shown in the picture below. I thought this would help it lay flat, but I forgot to do it on one and it didn’t seem to matter. So you decide. I would do it (if I remembered!). But do do the corners (hehehe do do).


Ok! Reach your hand into your quilt, in between the fabric pieces. As opposed to between the batting and fabric. Grab the far corner and pull your quilt right-side out. Once you’ve done that, put your fingers in to each corner, or blunt pencil, to pop out sharp corners. Press. (Put iron away! your almost done!)

Now, you will close up the opening. Pin the opening as shown in the first picture below. Using a small seam allowance, like 1/8th inch, machine stitch (can be done by hand) the opening closed and then continue top stitching allllll the way around the quilt, shown below in the second picture.


Here’s a picture of top-stitching close to the edges all the way around the quilt. This is the last step of pillowcase binding.


Now, you can quilt it. You could stitch in the ditch. Or if you are really good you can free hand some holiday themed things like a bell or a word. I just sewed from corner to corner. It turned out nice and ended up looking like a Lemoyne (8-pointed) star.

Here’s the back:


The back on the other one.


Here’s the top.


Now you are done!

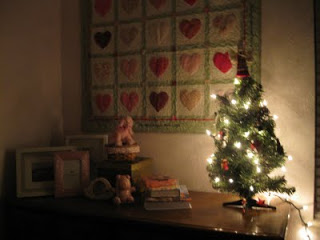
And here it is warming the feet of my dear daughter’s mini-Christmas tree. Cute!

You could also use this same tutorial to make a tree skirt for any size tree. The size depends on how big your pattern is. I will answer questions in the comments if there are any. I tend not to be clear….

Enjoy!

Previous Post: « Obsession Confession
Next Post: Been busy »

Reader Interactions

Comments

  1. Amanda says

    December 12, 2009 at 4:48 am

    Nice! If only I had a sewing machine…one of these days…

    By the way, I almost picked this layout for my blog. Love it!

Trackbacks

  1. Mini Christmas Tree Skirt {Tutorial Reboot} says:
    December 5, 2016 at 9:06 pm

    […] of my all time favorite tutorials I’ve ever written is for this mini Christmas Tree skirt from quite a few years ago. I thought I’d give the tutorial a reboot. Plus, I’ve got a free PDF pattern download […]

Primary Sidebar

New 2026 Block of the Month!

Graphic of Alchemy Quilt

Join the 2026 Block of the Month Program

Get my Modern Triangles Quilt Book

Get my Modern Rainbow Quilts Book

Image shows cover of the book "Modern Rainbow Quilts"

Make the Solstice Quilt!

Solstice Block of the Month by Bryan House Quilts

Get Your Invite!

Make Modern Triangles Logo

Make the Sparkler Quilt!

Image Shows Sparkler Quilt Top by Rebecca Bryan

Make the Echo (Echo!) Quilt

Echo BOM now open to join

Make the Wildflower Quilt!

Wildflower Block of the Month by Bryan House Quilts

Make the Stargazer Quilt!

Anne's Stargazer BOM

Make the Rainbow Triangles Quilt!

Rainbow Triangle BOM, modern triangle quilt, Rebecca Bryan

About

Hey there! I’m Rebecca, an author and teacher and freezer paper piecing evangelist. I’m also the founder of the Make Modern Triangles Quilt Club.

Disclosure

Just so you know, my site includes affiliate links from which I (it’s me! Rebecca!) receive payment or compensation. Something to consider as you peruse my website. Thanks!

Latest on Instagram

I’ve been teaching quilting for over a decade, and I’ve been teaching quilting for over a decade, and I’ll still remember the first time that I learned this. 👇

It completely changed my quilty life, and I’ve never looked back! 

At one point early on in my quilting days, I almost gave it up altogether because I was so frustrated with ripping tiny bits of paper out of my seams. 

My fingers hurt, it took forever, and I was over it! I still have unfinished blocks that have paper on them from those days... 😅

And then someone taught me what I have now taught thousands of other quilters, and I fell back in love with it all over again. 

You can try for yourself by taking my free class and see how you like it! 

Comment ‘FREE’ and i’ll send you the link to sign up! 💌

#quiltteacher #quiltingtutorial #quiltingtips #modernquilting
I’ll die on this hill... 👇 Quilting is not just a I’ll die on this hill... 👇

Quilting is not just about making something beautiful. 

It’s about making time for yourself. 

And that act of making time for yourself is something that you have to do. It’s essential. And above all, you deserve it! 👏

No one is going to make the time for you. You have to prioritize time for yourself to play and explore your creativity. 

What’s the quilting hill that you will die on? Share in the comments! ⬇️

#quiltersofig #modernquilting #modernquilt #quiltteacher
These triangle blocks might look complicated… 👇 … These triangle blocks might look complicated… 👇

…but they’re actually super beginner-friendly!

Triangles have a way of looking like they require years of experience and a whole lot of patience... 😅
And while they can be tricky at times, ANYONE can make a beautiful quilt with triangle blocks, and it’s become my absolute favorite. (I might be biased)

You’re just following a simple step… one piece at a time.

That’s it!

And before you know it, you’re holding a block that looks intricate and detailed… but didn’t feel overwhelming to make. That’s the magic of it. 🪄

They are complex-looking, but simple to create.

So if you’ve been telling yourself, “I’m not advanced enough for something like this,” you might be more ready than you think! ✨ Comment ‘FREE,’ and I’ll send you my free class to give it a try. 💕

#modernquilting #quiltingforbeginners #beginnerquilter #beginnerquiltpattern
The DAYS spent in the sewing room, enjoying every The DAYS spent in the sewing room, enjoying every bit of the process one stitch at a time, the love sewn into every block... 

AI could never make a quilt like this. 🪄

If you want to join a community of quilters who are all on this creative journey together, making beautiful quilts, connecting and learning from each other, and celebrating our progress, comment ‘CLUB’ and I’ll send you the details! 💌

#quilterslife #creativehobby #grannyhobby #quilterproblems #quiltersgonnaquilt
A scrappy quilt made from half-square triangles? Y A scrappy quilt made from half-square triangles? Yes please. 😍

The Hello Houston quilt is beginner-friendly, scrap-friendly, and full of playful color possibilities.

Save this one for your next “I need to use up these scraps” sewing day and comment ‘BLOG’ to find the full tutorial on the blog. 🧵✨

#freequiltpattern #quiltpattern #quiltingforbeginners #quilttutorial
The joy is in the journey. ✨ There’s something tr The joy is in the journey. ✨

There’s something truly so special about making these quilts. 

👉 Yes, it takes a long time. 
👉 Yes, it can be hard sometimes. 
👉 Yes, you will make mistakes. 

Sometimes you won’t feel inspired or motivated to sit down at your sewing machine. 

But while anyone can just go buy a quilt at a store, not everyone can make a beautiful handmade quilt that will last a lifetime and mean so much more. And when you get to experience that feeling that only quilters know when you are making a beautiful handmade quilt and get to give it to someone that you love, it will all be worth it. 🙌

That is a feeling like no other. Quilters, I know you know what i’m talking about! 

If you’ve been curious about getting started quilting, comment ‘FREE’ and i’ll send you the link to my free class to get started. 💌

#quiltingforbeginners #newquilter #quiltinglove #quiltingfun #quiltingtherapy
Follow on Instagram

Browse by Category

Archives

  • Instagram
  • Facebook
  • Pinterest
  • email
I’ve been teaching quilting for over a decade, and I’ve been teaching quilting for over a decade, and I’ll still remember the first time that I learned this. 👇

It completely changed my quilty life, and I’ve never looked back! 

At one point early on in my quilting days, I almost gave it up altogether because I was so frustrated with ripping tiny bits of paper out of my seams. 

My fingers hurt, it took forever, and I was over it! I still have unfinished blocks that have paper on them from those days... 😅

And then someone taught me what I have now taught thousands of other quilters, and I fell back in love with it all over again. 

You can try for yourself by taking my free class and see how you like it! 

Comment ‘FREE’ and i’ll send you the link to sign up! 💌

#quiltteacher #quiltingtutorial #quiltingtips #modernquilting
I’ll die on this hill... 👇 Quilting is not just a I’ll die on this hill... 👇

Quilting is not just about making something beautiful. 

It’s about making time for yourself. 

And that act of making time for yourself is something that you have to do. It’s essential. And above all, you deserve it! 👏

No one is going to make the time for you. You have to prioritize time for yourself to play and explore your creativity. 

What’s the quilting hill that you will die on? Share in the comments! ⬇️

#quiltersofig #modernquilting #modernquilt #quiltteacher
These triangle blocks might look complicated… 👇 … These triangle blocks might look complicated… 👇

…but they’re actually super beginner-friendly!

Triangles have a way of looking like they require years of experience and a whole lot of patience... 😅
And while they can be tricky at times, ANYONE can make a beautiful quilt with triangle blocks, and it’s become my absolute favorite. (I might be biased)

You’re just following a simple step… one piece at a time.

That’s it!

And before you know it, you’re holding a block that looks intricate and detailed… but didn’t feel overwhelming to make. That’s the magic of it. 🪄

They are complex-looking, but simple to create.

So if you’ve been telling yourself, “I’m not advanced enough for something like this,” you might be more ready than you think! ✨ Comment ‘FREE,’ and I’ll send you my free class to give it a try. 💕

#modernquilting #quiltingforbeginners #beginnerquilter #beginnerquiltpattern
The DAYS spent in the sewing room, enjoying every The DAYS spent in the sewing room, enjoying every bit of the process one stitch at a time, the love sewn into every block... 

AI could never make a quilt like this. 🪄

If you want to join a community of quilters who are all on this creative journey together, making beautiful quilts, connecting and learning from each other, and celebrating our progress, comment ‘CLUB’ and I’ll send you the details! 💌

#quilterslife #creativehobby #grannyhobby #quilterproblems #quiltersgonnaquilt
Follow on Instagram
© 2026 Bryan House Quilts