• About
    • Privacy Policy
  • Teaching
    • Member/Student Login
    • Online Programs
  • Shop
  • Member/Student Login
  • Blog
    • Free Quilt Patterns – Scrappy Whirligig Quilt

Bryan House Quilts

QAYG Applique Pillow Cover Tutorial

Quilting and Stitching· Tutorial

13 Dec

QAYG Applique pillow covers are easy, fast and fun any holiday.

QAYG Appilque pillow cover tutorial title graphic

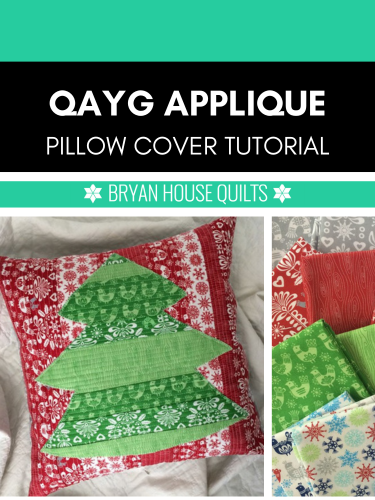
Learn to make this charming pillow using the Quilt As You Go (QAYG) method. Last-minute gift makers, it’s your time to shine!

  • Step-by-step instructions with photos and instructions.
  • Perfect for using up fabric scraps and batting remnants.
  • Get creative and use other motifs like snowflake or candy cane.
  • A great tutorial for beginner quilters and kids learning to quilt.

QAYG and Applique Basics

The Quilt As You Go (QAYG) method is a way to piece and quilt at the same time. Instead of quilting the entire quilt top at the end, individual blocks and sections are stitched, then sewn together. The pillow background is layered with batting and backing, then each piece is added and stitched down through the layers.

Applique, on the other hand, involves layering a smaller piece of fabric onto a larger one to create a design. Combining QAYG with applique opens up a world of creative possibilities, allowing you to add designs and personalize your quilts. I made the tree shape from a piece of QAYG fabric, a unique twist that used up my scrappies.

Echo 2025 Block of the Month

Introducing the Echo Block of the Month, an all NEW design for 2025! Colors and shapes create beautiful symmetry in this modern triangle quilt design. Make Echo or any of our BOM quilts in Make Modern Triangles Club.

Why You Will Love QAYG Applique

Quilt as You Go (QAYG) is a creative way to approach quilting and a favorite method of mine.

  • Great for beginners – simplifies the quilting process.
  • Manageable way to add stitching to the tops of blocks, especially if you are new to straight line quilting or free motion stitching. The easiest option – stitch in the ditch – is another way to finish the block.
  • No heavy lifting. With this method, you work on smaller individual blocks that are later assembled into the final QAYG top.
  • By utilizing the QAYG method, quilters can experiment with different designs and improvise with colors and prints.

Supplies

To embark on this festive project, you’ll need the following supplies and tools:

  • Sewing Machine: A basic sewing machine with a straight stitch and a walking foot is recommended for quilting.
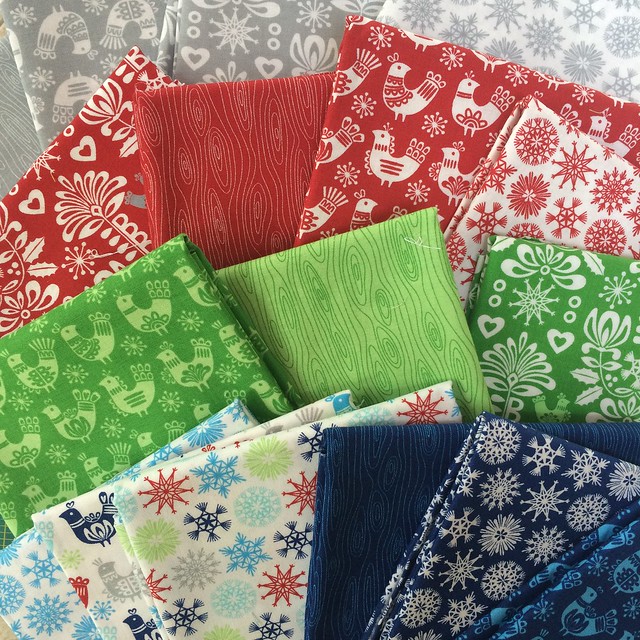
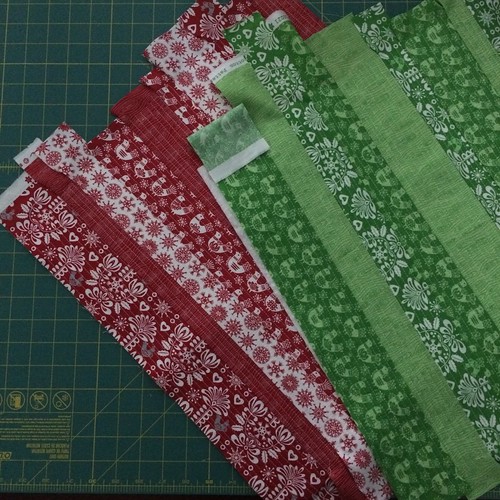
  • Fabric: Choose festive cotton fabrics in red, green, and white for the Christmas tree applique and pillow cover. Or opt for a non-traditional palette. Turquoise and cherry red?
  • Batting: Cotton batting provides the perfect amount of loft and warmth to your pillow cover.
  • Cutting Tools: Sharp fabric scissors, a rotary cutter, and a cutting mat will help achieve accurate cuts.
  • Marking Tools: A fabric pen or pencil, along with a ruler, is essential for marking your fabric for cutting and applique placement.
  • Other Supplies: Sewing pins, a seam ripper, an iron, and an ironing board are essential for sewing.
  • Thread: Wind your bobbin with the same thread used in the spool for the top thread.

Additionally, a walking foot is the best tool for keeping fabric layers from shifting when quilting. It’s a valuable investment if you plan on tackling more quilting projects in the future.

Materials

To make one pillow cover you will need: 

  • 2 squares of batting at least 17” (or at least 1” larger than your pillow form). I use Warm and White low loft batting
  • 4 Fat Quarters (or 1/4 yard cuts) red fabrics
  • 3 Fat Quarters (or 1/4 yard cuts) green fabrics
  • 1/2 yard to make the backside envelope
  • 1 pillow form, 16” square
Red and green fabrics selection

Step-by-Step Guide to Creating Your QAYG Applique Pillow Cover

Now, let’s move on to the fun part – creating your QAYG applique pillow cover.

Step 1: Cutting and Preparing Your Fabric

Red and green fabrics: Cut strips of fabric varying in width 1 1/2” to 3 1/2”, such as 1 1/2” strip, a 2 1/2” strip, and a 3 1/2” strip. (Note: if you cut from 1/4 yard cuts, sub cut the strips in half. They should be around 20” in length.)

Backing fabric: Cut two (2) pieces 16 ½ by 19 inches.

Step 2: Sewing the Top Cover and Applique Fabric

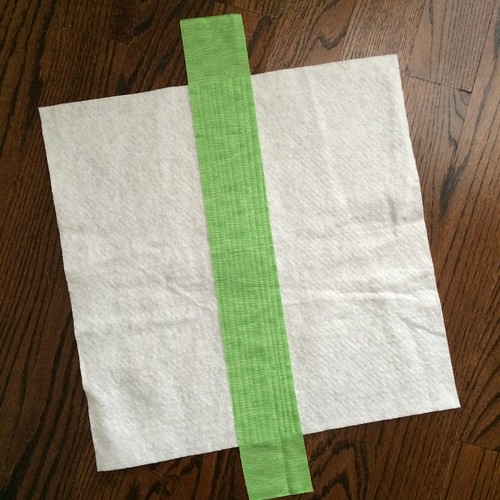
Place a green strip right side up along the center of one batting square. Use your walking foot to sew several vertical straight lines of stitching along the strip. When quilting, I increased my stitch length to 3.5. My quilting lines are roughly 1/4” apart. 

Sewing first strip on pillow top

Option: Add a piece of backing fabric to the back of the batting, which creates a sturdier top. This method is used when the backing will be seen. It creates a QAYG sandwich.

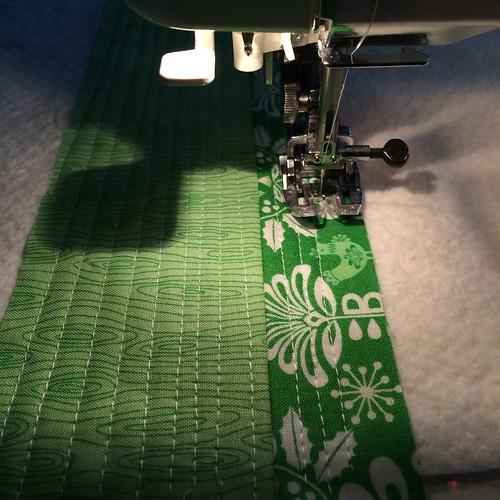
Next, place a second green strip on top of the quilted strip so that right sides are together (second strip is wrong side facing up) and align the raw edges. Use a 1/4” seam allowance, sew the strips together. Note: you will be sewing through the batting too. 

Then flip and press the second strip to the side so the right side is facing up. Quilt the second strip as desired. I chose to continue the same straight line quilting.

Stitching second strip on QAYG Applique pillow cover tutorial

Each strip is quilted individually. You can use straight-line quilting, free motion quilting, or a combination of both. Be sure to backstitch at the beginning and end of each stitching line to lock your stitches in place.

Repeat Step 2 to finish adding green strips to the batting square. 

Make a second QAYG blocks panel in red by repeating the process. Then square (trim) the background (mine is the red) square to 16 ½ inches.  

Background and applique fabric for QAYG Applique pillow cover tutorial

Step 3: Designing and Applying the Christmas Tree Applique

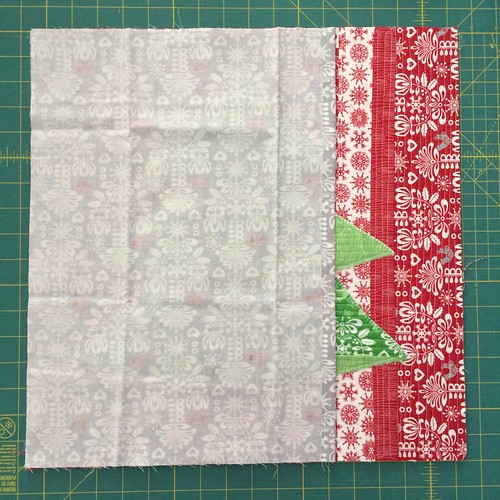
Now comes the fun part – bringing your QAYG applique tree to life! Now, you will cut a shape from one of the panels to applique onto the second panel. I chose to cut out a tree shape from my green panel to applique onto the red panel. 

cutting tree shape for QAYG Applique pillow cover tutorial
QAYG Applique pillow cover tutorial for cutting out tree shape on fabric

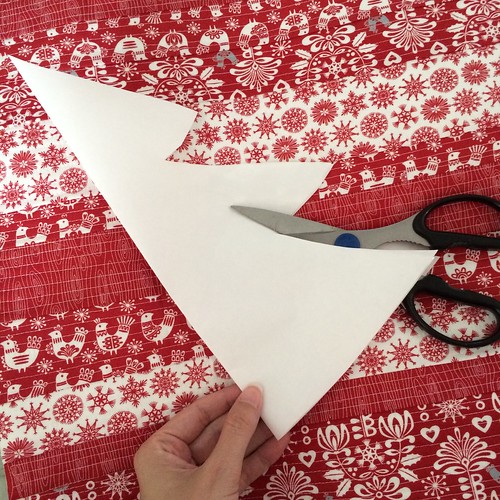
I used the red panel to gauge how large I want my green fabric tree – it should fit on the red panel with at least one inch allowance on the sides. Using freezer paper or copy paper, trace and cut your desired shape. Now pin the paper applique shape on top of the red panel and trace for positioning.

You can also trace the tree pattern using a washable fabric pen directly onto the green fabric and cut out. 

Some things to think about as you place your pattern:

  • Which way do you want the quilting or pieces to be oriented?
  • Make sure that tiny pieces aren’t along the edges of the top cover.

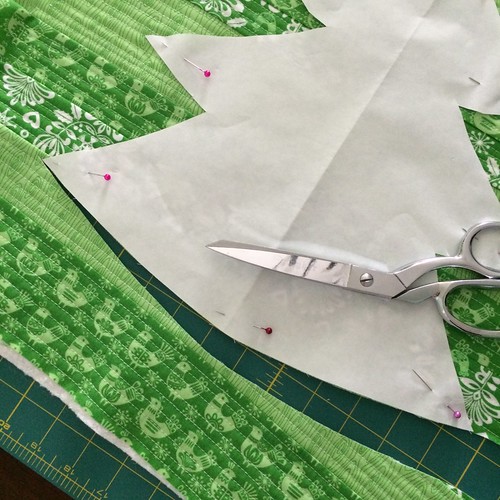
Arrange your tree fabric cut out on the quilted base, ensuring it’s centered and positioned as you desire. If you’re using multiple pieces for the tree, such as a trunk or star, layer them accordingly.

Baste the green pattern piece to the red panel with pins or a few large stitches.

Pinning tree to background fabric

Things to think about:

  • How do you want your background quilting and strips oriented? Matching, perpendicular, horizontal or vertical? I oriented mine so that the quilting is perpendicular.

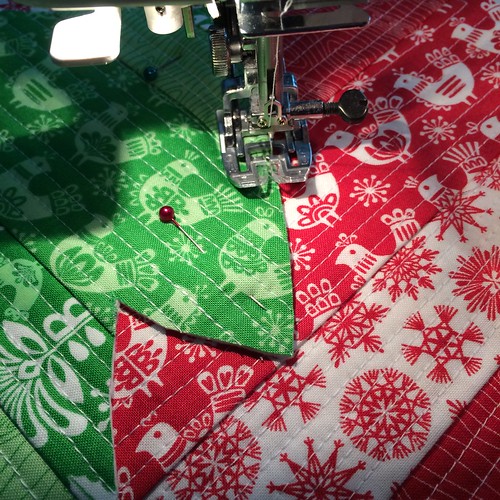
Attach the applique: Use a simple straight stitch or a decorative machine or hand stitch. Sew slowly and carefully around the edges of your applique, making sure to catch all layers of fabric. If you’re using a smaller stitch, consider using a stabilizer on the backside to prevent puckering. I used a blanket stitch and loved it.

Attaching the qayg applique tree

Feel free to embellish your Christmas tree further. Add buttons for ornaments, stitch on beads for shimmer, or use embroidery floss for textured effect.

Step 4: Assemble the Pillow Cover and Backing

Make the back envelope pieces by pressing one of the raw edges under by 1/2”. Fold it under again by 1/2” and press. Then top stitch to secure. Do this to both halves.

Lay out the pillow top, right side up. Then lay one side of the envelope back right side down on top of the pillow top. Align the raw edges with the raw edges of the pillow. 

Lay back panel over right side of top panel

Lay the second half of the envelope back right side down and aligning the raw edges to the other side of the pillow top. 

{“DeviceAngle”:-0.009200888}

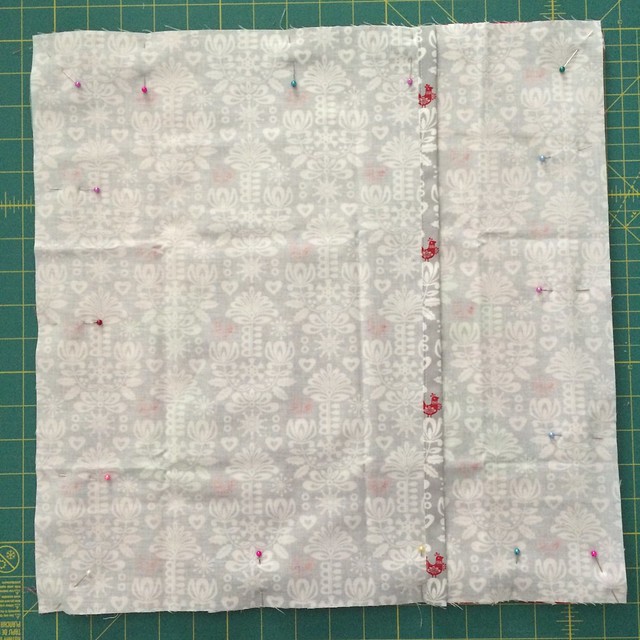
Pin baste around the outer edges. 

Sew around the perimeter using a 1/4” seam allowance. Backstitch when starting and stopping and also backstitch when stitching over where the backing pieces overlap, for extra security. 

Clip the corners to reduce bulk and turn the pillow right side out. Then shove (daintily mind you!) on a pillow form.

Use a chopstick or a turning tool to gently push out the corners for a crisp finish. Press the seams flat.

TA DA!

Quilting a Quilt the QAYG Applique Way

Are you thinking what I’m thinking? This technique is so versatile – bunnies, Easter eggs, pumpkins and shamrocks! And letters, puppy dogs and birds….go with it!

Frequently Asked Questions

How do I choose the right batting for my pillow cover?

Cotton batting is an excellent choice for pillow covers as it offers a good balance of warmth and sturdiness. You can also opt for other types of batting, such as polyester or bamboo, depending on the desired thickness and warmth.

What’s the best stitch to use for applique edges?

A straight stitch or a zigzag stitch set to a narrow width are standard choices for applique. However, you can use decorative stitches offered by your sewing machine for a more stylized finish. Ensure that the stitch you choose provides a secure and durable hold for the applique.

MORE RESOURCES

  • Rainbow Quilt Designs: 9 Ways to Make Inspired Rainbow Quilts
  • Hexagon Quilts Roundup
  • Quilt Coloring Pages: 4 Methods for Successful Color
  • Rainbow Quilt Designs: 9 Ways to Make Inspired Rainbow Quilts
Previous Post: « TA-DA to the TOPS!
Next Post: Quilt Finishes are a Wrap! »

Primary Sidebar

New 2026 Block of the Month!

Graphic of Alchemy Quilt

Join the 2026 Block of the Month Program

Get my Modern Triangles Quilt Book

Get my Modern Rainbow Quilts Book

Image shows cover of the book "Modern Rainbow Quilts"

Make the Solstice Quilt!

Solstice Block of the Month by Bryan House Quilts

Get Your Invite!

Make Modern Triangles Logo

Make the Sparkler Quilt!

Image Shows Sparkler Quilt Top by Rebecca Bryan

Make the Echo (Echo!) Quilt

Echo BOM now open to join

Make the Wildflower Quilt!

Wildflower Block of the Month by Bryan House Quilts

Make the Stargazer Quilt!

Anne's Stargazer BOM

Make the Rainbow Triangles Quilt!

Rainbow Triangle BOM, modern triangle quilt, Rebecca Bryan

About

Hey there! I’m Rebecca, an author and teacher and freezer paper piecing evangelist. I’m also the founder of the Make Modern Triangles Quilt Club.

Disclosure

Just so you know, my site includes affiliate links from which I (it’s me! Rebecca!) receive payment or compensation. Something to consider as you peruse my website. Thanks!

Latest on Instagram

A scrappy quilt made from half-square triangles? Y A scrappy quilt made from half-square triangles? Yes please. 😍

The Hello Houston quilt is beginner-friendly, scrap-friendly, and full of playful color possibilities.

Save this one for your next “I need to use up these scraps” sewing day and comment ‘BLOG’ to find the full tutorial on the blog. 🧵✨

#freequiltpattern #quiltpattern #quiltingforbeginners #quilttutorial
The joy is in the journey. ✨ There’s something tr The joy is in the journey. ✨

There’s something truly so special about making these quilts. 

👉 Yes, it takes a long time. 
👉 Yes, it can be hard sometimes. 
👉 Yes, you will make mistakes. 

Sometimes you won’t feel inspired or motivated to sit down at your sewing machine. 

But while anyone can just go buy a quilt at a store, not everyone can make a beautiful handmade quilt that will last a lifetime and mean so much more. And when you get to experience that feeling that only quilters know when you are making a beautiful handmade quilt and get to give it to someone that you love, it will all be worth it. 🙌

That is a feeling like no other. Quilters, I know you know what i’m talking about! 

If you’ve been curious about getting started quilting, comment ‘FREE’ and i’ll send you the link to my free class to get started. 💌

#quiltingforbeginners #newquilter #quiltinglove #quiltingfun #quiltingtherapy
TODAY is the last chance to get in on the presale TODAY is the last chance to get in on the presale special for the NEW Alchemy block of the month!!! ✨

Sometimes when inspiration hits, you just have to run with it. And that is exactly what I did when I designed and made this quilt, so that I could share another block of the month with you this year! 

The Alchemy will be a bit more challenging than my other programs, but with freezer paper piecing being the main technique, it is still totally doable! 🙌

And of course, just like all of my other block of the month programs, you’ll get all the step-by-step instructions and video tutorials to make sure that you succeed. You’ll also get to connect and sew with the entire community to celebrate your progress and get support when you need it! 

Comment ‘ALCHEMY’ if you want to get in on the presale before it’s gone! 💕

#modernquilting #quiltinginspiration #blockofthemonthquilt #quiltpattern #quiltdesign
What would you add to the list? 👀⬇️ #quiltteacher What would you add to the list? 👀⬇️

#quiltteacher #quiltingtechniques #quiltingtips #quiltingfun
I always tell people that if you really want to ge I always tell people that if you really want to get started with quilting, you can buy everything that you need at Walmart. 🙌

👉 You don’t need the newest, fanciest sewing machine to get started. 
👉 You don’t need to order the latest, high-end fabric to practice with. 
👉 You don’t need a bunch of expensive tools to make something beautiful. 

And soooo many people don’t know this, but oftentimes local libraries offer sewing machines for rent or for use in the library, so if you want to try quilting without investing in your own machine, it’s a great option to explore to get you started! 🪡

So if you really want to give quilting a shot, head to your nearest supermarket, grab a few affordable fabrics and tools to start with, sign up for my free class, and see if it’s something that you like! Comment ‘FREE’ to sign up for the free class! 💌

Where is your favorite place to get affordable quilting supplies? Share in the comments! ⬇️

#quiltingtools #quiltingnotions #quiltingforbeginners #newquilter
Presale for the NEW Alchemy block of the month is Presale for the NEW Alchemy block of the month is LIVE!!! 🌟

I am sooo excited to make this quilt with you, and I can’t wait to see all of the beautiful color and fabric choices that you come up with!!! 

If you’ve been around for a while, you know that I LOVE the planning and picking phase of starting a new project. 

For a rainbow version of the Alchemy, it turns out we can use fat quarters! 

A fat quarter-friendly project just makes choosing fabrics so easy! Fat quarters are like potato chips, you can’t just have one... You simply collect them. 🧐 So if you are anything like me, you already have a stash of fat-quarters that you can choose from! 

If you want to get a head start in choosing your own fat quarter rainbow, you will need 12 different rainbow colors, and then you’ll need 2 fat quarters for each color, a light and a bright, for a total of 24 fat quarters. 🌈

Comment ‘ALCHEMY’ to join in on this block of the month program! We start in June. ✨

#quiltdesign #modernquilt #rainbowquilt #modernquilting #quiltersgonnaquilt
Follow on Instagram

Browse by Category

Archives

  • Instagram
  • Facebook
  • Pinterest
  • email
A scrappy quilt made from half-square triangles? Y A scrappy quilt made from half-square triangles? Yes please. 😍

The Hello Houston quilt is beginner-friendly, scrap-friendly, and full of playful color possibilities.

Save this one for your next “I need to use up these scraps” sewing day and comment ‘BLOG’ to find the full tutorial on the blog. 🧵✨

#freequiltpattern #quiltpattern #quiltingforbeginners #quilttutorial
The joy is in the journey. ✨ There’s something tr The joy is in the journey. ✨

There’s something truly so special about making these quilts. 

👉 Yes, it takes a long time. 
👉 Yes, it can be hard sometimes. 
👉 Yes, you will make mistakes. 

Sometimes you won’t feel inspired or motivated to sit down at your sewing machine. 

But while anyone can just go buy a quilt at a store, not everyone can make a beautiful handmade quilt that will last a lifetime and mean so much more. And when you get to experience that feeling that only quilters know when you are making a beautiful handmade quilt and get to give it to someone that you love, it will all be worth it. 🙌

That is a feeling like no other. Quilters, I know you know what i’m talking about! 

If you’ve been curious about getting started quilting, comment ‘FREE’ and i’ll send you the link to my free class to get started. 💌

#quiltingforbeginners #newquilter #quiltinglove #quiltingfun #quiltingtherapy
TODAY is the last chance to get in on the presale TODAY is the last chance to get in on the presale special for the NEW Alchemy block of the month!!! ✨

Sometimes when inspiration hits, you just have to run with it. And that is exactly what I did when I designed and made this quilt, so that I could share another block of the month with you this year! 

The Alchemy will be a bit more challenging than my other programs, but with freezer paper piecing being the main technique, it is still totally doable! 🙌

And of course, just like all of my other block of the month programs, you’ll get all the step-by-step instructions and video tutorials to make sure that you succeed. You’ll also get to connect and sew with the entire community to celebrate your progress and get support when you need it! 

Comment ‘ALCHEMY’ if you want to get in on the presale before it’s gone! 💕

#modernquilting #quiltinginspiration #blockofthemonthquilt #quiltpattern #quiltdesign
What would you add to the list? 👀⬇️ #quiltteacher What would you add to the list? 👀⬇️

#quiltteacher #quiltingtechniques #quiltingtips #quiltingfun
Follow on Instagram
© 2026 Bryan House Quilts