Freezer paper piecing will save you so much time and *tears*. No more ripping out those tiny paper bits for hours! Oh, my achy, breaky fingers!
In this post, I’m sharing a free modern triangle block pattern, Scrappy Whirligig, and a tutorial to make it with the freezer paper piecing technique that I’ve taught to thousands of quilters in my Make Modern Triangles Club. Read on or watch the tutorial below.
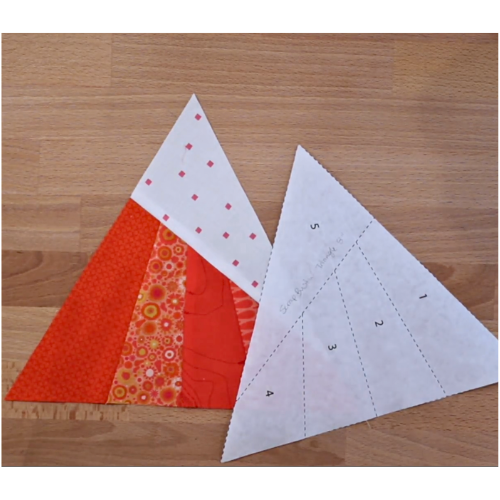
Download the free Scrappy Whirligig Block pattern below.

Now, raise your hand if you LOVE paper piecing but HATE ripping the papers off of the blocks.
*hands are raising everywhere*
Well, pull up a chair and I’ll tell you my story about how paper piecing killed my sewjo (sewing joy) and how discovering freezer paper piecing changed my quilting life for the better. I’ll show you exactly how to do freezer paper piecing and give you a free guide to download. Yah!
Free Printable and Tutorial for Freezer paper piecing
DOWNLOAD THE Free Guide to Freezer Paper Piecing
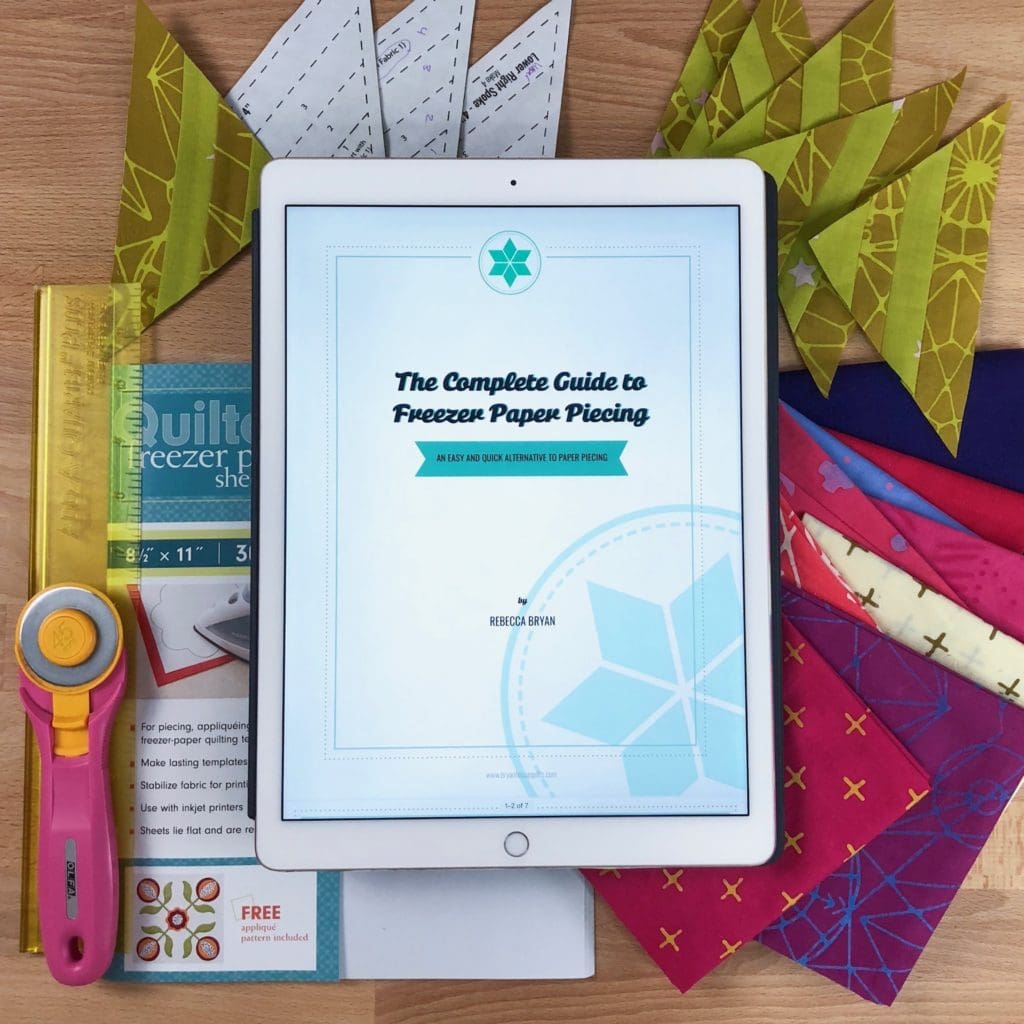
Before I get to the story and tutorial, please download the free guide which will help you get the most out of this freezer paper piecing tutorial. Keep it nearby for reference as you experiment with the techniques. Click the button below to get your free guide now.
Why I Quit Paper Piecing
Quitting for good
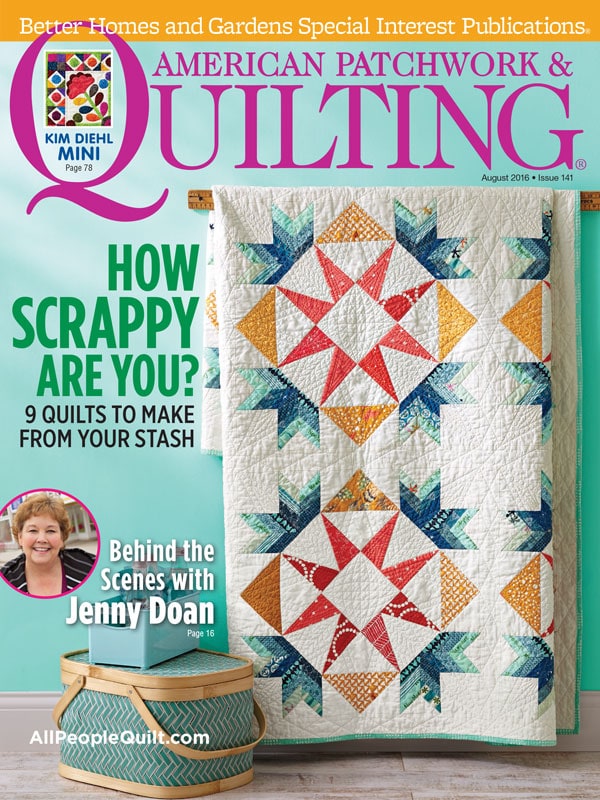
Once upon a time, I made a gorgeous quilt. It even made the cover of American Patchwork & Quilting (what! crazy town!), however, after I made this beauty, I swore off paper piecing. Forever.
I know – dramatic, but it’s true and I meant every word.
That cover quilt was a labor of love. Tearing those papers out of the blocks took twice as long as the actual making, even though my mom helped me for hours. Two people, twice as long. Maybe thrice as long. And our fingers hurt for days after ripping. Not cool.
I said no more. No more ripping and definitely no more foundation patterns for me. Ever. I just couldn’t imagine spending that much time on ripping again. Life is too short. Wouldn’t you rather spend time creating and making?
Freezer paper piecing Tutorial changed my life
Luckily, a friend gave me a freezer paper piecing tutorial. And my life changed. I saved so much time and paper, and no more achy fingers. My quilting world was reopened to those lovely foundation patterns.
Now it’s your turn to feel lucky because I’m sharing the technique with you today! This is the same technique I’ve taught to thousands of quilters inn my online programs.
FREEZER PAPER Piecing Versus Regular Paper
My freezer paper piecing tutorial is similar to paper foundation piecing in several ways. First, the general techniques are similar. Second, there is the same focus on placement, trimming and pressing. All good, however, the most important and main difference is that you can reuse the templates without ripping them to shreds. And the whole template peels off in one piece.
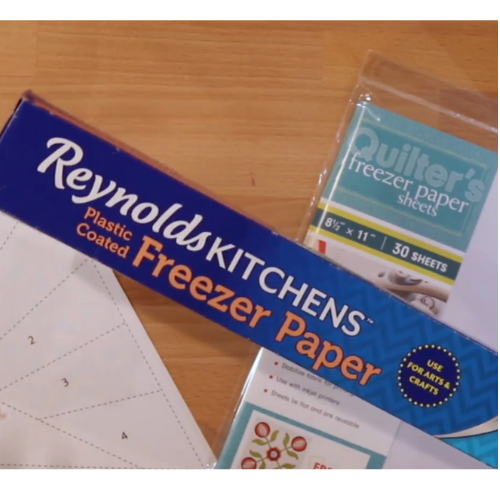
You don’t have to make dozens of copies of templates. You can trace a few copies on freezer paper and then reuse them many times. Or you can use printable freezer paper in your inkjet printer – it’s sized to fit your printer. There are other options, too. Like regular freezer paper off of the roll which many quilters swear by.
You may want to make a few copies for working in batches, which is what I like to do. I usually make four of each template and work in batches of four units.
STEP-BY-STEP TUTORIAL
Welcome to fun! Let’s get started!
1. Prepping the templates AND CUTTING FABRIC
If you’re new to foundation piecing, freezer or paper, see my blog post on how to make and use fabric cutting templates for a tutorial.
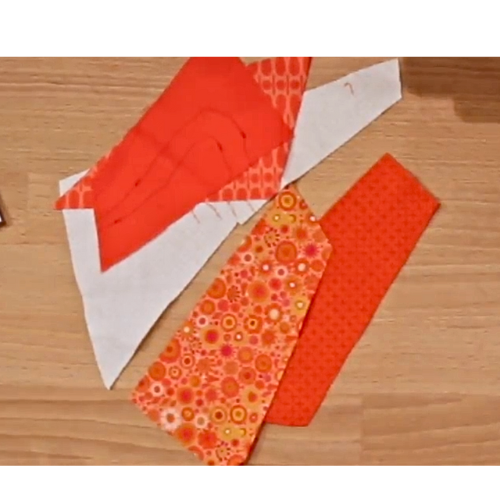
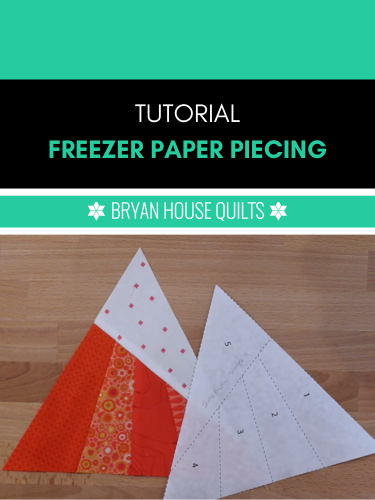
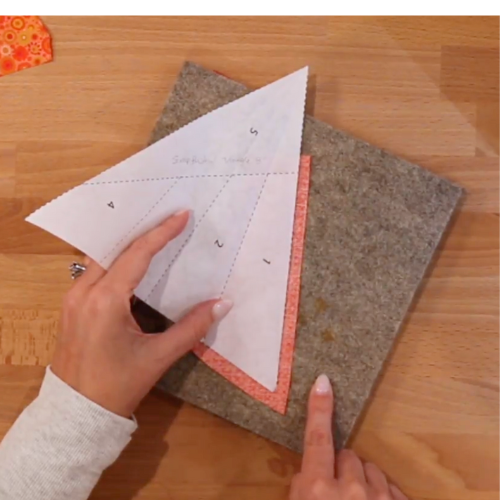
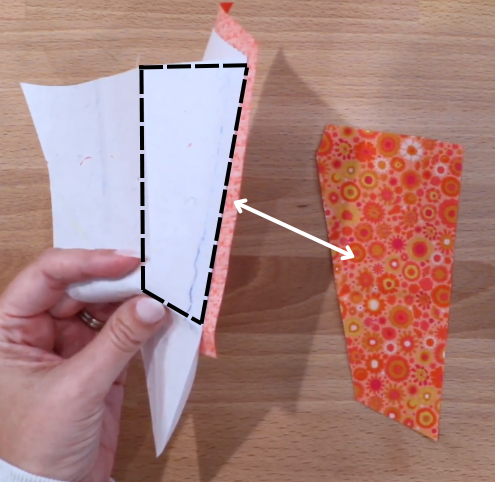
Cut out all of fabric pieces before you start sewing. Below, I show the set of pieces required to make a Scrappy Whirligig triangle.
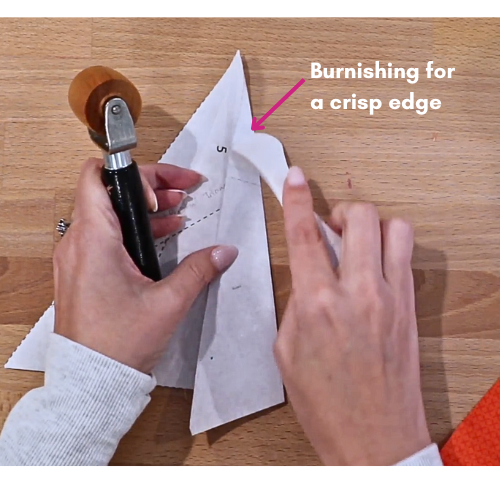
Next, fold and score the seam lines on the foundation. This makes it easier to fold along the lines in subsequent steps. Try using an index card to make crisp lines by lining it up with dashed line and folding over it. Use a hera tool (white plastic thingy in the photo) or a seam roller to set crisp fold lines.
2. Sewing the first SECTION
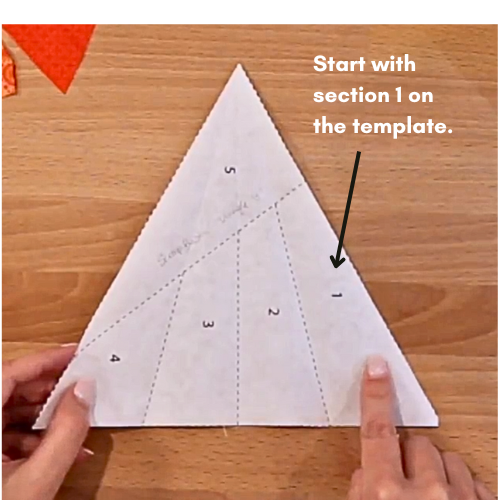
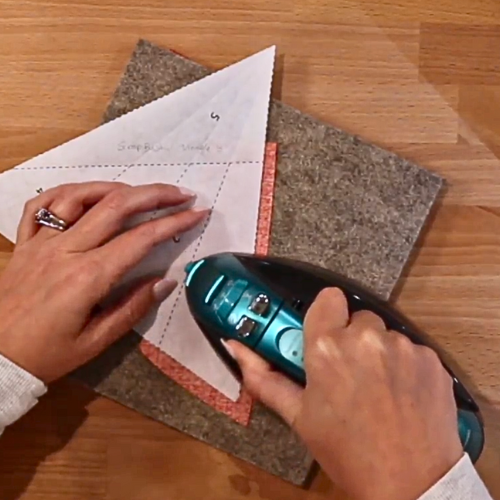
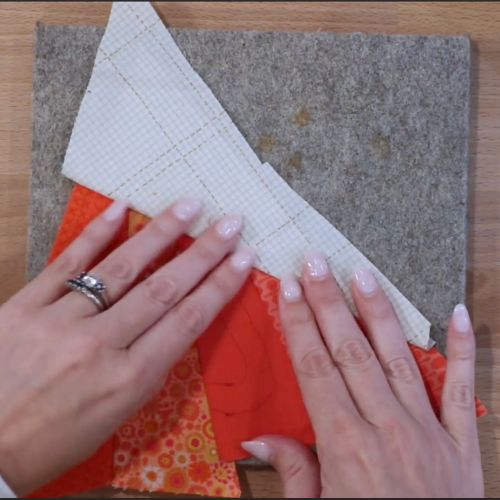
Instead of pinning or glue basting the first fabric piece to the template like you would in paper piecing, you will iron the freezer paper to Fabric 1 (my Fabric 1 is an orange floral). Make sure the paper side of the freezer paper is facing up (with the numbered sections). The wrong side of the fabric is facing the shiny part of the freezer paper. The right side of the fabric is facing the pressing mat. The shiny side adheres to the fabric when pressed with the iron.
I line up Fabric 1 to Section 1, centering it on section and leaving approximately a quarter inch seam allowance (just eyeball it). Then I iron the freezer paper template to the fabric.
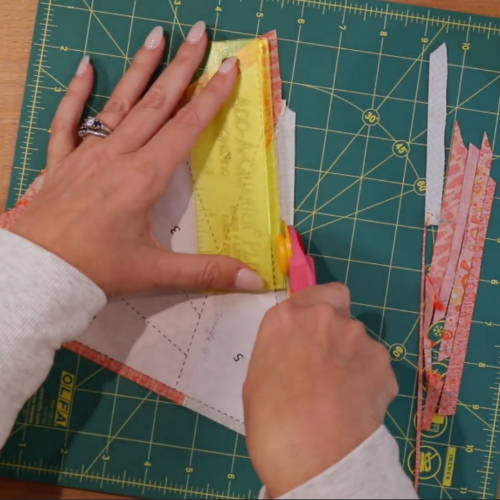
Using my ruler or an Add-a-Quarter inch ruler to trim the seam allowance to a quarter inch.
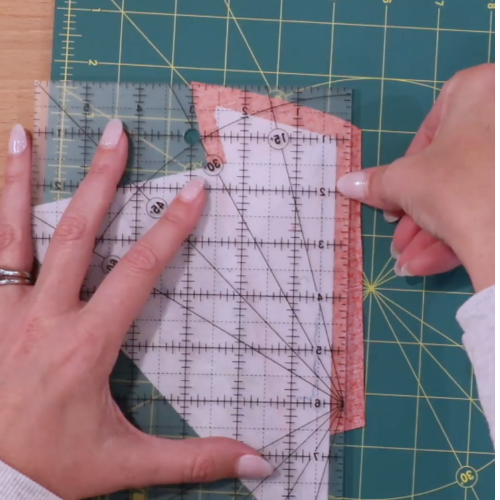
Next, I fold Section 2 foundation back and match the Section 2 fabric to it, making sure I have the right fabric piece. Place the right sides together with the Section 1 fabric, that you ironed and trimmed to the foundation.
3. Sewing the second section
Now, I check to make sure there is enough seam allowance around each side by gently pulling over the edges to check while using my fingers to hold the edges in place.
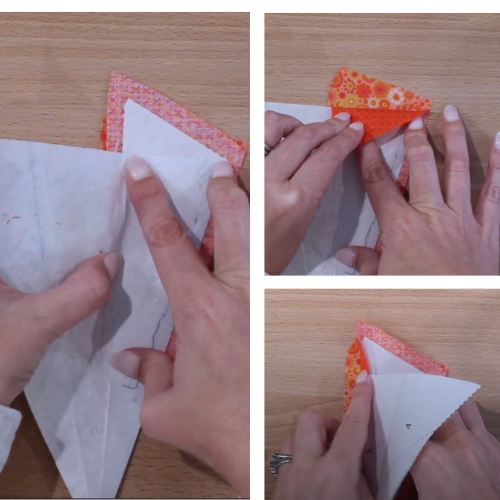
Stitch right next to the fold but not through the paper. Keep the Section 2 freezer paper folded back and out of the way.
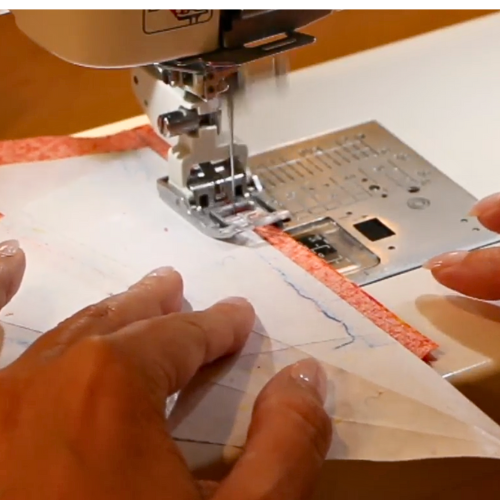
See how my seam line is right next to the fold, but not through the paper?
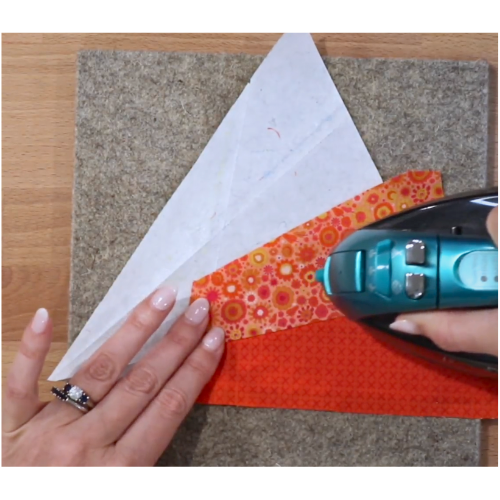
I open up the seam and press on the paper side and turn over to press the seam with the fabric right side up. This will also make the freezer paper stick to Fabric 2. Be sure to avoid pressing on the sticky (shiny) side of the freezer paper that is facing up around the edges to avoid stickiness on your iron plate.
Continue the process
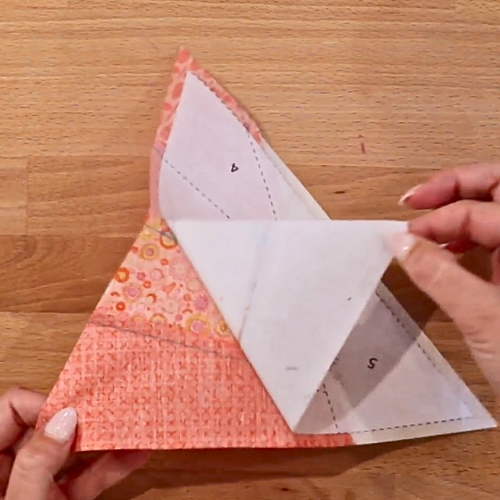
Continue to add sections in numerical order. Fold over the last piece and finger press the seam. Press the entire piece on top of the fabric and flip over to press on the paper side.

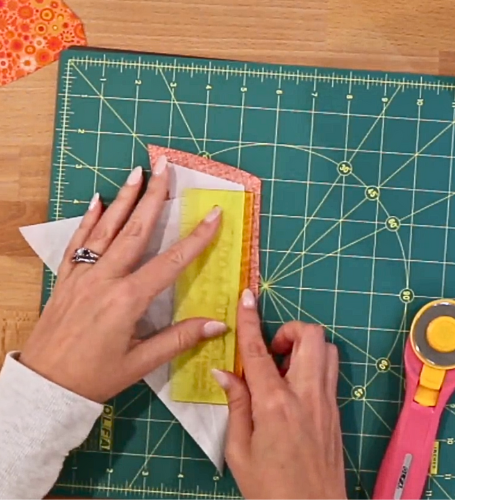
Grab your cutting mat and rotary cutter to trim the three sides of the triangle to a quarter inch. If you’re using a regular ruler, make sure to match the quarter inch line on the ruler to your stitching line for the seam.
Now comes the really fun part! After the unit is completed, peel the foundation in the same direction as the seam allowances, which limits the edges from fraying. It comes right off.
And TADA!!!
No picking out paper from your seams and you can reuse that freezer paper template many more times.
Want More?!
If you *need* to try this technique right away:
Download the free printable – “The Complete Guide to Freezer Paper Piecing”. By clicking the button below.
Check out my list of must-have tools for Freezer Paper Piecing.
For more on quilting modern triangles, check out these posts:

I recently started doing this myself and it is an amazing thing! It saves time ripping, which is the worst part of paper piecing. I actually stick my freezer paper right into my printer and print the pattern directly onto it.
wow that’s great – I assume you cut the freezer paper to 81/2 x 11 ?
Not necessarily. You can purchase printable freezer paper that is 8 1/2” x 11”.
I love this idea. Where can I purchase the premeasured freezer paper? Thank you for sharing.
Hi Linda, I sell it in my shop here:
https://shop.bryanhousequilts.com/search?q=freezer+paper
You can also find it in your local quilt shop or Joann’s.
Thanks!
Brilliant!
Great and thanks for telling!
Thanks so much! I hate printing all those copies, plus my printer is always running out of ink. Can't wait to try it!
I had seen this before but you've explained it so well now I want to try it!! I'm not a huge fan of pp but next time I'm going to try it this way! Thanks 🙂
I had seen this before but you've explained it so well now I want to try it!! I'm not a huge fan of pp but next time I'm going to try it this way! Thanks 🙂
Awesome! I love this concept and you aren't dulling your machine needle and you don't have to use tiny stitches!
I was definitely nodding my head with your opening question. I have seen this demonstrated before as well but haven't tried it. Love the idea of doing a small batch at a time.
That's GREAT!!! ❤️ I love this paperless way to paperpiece :0) THANK YOU so much
dearest greetings, Gesine
This is a great technique. I think it was first developed by Judy Mathieson (Queen of the Mariner's compass https://www.youtube.com/watch?v=II3jICgLMcI ) but needs to be disseminated much more widely. Two additional benefits. with the paper folded back in preparation for sewing (next to the fold) you can clearly see whether the new piece covers the area it is supposed to cover, AND, since the fabric is not sewn down to the paper, you have the option of changing the direction of the seam allowance. After sewing, you can peel up the paper edge along the fold and tuck the new seam allowance under. This can reduce bulk and allows control over the way layers come forward or recede. Thanks again for a very clear demonstration.
Hand raised! I haven't tried this method, but cannot wait for the next project to use it with! You can buy freezer paper sheets and print them in your printer. http://pileofabric.com/collections/supplies/products/freezer-paper-sheets-50-pack
Or, I have heard that some people cut sheets from the roll and do the same thing. Thanks for the tutorial…very valuable info!
Mitra303 | Bola Online | Agen SBOBET | Agen Poker | Agen IBCBET | Agen Judi
Agen Judi Online
Agen Judi
Bandar Judi
Bola Online
Bandar Bola
Agen SBOBET
Agen Casino
Agen Poker
Agen IBCBET
Agen Asia77
Agen Bola Tangkas
Prediksi Skor
Prediksi Skor LEICESTER CITY VS TOTTENHAM HOTSPUR 22 Agustus 2015
Prediksi Skor NORWICH CITY VS STOKE CITY 22 Agustus 2015
Prediksi Skor ATHLETIC BILBAO VS BARCELONA 23 Agustus 2015
Prediksi Skor EMPOLI VS CHIEVO 24 Agustus 2015
Its extremely instructive, intelligent and quality substance. I wish all of you good fortunes for your coming sites and posts. Continue sharing! Buzz App
I love this method and have used it several times.
I am seriously so excited to try this!! I love the look of paper piecing but hate all the tearing….this is going to make life so much easier!! Thank you for sharing!
Yah! Your excitement matches mine. It makes life SO much easier!
How many times can you use the same piece of freezer paper before it loses its stickiness?
I wanna say I am able to use each around 8 times. Thanks!
seems like just as much hard work to me ..all that ironing :/
Yes! It is work all around, but less work when it comes to picking out the paper.
Very interesting! I might like paper-piecing better this way. I don’t do it at all now because I dislike the process so much.
It’s really been a game changer for me! Give it a try for sure! 🙂
Do you have any video of that? I’d like to find out some additional information.
I hope to. This tutorial is first on my list for video tutorials.
I quilt with a group of ladies and I just wondering if I could use the above to teach them your method of Paperless Paper Piecing. I think that they would enjoy it. If that is okay with you. Thank you
Yep! You can also make copies of the PDF and share with your group. Thanks for asking!
I might try this now. Very clear explanation of the process.
Thanks,
Great! thank you!
Thanks for sharing your thoughts about agen judi online.
Regards
Thanks for a marvelous posting! I genuinely enjoyed reading it, you may be a
great author.I will be sure to bookmark your blog and will come back later on. I want to encourage yourself
to continue your great job, have a nice holiday
weekend!
I had my hands raised also. I will put this method on my to try list.
Yes! Let me know how you like it. 🙂
I keep trying to download the freezer paper piecing guid but nothing happens. Can you send to me?
I believe the links are fixed now. Sorry about that!
What temperature is your iron set on and how long do you press? Can’t seem seem to find those details.
The hottest, driest setting. 🙂
Thank you for the tutorial. It is very clear and understandable, but after several tries I need help. When the process is going smoothly, no problem, but several times the freezer paper got loose from the fabric and then I am completely lost. Do you have a solution for this problem?