• About
    • Privacy Policy
  • Teaching
    • Member/Student Login
    • Online Programs
  • Shop
  • Member/Student Login
  • Blog
    • Free Quilt Patterns – Scrappy Whirligig Quilt

Bryan House Quilts

Triangle in a Square {Tutorial}

design improv with triangles· finished quilts· Modern Triangle Quilts· Tutorial

15 May

Hey guys!

Today, I’m sharing a triangle quilt tutorial. This tutorial will show you how to turn a Modern Triangle into a Square Block. I published this tutorial as part of my online workshop, Design Impov with Triangles. But I’ve had a couple of requests for this tutorial outside of that workshop, especially for those of you who enjoyed making the Heart Triangle.

Make this free heart triangle quilt block!

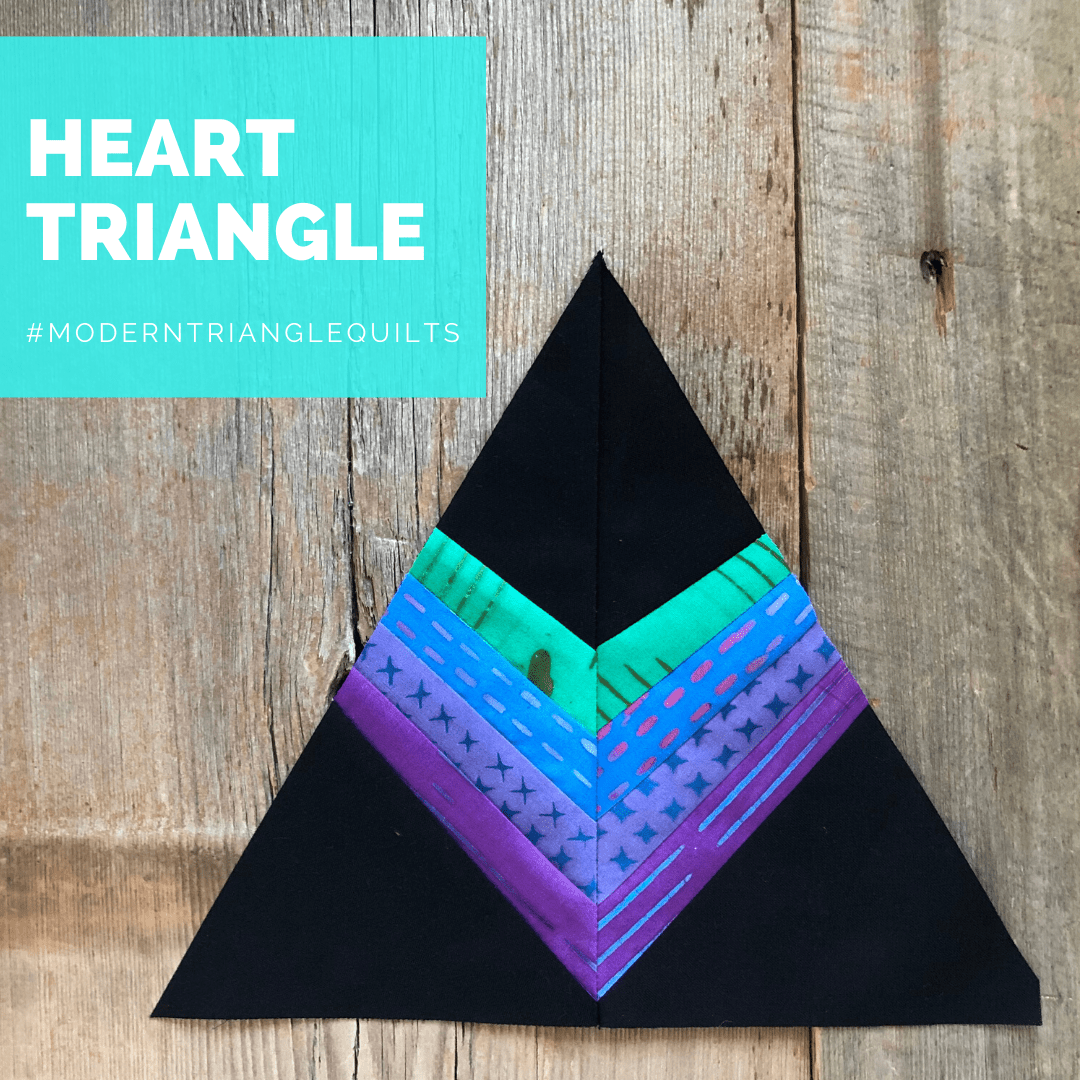
So, if you’ve made one equilateral triangle, or several (they can be like candy!), this is how you can turn your triangles into square minis. And if you’d like to learn how to design your own triangles, grab a spot on the waitlist and I’ll let you know when enrollment opens.

Enjoy!

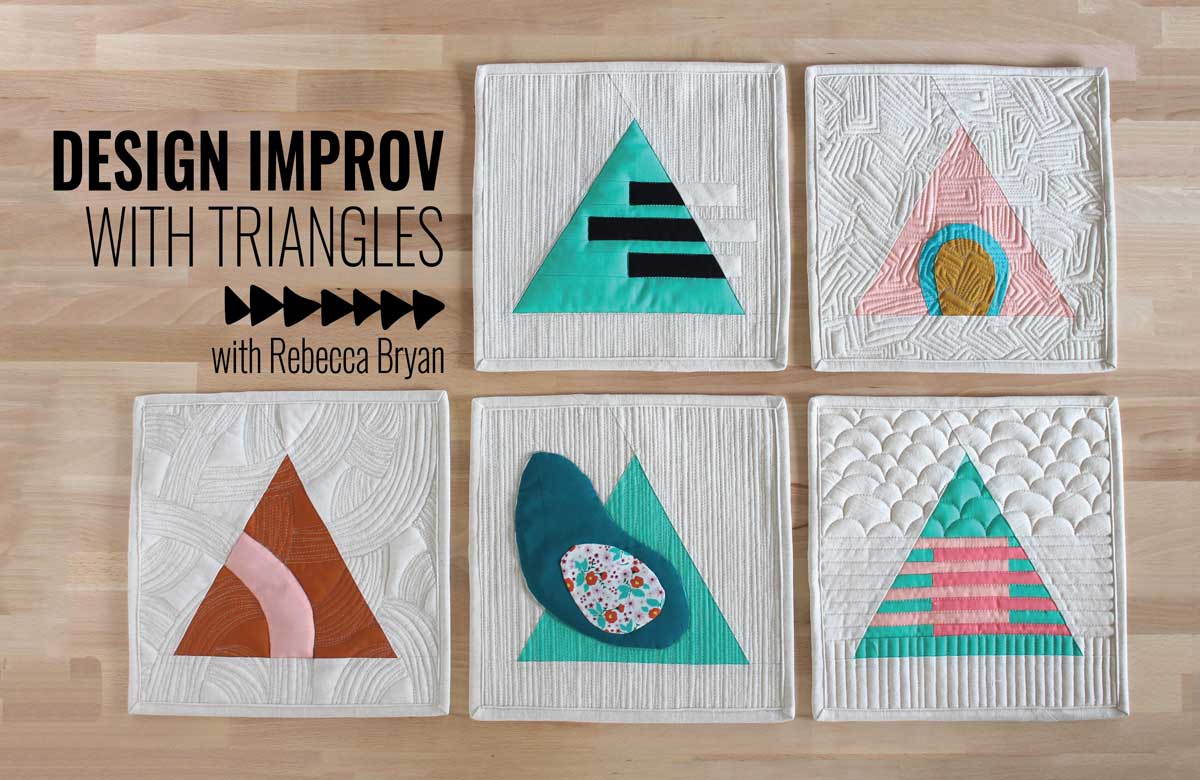
This triangle quilt tutorial is based on the Equilateral Sampler pattern on page 44 of Modern Triangle Quilts. This version has pictures, a few more images and tips, and instructions and fabric requirements for mini quilts in multiples of 3. (So if you want to make 6 minis then double the recipe so to speak.)

Materials for Three Mini Quilts:

  • Three 8 1/2” equilateral triangle blocks
  • 1/2 yard of background fabric for every 3 triangles
  • 3 squares 20” x 20” backing
  • 3 squares 20” x 20” batting
  • 1/2 yard for binding for every 3 mini quilts

Cutting

From the background fabric cut:

  • Cut 2 strips 7” x fabric width. From each strip, subcut 3 rectangles 7” x 13 1/2” for a total of 6 rectangles.
  • Cut 1 strip 2 1/2” x fabric width. From each strip subcut 3 rectangles 2 1/2” x 12 1/2” for a total of 3 strips

Piecing

1. Make your equilateral blocks either by following the instructions in Modern Triangle Quilts (pages 15-43) or by creating your own designs within the Design Improv with Triangles.

2. Trim off the lower right corner from each background rectangle: Mark 1” from the corner on the long side and 1 3/4”from the corner on the short side. (Important note: If you are using printed fabric, you will need to trim the corners from the rectangles a bit differently: 36 of the rectangles should have the lower right corner trimmed, while the other 36 should have the lower left corner trimmed.)

3. For each block, lay out 2 mirrored trimmed rectangles on the sides and 1 background 2 1/2” x 12 1/2” strips along the bottom of the block.

4. Add the left background piece.

Tip: Notice in the picture to the left, the wee pink triangle sticking out? This is the dog ear and I’m looking for it to extend past the background piece by roughly 1/4”.

My favorite trick is to use my acrylic ruler, or add-a-quarter ruler to measure how far the dog ear sticks out.

You can see in the picture on the right, where the pin is pointing, that the dog ear sticks out about 1/4” beyond the background.

Note that this doesn’t have to be perfect all the time. There is some room to fudge here and there.

triangle quilt tutorial

Optional: Consider pinning the pieces together before sewing.

I don’t usually pin, but I’ve pieced angles a TON of times. When I was a beginner I did pin. So, if you are a newer piecing or new to piecing with angles, you might want to pin.

4a. Sew and press the seam toward the triangle.

4b. Trim the excess fabric from the rectangle as shown above.

5. Add the right background piece in the same manner. Notice the dog ear sticking out roughly 1/4” beyond the background piece in the lower right corner of the triangle in the above picture?

Same trick with the acrylic ruler. If necessary pin the pieces together and then sew.

Press the seams toward the background.

6. Lastly center and add the 2 1/2” x 12 1/2” strip to the bottom of the triangle. To center the pieces, fold the strip in half and finger-press to mark the center. Also do this with the triangle.

Press the seam toward the background.

7. Square up the block to 12 1/2” x 12 1/2”. Use the 2 1/2” x 12 1/2” strip at the bottom to guide you. Line up the base of the block (shown as the left side of the block as pictured above) with a line on your cutting mat.

7a. Trim the right side of the block.

7b. Trim the left side of the block.

triangle quilt tutorial

Finishing

1. Make or cut 3 backings, 20” x 20”.

2. Baste and quilt as desired. (Hint: Use some of the line motifs you explored or use some of the textures you’ll explore in Lesson 5 (of Design Improv with Triangles): Layering and Texture.

3. Bind the mini using your preferred method and upload a picture for us to oogle in a “Show your Work” page.

Want more Modern Triangle Quilts?

I hope you find this triangle quilt tutorial useful! Whether you are interested in designing your own modern triangle quilts or you simply want to make a modern triangle quilt, I’ve got so many fun options for you to explore!

  • Try your hand at making modern triangles with this free sample.
  • Buy the book, Modern Triangle Quilts.
  • Make a BOM Quilt – Rainbow Triangles, Stargazer, Solstice.
  • Join the Make Modern Triangles program waitlist.
  • Join the Design Improv with Triangles workshop waitlist.
Previous Post: « Solstice BOM Months 1&2 Member Gallery
Next Post: 6 Creative Journaling Strategies for Quilting »

Primary Sidebar

New Block of the Month!

Join the 2026 Block of the Month Program

Get my Modern Triangles Quilt Book

Get my Modern Rainbow Quilts Book

Image shows cover of the book "Modern Rainbow Quilts"

Make the Solstice Quilt!

Solstice Block of the Month by Bryan House Quilts

Get Your Invite!

Make Modern Triangles Logo

Make the Sparkler Quilt!

Image Shows Sparkler Quilt Top by Rebecca Bryan

Make the Echo (Echo!) Quilt

Echo BOM now open to join

Make the Wildflower Quilt!

Wildflower Block of the Month by Bryan House Quilts

Make the Stargazer Quilt!

Anne's Stargazer BOM

Make the Rainbow Triangles Quilt!

Rainbow Triangle BOM, modern triangle quilt, Rebecca Bryan

About

Hey there! I’m Rebecca, an author and teacher and freezer paper piecing evangelist. I’m also the founder of the Make Modern Triangles Quilt Club.

Disclosure

Just so you know, my site includes affiliate links from which I (it’s me! Rebecca!) receive payment or compensation. Something to consider as you peruse my website. Thanks!

Latest on Instagram

I’ve just recently got all of these quilts back fr I’ve just recently got all of these quilts back from the quilter!!!! 😍

SWIPE to see them all and tell me which one is your favorite in the comments! 💕 👇

#quiltpattern #quiltinspiration #modernquilting #finishedquilt
I think as quilters, we sometimes get really wrapp I think as quilters, we sometimes get really wrapped up in a project or wanting to finish by a certain deadline, that we forget to just play. 🙌

Triangle blocks are especially fun for playing with! 

Because the same exact blocks can look completely different depending on how you arrange them.

All of a sudden, you’re not just following a pattern anymore, you’re creating something unique. 🪄

And I think that’s where a lot of the joy in quilting lives.

Not in getting it “right” or making it perfect, but in letting yourself be curious. 

Letting yourself try something, change it, try something else, and be a little playful instead of precise.

Some of my favorite quilts didn’t come from a perfectly planned layout… 👇

They came from standing at the wall, thinking, “Wait… what if I try it like this instead?” 👀

So if you have a few triangle blocks sitting nearby, take a little time to play with them and see what kind of pattern they end up in. 

Comment ‘TRIANGLE’ if you want to take my free class where I teach you how to make a modern triangle, and give you a block pattern to start sewing. 💕

#modernquilting #quiltingtechnique #quiltingforbeginners #beginnerquilter
This time of year in the sewing room is always so This time of year in the sewing room is always so lovely. 

We FINALLY get to have the windows open, the world outside is getting colorful again, and the extra daylight is a big bonus. 

This is my recipe for a PERFECT April sewing day...

✨ Self care: plan meals/snacks for eating right & getting your exercise (booooooo! I know, I know.) Maybe a fun wee treat tho!?

✨ Entertainment: if it’s just you, get your show/ sporting event/ audible, etc. Or if you’re with your quilty buds, you know what to do! Sew, gab, laugh!

✨ Something you’re excited to sew: latest bingeable project at the ready!? Latest fabric stack that arrived in the post? Or...finally get that WIP d.u.n!

✨ Essential responsibilities taken care of: feed the dog, respond to that time-sensitive email, dinner for the fam? Take care of what you must get done so you can check out more completely.

Finally, set a timer for your hard stop time.

I set my alarm for when I need to pick up my kiddos from school. That way, I can get carried away by my creativity and indulge in “me” time!

Shut the laptop, check out, it’s sew time! 🧵 Everything else on your to-do list can wait. It is time for you!

What are you working on for a perfect April sewing day? ⬇️

#quiltingprogress #quiltinginspiration #quiltpattern #springsewing
If my WIP pile was getting out of control… here’s If my WIP pile was getting out of control… here’s exactly what I’d do: ⬇️

👉 Find a community of quilters to connect with, learn from, and grow with. People who cheer you on, celebrate your blocks, and make you want to keep going!!! 

👉 Make it easier on yourself with freezer paper piecing. This technique completely changed my life. I wanted to give up on quilting altogether at one point before I found freezer paper piecing. 

It’s not that you don’t finish quilts…

It’s that you don’t have the right support or the right process yet. 🧵✨ Comment ‘FREE’ to take my free class, learn the freezer paper piecing technique, and get invited to join an amazing community. 💕

#quiltingcommunity #quiltingclass #quiltingtechnique #quiltinginspiration
One stitch at a time!!! 🪡 Sometimes, a few hours One stitch at a time!!! 🪡

Sometimes, a few hours (or days) in the sewing room just makes it all alright. 🙌

Who agrees? ⬇️

#quiltingismytherapy #quiltinglife #quiltingismybliss #quiltersgonnaquilt
Comment ‘FREE’ to sign up for the class! 🫶 One th Comment ‘FREE’ to sign up for the class! 🫶

One thing that will NEVER get old with freezer paper piecing... ⬇️

The number of blocks I can sew from just ONE foundation! 🙌

It always amazes me, and it’s one of my favorite things about the technique. 

I save so much time not having to make a new foundation for every single block, and that’s not to mention the time saved from not having to rip the paper bits of those foundations out of the seams. ✨

I’m hosting a free class where I teach you this technique, and give you a modern triangle block pattern to start sewing! 

Comment ‘FREE’ if you want to sign up! 🫶
.
.
.
#quiltingclass #quiltingforbeginners #foundationpaperpiecing #paperpiecing
Follow on Instagram

Browse by Category

Archives

  • Instagram
  • Facebook
  • Pinterest
  • email
I’ve just recently got all of these quilts back fr I’ve just recently got all of these quilts back from the quilter!!!! 😍

SWIPE to see them all and tell me which one is your favorite in the comments! 💕 👇

#quiltpattern #quiltinspiration #modernquilting #finishedquilt
I think as quilters, we sometimes get really wrapp I think as quilters, we sometimes get really wrapped up in a project or wanting to finish by a certain deadline, that we forget to just play. 🙌

Triangle blocks are especially fun for playing with! 

Because the same exact blocks can look completely different depending on how you arrange them.

All of a sudden, you’re not just following a pattern anymore, you’re creating something unique. 🪄

And I think that’s where a lot of the joy in quilting lives.

Not in getting it “right” or making it perfect, but in letting yourself be curious. 

Letting yourself try something, change it, try something else, and be a little playful instead of precise.

Some of my favorite quilts didn’t come from a perfectly planned layout… 👇

They came from standing at the wall, thinking, “Wait… what if I try it like this instead?” 👀

So if you have a few triangle blocks sitting nearby, take a little time to play with them and see what kind of pattern they end up in. 

Comment ‘TRIANGLE’ if you want to take my free class where I teach you how to make a modern triangle, and give you a block pattern to start sewing. 💕

#modernquilting #quiltingtechnique #quiltingforbeginners #beginnerquilter
This time of year in the sewing room is always so This time of year in the sewing room is always so lovely. 

We FINALLY get to have the windows open, the world outside is getting colorful again, and the extra daylight is a big bonus. 

This is my recipe for a PERFECT April sewing day...

✨ Self care: plan meals/snacks for eating right & getting your exercise (booooooo! I know, I know.) Maybe a fun wee treat tho!?

✨ Entertainment: if it’s just you, get your show/ sporting event/ audible, etc. Or if you’re with your quilty buds, you know what to do! Sew, gab, laugh!

✨ Something you’re excited to sew: latest bingeable project at the ready!? Latest fabric stack that arrived in the post? Or...finally get that WIP d.u.n!

✨ Essential responsibilities taken care of: feed the dog, respond to that time-sensitive email, dinner for the fam? Take care of what you must get done so you can check out more completely.

Finally, set a timer for your hard stop time.

I set my alarm for when I need to pick up my kiddos from school. That way, I can get carried away by my creativity and indulge in “me” time!

Shut the laptop, check out, it’s sew time! 🧵 Everything else on your to-do list can wait. It is time for you!

What are you working on for a perfect April sewing day? ⬇️

#quiltingprogress #quiltinginspiration #quiltpattern #springsewing
If my WIP pile was getting out of control… here’s If my WIP pile was getting out of control… here’s exactly what I’d do: ⬇️

👉 Find a community of quilters to connect with, learn from, and grow with. People who cheer you on, celebrate your blocks, and make you want to keep going!!! 

👉 Make it easier on yourself with freezer paper piecing. This technique completely changed my life. I wanted to give up on quilting altogether at one point before I found freezer paper piecing. 

It’s not that you don’t finish quilts…

It’s that you don’t have the right support or the right process yet. 🧵✨ Comment ‘FREE’ to take my free class, learn the freezer paper piecing technique, and get invited to join an amazing community. 💕

#quiltingcommunity #quiltingclass #quiltingtechnique #quiltinginspiration
Follow on Instagram
© 2026 Bryan House Quilts